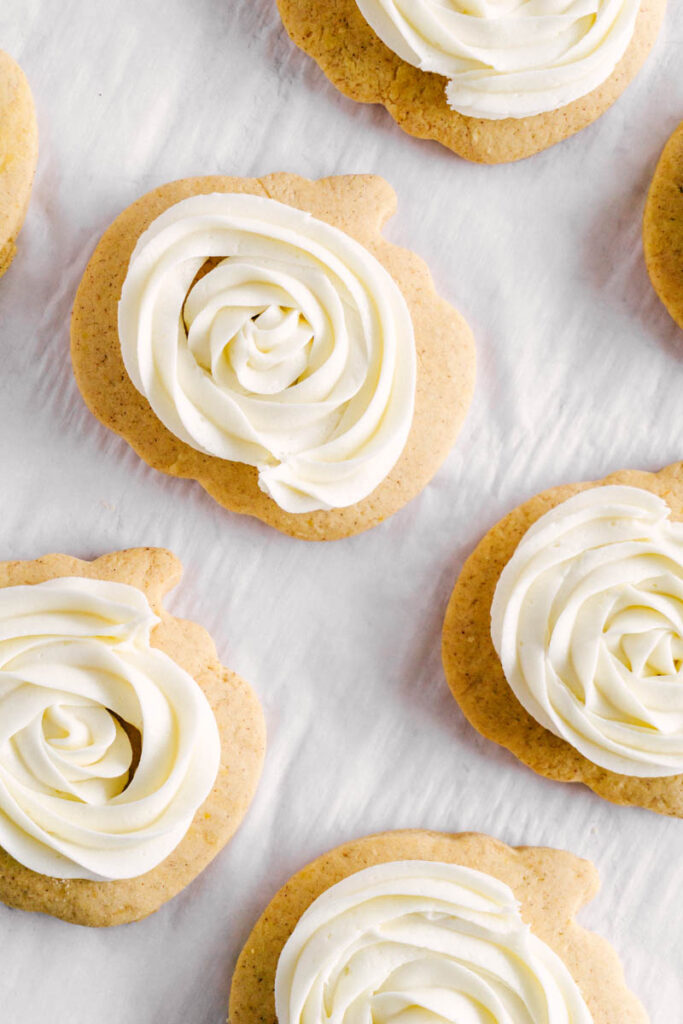
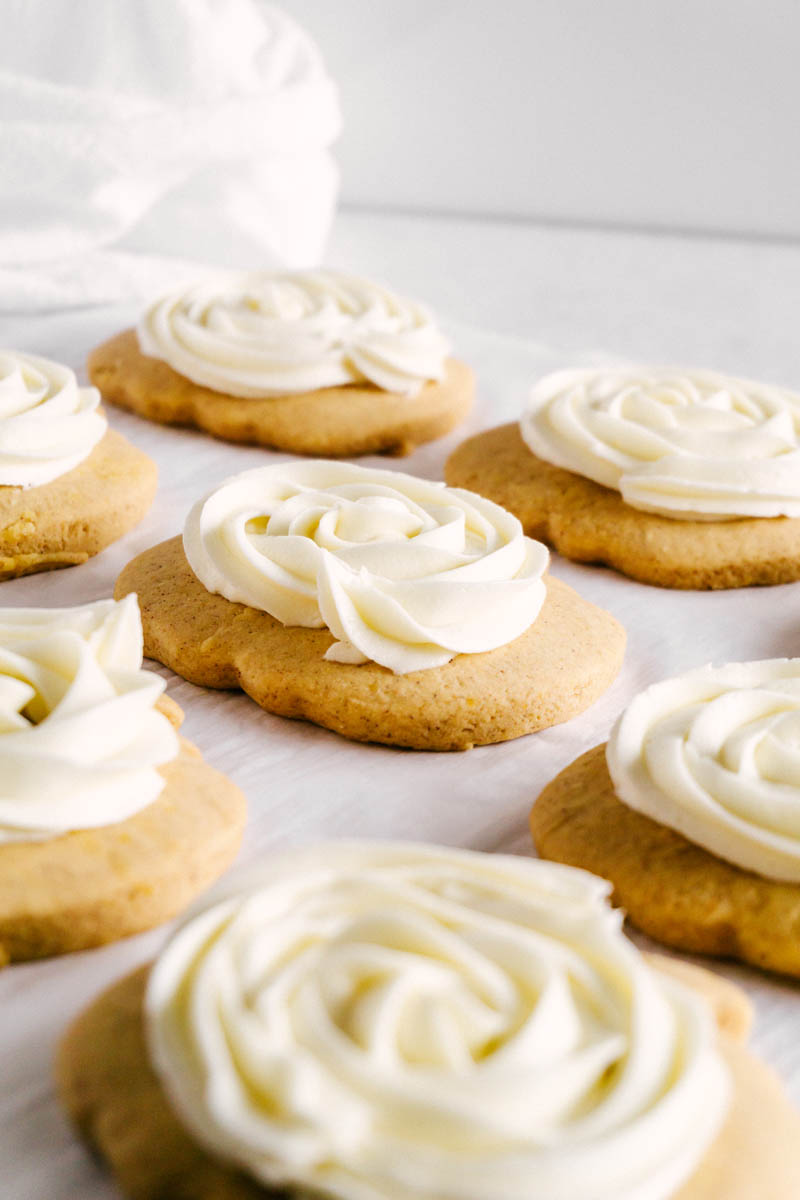
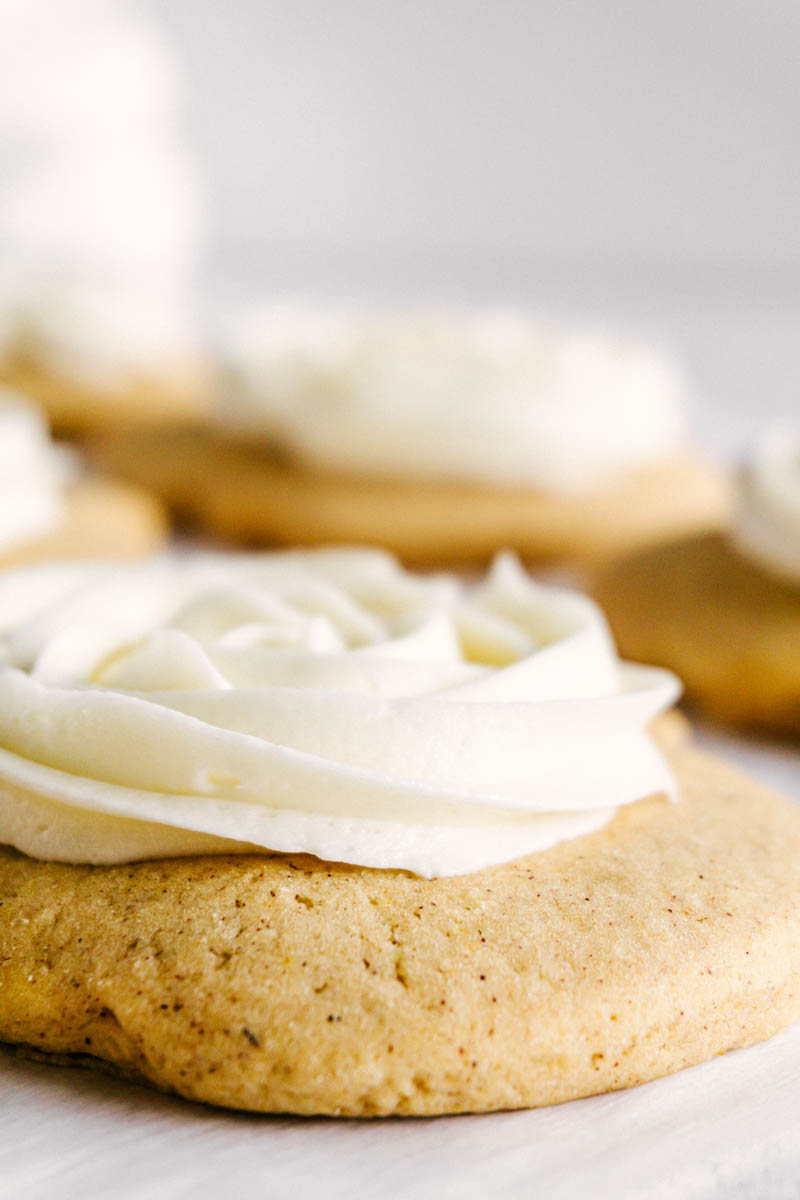
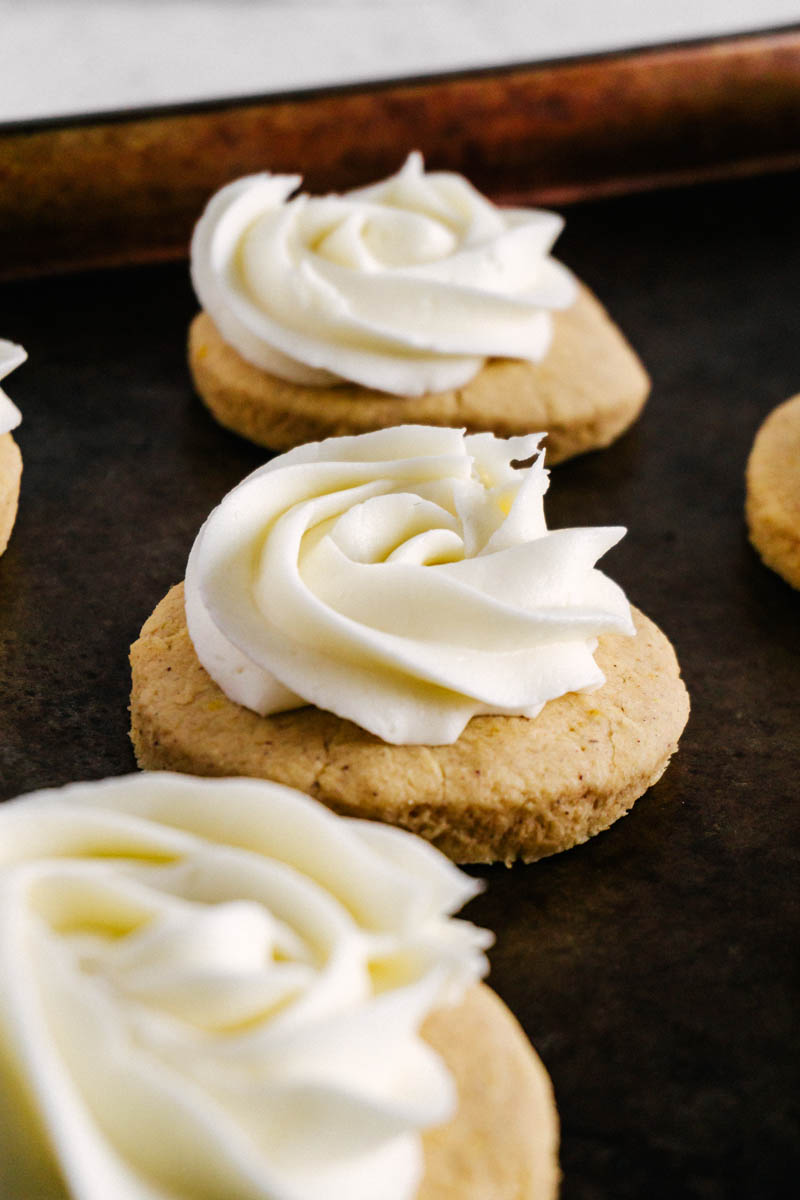
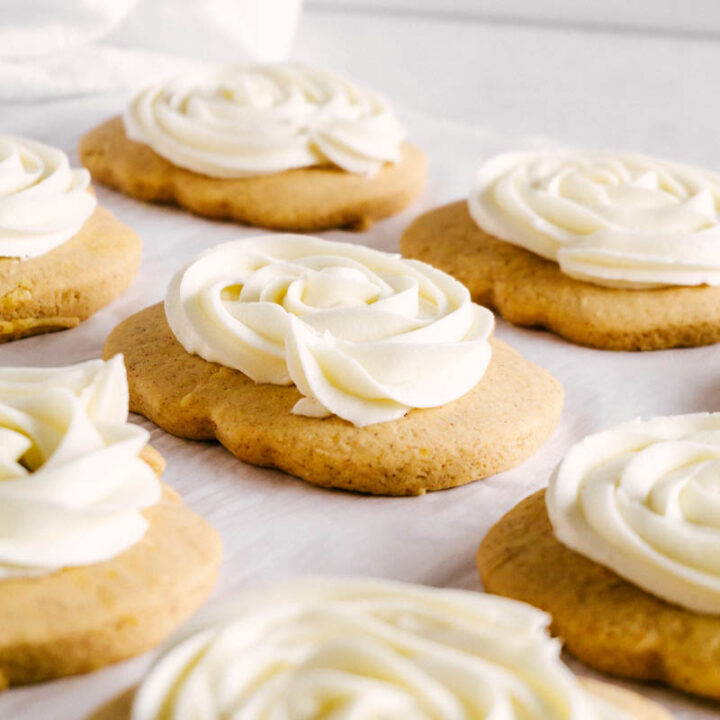
These Frosted Pumpkin Sugar Cookies are super soft and have creamy, fluffy buttercream frosting. It’s the perfect fall treat!
Soft, Fluffy, and Irresistible
With fall in the air, it seems like time to start baking again (I never really stopped, but you know what I mean.) After trying ourApple Cinnamon Cookies, I knew I needed more of them in my life. I played around with the recipe, adding pumpkin puree and pumpkin pie spice. Instead of a glaze, I opted for a pillowy soft Vanilla Buttercream Frosting.
These cookies are so soft and flavorful. I couldn’t help myself from sneaking a couple of plain ones while I waited for them to cool enough to frost. And then I snuck a few more after I frosted them. I was supposed to take these Frosted Pumpkin Sugar Cookies to a girls’ night with some friends, but only a few made it there.
My Favorite Ingredients
Margarine – don’t let this one freak you out. Margarine contributes the perfect moisture content to this cookie to keep it soft and fluffy. Make sure to use the stick kind.
Pumpkin – adds moisture and pumpkin flavor, plus helps this cookie be extra soft.
Pumpkin Pie Spice – I usually make my own spice blends, but this is one worth keeping around. It’s the perfect blend of warm fall spices to complement the pumpkin.
Butter – Adds delicious moisture and flavor to the pumpkin sugar cookies, plus is the base for the best Vanilla Buttercream Frosting ever!
Vanilla – I like to use a quality vanilla extract for this recipe to help round out and complement the spice flavors. Watkins Baking Vanilla is my go-to choice for baked goods.
Tips for Making Frosted Pumpkin Sugar Cookies
When mixing the pumpkin sugar cookie dough, make sure the butter and margarine are softened to room temperature. If they are too cold, the pumpkin may not mix in smoothly and will make a lumpy dough. Let the dough warm up a bit if this happens.
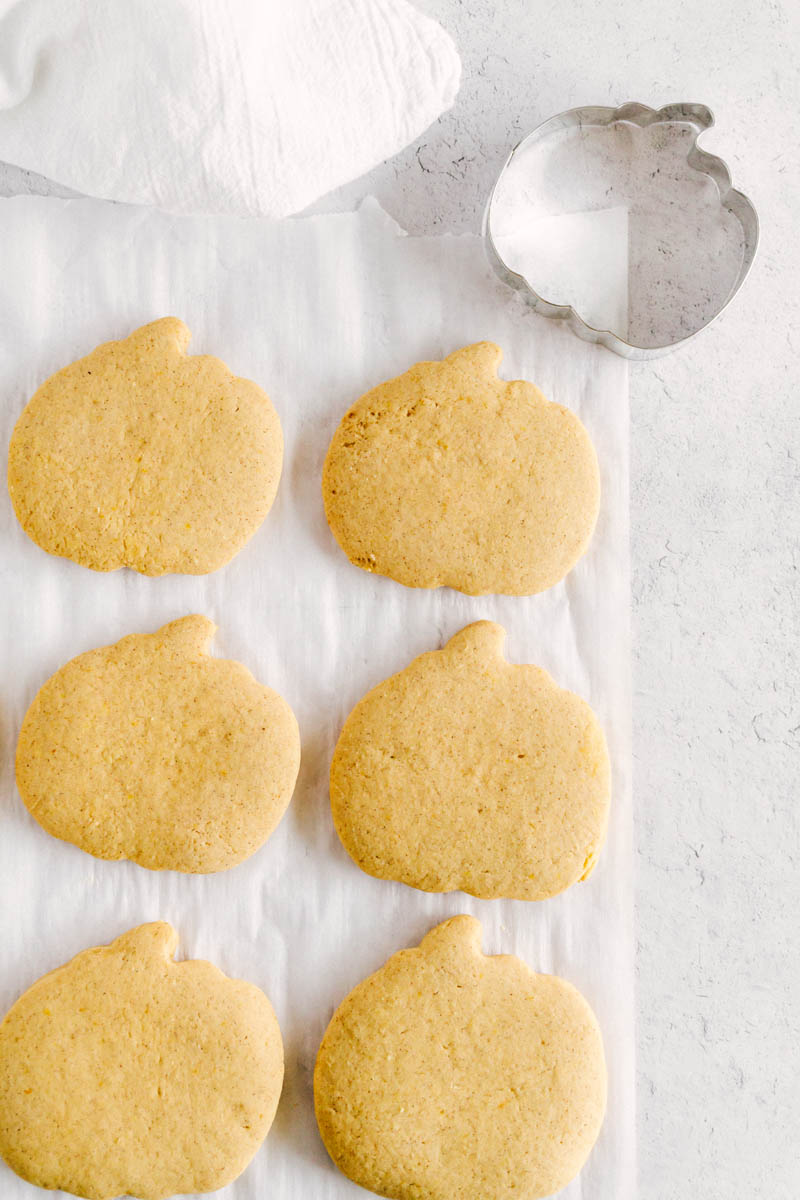
Chilling the dough for just a few minutes before rolling the dough out helps to firm it up. This makes it easier to roll out without the dough sticking and helps them transfer to a baking sheet without losing their shape.
When making the vanilla buttercream frosting, add just a bit of milk at a time and don’t overbeat. The frosting will develop large air pockets that don’t look as pretty, although the taste will be unaffected.
These Frosted Pumpkin Sugar Cookies are just waiting for you to eat them with a tall glass of milk while you enjoy the changing leaves outside!
Looking for more delicious pumpkin recipes? Try these:
These Frosted Pumpkin Sugar Cookies are super soft and have creamy, fluffy buttercream frosting. It’s the perfect fall treat!
Ingredients
Pumpkin Sugar Cookies
½ C (4 oz) salted butter, softened
½ C (4 oz) margarine, softened (stick not tub)
½ C + 1 T (4 oz) granulated sugar
⅓ C + 1 T (3 oz) light brown sugar
1 large egg
⅓ C (3 oz) pumpkin puree
1 ½ tsp vanilla
½ tsp salt
2 tsp baking powder
1 T pumpkin pie spice
3 ½ C (15.7 oz) all-purpose flour, plus extra for rolling out
Vanilla Buttercream Frosting
2 sticks (8 oz) salted butter
3 ½ C (16 oz) powdered sugar
1 tsp vanilla
2-4 T milk
Instructions
Make the Cookies.
Preheat oven to 350*F.
Line cookie sheets with parchment paper.
Cream butter, margarine, and sugars.
Add eggs, vanilla, and pumpkin puree. Mix well.
Add salt, baking powder, pumpkin pie spice, and flour. Mix until all combined.
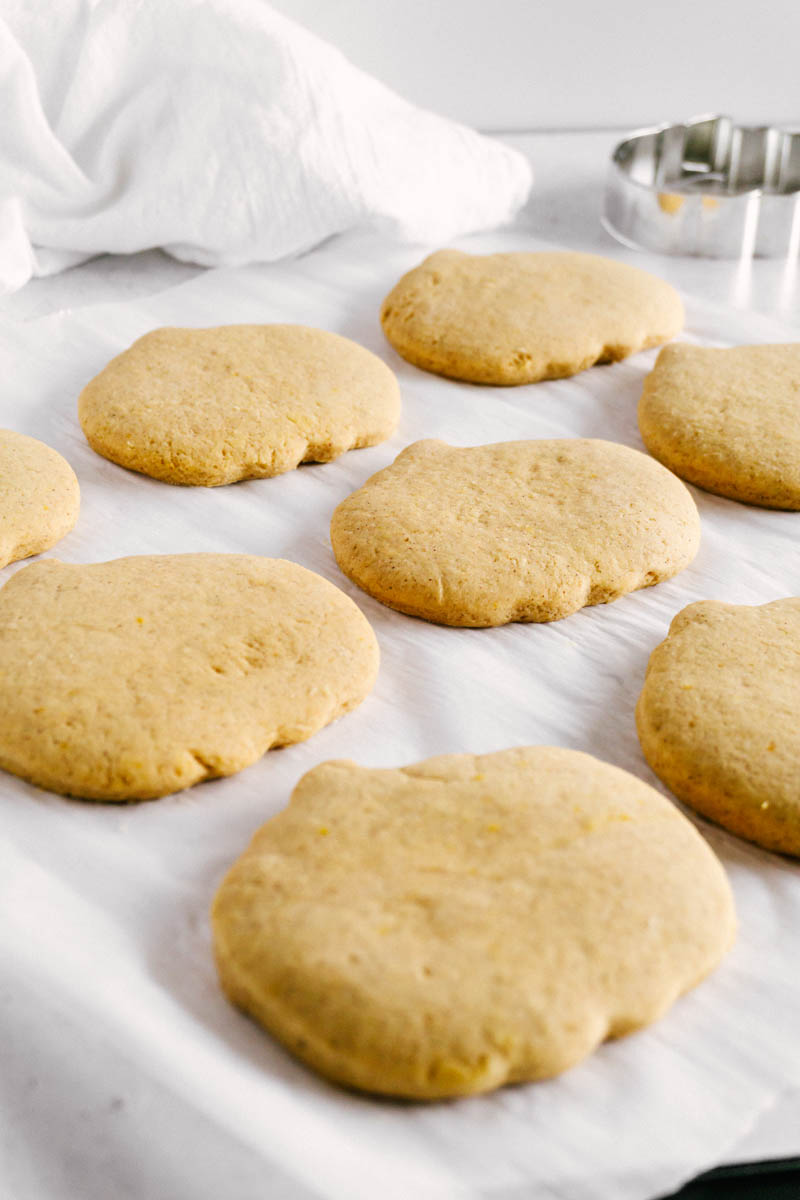
Refrigerate for 5-10 minutes before rolling out to help firm the dough up.
Place dough onto generously floured counter and sprinkle a little flour on top to keep it from sticking while rolling out. Press or roll out dough to ¼ inch thick.
Cut out cookies with cookie cutter dusted well with flour. Use a thin spatula to move them to the parchment paper to bake.
Bake for 7-11 minutes, depending on the size of the cookies.
Make Vanilla Buttercream Frosting.
Soften the butter, but do not melt. Beat butter with a mixer until it is smooth.
Add powdered sugar. Beat butter and powdered sugar until combined and mixture looks dry and uniform. Scrape bowl.
Add vanilla and 2 T of milk. Beat until frosting is light, creamy, and soft.
If frosting is too thick, add 1-2 additional tablespoons of milk. Caution: overbeating will result in large air pockets that will create a less smooth finish to the buttercream.
Assemble.
After cookies have cooled, pipe or spread frosting onto each cookie. Top with sprinkles or sparkling sugar, if desired.
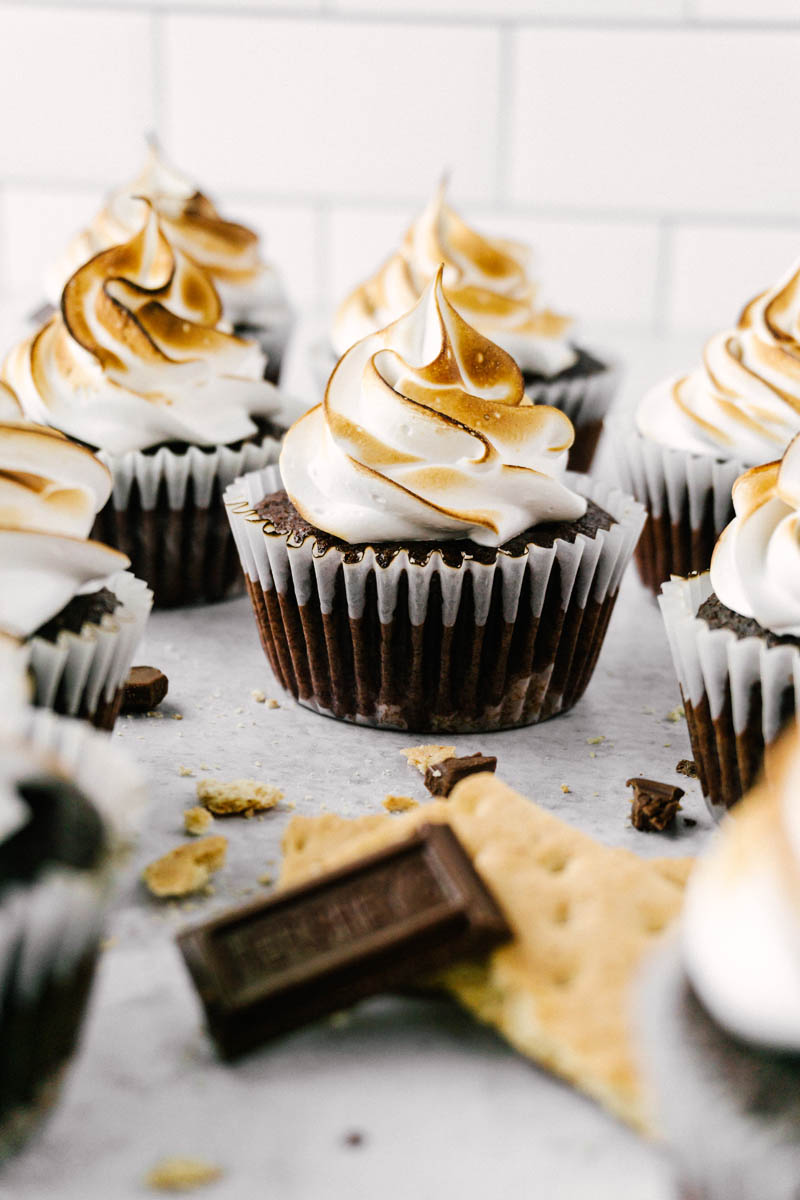
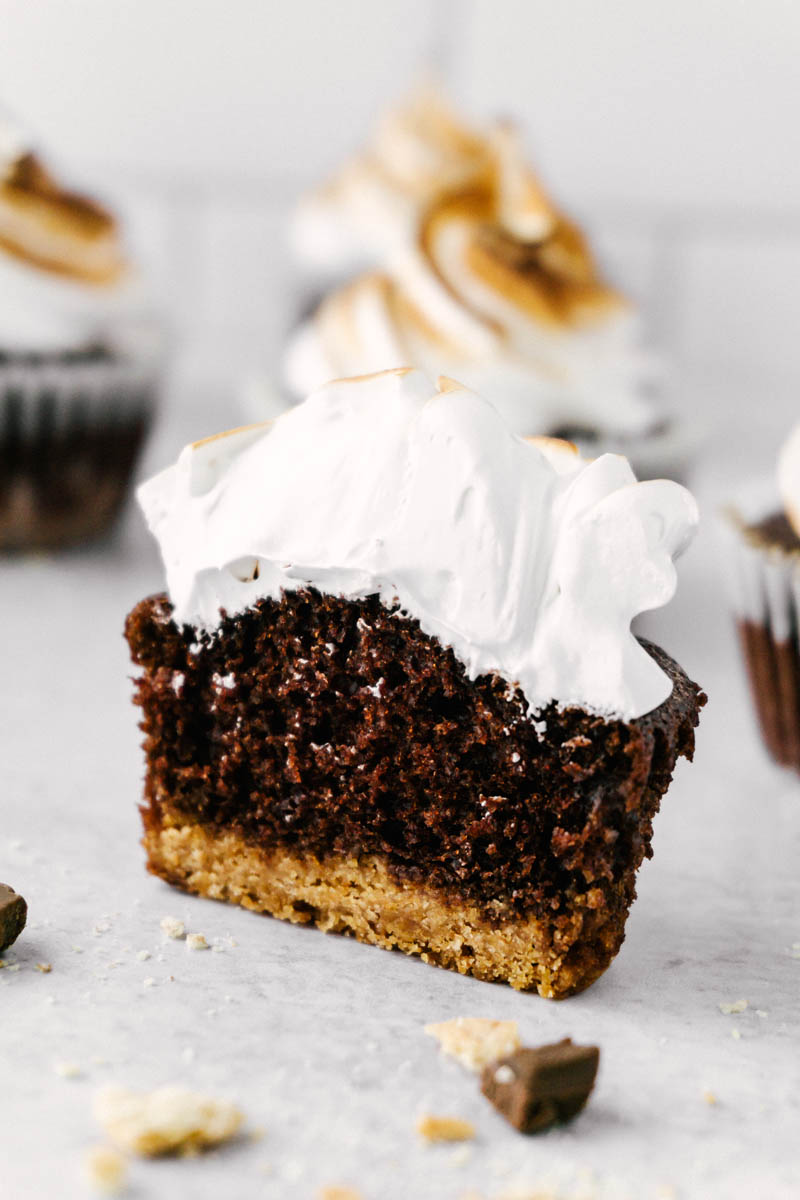
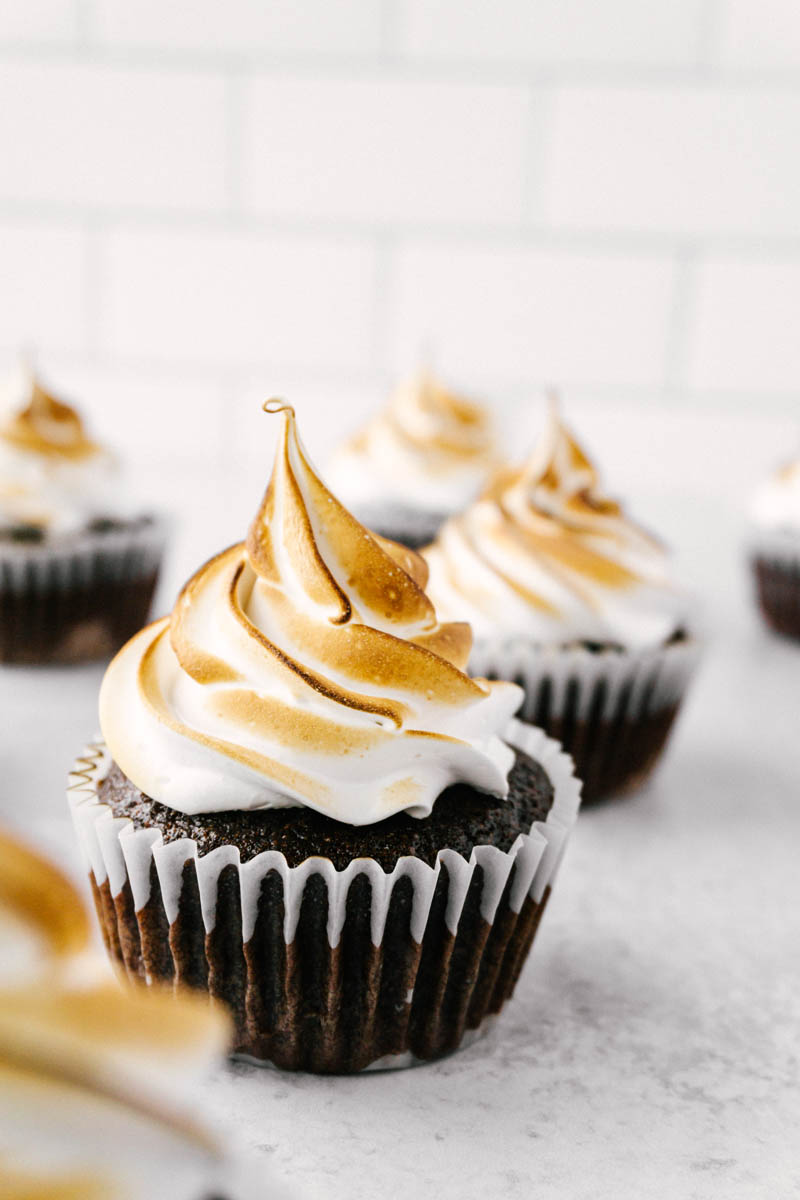
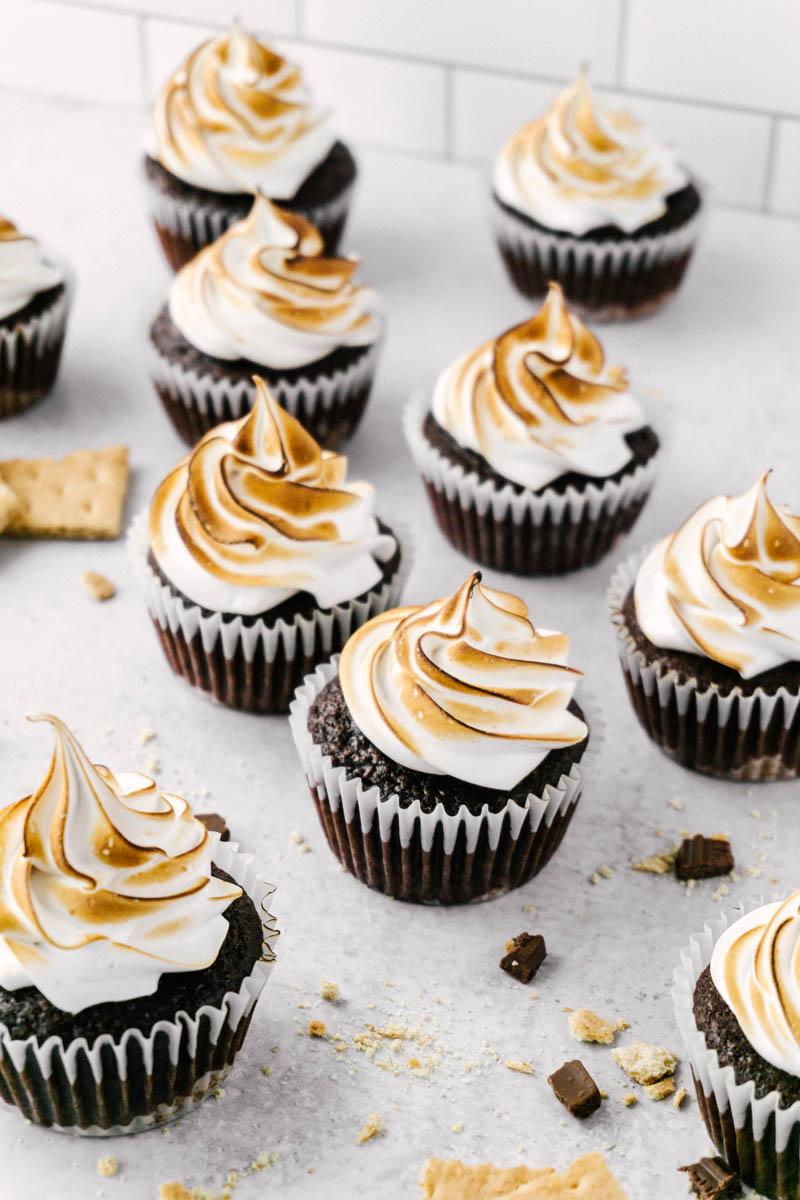
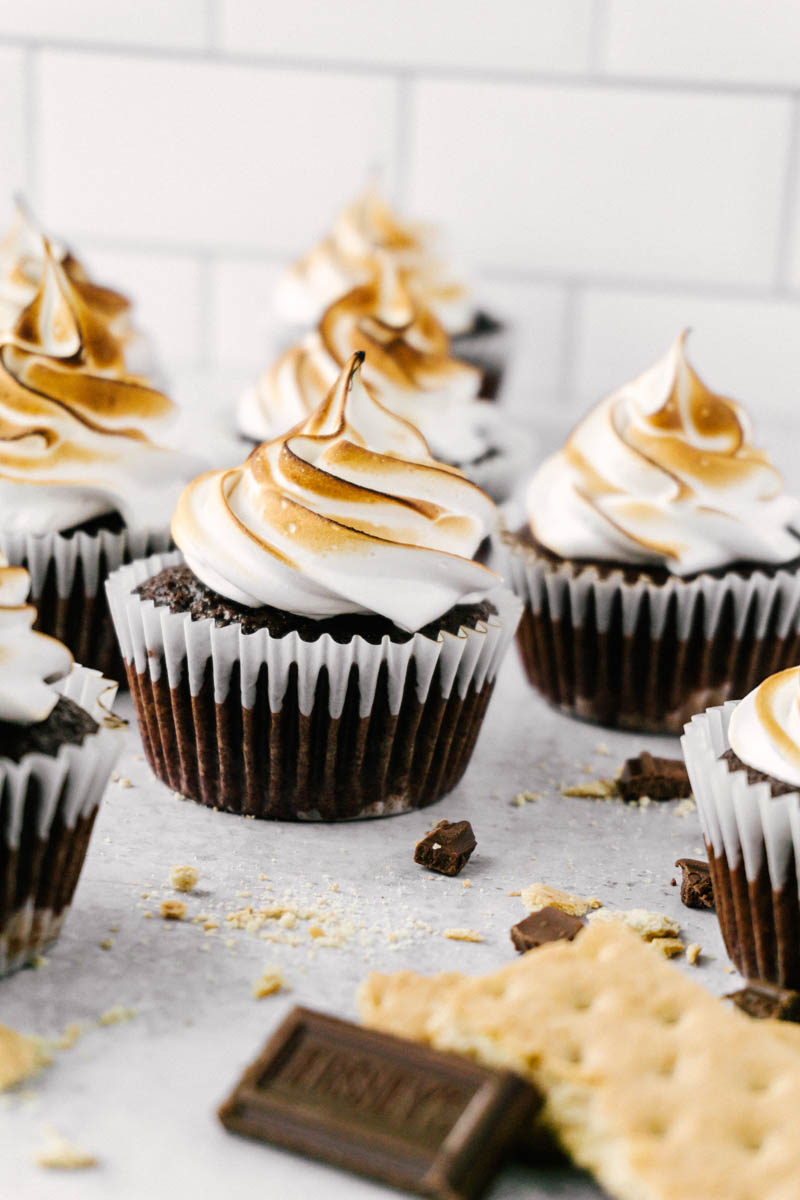
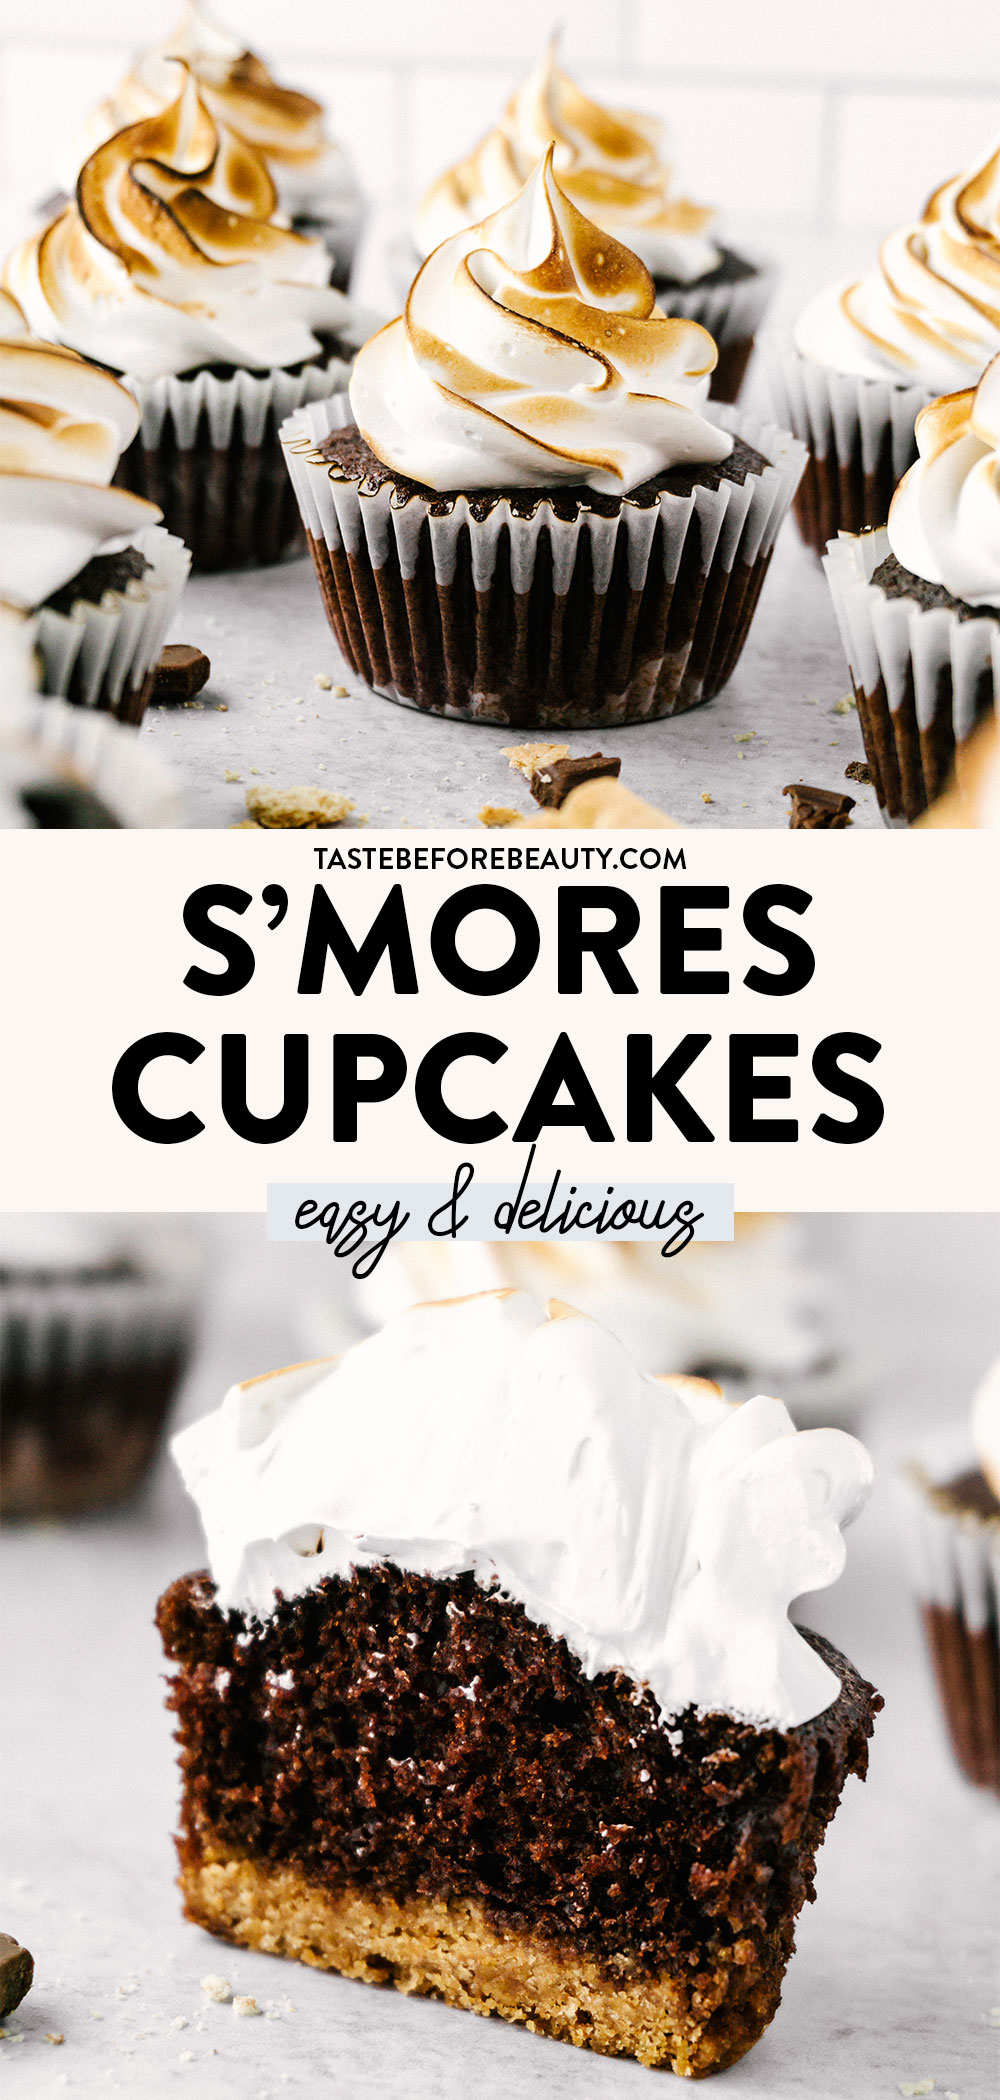
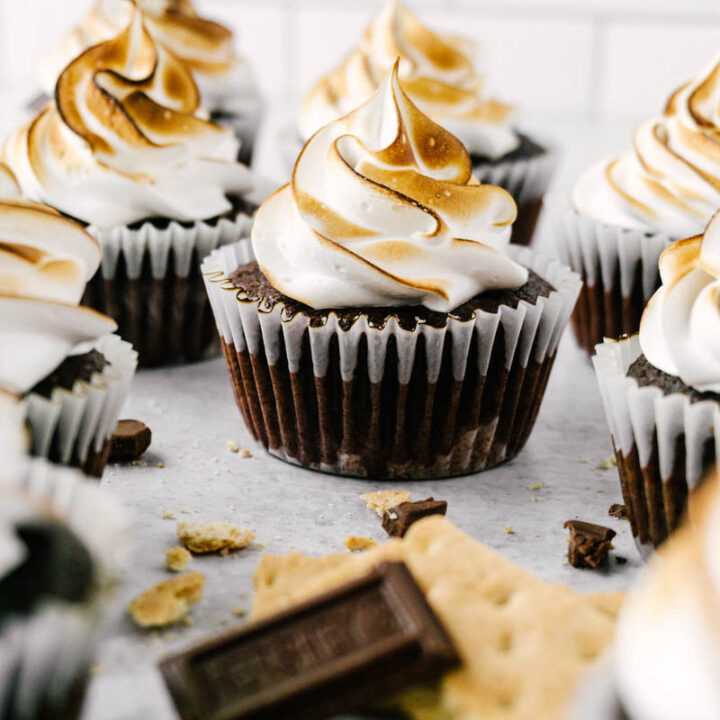
These S’mores Cupcakes feature a crisp graham crust, rich chocolate cake, and a homemade marshmallow frosting. All the ooey, gooeyness you love in a s’more, fire optional.
Fire Optional But Recommended
These S’mores Cupcakes are so decadent and such an elegant take on everyone’s favorite messy, camping treat. While the campfire is optional, I highly recommend browning the marshmallow frosting to that perfect golden brown before eating. I used a blowtorch, but the broiler works too. Don’t look too closely or you’ll see where I caught the paper on fire.
The Ideal S’more Ratio
My ideal s’more has about a quarter graham cracker to half a bar of chocolate to a whole, perfectly toasted marshmallow. There is just enough graham crust in the bottom of these S’mores Cupcakes to satisfy your need for graham cracker without overtaking the whole treat. The chocolate cupcake is perfectly moist and chocolatey, while the marshmallow frosting is lightly sweet and melts in your mouth.
The Marshmallow Frosting
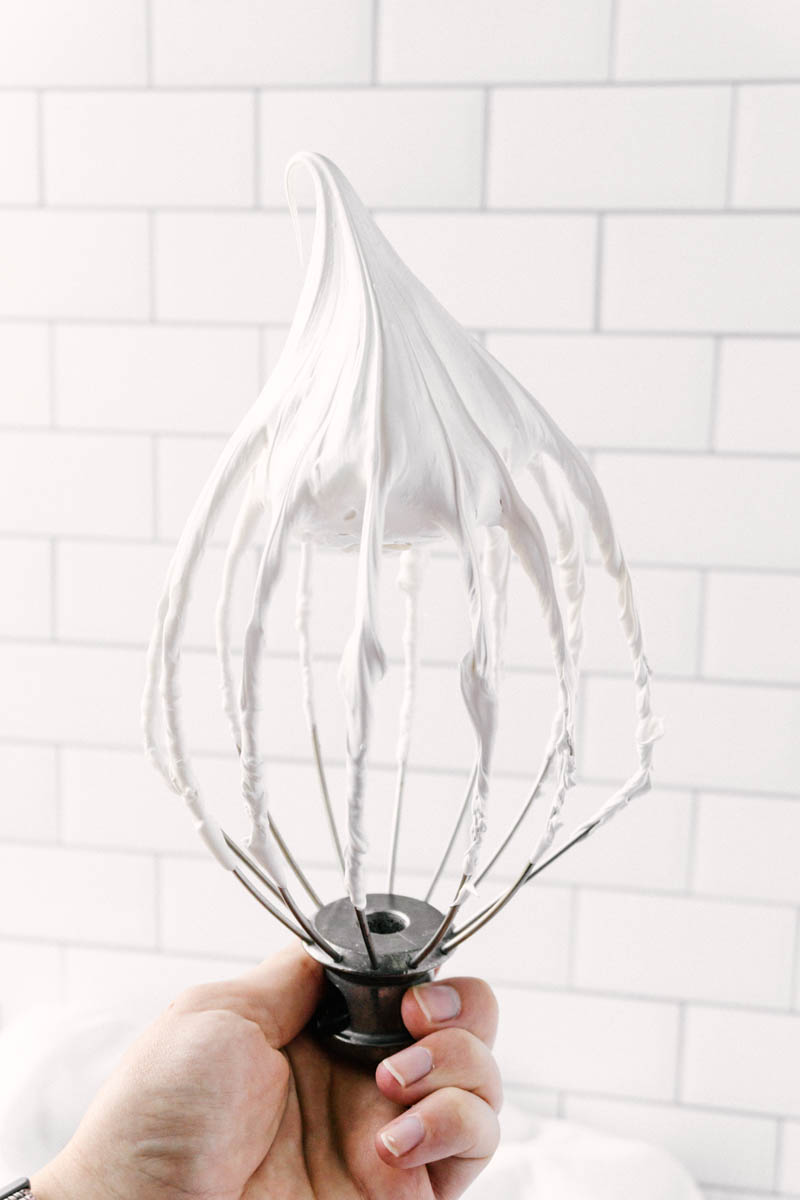
I’ll let you in on a little secret. The “Marshmallow Frosting” is actually a classic Swiss Meringue. Calling it Marshmallow Frosting captures the taste and texture better, plus it makes it sound way less intimidating. I actually like this topping better than regular, store-bought marshmallows because it’s not overly sweet and the texture is silky smooth.
If the idea of making a meringue has you scared, don’t worry. This was the first one I had ever made and it is so easy. With only three ingredients and a simple two-step process, it is the easiest kind of meringue to make. Check below for some tips on preparing it.
My Favorite Ingredients
Graham Crackers – an essential part of any s’more.
Cocoa Powder – use both natural cocoa powder and Dutch-processed cocoa powder to achieve the perfect, rich chocolate balance.
Vanilla Extract – I prefer to use imitation vanilla in the chocolate cupcake, to let the chocolate flavor take center stage, and real vanilla in the marshmallow frosting to create the perfect, warm flavor balance. Use whatever you have on hand.
Buttermilk– adds moisture. If you don’t have any on hand, put 2 T lemon juice in a measuring cup, then add milk to equal 2 cups. Let sit for a few minutes before adding to the batter.
Sugar – adds the perfect amount of sweetness.
Helpful S’mores Cupcakes Tips
Graham Crust
Start by finely crushing the graham crackers. I place them all in a ziplock bag and use a rolling pin to crush them.
Add the crushed graham crackers, sugar, and melted butter to a mixing bowl. Stir them all together. The mixture will look crumbly, but will hold together after baking.
Place about a tablespoon of graham mixture in the bottom of each cupcake liner. I found that the bottom of a ¼ C measuring cup fits perfectly to press the crust down into a flat layer.
Bake until lightly golden, then set aside to cool before adding the cupcake batter.
Chocolate Cupcakes
Start by sifting together the dry ingredients. This ensures that no lumps of flour or cocoa will be in the finished batter, and helps incorporate the rising agents evenly throughout.
Add the liquid ingredients all at once. Use a hand mixer to mix for about a minute, until everything is fully combined. It will be a thin batter.
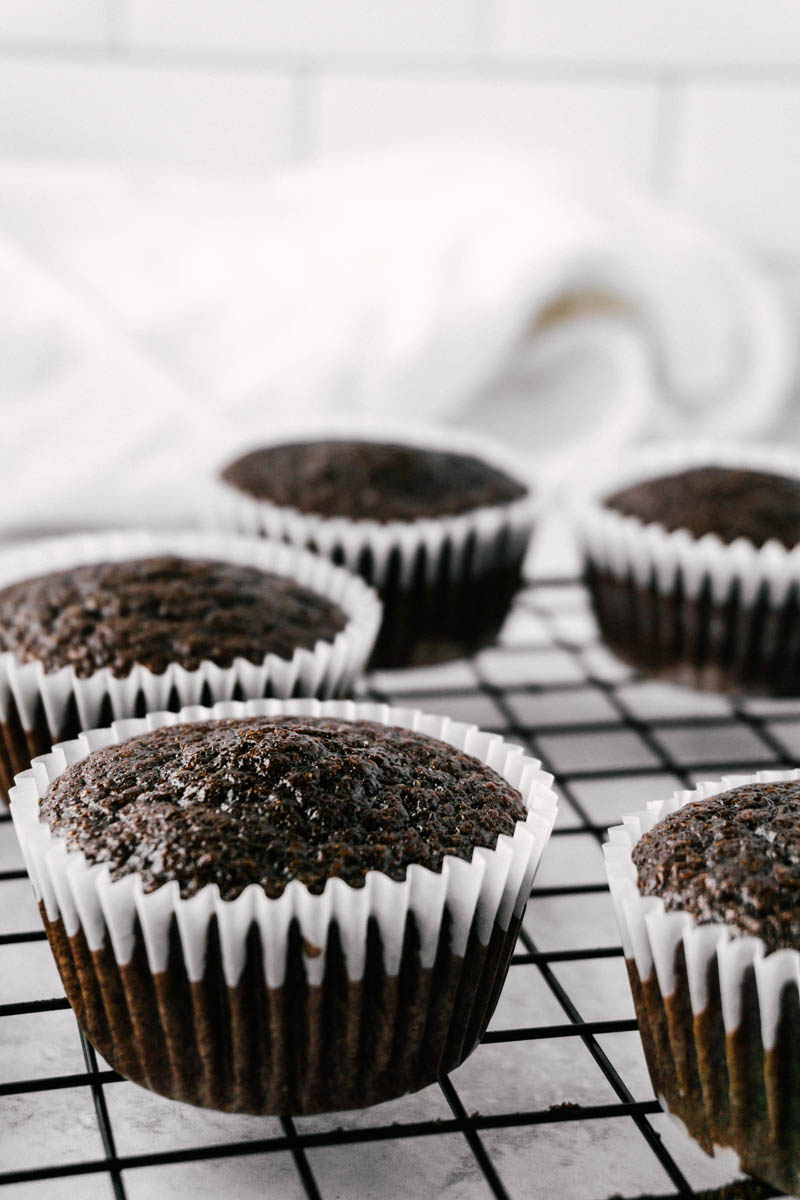
Pour the cupcake batter on top of the cooked, cooled graham crust. If you have a #20 cookie dough scoop, use that to portion the batter out. Each cupcake should be about ⅔ full of batter.
Bake until the tops of the cupcakes spring back to the touch. Set aside to cool completely before frosting.
Marshmallow Frosting
Start by washing all tools and utensils that will be used, including whisks, bowls, and an instant-read thermometer. Any traces of oil can cause the frosting to not set up properly.
Separate the egg whites. I recommend separating them one at a time into a separate bowl, so if a yolk breaks it doesn’t ruin all the egg whites.
Whisk the sugar and egg whites together, then place over a double boiler that is set at a simmer. You mostly need steam to cook the eggs gently, and a full rolling boil is too intense.
Whisk the eggs and sugar continuously until the mixture reaches 160*F. I used a metal whisk, but you could use a hand mixer if you prefer.
Once the mixture reaches the proper temperature, pour it into the bowl of a stand mixer. Use the whisk attachment to beat the egg white mixture until stiff peaks form and the mixture is cooled. If it won’t reach the stiff peaks stage, it is likely because the mixture is too hot. Place in the fridge for a few minutes, then resume whisking.
Use a piping bag to pipe the marshmallow frosting onto the cooled cupcakes. I used a Wilton 1M tip. Use a blowtorch or broiler to brown the marshmallow frosting to the perfect golden brown.
I am so happy with how incredible these S’mores Cupcakes turned out. I guarantee you’ll love them. If you want to dress them up for an event, add a piece of chocolate in the marshmallow frosting, some crumbled graham crackers, or a drizzle of chocolate or salted caramel sauce. No matter what, they’ll be a hit!
Looking for more delicious cake recipes? Try these:
These S’mores Cupcakes feature a crisp graham crust, rich chocolate cake, and a homemade marshmallow frosting. All the ooey, gooeyness you love in a s’more, fire optional.
Ingredients
Graham Crust
1 ⅔ C (8.7 oz) finely crushed graham crackers (about 16 sheets)
2 ½ T granulated sugar
6 T (3 oz) salted butter, melted
Chocolate Cupcakes
2 ¼ C (10 oz) all-purpose flour
½ C + 1 T (2 oz) cocoa powder
2 C (14 oz) white sugar
1 tsp salt
1 tsp baking powder
2 tsp baking soda
2 tsp Dutch-processed cocoa powder
2 C (16 oz) buttermilk
2 large eggs
1 C minus 1 T (7 oz) vegetable oil
1 ½ tsp vanilla extract
Marshmallow Frosting
6 large egg whites
2 C (14 oz) granulated sugar
1 tsp vanilla extract
Instructions
Make Graham Cracker Crust.
Preheat oven to 350*F. Line cupcake pans with paper cupcake liners.
In a bowl, mix together crushed graham crackers, sugar, and melted butter.
Fill each cupcake liner with a generous tablespoon full of graham mixture. Press into the bottom of the cupcake liner.
Bake for 6 minutes until edges of graham crust are lightly golden.
Let cool completely before adding cake batter.
Make Chocolate Cupcakes.
Preheat oven to 350*F.
In a large mixing bowl, sift together flour, cocoa powders, salt, baking powder, and baking soda.
Add the buttermilk, eggs, oil, and vanilla extract. Use a hand mixer to mix for one minute to combine.
Fill each cupcake ⅔ with batter. Bake for 16 minutes until the center of the cupcakes springs back when lightly touched.
Remove from pan after 5 minutes. Cool completely before frosting.
Make Marshmallow Frosting.
Wash all dishes and tools, including an instant-read thermometer, thoroughly to remove any traces of oil.
Bring a pot of water to a gentle boil. In a heat-safe bowl or double boiler, whisk together egg whites and sugar. Place over the double boiler and whisk until instant-read thermometer reads 160*F.
Pour mixture into the bowl of a stand mixer and whisk on high until stiff peaks form and mixture has cooled to 70-80*F. Add vanilla extract towards the end of mixing.
Assemble.
Use a piping bag to pipe Marshmallow Frosting onto cooled cupcakes.
Using a blowtorch or broiler, brown marshmallow frosting to a perfect golden brown.
Serve immediately for best results. Cupcakes will be good for 1-2 days at room temperature. Unfrosted cupcakes can be frozen for up to 3 months. Thaw before frosting.
Notes
If you don’t have an instant-read thermometer, test the egg mixture by rubbing a small amount between your fingers. If the sugar is dissolved and it feels smooth, it is ready to be taken off the heat and whipped.
If Marshmallow Frosting won’t reach stiff peak stage, place it in the fridge for up to 10 minutes, then continue beating.
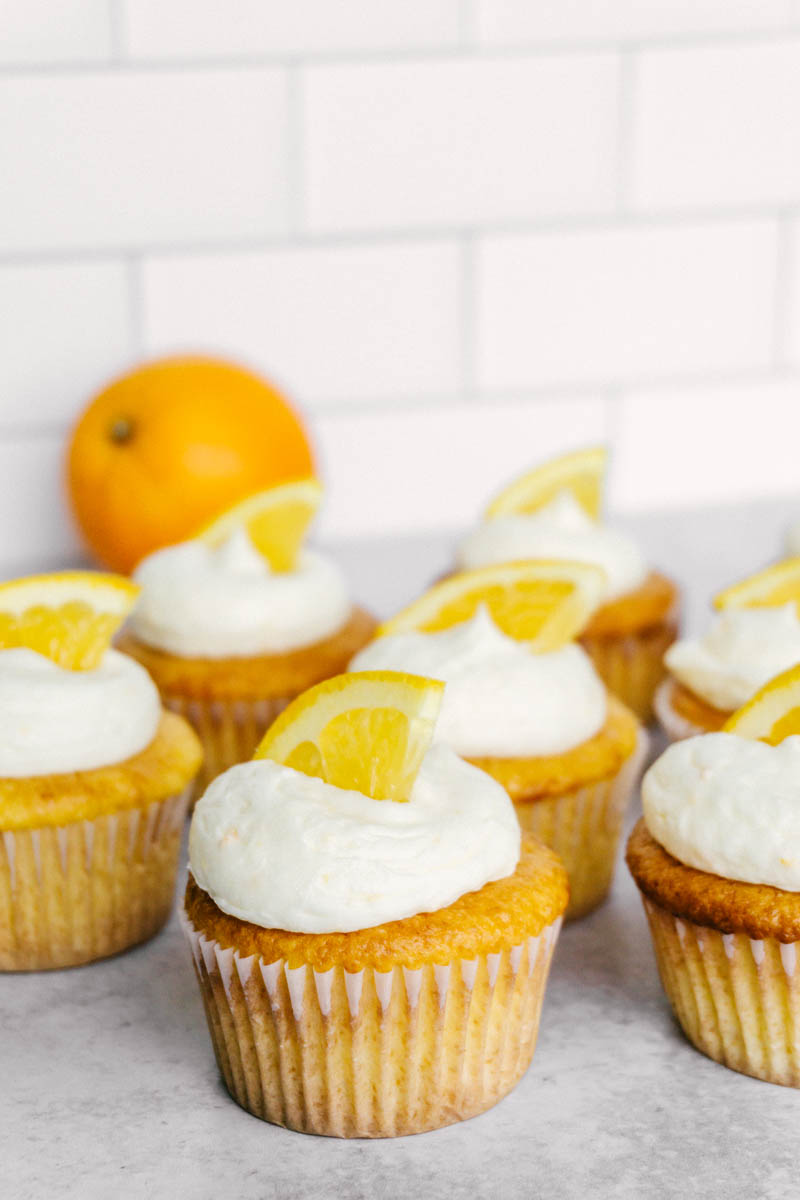
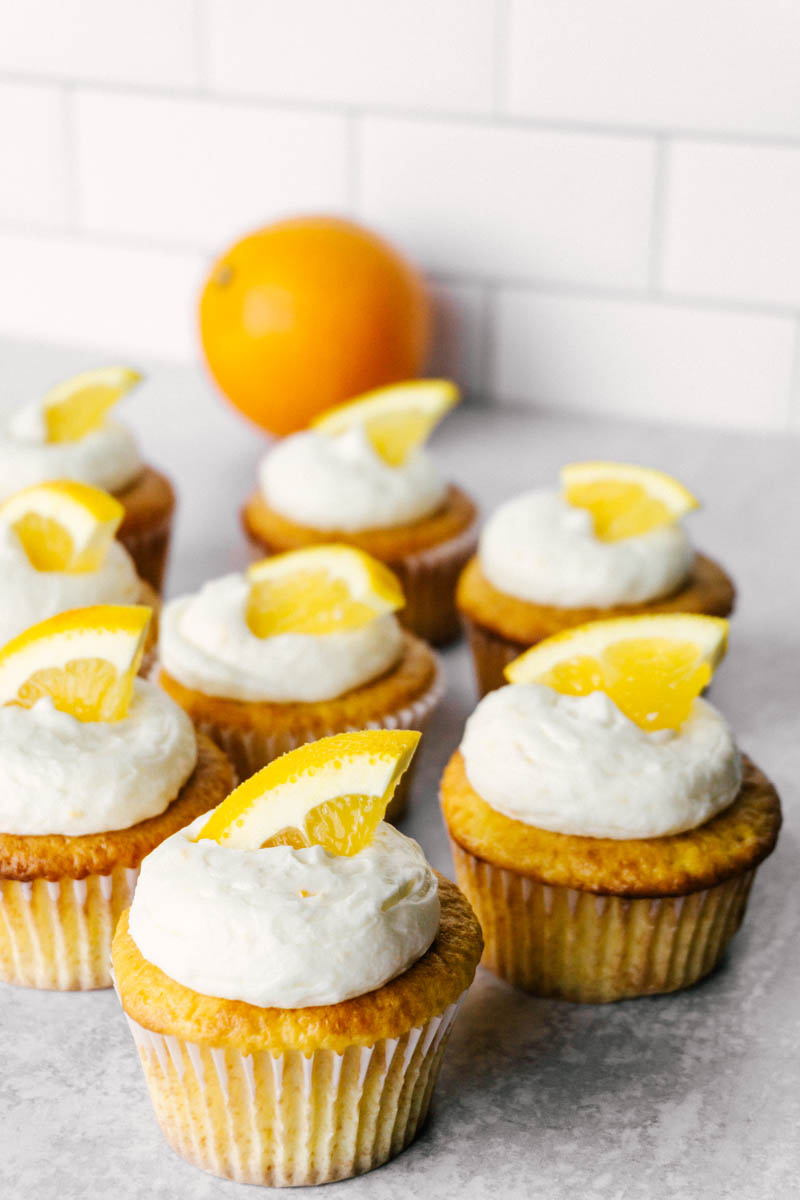
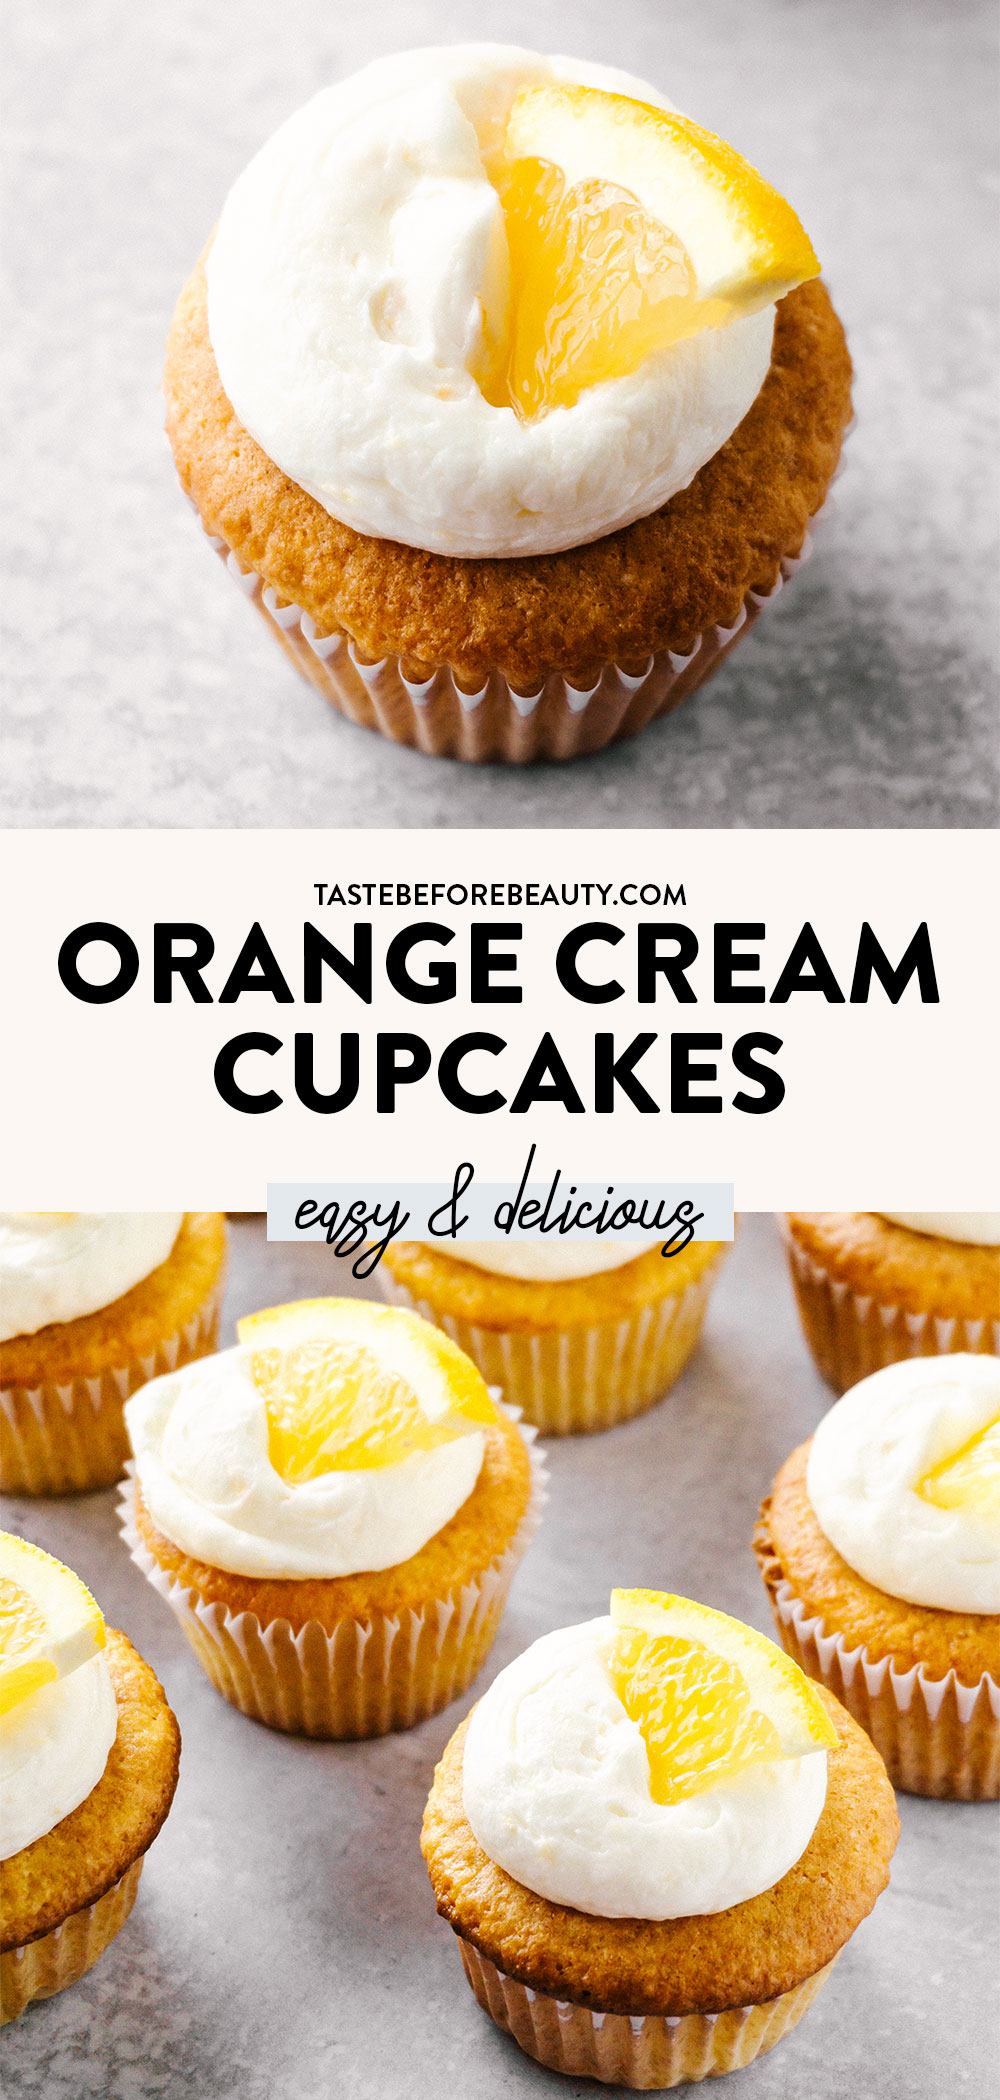
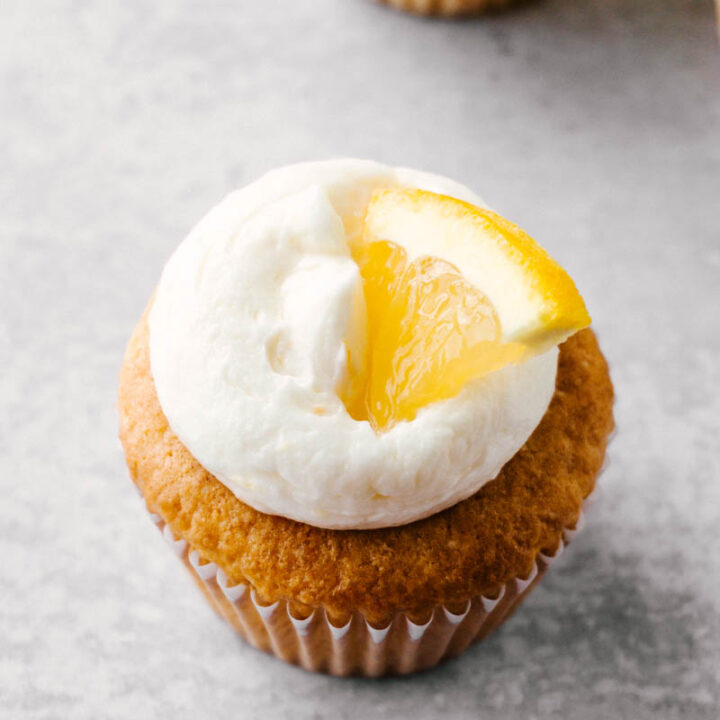
A delightful Orange Cream Cupcake with your choice of Vanilla Buttercream, Orange Zest Whipped Cream, or Coconut Cream. “Orange” you glad you have options!
Summer and Winter Flavors
During the cookie shop days, I needed a bright, fun flavor of cupcakes to add variety. This Orange Cream Cupcake was the result. It is a desirable flavor in any season, hot or cold.
I love that orange zest can be so effective in flavoring just about anything. It goes well with the yellow cake batter without the fake taste of orange extract. I like to use a boxed cake mix for this recipe so I can focus my energy on the frosting. With the right homemade frosting, even boxed cake tastes authentic and delicious.
Balancing the Orange
If you like just a little orange, don’t put any zest in the topping. If you can’t get enough orange, add some zest to the frosting, as well as the cake. As far as toppings and decorations, let your imagination run wild. Strawberries, raspberries, or blueberries would taste good and be beautiful. Toasted coconut would add a tropical flair. It’s a choose-your-own-adventure with this Orange Cream Cupcake!
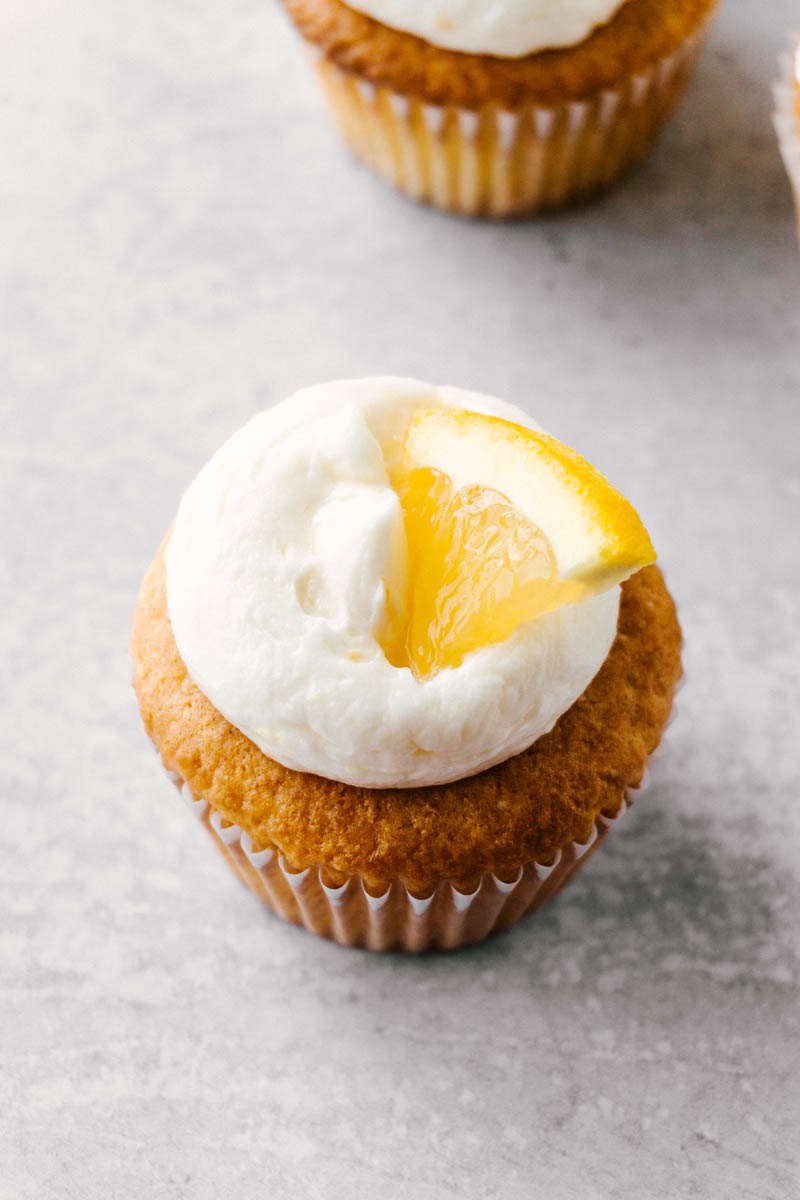
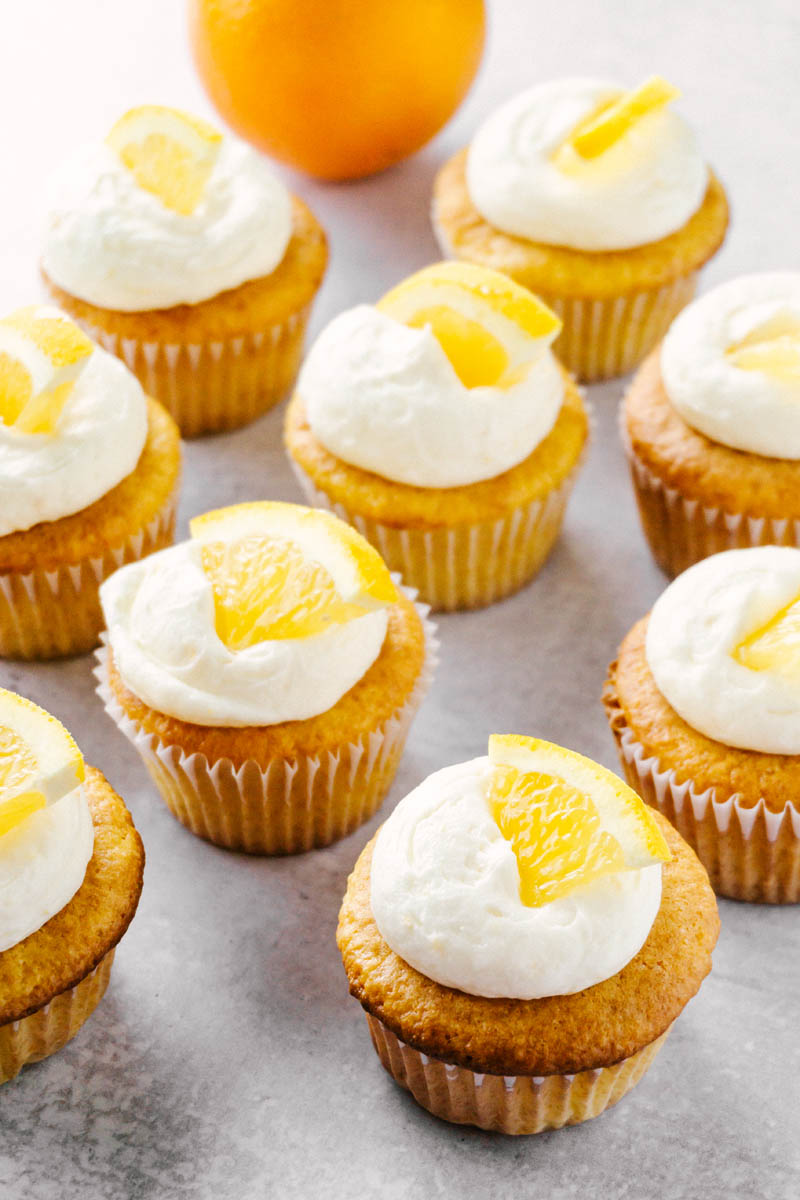
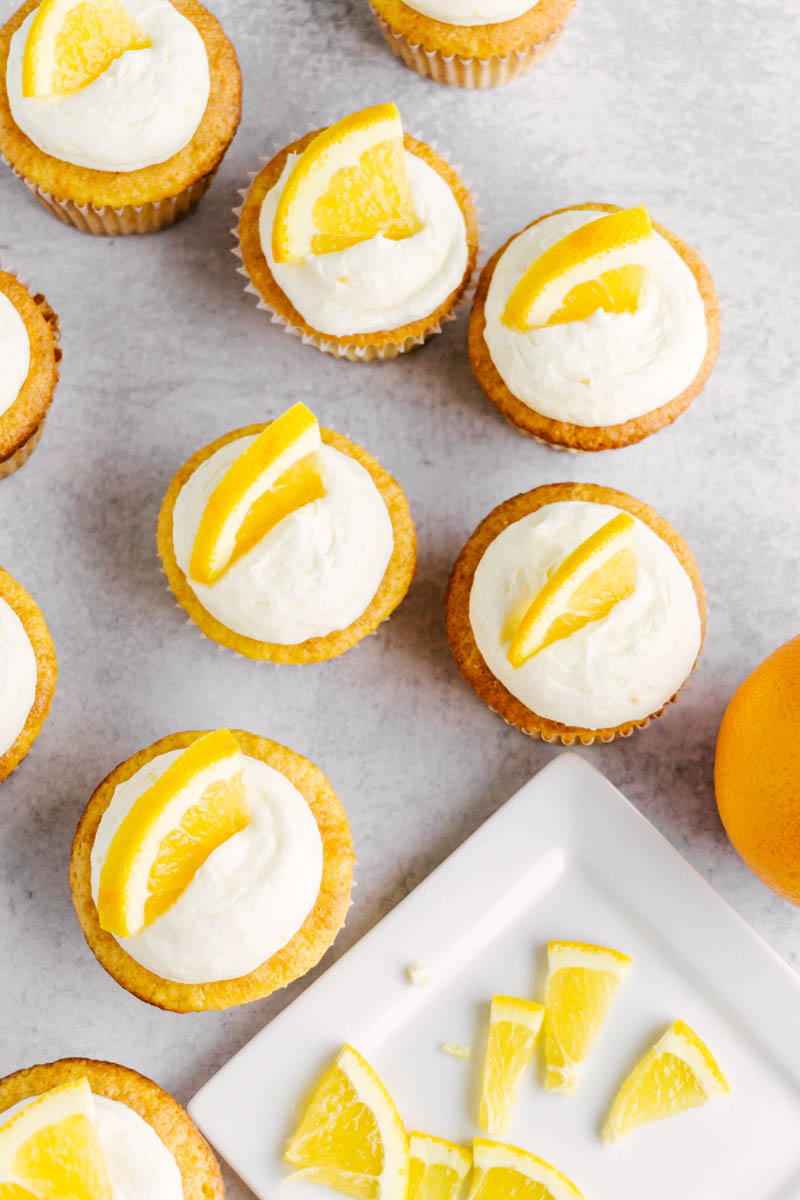
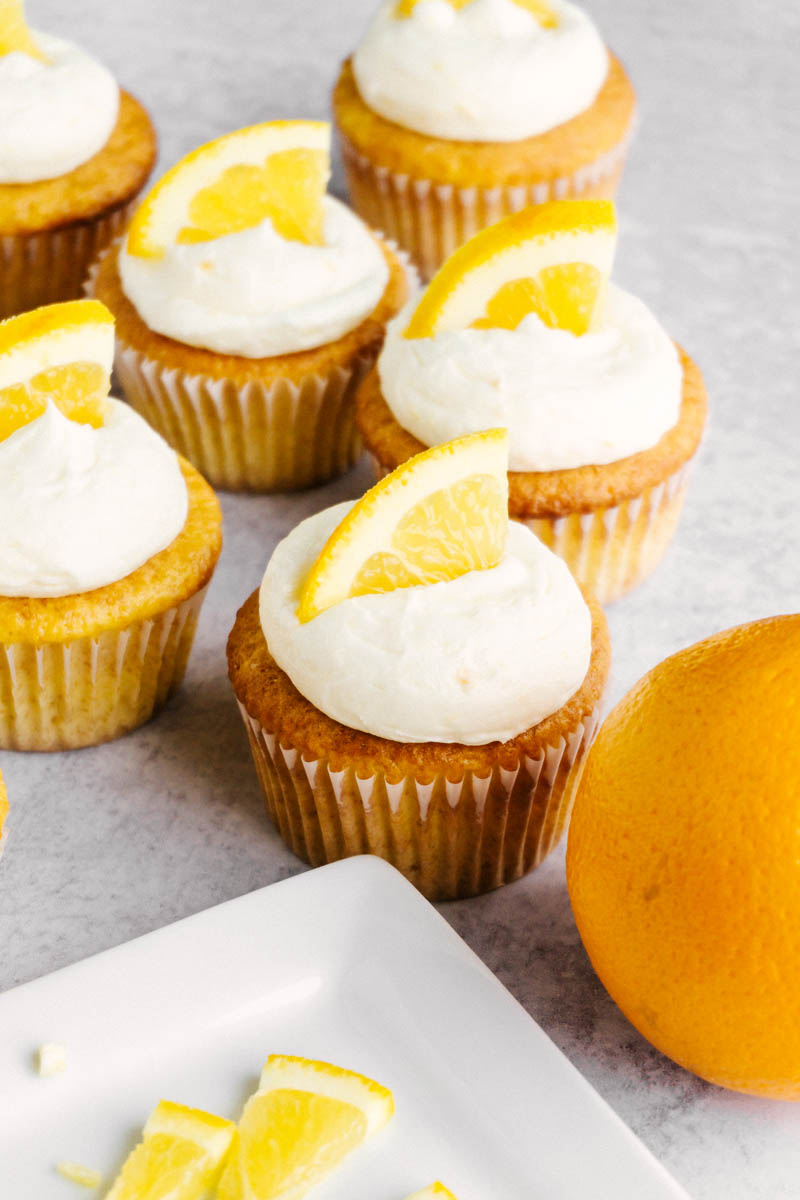
I used Vanilla Buttercream Frosting when I made these for photos. I stirred in some orange zest and used orange slices to decorate.
Orange Cream Cupcake Recipe Ingredients
Orange Zest – contributes great flavor to anything it touches. Great stirred into cake batter, cream or buttercream.
Yellow Cake Mix – consistent results without a lot of effort.
More Details About the Orange Cream Cupcake Components
Orange Cupcakes: The moist dreamy base of this dessert. By using a boxed cake mix, you save lots of time and effort, making this a quick and easy dessert to whip up any time.
Vanilla Buttercream Frosting: The iconic cupcake topping. Buttercream makes this a more rich, sweet dessert. If you want to kick up the orange factor, add a bit of orange zest to the frosting. I used Vanilla Buttercream Frosting the day I made these cupcakes for photos.
Orange Cream Cheese Whipped Cream: A lighter option for topping these yummy Orange Cupcakes. This stable whipped cream topping would be refreshing and light for a summer treat.
Coconut Cream: Decadent and delicious on our Sweet Coconut Cake, the creamy coconut flavor of this topping would pair perfectly with the summery orange flavor of the cupcake. Top with toasted coconut flakes for a beautiful, delicious dessert.
Assembling the Orange Cream Cupcakes
Make the Orange Cupcakes. Start by emptying the yellow cake mix into a mixing bowl. Add the liquid ingredients, then mix to combine. Bake the cupcakes until the tops spring back when you gently touch them with your finger. Let them cool completely before adding any frosting.
Pick a Topping! With so many to choose from, you can’t go wrong. Just make sure that if you use one with cream in it, you store these cupcakes in the fridge.
Frost. After you’ve made the desired frosting, pipe or spread it on top of the cooled cupcakes. Decorate with orange slices, berries, cookie crumbles, or toasted coconut.
Enjoy!
No matter which topping you choose, you’ll enjoy these Orange Cupcakes any time of the year!
Looking for more delicious cake recipes? Try these:
A delightful Orange Cupcake with your choice of Vanilla Buttercream, Orange Zest Whipped Cream, or Coconut Cream. “Orange” you glad you have options!
Ingredients
Orange Cupcakes
1 box yellow cake mix
¾ C (6 oz) buttermilk
3 eggs
¼ C (1.75 oz) oil
4 T orange juice
2 T orange zest (the zest of about one orange)
Vanilla Buttercream Frosting
1 C (8 oz) salted butter
3 ½ C (16 oz) powdered sugar
1 tsp vanilla
4 T milk
1 T orange zest, optional
Orange Cream Cheese Whipped Cream
1 (8 oz) package cream cheese
½ C (3.5 oz) white sugar
1 tsp vanilla
1 ¾ C (14 oz) heavy cream, cold
1 T orange zest, optional
Coconut Cream
1 (3 oz) box cook & serve vanilla pudding
1 ½ C (12 oz) coconut milk
1 ½ C (12 oz) heavy cream
½ C (2.2 oz) powdered sugar
1 tsp vanilla
½ C toasted coconut flakes
Garnish
½ C toasted coconut flakes
Orange slices
Instructions
Make Orange Cupcake
Preheat oven to 350*F.
Empty yellow cake mix into a mixing bowl.
Add milk, orange juice, oil, eggs, and orange zest.
Beat together for 2 minutes.
Line 2 (12 ct) cupcake pans with paper cupcake liners. Fill each cup ⅔ full of cake batter.
Bake for 18 minutes or until the center of cupcake springs back to the touch.
Cool completely before frosting.
Make Vanilla Buttercream
Soften the butter. Do NOT melt. Beat butter with a mixer until smooth.
Add powdered sugar. Beat together until combined and the mixture looks dry but uniform. Scrape bowl.
Add vanilla. Add milk until frosting is light and creamy. Add up to 3 additional tablespoons of milk if too thick.
Make Orange Zest Cream Cheese Whipped Cream
In a medium-sized bowl, beat cream cheese until smooth.
Add sugar and vanilla and mix. Scrape bowl. I can’t say this enough.
Add heavy cream and mix for 30 seconds. Stop, scrape bowl, beat another 30 seconds, then stop and scrape bowl again.
Whip on high speed until pipeable and ready to spread. Pipe or spread onto your treat of choice. Store in the refrigerator.
Make Coconut Cream
Make 3 oz box vanilla cook & serve pudding using the 1 ½ C (12 oz) coconut milk. Refrigerate until chilled.
In a mixing bowl, beat whipped cream, powdered sugar, and vanilla until stiff peaks form. Stir into chilled pudding and spread or pipe onto cupcakes. Sprinkle with toasted coconut.
Assemble.
Let the baked cupcake cool.
Make Vanilla Buttercream Frosting OR Orange Zest Cream Cheese Whipped Cream OR Coconut Cream. Pipe or spread onto cupcakes.
Garnish cupcakes with toasted coconut flakes and orange slices (optional).
Store whipped cream-type toppings in the fridge until an hour before serving.
Notes
No need to make all three frosting options. Just pick your favorite to make!
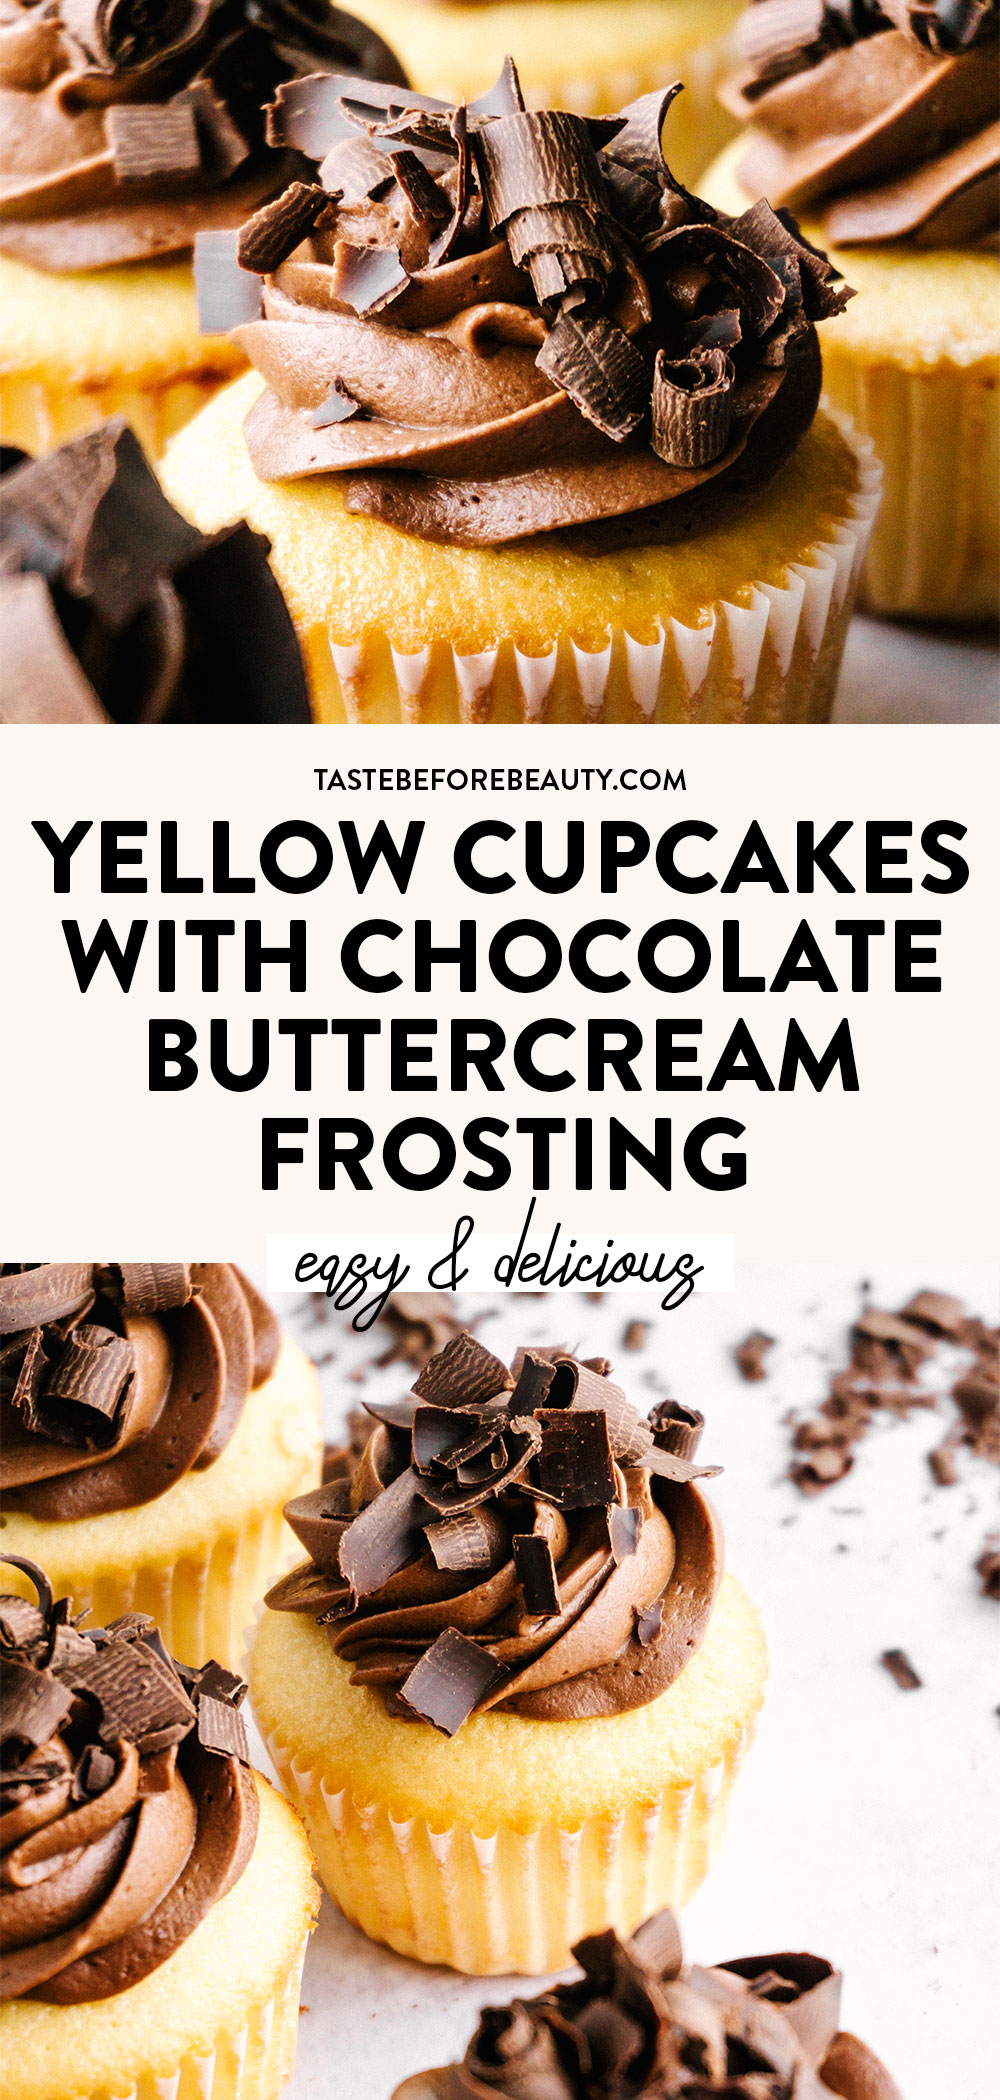
Yellow Cake and Chocolate Buttercream were meant to be friends for life, but not just any recipe will do. With this recipe, you’ll be fighting with your lifelong friends for the last cupcake!
The Challenge
I looked at the yellow cake mix box with frustration. The last decade has brought change to cake mixes. Even though less mix is put in the box, the same amount of eggs and liquid are still called for, affecting the size and texture of the finished cake.
So after I decided I’d had enough, I gave the yellow cake mix an evil eye, and pulled out every cookbook I had to study “yellow cake”. Days later and a freezer full of cake failures, I hit upon the right flavor and texture. This recipe was my 11th attempt.
The Solutions
Cake flour, a bit of butter, brown sugar, and buttermilk, plus some quality vanilla, come together in what I would call the perfect Yellow Cake. In addition to the perfect ratio of ingredients, I also learned that the process is absolutely important. From sifting the flour three times over, to mixing for the exact amounts of time specified, it’s all important to the final cake result. I know because I tested it, using the same exact ingredients but two separate methods. One turned out much better than the other.
This Yellow Cake is one of the hardest things I have ever tested. Cakes from scratch are not for the faint of heart. It’s much more of a science than any other baked item I have attacked.
Feeling Like Star Baker?
Don’t worry, you can do this. Start by making sure your ingredients are all at room temperature. Set your timers. Don’t get distracted and walk away from the mixer bowl or the oven. Follow the steps and you will find success in baking these yellow cupcakes with chocolate buttercream frosting!
I learned so much about cakes in this process. The journey is worth it to find that you too can be a star baker in your own kitchen. Even if you fail, the worst thing that can happen is that you have an ugly cake to cut up and throw in a trifle bowl with cream and berries (I recommend this Raspberry Trifle). No one will complain about that!
Recipe Ingredients
Butter – brings flavor to both the cake and the frosting.
Shortening –improves the texture of the cake and gives it the perfect crumb.
Buttermilk – adds moisture and the acid tenderizes the cake.
Eggs – add lift and richness to the cake.
Baking Powder – the perfect amount gives the cake a beautiful rise without creating tunnels. Too much will cause multiple tunnels in the finished product as if the dough has been overbeaten.
Yellow Cupcakes with Chocolate Buttercream Frosting Mixing Tips
Sifting the flour 3 times incorporates the leavening agents into the flour equally, giving an even crumb.
Room temperature eggs, butter, shortening, and buttermilk are essential to properly combine the cake batter. If you forget to put the eggs on the counter early enough to come to room temperature, set them in a bowl full of hot tap water while you assemble the other ingredients. Dry them off before cracking them open.
This batter is made with a “Two-Stage” method for the buttermilk because it is added in two steps. Adding the buttermilk too early will develop too much gluten. I think this method should be renamed Five-Stage method because of all the other additions, but that’s just my opinion.
The eggs only need to be lightly beaten before adding to the milk. Add them last to avoid adding too much air. Eggs have a remarkable ability to trap air (something you definitely want in a Pavlova, but not in a Yellow Cake).
Follow the directions exactly, paying close attention to the mixing times. Before baking, tap your pans on the counter and give them a spin to make sure all the air bubbles are out of the batter. If I overbeat even 30 seconds, there will be too much air and extra “tunnels” happen. I use timers for every step of this recipe.
Let the cakes cool completely before frosting. Buttercream Frosting is made of mostly – you guessed it – butter, which will melt if placed on a hot cake.
Is a cake from scratch worth it? It depends. This one is definitely worth it.
Looking for more delicious cake recipes? Try these:
Yellow Cupcakes with Chocolate Buttercream Frosting
Yield: 32 cupcakes or 2 (9-inch) round cakes
Prep Time: 40 minutes
Cook Time: 18 minutes
Additional Time: 1 hour
Total Time: 1 hour58 minutes
Yellow Cake and Chocolate Buttercream were meant to be friends for life, but not just any recipe will do. With this recipe, you’ll be fighting with your lifelong friends for the last cupcake!
Ingredients
Yellow Cake Batter
3 ¼ C (13 oz) cake flour
1 ¼ tsp salt
1 T baking powder
4 T (2 oz) salted butter, slightly softened
½ C (3.5 oz) shortening
1 ½ C + 1 T (11 oz) white sugar
½ C (4 oz) brown sugar, packed
1 ½ C (12 oz) buttermilk, room temperature & divided in half
4 large eggs, room temperature, lightly beaten
1 T vanilla
Chocolate Buttercream Frosting
2 C (16 oz) salted butter, room temperature
1 C (3.6 oz) cocoa
7 C (32 oz) powdered sugar
2 tsp vanilla
7 T + 3 T milk
Garnish
3 oz dark chocolate bar shaved, optional
Chocolate pareils, optional
Instructions
Make Yellow Cake.
Preheat oven to 350*F. Line cupcake pans with cupcake liners, or grease and flour cake pans and line bottom with wax paper.
Mix cake flour, salt, and baking powder together. Sift together 3 times.
Add slightly softened butter and shortening. Mix for 2 minutes at low speed. Scrape bowl.
Add sugars and ¾ C (6 oz) buttermilk. Beat on low for 2 minutes. Scrape bowl.
Lightly beat eggs and add to remaining ¾ C (6 oz) buttermilk with the vanilla. Add in thirds to the sugar mixture. Beat for 30 seconds after each addition, scraping the bowl before adding more.
Fill cupcake liners ⅔ full with cake batter. If making a cake, divide batter equally between 9-inch round pans.
Bake cupcakes for 18 minutes or until center springs back when lightly touched. Cool completely.
Bake cakes for 25-28 minutes, or until center springs back when lightly touched. Let cool 5-10 minutes and then turn onto a cooling rack. If necessary, run a knife around the edge to release.
Make Chocolate Buttercream Frosting.
Soften the butter, but do not melt. Beat butter with a mixer until it is smooth.
Add cocoa and powdered sugar. Beat butter, cocoa, and powdered sugar until combined and mixture looks dry and uniform. Scrape bowl.
Add vanilla and 7 T of milk. Beat until frosting is light, creamy, and soft.
If frosting is too thick, add up to 3 additional tablespoons of milk. Caution: overbeating will result in large air pockets that will create a less smooth finish to the buttercream.
Assemble.
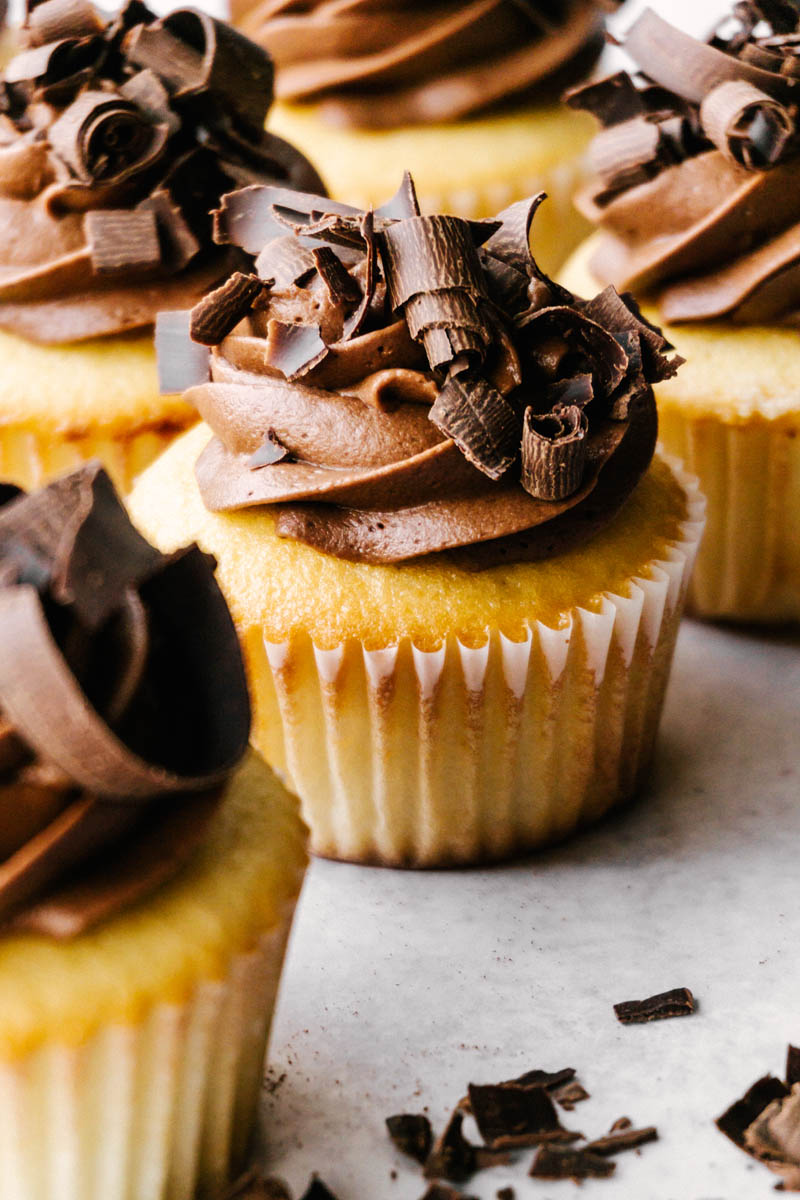
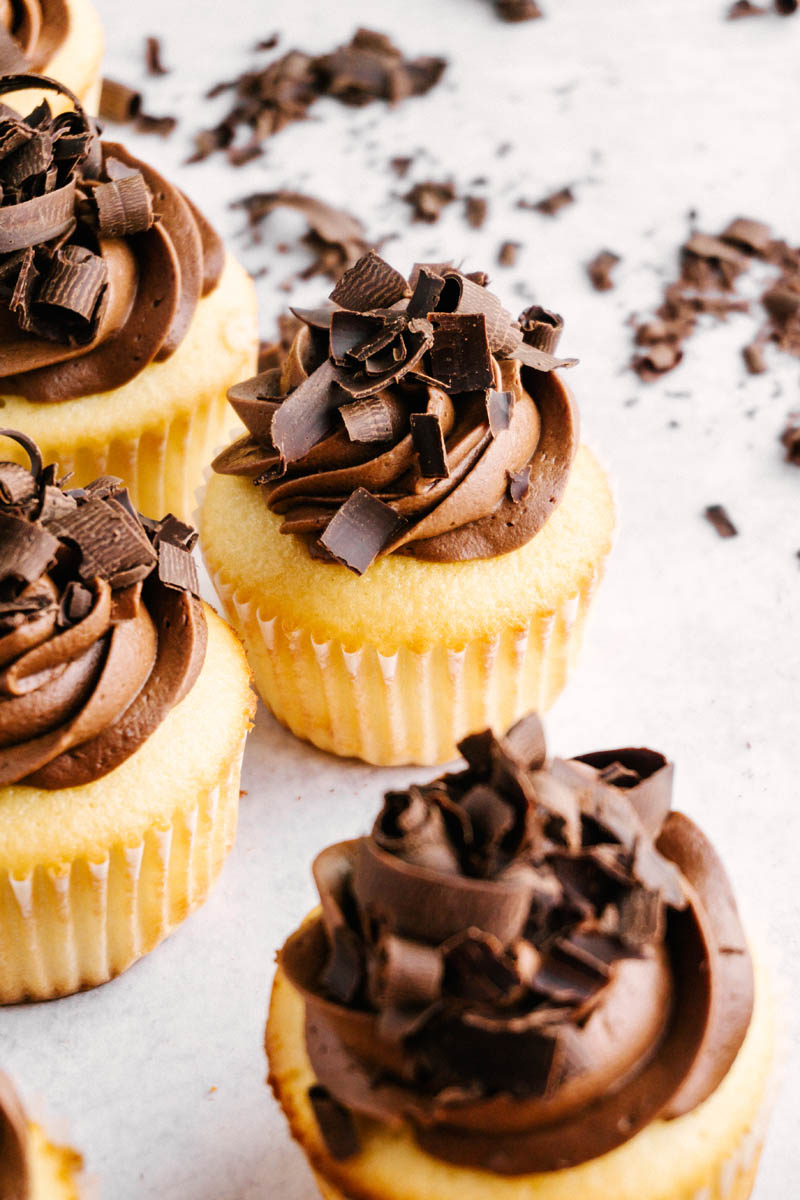
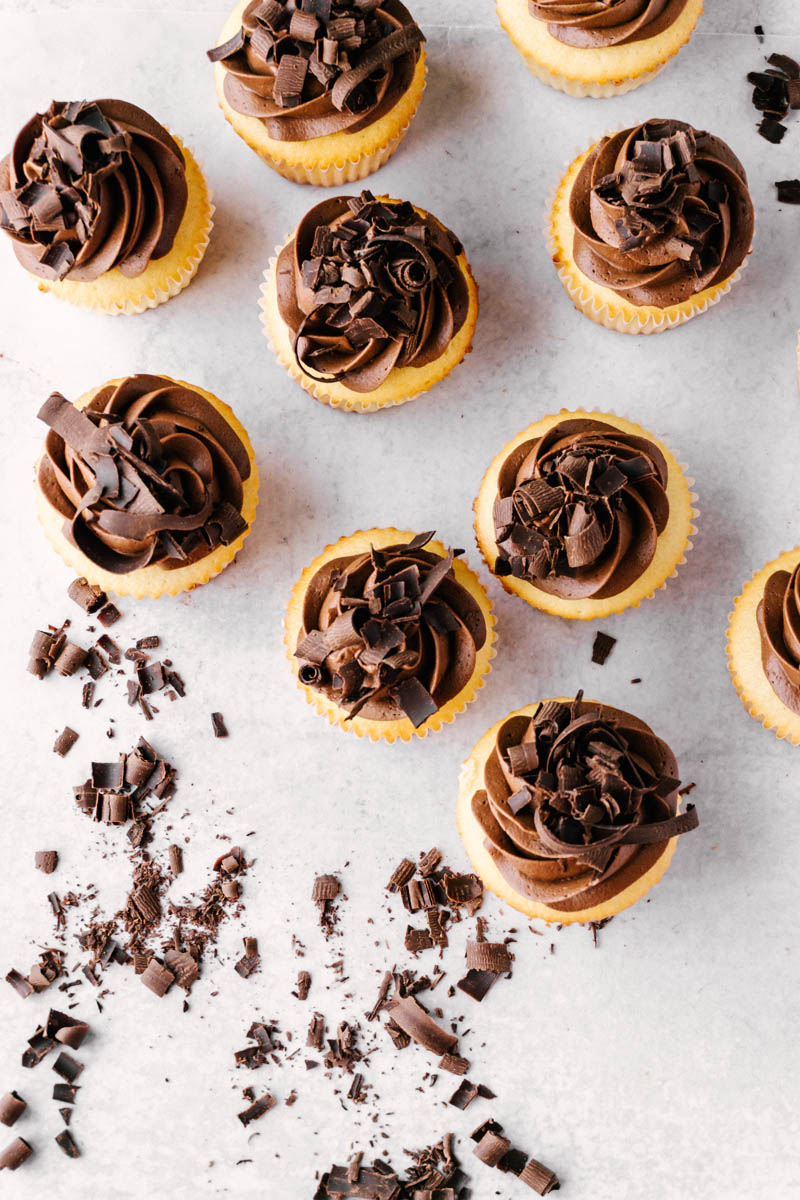
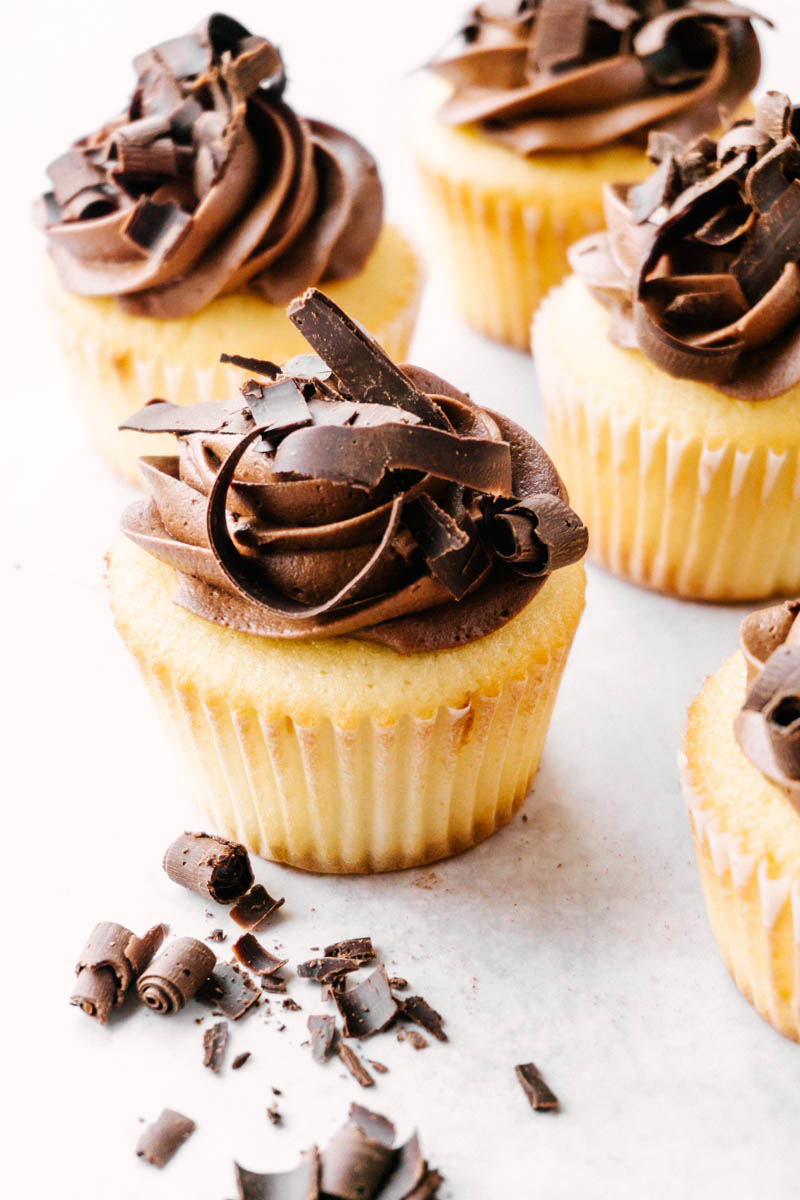
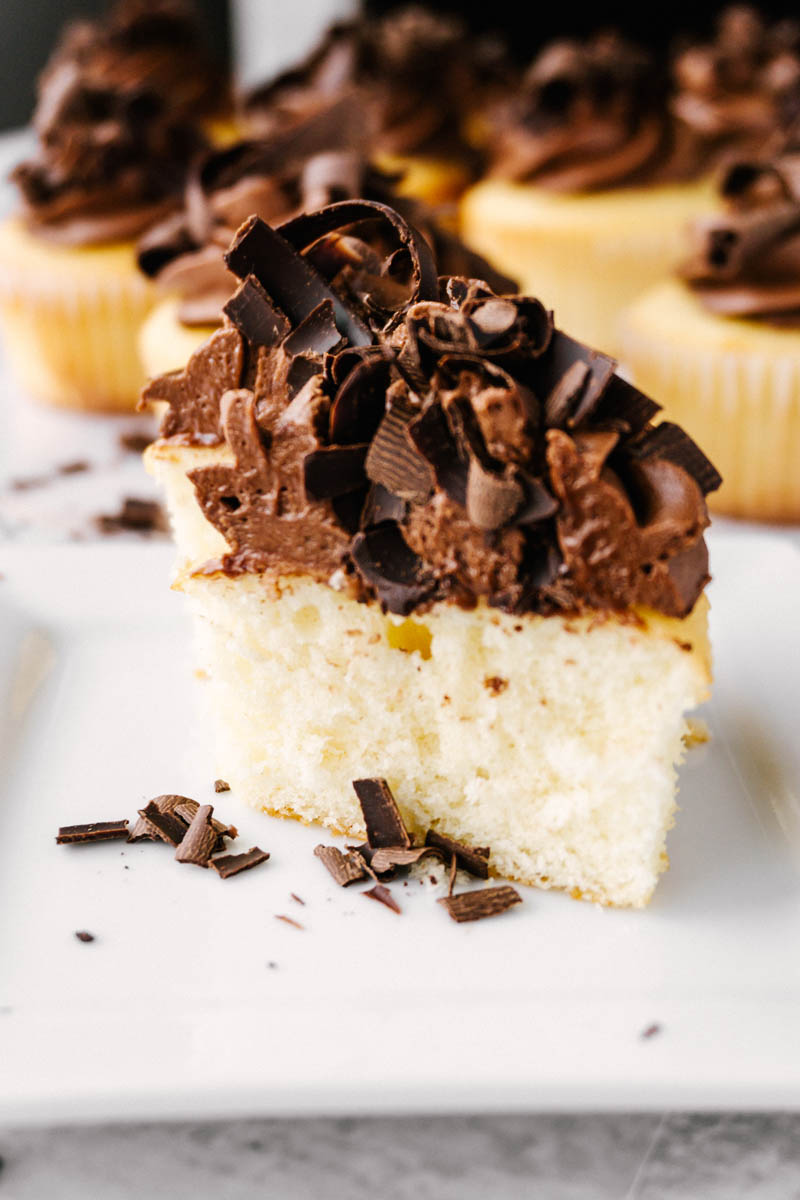
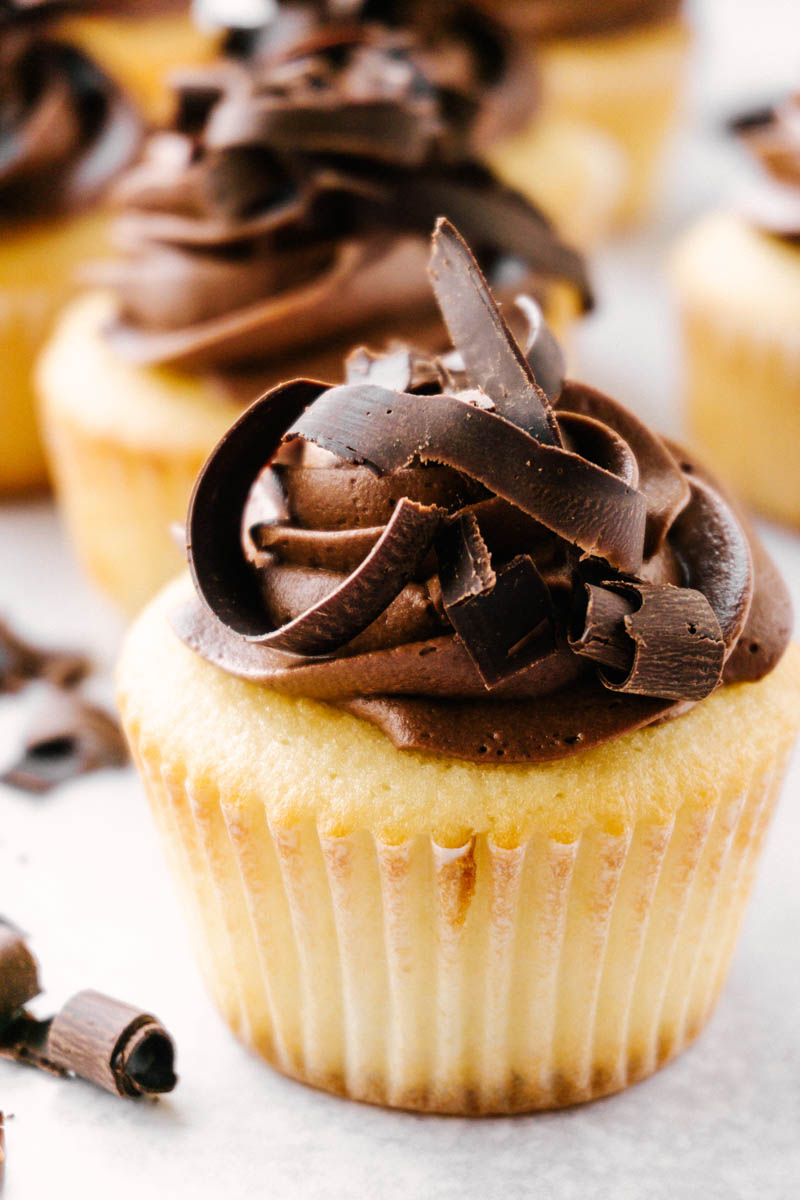
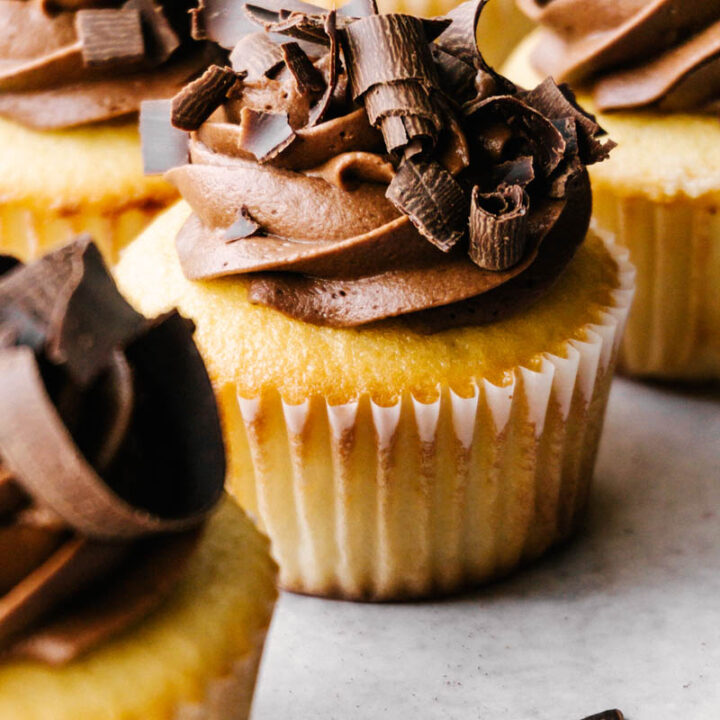
Use a carrot peeler to shave chocolate curls off of a large chocolate bar.
If frosting was made in advance, rewhip before frosting cupcakes or cake.
Place frosting in a piping bag with 2D star tip. Pipe frosting onto the center of the cupcake or spread between cake layers and on top. Garnish with chocolate shavings and sprinkles, if desired.
Notes
To make your own buttermilk, place 1 ½ T lemon juice in the measuring cup. Add milk to equal 1 ½ C. Set aside for a few minutes before using.
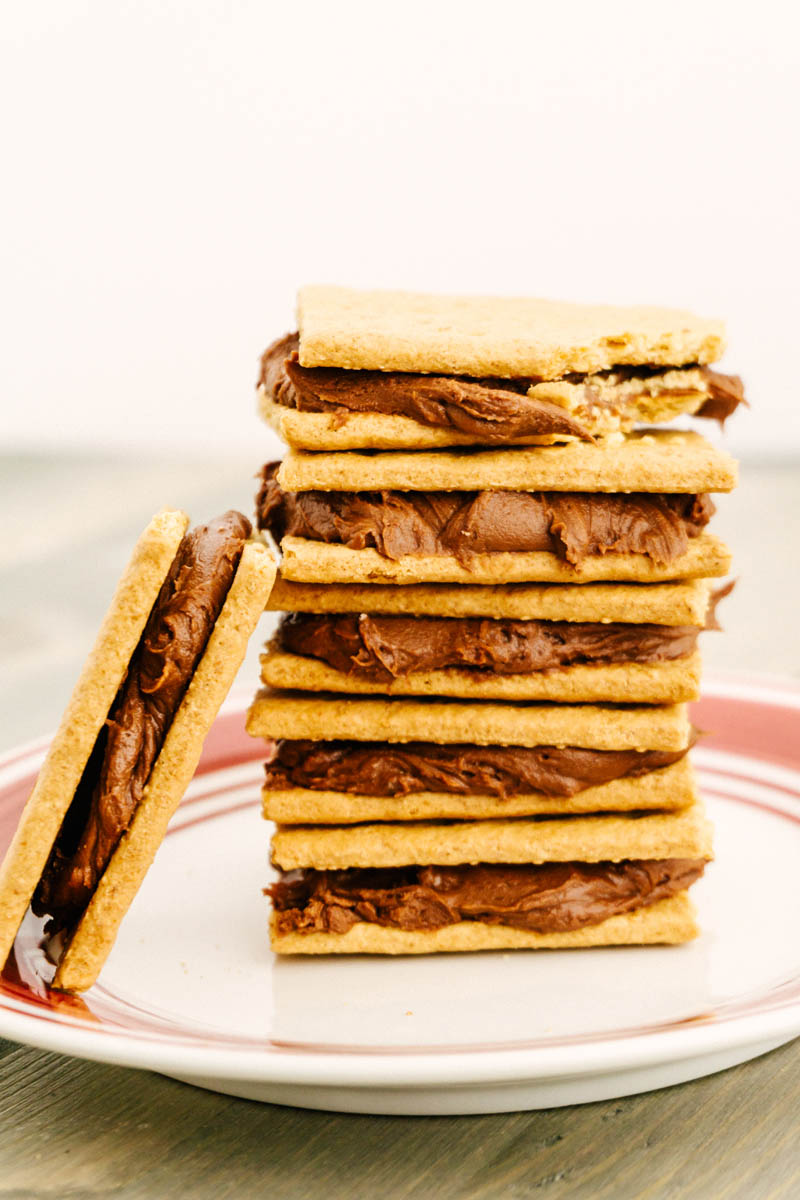
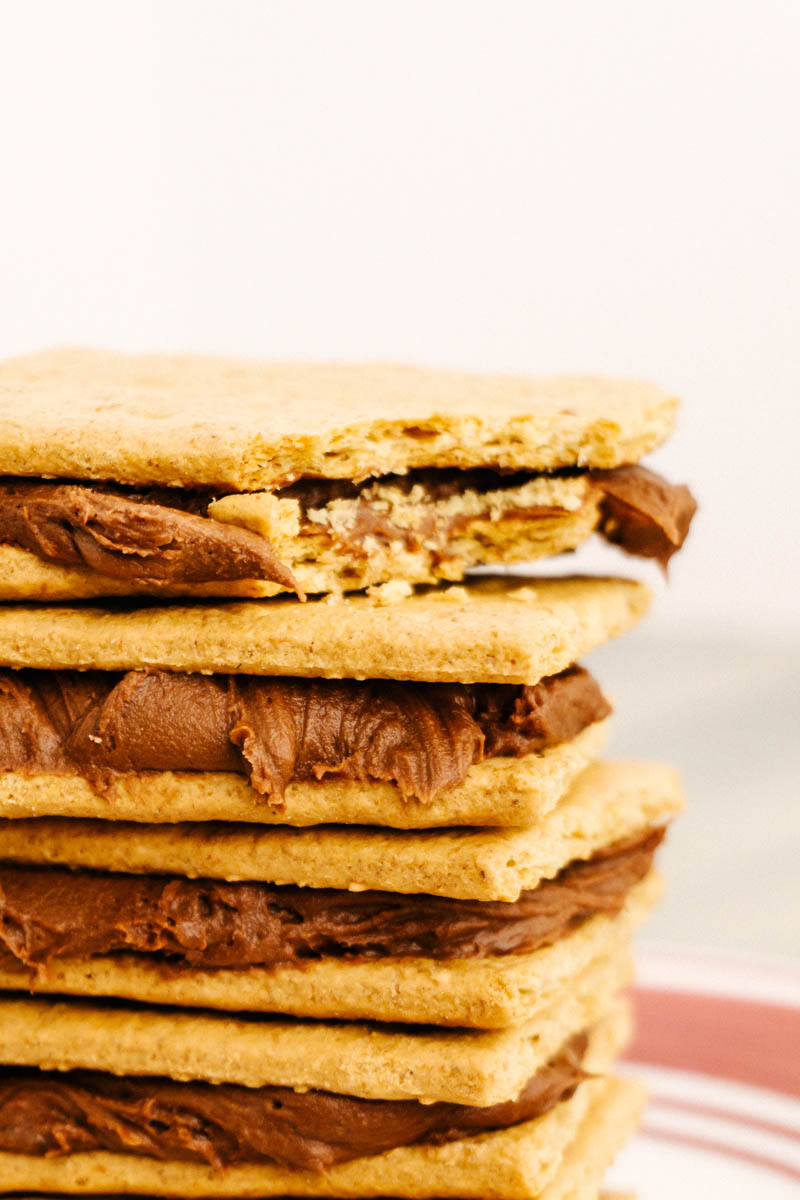
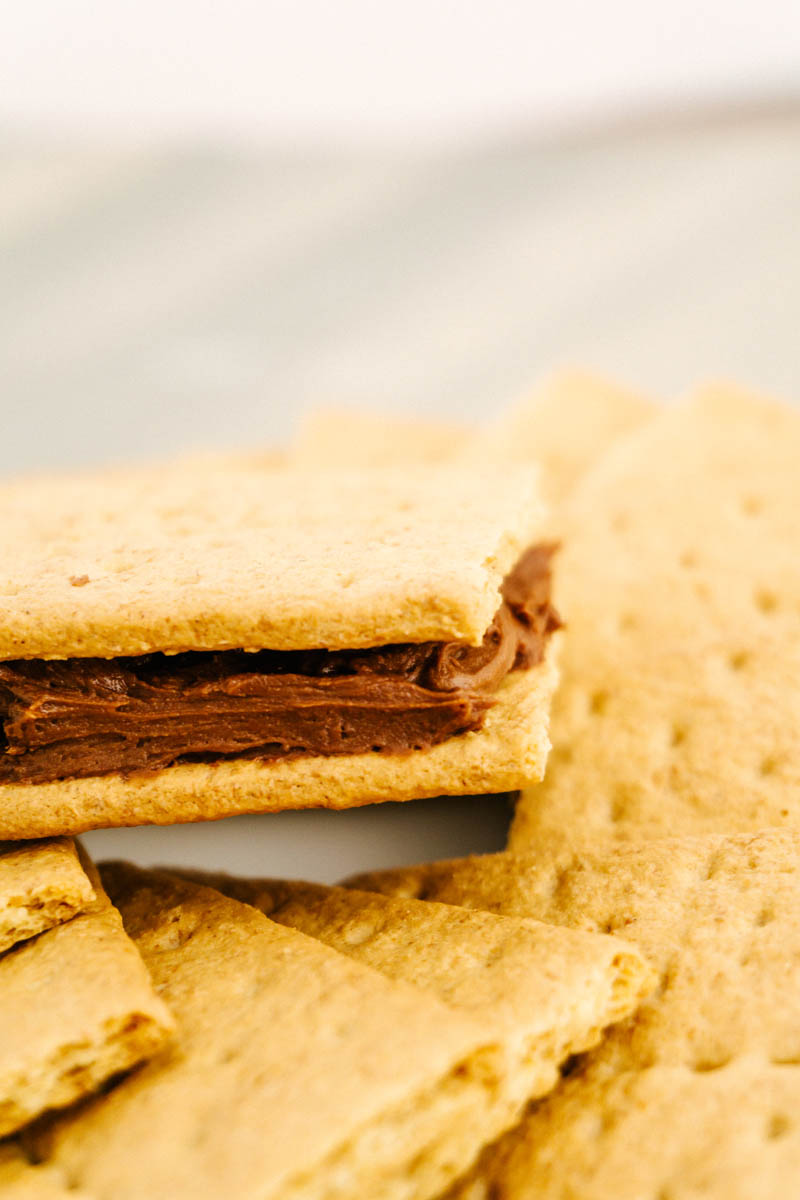
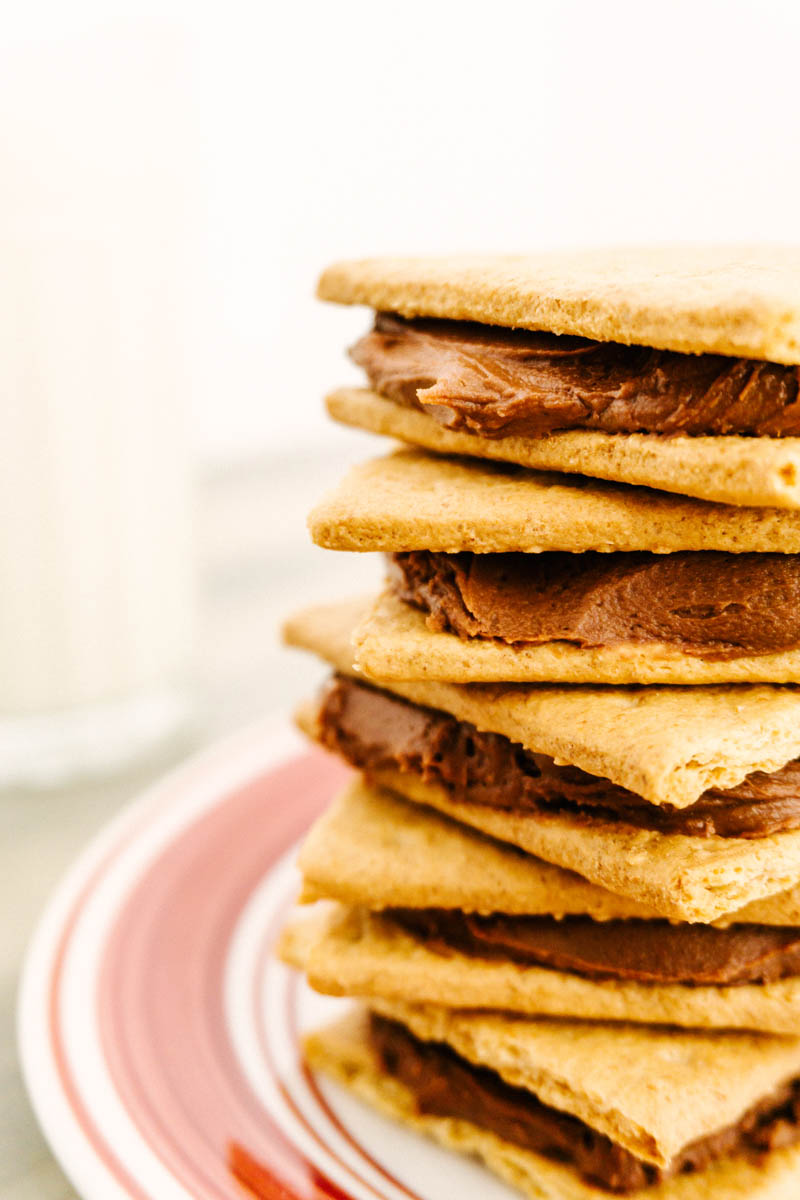
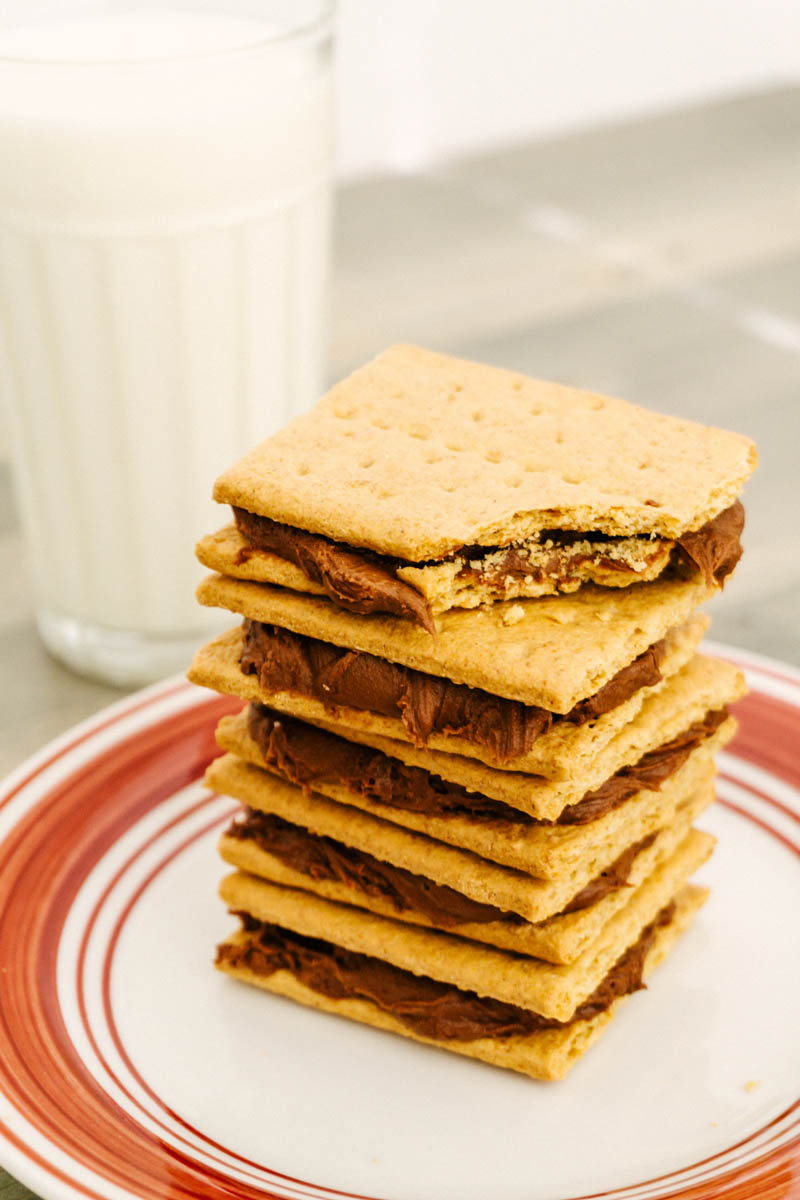
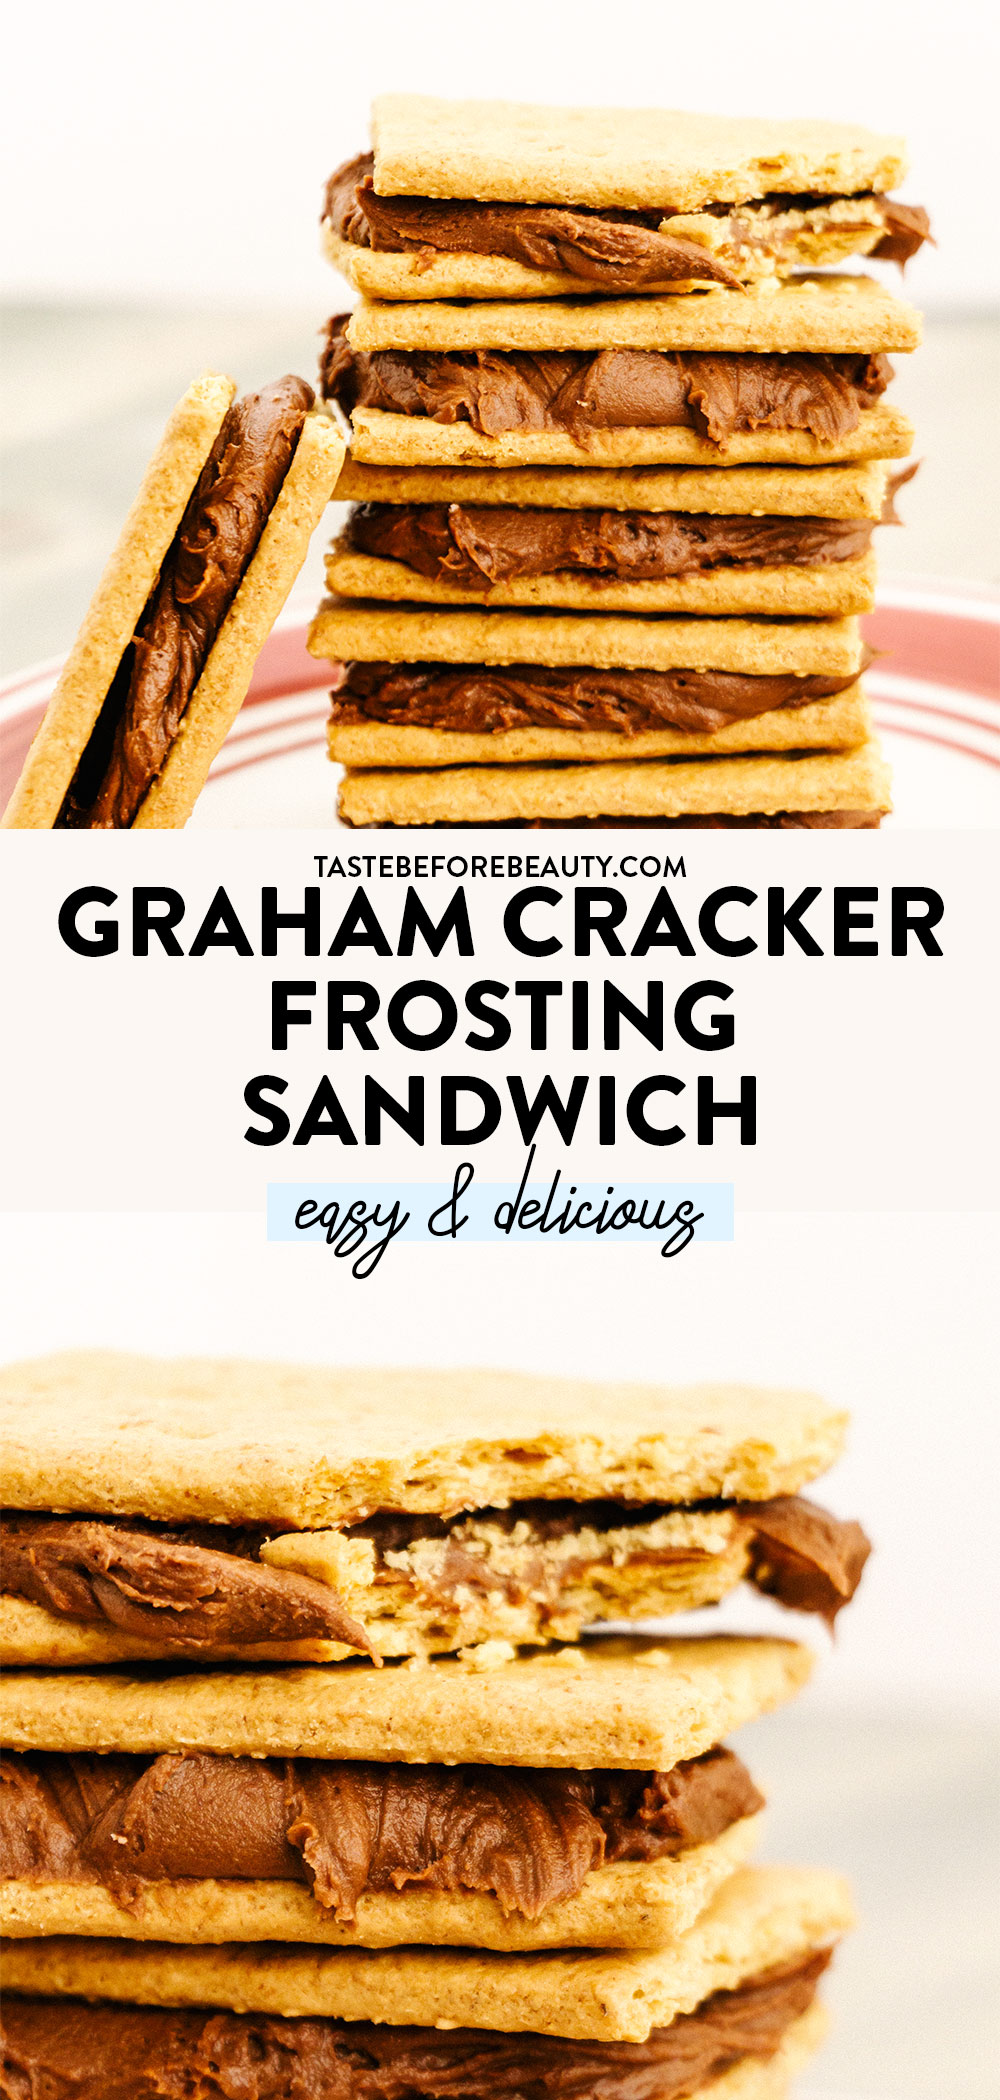
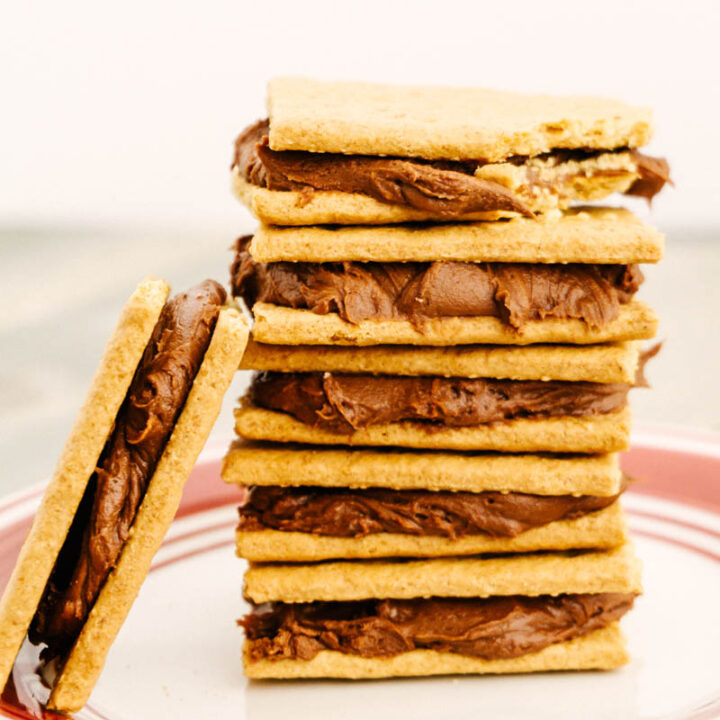
Talk about classics! This Graham Cracker Frosting Sandwich brings me back to my elementary school days when I’d open up my lunch box to find one of these and I’d look up to see my friends would be drooling. With delicious graham crackers and creamy Buttercream Frosting, these are a timeless classic enjoyed by all!
The Best Solution for Leftover Frosting
Don’t toss that leftover frosting! Grab some graham crackers and sandwich that good stuff in between them. That’s my kind of lazy day treat! These are so easy you really have no reason not to make them!
We have so many desserts that call for Buttercream Frosting from Frosted Marshmallow Brownies to Black Forest Cake. Somehow I always end up with extra frosting. I don’t have enough freezer space for all of the leftover frosting to be stored so I make a batch of these Graham Cracker Frosting Sandwiches and they’re gone within a few days!
This Graham Cracker Frosting Sandwich is one of my favorites and a lunchtime favorite! I always loved opening up my lunchbox to one of these. They really are best three to five days later. The softer the graham cracker gets the better. I leave mine in a ziplock bag on the counter and they only last a few days.
Recipe Ingredients
Graham Crackers: Use generic or name brand for this recipe!
Break your graham crackers in half. Do this carefully or the frosting will squish out of the smaller half of the sandwich.
Add frosting. Use as much or as little as you like!
Now comes the hardest part: waiting 3-5 days for the graham crackers to soften up and the flavors to meld. Of course, you can eat these Graham Cracker Frosting Sandwiches right away, but I promise they taste best after they’ve had a few days to sit.
This is probably one of the easiest and tastiest desserts to make. Let us know how long they last on your counter!
Looking for more delicious easy recipes? Try these:
Yield: 24ish - depending on how much frosting you like in between your graham crackers
Prep Time: 10 minutes
Additional Time: 5 minutes
Total Time: 15 minutes
Talk about classics! This Graham Cracker Frosting Sandwich brings me back to my elementary school days when I’d open up my lunch box to find one of these and I’d look up to see my friends would be drooling. With delicious graham crackers and creamy Buttercream Frosting, these are a timeless classic enjoyed by all!
Ingredients
Chocolate Buttercream Frosting
1 C (16 oz) salted butter, room temperature
1 C (3.6 oz) cocoa
7 C (32 oz) powdered sugar
2 tsp vanilla
7 T + 3 T milk
Instructions
Make the Frosting:
Soften the butter, but do not melt. Beat butter with a mixer until it is smooth.
Add cocoa and powdered sugar. Beat butter, cocoa, and powdered sugar until combined and mixture looks dry and uniform. Scrape bowl.
Add vanilla and 7 T of milk. Beat until frosting is light, creamy, and soft.
If frosting is too thick, add up to 3 additional tablespoons of milk.
Sandwich Frosting between Graham Crackers:
Carefully break each graham cracker sheet into two pieces and spread 1-2 T of frosting between graham crackers.
Best if eaten 3-5 days later. This allows time for the graham crackers to soften and absorb some flavor from the frosting.
Lasts for one to two weeks in an airtight container at room temperature or stored in refrigerator. Can also be frozen.
Notes
When adding powdered sugar and cocoa, we highly recommend covering your mixer. Use a clean tea towel or a shield if your mixer came with one, or spend the next decade cleaning powdered sugar and cocoa dust from every surface in your life.