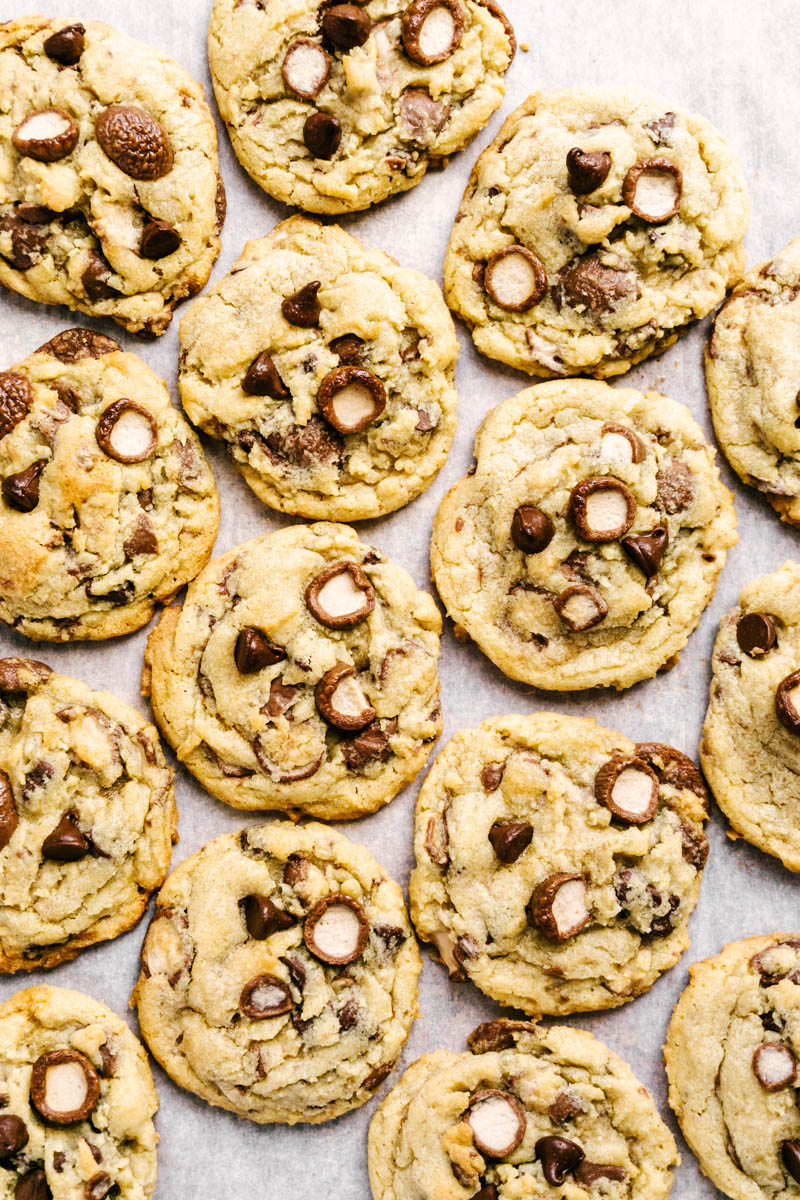
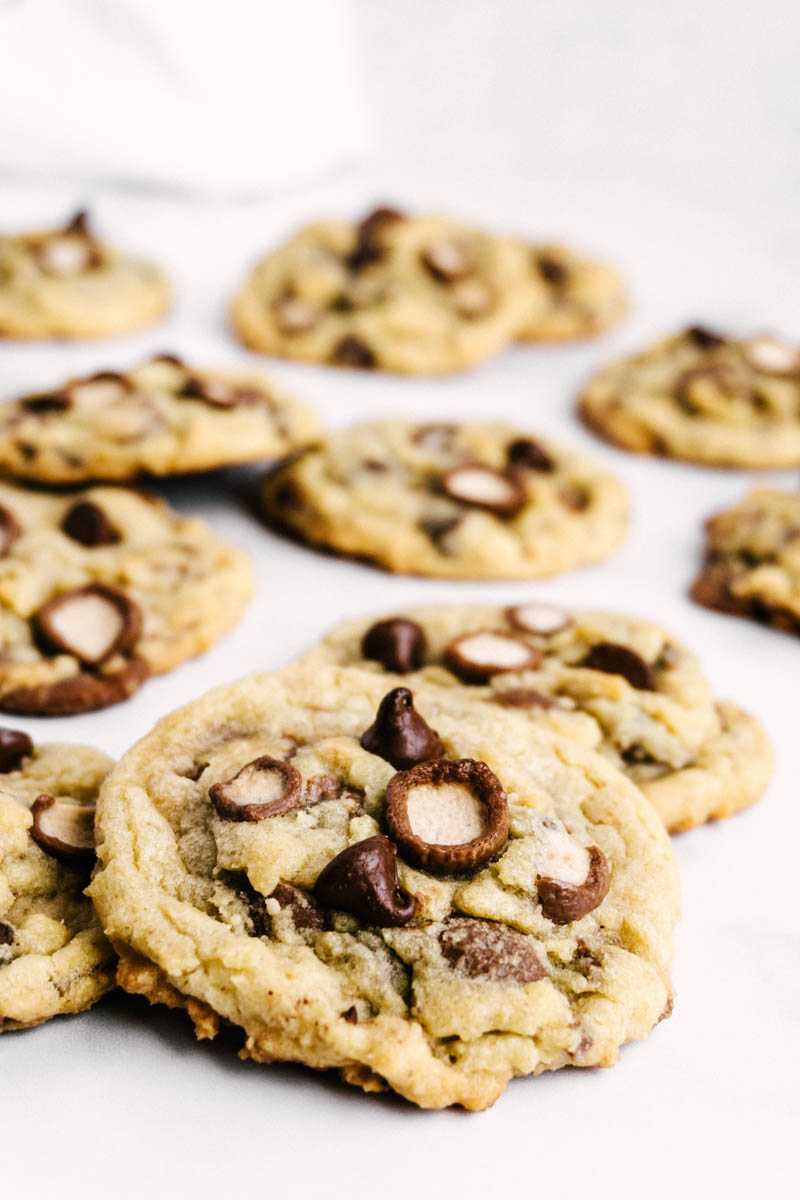
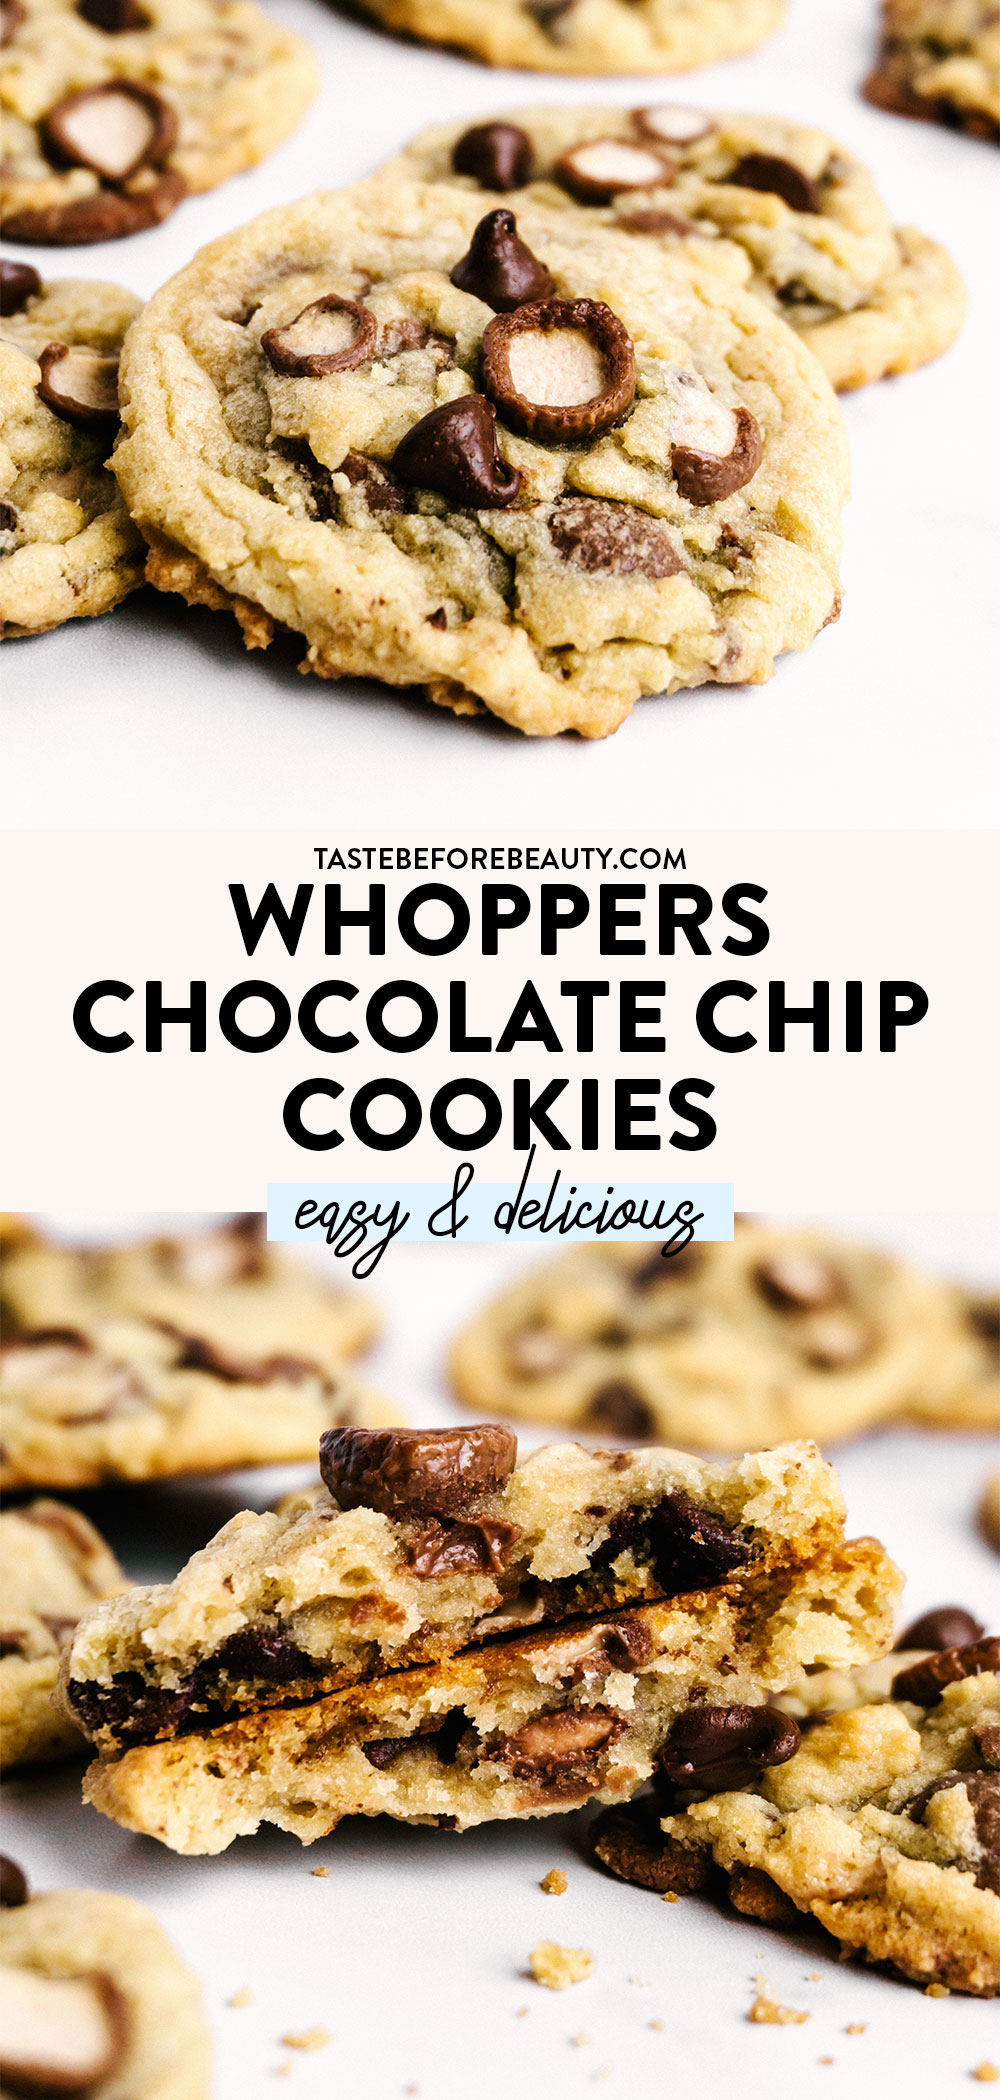
Can’t get enough of those crunchy chocolate-covered malt balls? Then these cookies are for you! With melty chocolate chips and crunchy Whoppers nestled in the perfect buttery cookie dough, these whoppers chocolate chip cookies pack a punch of flavor!
How the Malted Chocolate Chip Whopper Cookies Came to Be
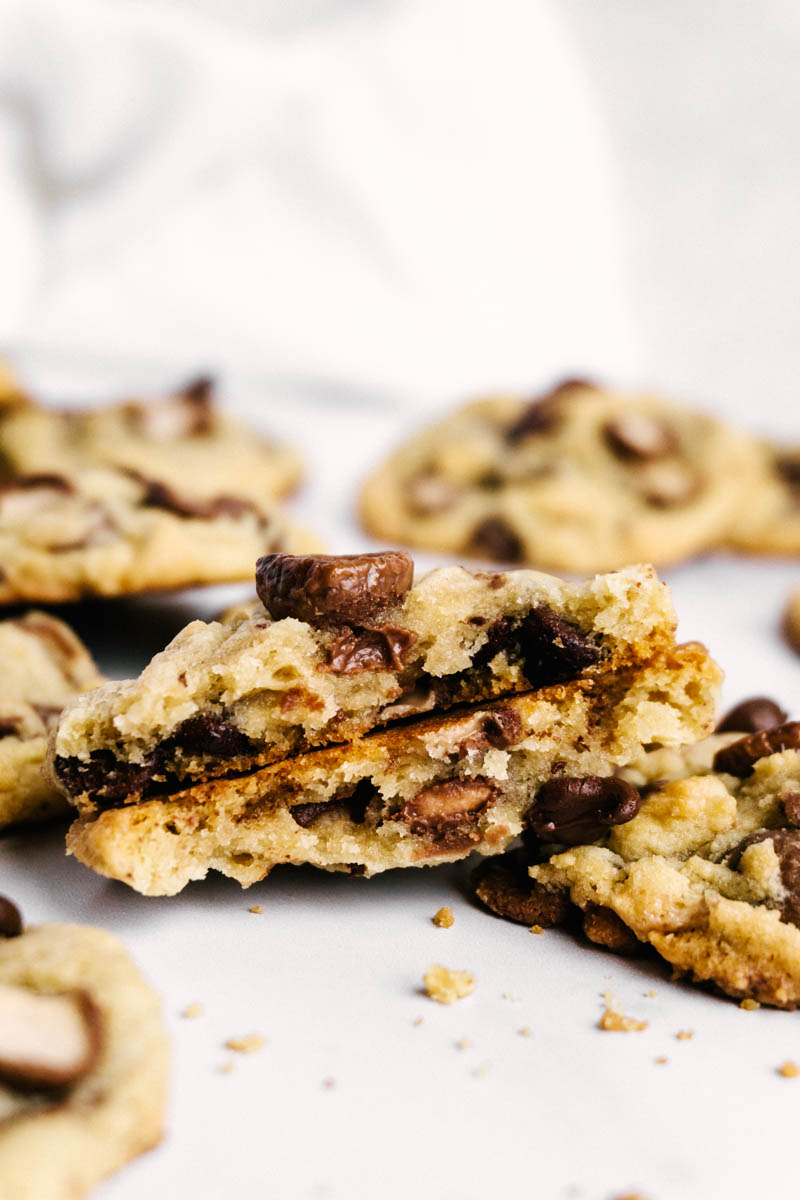
These Whoppers Chocolate Chip Cookies are to die for! It’s hard to improve on the irresistible malt crunch of a Whopper, but when you add melty chocolate chips and the perfectly baked cookie to go with them, then wow! You’ve got a real winner!
Missy tested a malt cookie for a long time. Adding malted milk powder to a cookie is a tricky problem and the results were often variable. The solution to this was to add Whoppers malted milk balls. It adds all the malt flavor you crave, plus a bonus bit of chocolate.
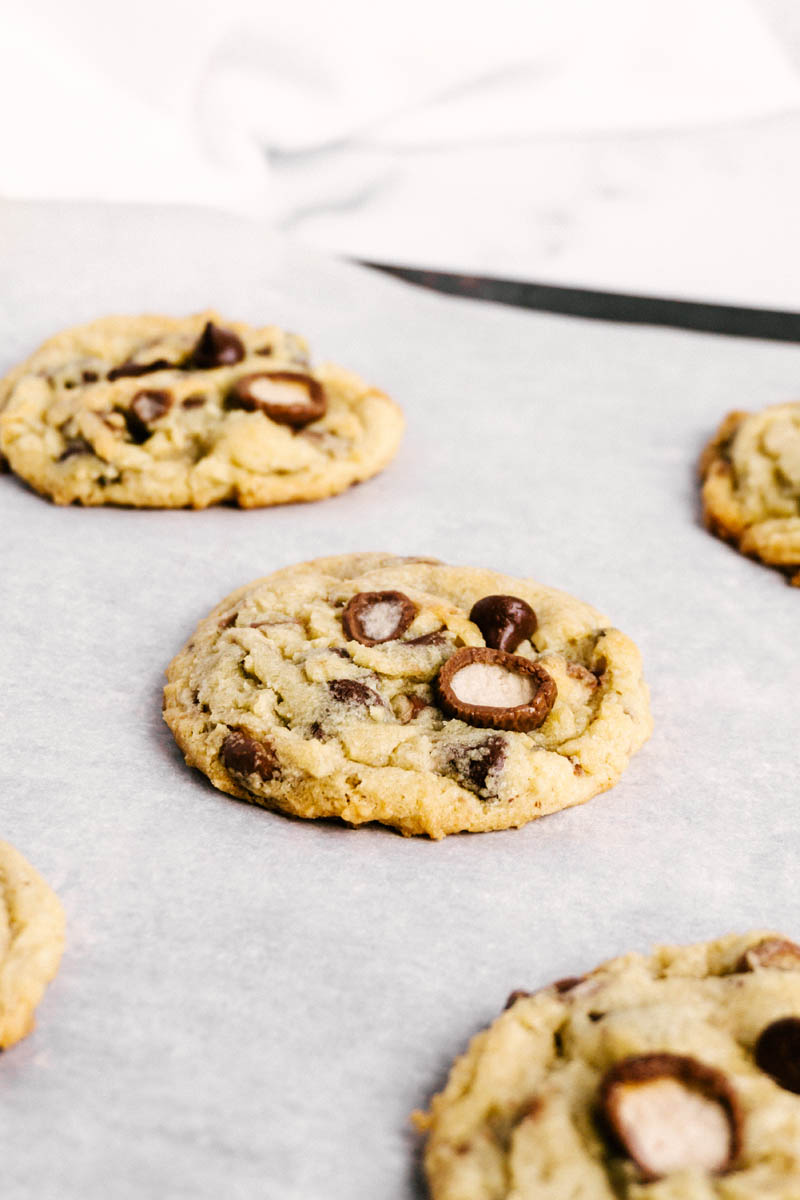
I love to make these. Chopping the Whoppers is the most difficult part and it only takes a few minutes. I like to chop them in half so there are big chunks of malt throughout the cookies. If you want smaller pieces, you can cut them smaller or roughly crush them. When you make the dough, it will be a very sturdy dough and seem a little drier than you’d think. It bakes up perfectly though!
Malted Chocolate Chip Cookies Recipe Ingredients
Sugar & Brown Sugar – Using both provides the perfect balance of sweetness.
Vanilla – Balances the chocolate and malt flavors together. I like to use Watkins Baking Vanilla in this Whoppers Chocolate Chip Cookie.
Chocolate Chips – We love to use semi-sweet chocolate chips in our family, but feel free to use milk chocolate chips, if your heart so desires. We just love the added chocolate to these malted milk cookies.
Whoppers – The star of this cookie! These provide the delicious malt flavor and awesome crispy-crunchy texture within the chewy dough.
How to Make a “Whopper”ing Good Cookie
Chop the Whoppers. I like to chop them in half so there are pretty big chunks of Whopper throughout the cookie. You can chop them smaller or place them in a bag and roughly crush them if you prefer smaller pieces.
I recommend using a durable stand mixer, like a KitchenAid mixer, for mixing these cookies. The dough is sturdy and can be hard to mix by hand. If you are using a hand mixer, you’ll probably need to stir the chocolate chips and Whoppers in by hand with a wooden spoon.
Once you’ve added all of the ingredients, the dough may seem extra dry, especially compared to most other cookie doughs. It’s meant to be this way because of the malt in the Whoppers and it will spread when it bakes.
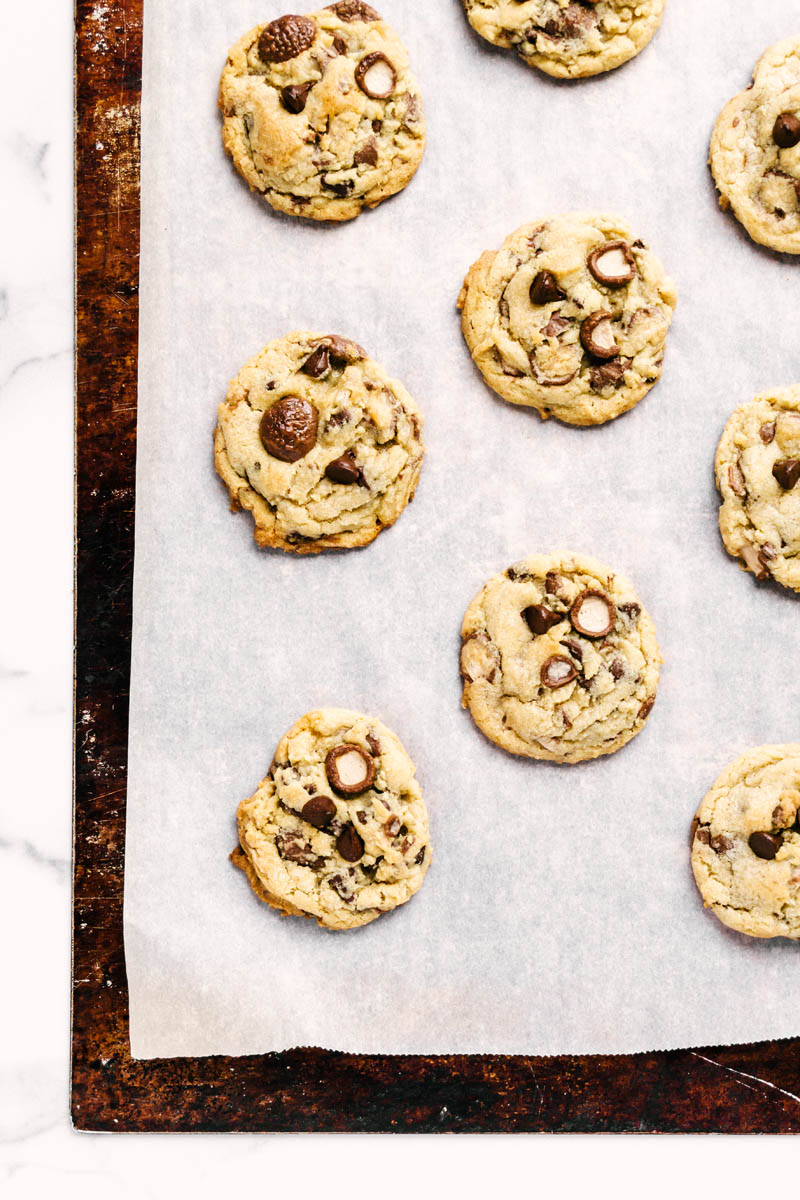
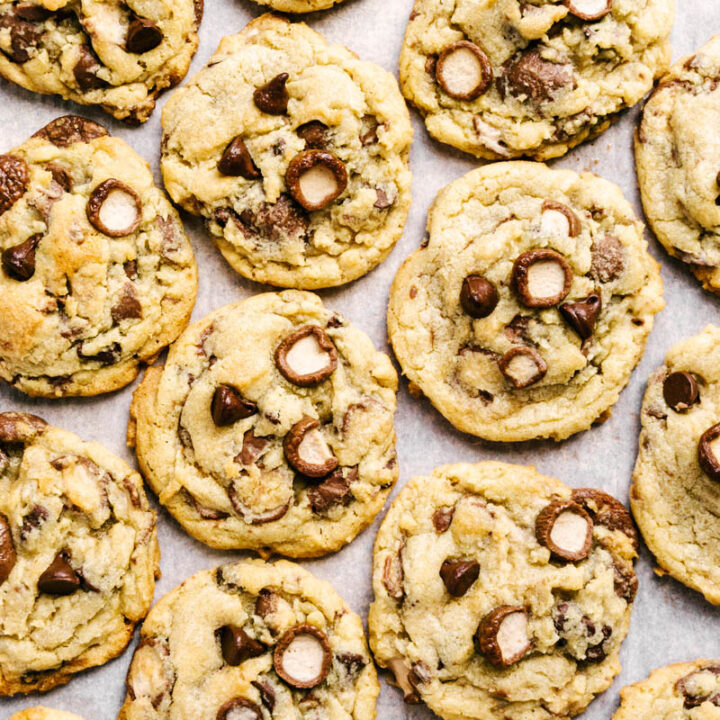
After you’ve scooped the dough onto baking sheets, don’t forget to top with extra chocolate chips and Whopper pieces. This highlights what the cookie contains and makes it look extra delicious!
Enjoy this delicious, fun twist on a classic chocolate chip cookie, our malted chocolate chip cookies with Whoppers!
Looking for more delicious chocolate chip cookie recipes? Try these:
Can’t get enough of those crunchy chocolate-covered malt balls? Then these cookies are for you! With melty chocolate chips and crunchy Whoppers nestled in the perfect buttery cookie dough, these cookies pack a punch of flavor!
Ingredients
1 C (8 oz) salted butter
1 C (7 oz) granulated sugar
½ C (4 oz) light brown sugar
2 egg yolks
1 T water
1 T vanilla
½ tsp salt
2 tsp baking soda
3 C (13.5 oz) all-purpose flour
1 C (6 oz) semi-sweet chocolate chips
2 ½ C (11 oz) Whoppers Malted Milk Balls, chopped into halves or thirds
Instructions
Preheat oven to 375*F. Line baking sheets with parchment paper.
Chop Whoppers into halves or thirds. Set aside.
Using a stand mixer, cream butter, granulated sugar, and brown sugar together. Add egg yolks, water, and vanilla and mix well.
Add salt, baking soda, and all-purpose flour. Mix then add ½ C chocolate chips and 1 ¾ C Whoppers, setting aside the rest for topping. Mix until combined. Dough will be dry.
Use a #30 cookie dough scoop to scoop cookie dough onto baking sheets. Top with a few chocolate chips and Whoppers pieces. Bake for 8-11 minutes until lightly browned on edges.
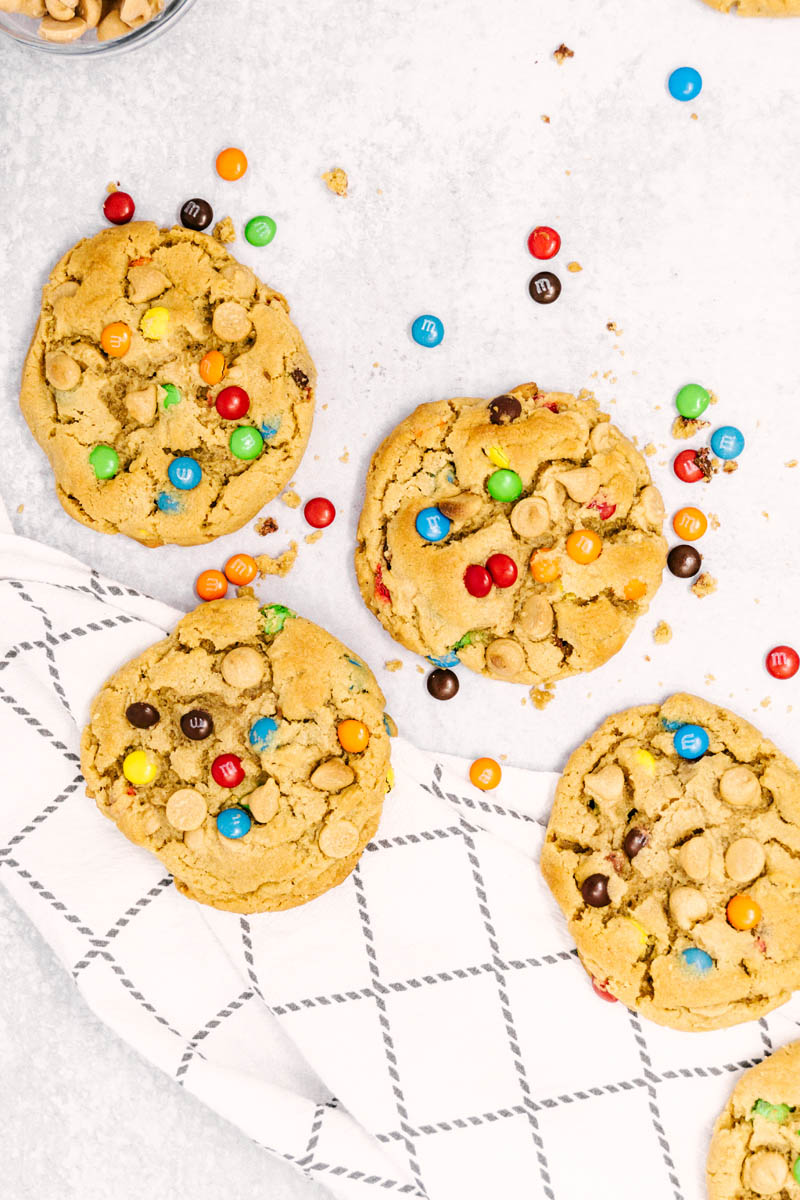
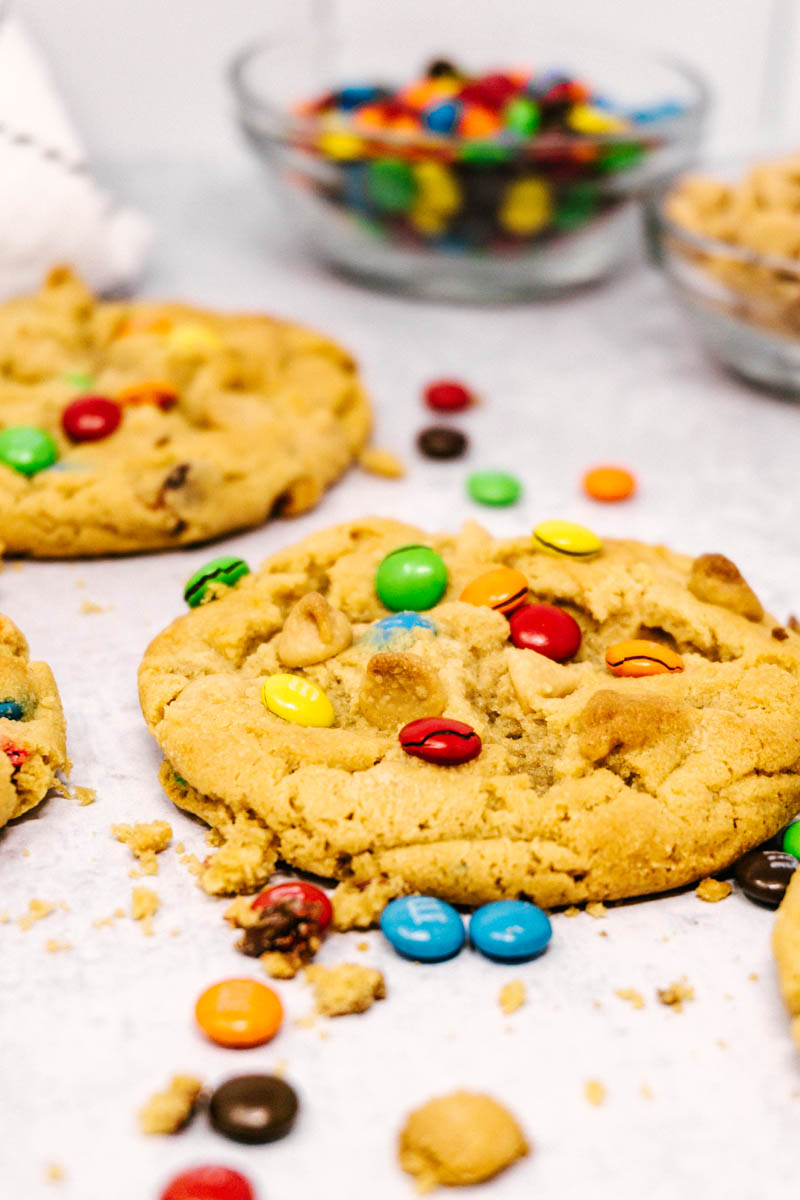
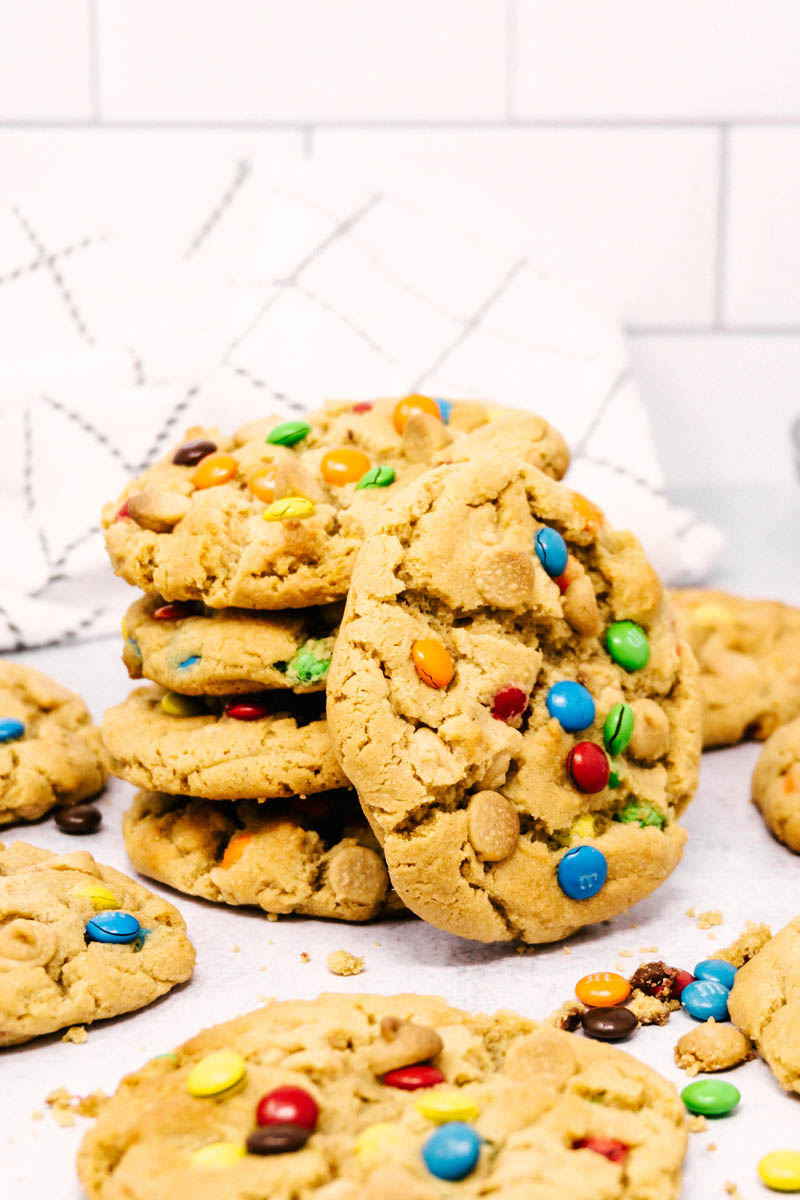
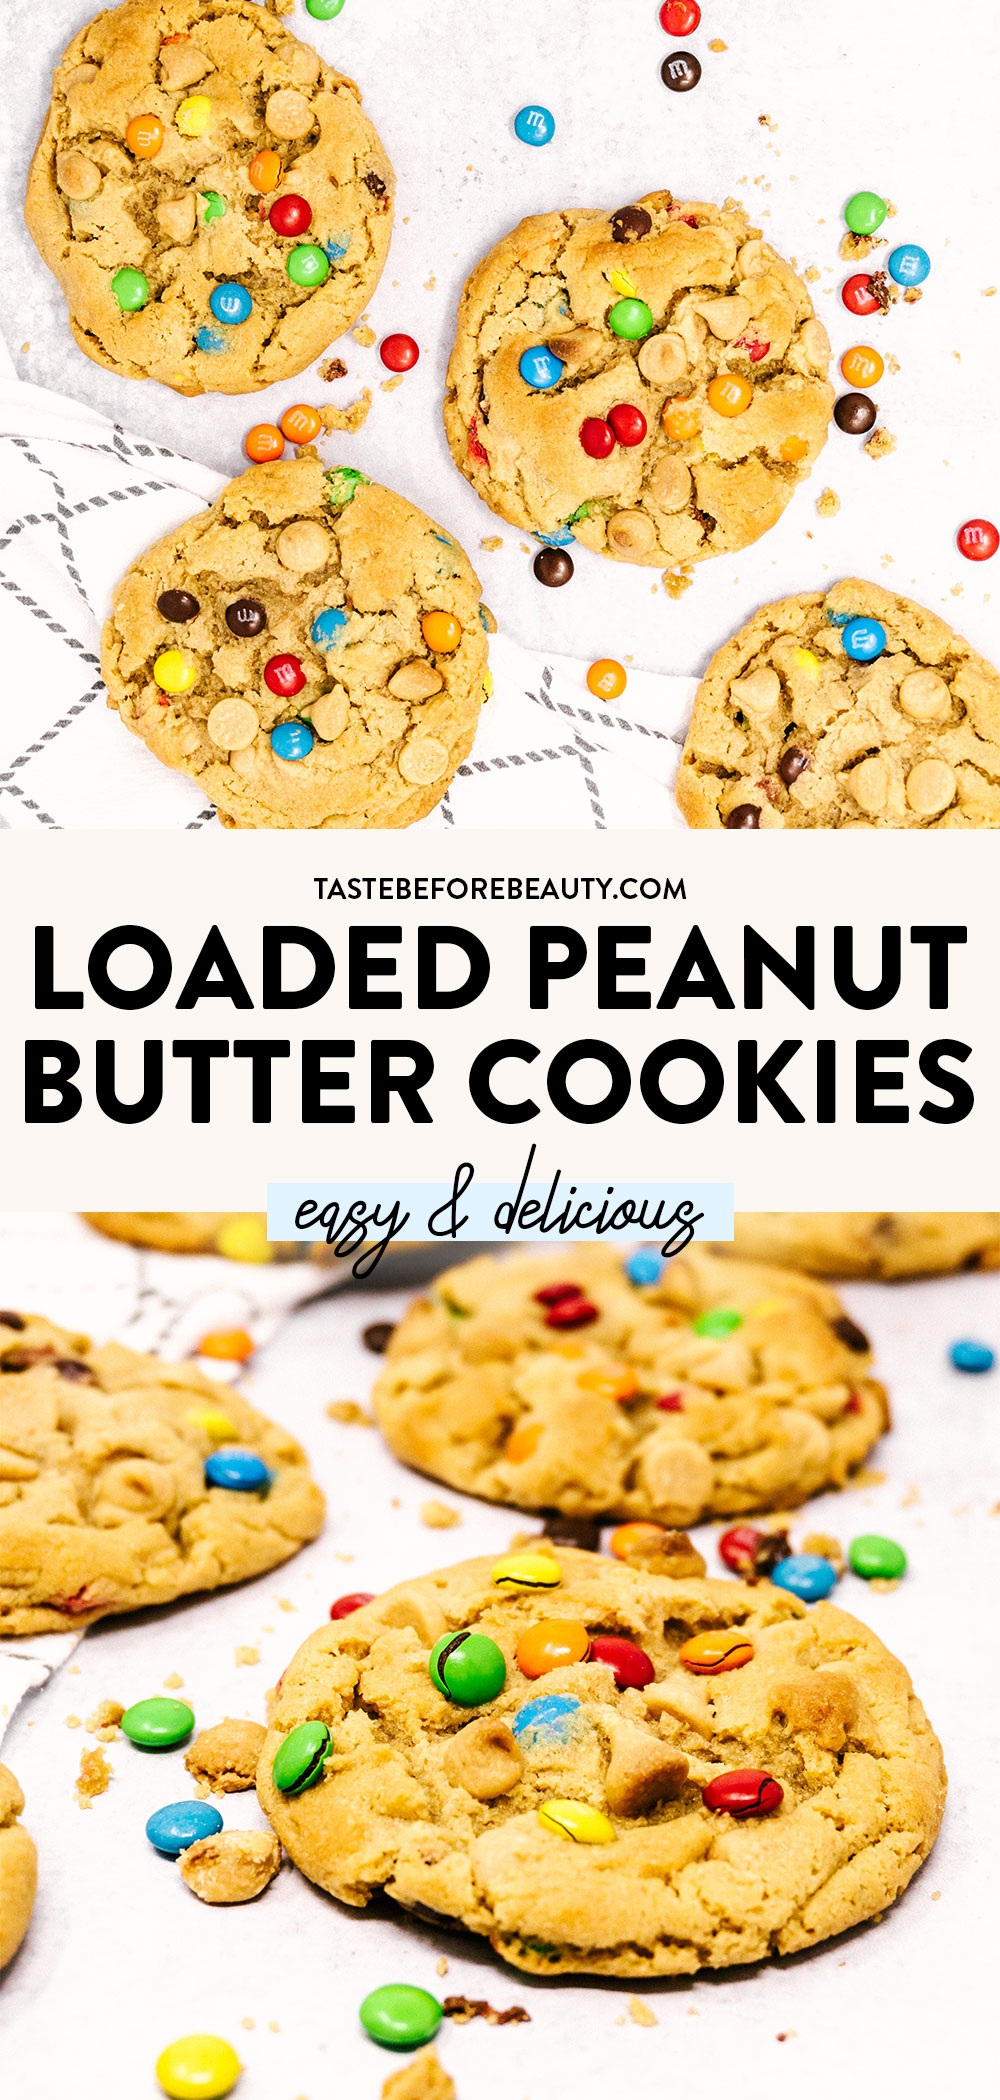
This recipe is locked and loaded with our favorite ammo; chocolate and peanut butter. Loaded with plenty of peanut butter chips and chocolate candies, these Loaded Peanut Butter Cookies are ready to be fired into your mouth!
To Improve Upon A Classic
Peanut butter cookies are a classic. You almost can’t go wrong with them, especially if you use my Peanut Butter Cookie recipe. I’ve made countless batches of peanut butter cookies and they are always received well.
Kenzie has a particular fondness for mini M&Ms and is determined to add them to everything. Greek yogurt, banana bread, you name it. We were making a batch of peanut butter cookies one day and she suggested we add mini M&Ms and these cookies were born. With the addition of some peanut butter chips, we kept a smooth, strong peanut butter flavor that pairs perfectly with the chocolate crunch of the candies. For a peanut butter extreme cookie, you could use Reese’s Pieces in place of the mini M&Ms.
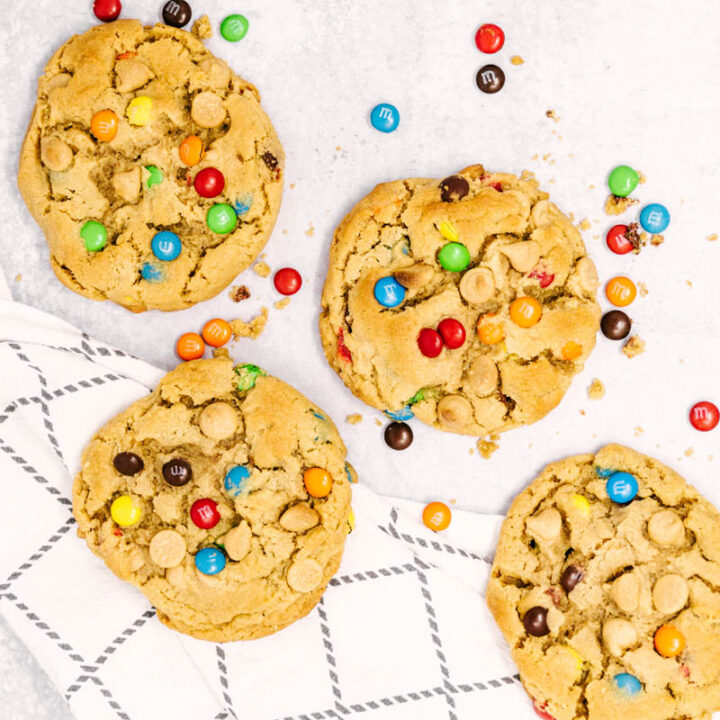
These cookies stand out against the competition with their multi-colored candy pieces and will guarantee a top-seller at any bake sale. The only problem with these cookies is how easy it is to eat too many and spoil your dinner. Enjoy!
About the Ingredients
Margarine – Surprisingly, margarine tastes better in these cookies than butter! The moisture balance in margarine is perfect for making the best soft peanut butter cookie. I use Blue Bonnet brand.
Creamy Peanut Butter – I prefer Creamy Peanut Butter for its smooth texture. You could also use Chunky Peanut Butter!
Vanilla – Helps round out the peanut butter flavor! I like to use Watkins Baking Vanilla.
Peanut Butter Chips – adds extra peanut butter flavor and fun texture!
Mini M&Ms – the star of this cookie! The fun colors and crunchy candy coating make this fun for kids and adults. If you want a super peanut butter experience, try swapping these out for Reese’s Pieces.
Making the Perfect Loaded Peanut Butter Cookies
Start by creaming the margarine, shortening, brown sugar, and white sugar together. Give them a bit to fully incorporate. This gives a smooth base to start these cookies off with.
Add the peanut butter. As it mixes, enjoy the peanut buttery smell coming out of the mixer and imagine these going into your mouth in just a few minutes!
Once the eggs and vanilla are mixed in, add the flour, peanut butter chips, and mini M&Ms. You don’t want to mix too long or the M&Ms will start to break up. Just mix until everything is fully combined.
Scoop onto the cookie sheets. These are fun as mini cookies or giant cookies! Make sure to top them with peanut butter chips and mini M&Ms before baking so they look extra loaded and decadent!
These Loaded Peanut Butter Cookies are the only way I could think of to make a Classic Peanut Butter Cookieany better. I hope you enjoy them as much as I do!
Looking for more delicious cookie recipes? Try these:
This recipe is locked and loaded with our favorite ammo; chocolate and peanut butter. Loaded with plenty of peanut butter chips and chocolate candies, this Loaded Peanut Butter Cookie is ready to be fired into your mouth!
Ingredients
½ C (4 oz) margarine
⅓ C (2.2 oz) shortening
¾ C (7 oz) light brown sugar, packed
1 C (7 oz) white sugar
1 ½ C (11 oz) creamy peanut butter
2 large eggs
2 tsp vanilla
¾ tsp salt
2 tsp baking soda
2 ⅓ C (11 oz) all-purpose flour
1 ⅔ C(10 oz) peanut butter chips, divided
1 ⅔ C (10 oz) mini M&Ms, divided
Instructions
Preheat oven to 375*F. Line cookie sheets with parchment paper.
Cream margarine, shortening, and sugars. Add peanut butter and mix. Add eggs and vanilla then mix until smooth.
Add dry ingredients, then add peanut butter chips and mini M&Ms, reserving ½ C (2 oz) of each for topping. Mix well.
Using a #30 (2 ½ T) cookie dough scoop, place scoops of cookie dough on parchment-lined cookie sheets. Top equally with reserved peanut butter chips and mini M&Ms. Bake for 8-9 minutes or just until the edges lightly brown.
Notes
Our recipe testing revealed that margarine tastes the best in this recipe. Make sure to use the stick variety, not the tub variety as it contains too much water. We prefer Blue Bonnet brand.
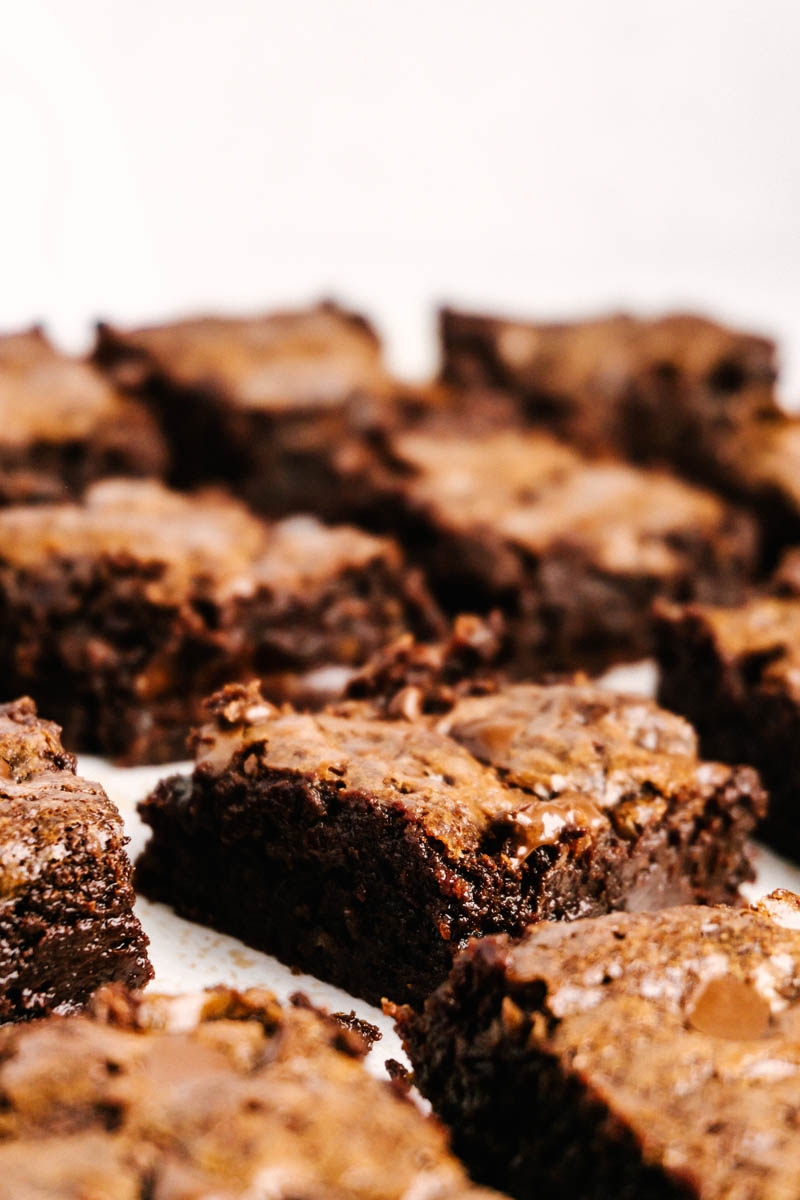
If you’ve ever taken a bite of a brownie and wondered what it was missing, the answer is probably chocolate. No need to wonder that with these Purely Chocolate Brownies! With a rich chocolate brownie base and a fudgy chocolate swirl, they live up to their name and then some!
An Easy Chocolate Fix
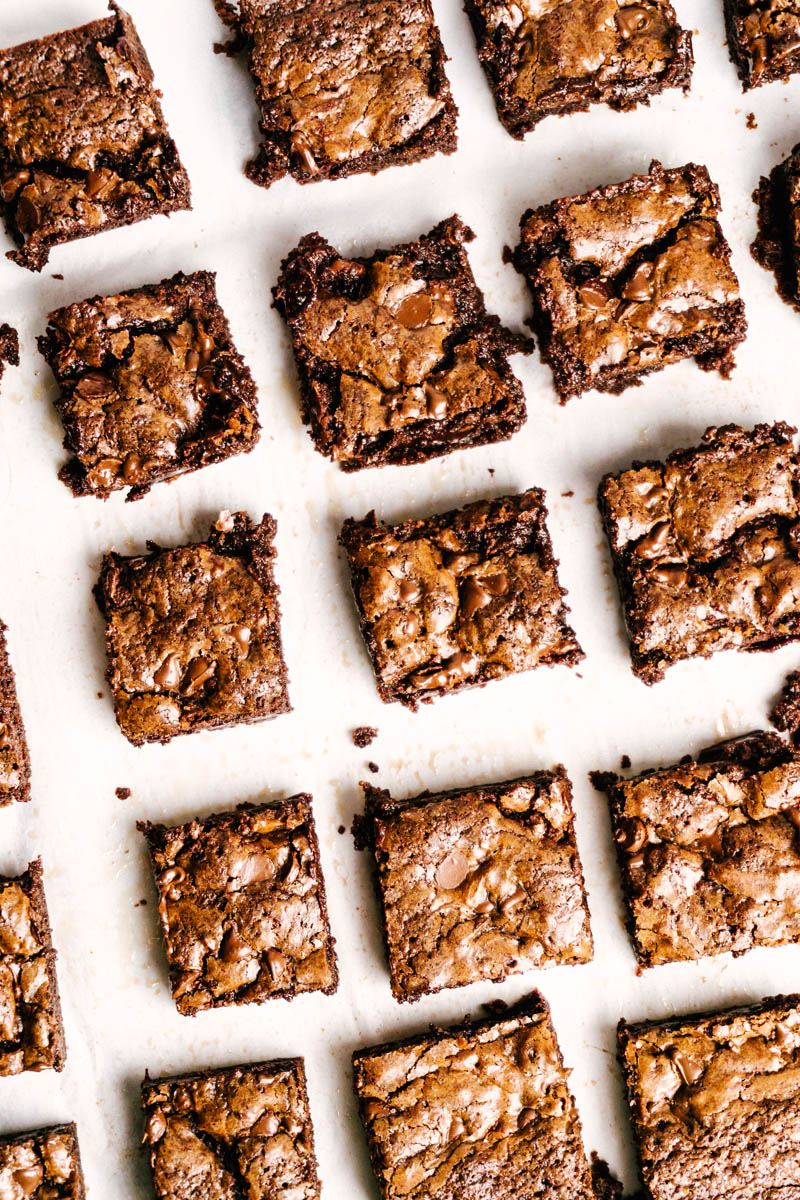
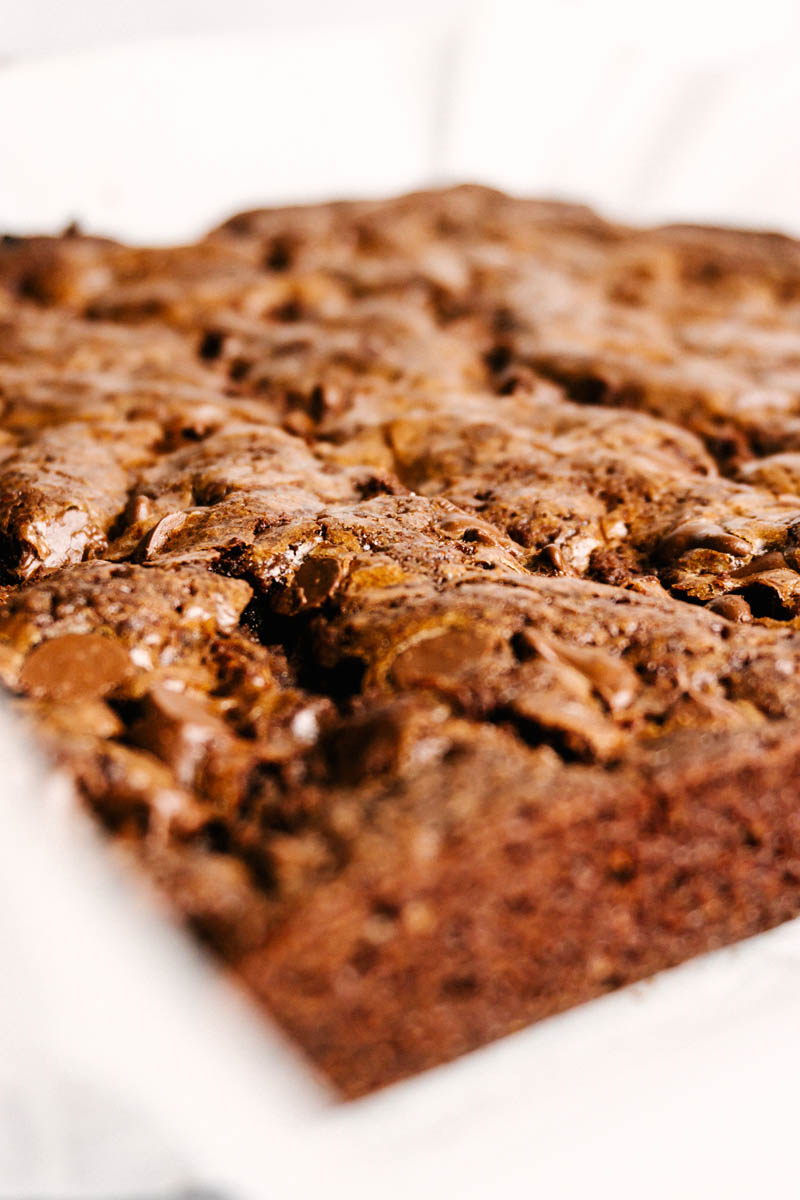
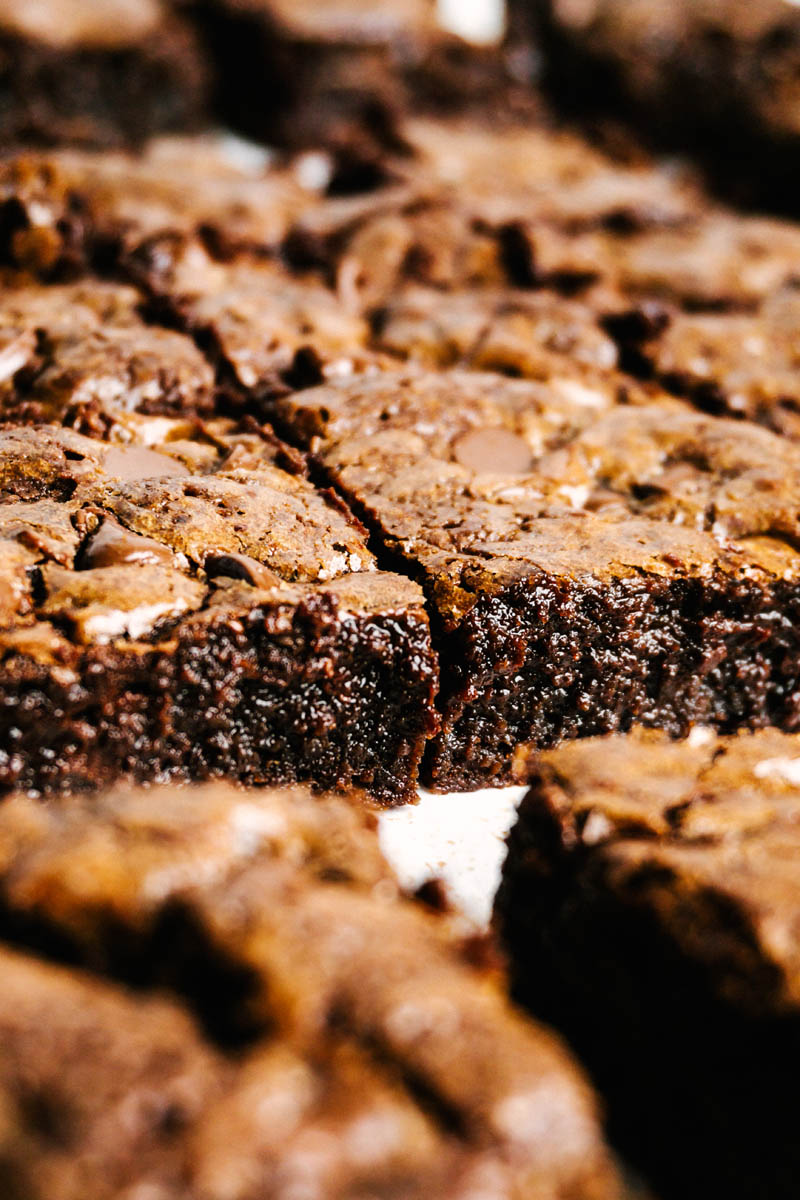
These Purely Chocolate Brownies were created with one objective in mind: to be a fudgy brownie that was easy enough to make any time. It certainly is that! The name alone should clue you in to the goodness found in these brownies. They’ve got a fudgy brownie base, a creamy, fudgy chocolate swirl, and chocolate chips. What more could you want?
While I believe any brownie should be good enough to stand alone (maybe with a glass of milk), these also make a fantastic brownie sundae! Top with a little ice cream and sprinkles and you’ve got an easy, delicious dessert. I also love to add a spoonful of peanut butter to the top of these when I need a chocolate peanut butter fix and I’m not feeling like taking the time to make a whole batch of Peanut Butter Brownies.
However you choose to enjoy these, I can pretty much guarantee you’ll be satisfied. This is definitely my go-to basic brownie for any time and it’s sure to become yours, too!
Recipe Ingredients
Salted Butter – salt is essential to dial up the chocolate flavor and salted butter gives a solid foundation!
Powdered Sugar – Powdered sugar dissolves faster than granulated sugar and lets the fudgy texture shine!
Cocoa Powder – You can use natural cocoa powder or Dutch-processed cocoa powder here. I’ve used both and they are each delicious!
Semi-Sweet Chocolate Chips – These are used in the fudgy swirl and on top. They add an extra chocolate element with minimal effort! Try milk or dark chocolate chips for a fun change.
About the Purely Chocolate Brownie Components
Make the Brownie Batter: When mixing the butter, oil, sugars, and cocoa make sure to mix it enough that any clumps of powdered sugar or cocoa get broken up and mixed in. Then add the eggs and vanilla and mix thoroughly. Once you’ve added the flour, stir gently for just long enough to combine everything.
Make the Fudgy Swirl: To make the fudgy swirl, add the chocolate chips and heavy cream to a microwave-safe bowl. Gently heat until the chocolate chips are melted and it is a smooth texture.
Add the Chocolate Chips: Add the chocolate chips over top. Use as many or as few as you would like!
Assembling the Purely Chocolate Brownie
To prepare the pan for baking, line with parchment paper and spray with a little bit of cooking oil. This helps the brownies release cleanly after baking.
Mix the brownie batter then pour it into the pan. Smooth the top out.
Once the fudgy swirl mixture is melty, pour it over the brownie batter and swirl it just enough to create a marbled effect.
To switch it up or change to suit your mood and taste preferences, you could swap out the semi-sweet chocolate chips for milk or dark chocolate chips.
Whenever you are in serious need of a good chocolate fix, these Purely Chocolate Brownies are the cure! I hope you enjoy them!
Looking for more delicious brownie recipes? Try these:
If you’ve ever taken a bite of a brownie and wondered what it was missing, the answer is probably chocolate. No need to wonder that with these Purely Chocolate Brownies! With a rich chocolate brownie base and a fudgy chocolate swirl, they live up to their name and then some!
Ingredients
Brownie Base
½ C (4 oz) salted butter, melted
½ C (3.8 oz) vegetable oil
1 ¾ C (7 oz) powdered sugar
¾ C (7 oz) light brown sugar, packed
½ C (1.8 oz) cocoa powder
4 large eggs
1 tsp vanilla
1 tsp salt
1 C minus 2 T (4 oz) all-purpose flour
½ C semi-sweet chocolate chips
Fudgy Swirl
1 ½ C (12 oz) semi-sweet chocolate chips
4 T heavy cream
Instructions
Preheat oven to 350*F. Line a 10x10 or 9x13 pan with parchment paper and lightly spray with cooking oil.
In a mixing bowl, add melted butter, vegetable oil, powdered sugar, brown sugar, and cocoa. Stir to combine.
Add eggs and vanilla and mix thoroughly. Gently fold in salt and flour until just combined.
Pour the batter into the prepared pan.
In a small bowl, gently melt together 1 ½ C semi-sweet chocolate chips and heavy cream. Pour over the top of the batter and swirl through to create a marbled effect. Top with ½ C semi-sweet chocolate chips.
Bake for 30 minutes. Let cool slightly before cutting and serving.
Notes
Don’t over-swirl the Fudgy Swirl into the Brownie Batter. Swirl just enough to create a marbled effect without mixing it totally in.
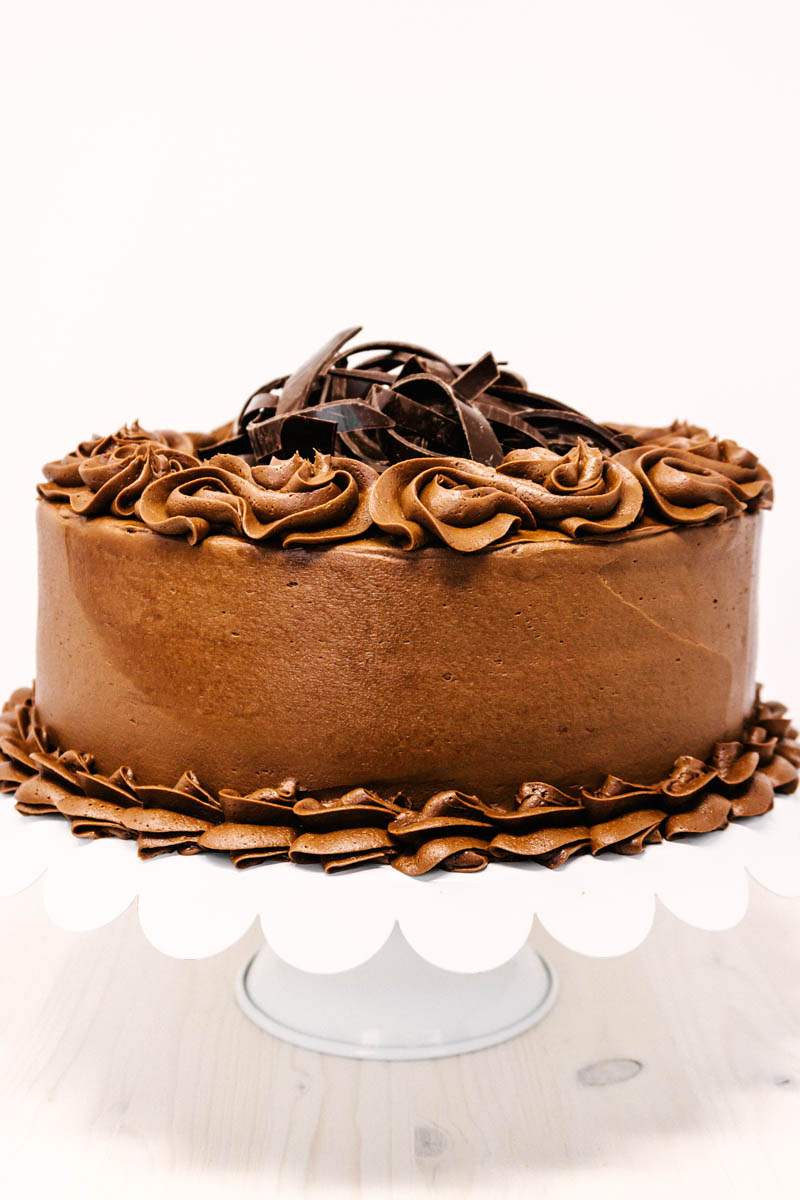
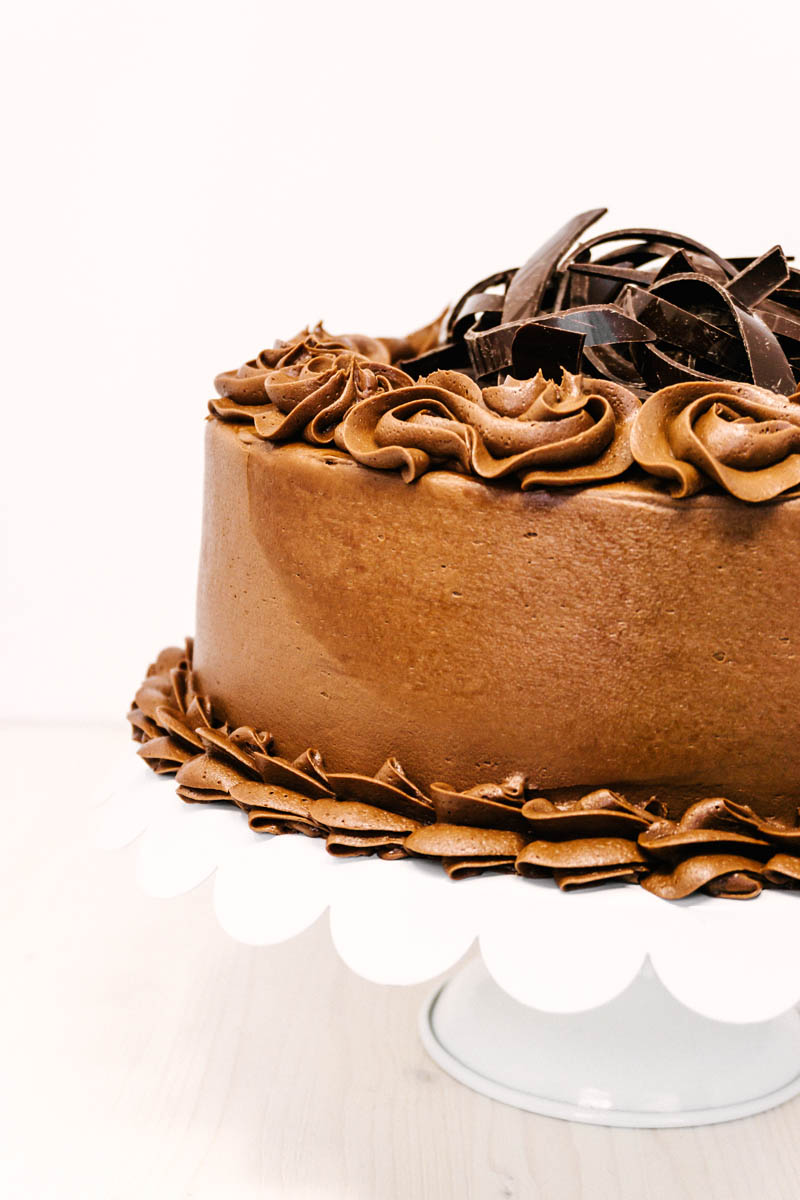
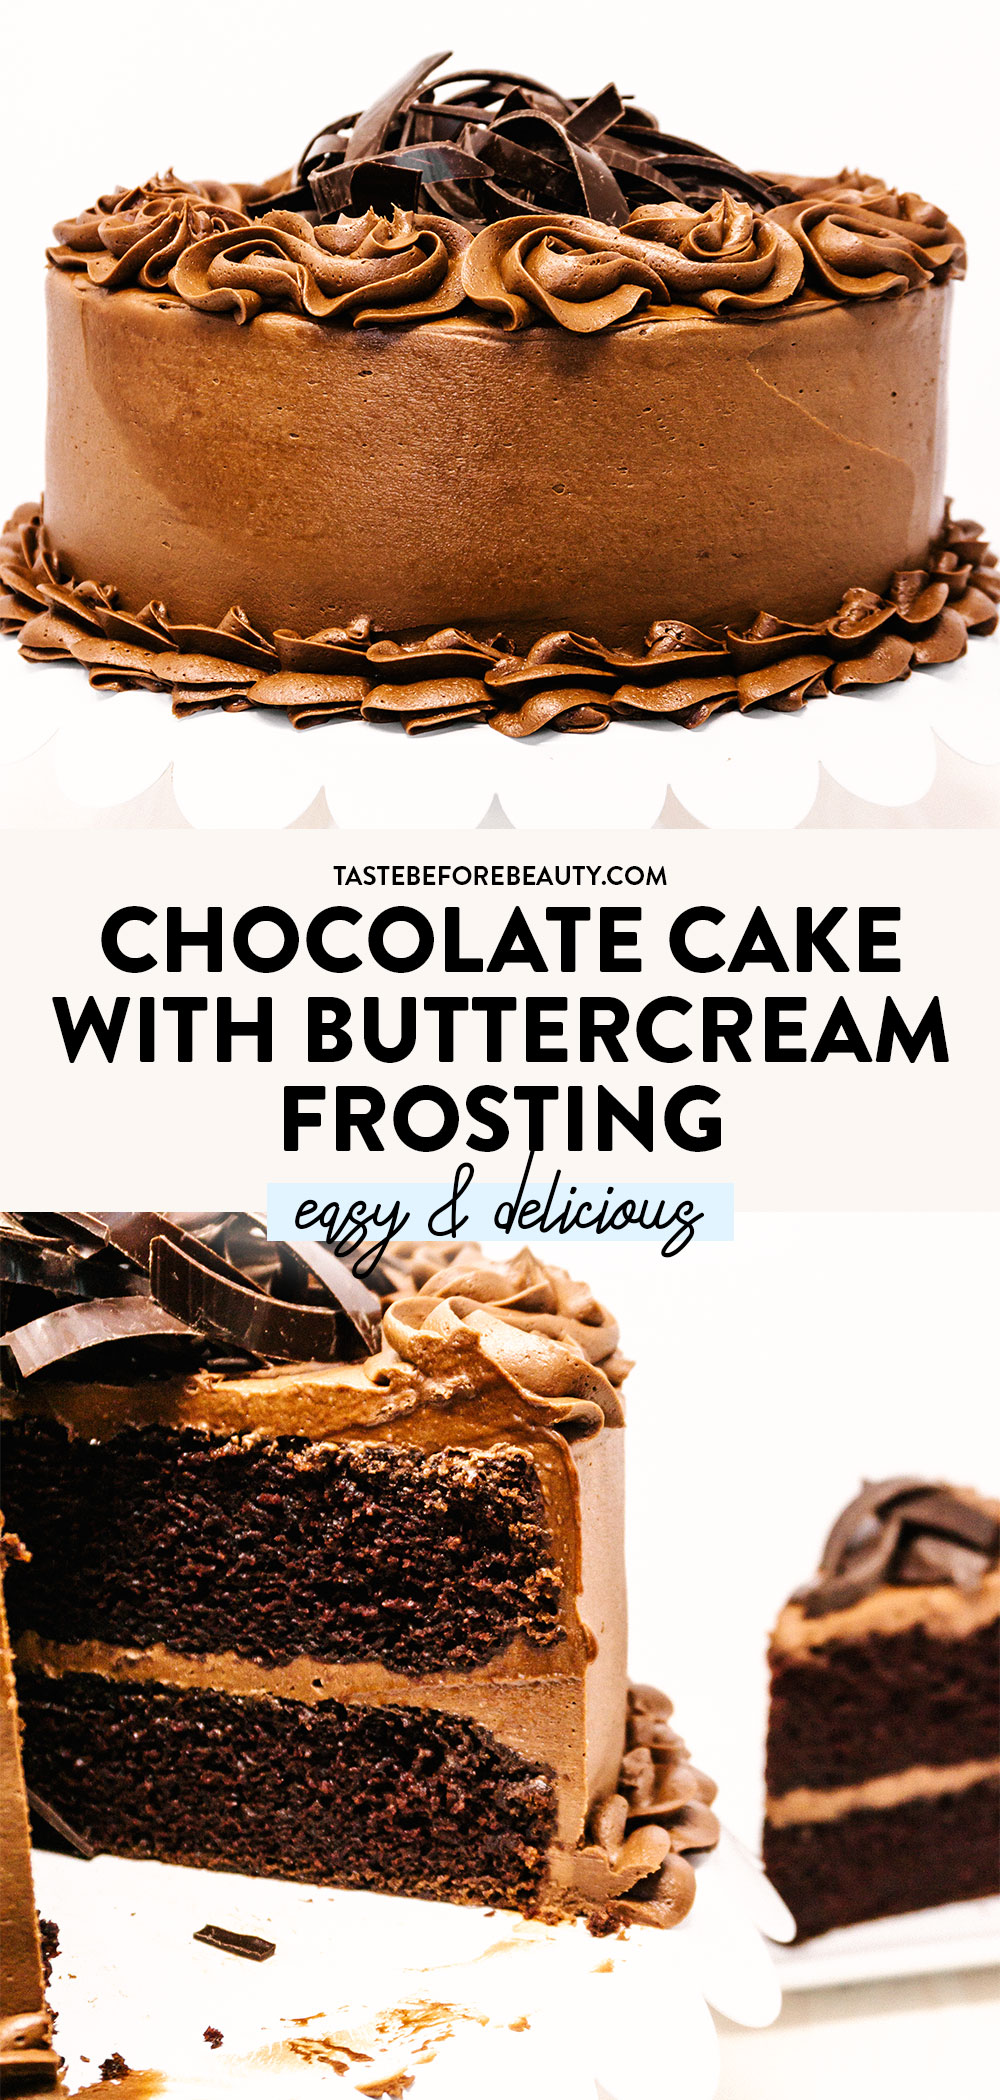
This Chocolate Cake is THE Chocolate Cake. It has rich chocolatey layers, a smooth chocolate buttercream, and checks every box on the list. It’s really the only cake you need.
The Chocolate Cake Origin
I used to love using boxed Devil’s Food cake mixes. I learned from my first cake decorating class back in 1998 to start with a basic cake mix and doctor it up a bit. It made a great cake with good flavor. I received lots of compliments over the years and no one ever knew it came from a box! However, over the years, cake mixes changed. The amount decreased over time and I noticed my cakes baked up thinner and the flavor changed for the worse. I was tired of subpar results, so I decided to create my own Chocolate Cake recipe from scratch.
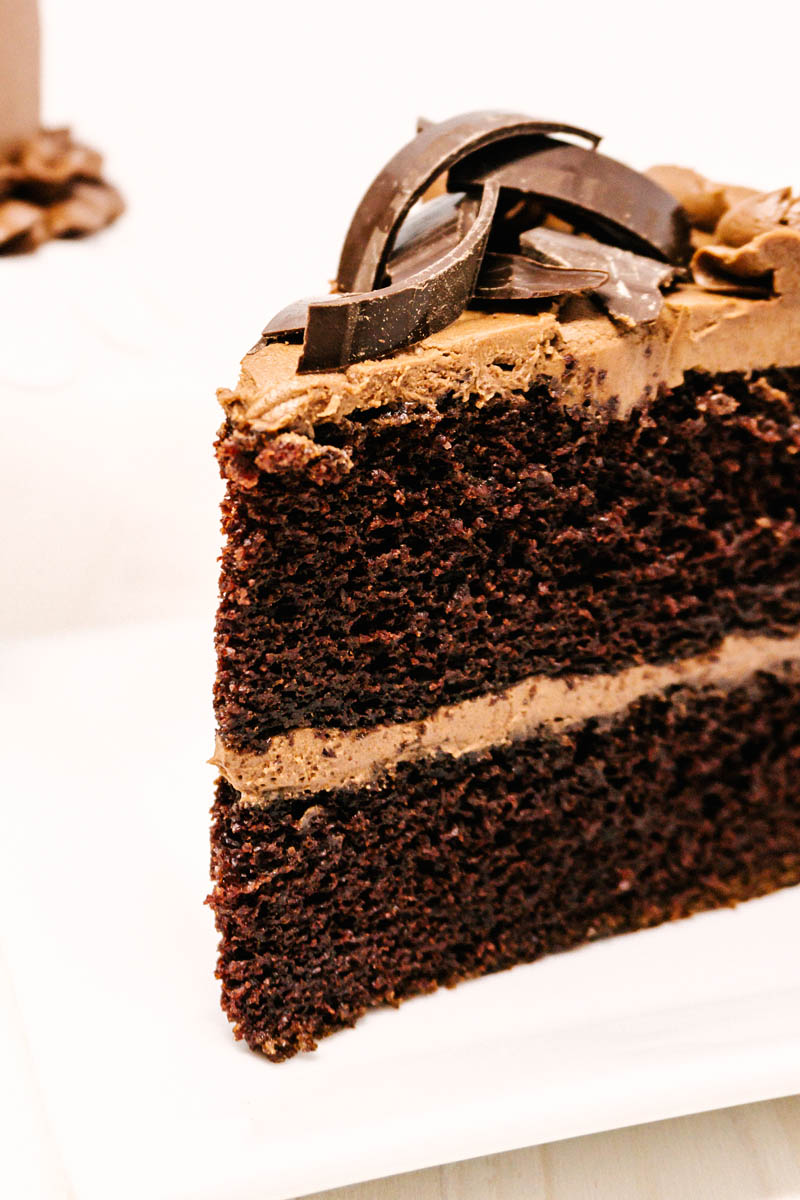
I spent time researching, testing, baking, and retesting chocolate cakes. I had chocolate cakes all over my counter. There were six cookbooks laid out across my table, comparing and researching. This cake needed to have the structure to stack four layers high, be moist and flavorful, but not have too dark of a chocolate flavor that it wouldn’t pair with my Chocolate Buttercream Frosting or Easy Chocolate Mousse. It needs to be endlessly versatile and a cake my children could also easily make.
One moment on the right day, I had a “eureka!” moment! Adding a touch of Dutch-process cocoa powder made this cake perfect. This Chocolate Cake has the perfect balance of moisture and texture I hoped for. My husband even calls this cake “The Only Cake.” I hope you enjoy this cake as much as we do!
Cocoa Powder – essential for a rich, chocolate flavor! I use Hershey’s 100% Natural Unsweetened Cocoa Powder.
Buttermilk – I make my own buttermilk. I add 1 T lemon juice to a cup and then enough milk to equal 1 C or 8 ounces.
Dutch-Process Cocoa – Yes, there are two types of cocoa in this cake! Dutch-preocess cocoa is processed with alkali and will specify that in the ingredient list. I use Hershey’s Special Dark 100% Cacao Dutched Cocoa.
Salted Butter – Using salted butter is necessary to make the Chocolate Buttercream lick-the-spoon delicious!
Chocolate Cake Components
Chocolate Cake: Make sure to sift together the dry ingredients first. Then add the liquids. You only need to mix long enough to combine all the ingredients together. If you will be layering these, bake them at 325*F so the tops stay flat.
Chocolate Buttercream Frosting: Start with salted butter and beat it until it’s smooth. I like to use my stand mixer for this. Once the butter is smooth, add the cocoa and powdered sugar. Cover the mixer bowl with a damp towel to avoid spraying powder all over the kitchen! Once they are combined into a powdery mixture, add the milk and vanilla. After mixing, if your frosting is still too dry add extra milk, one tablespoon at a time until it reaches the perfect consistency.
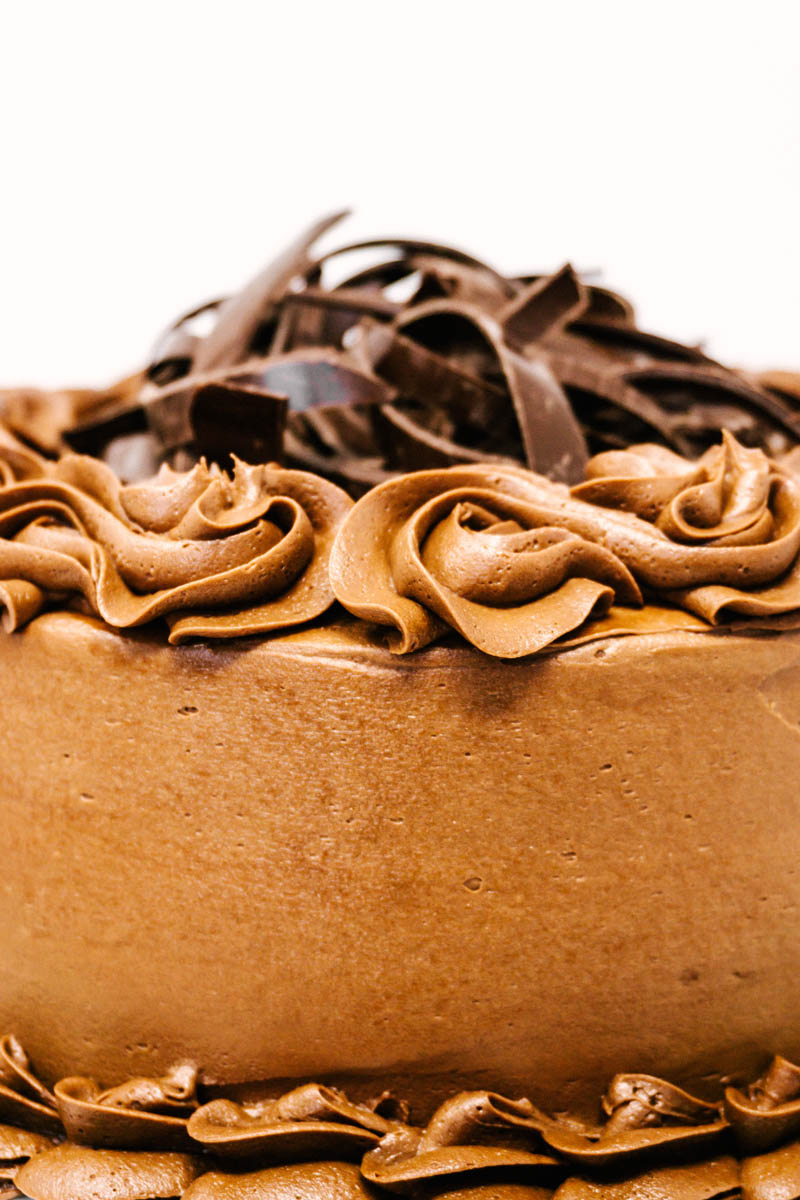
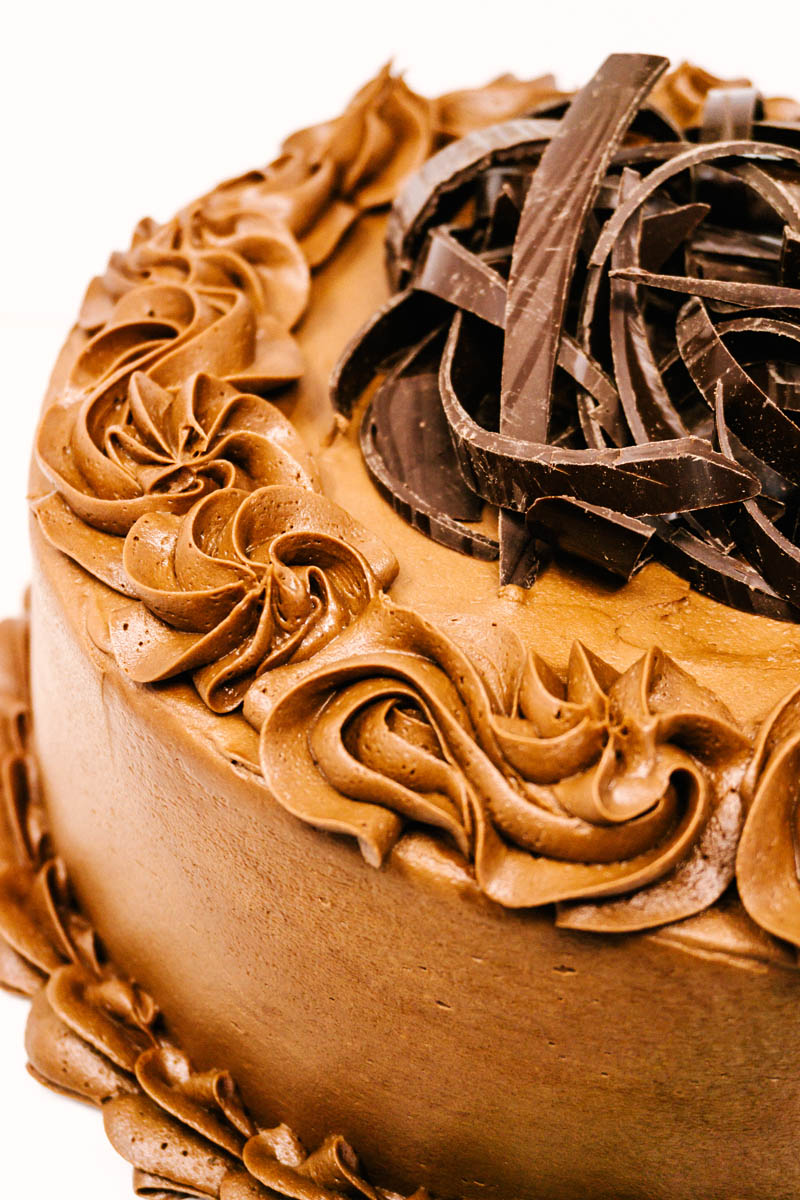
Decorating: You can decorate this cake however you want. I like to pipe extra Chocolate Buttercream Frosting on the top and base of the cake and then add shaved chocolate curls to the top.
Assembling the Chocolate Cake
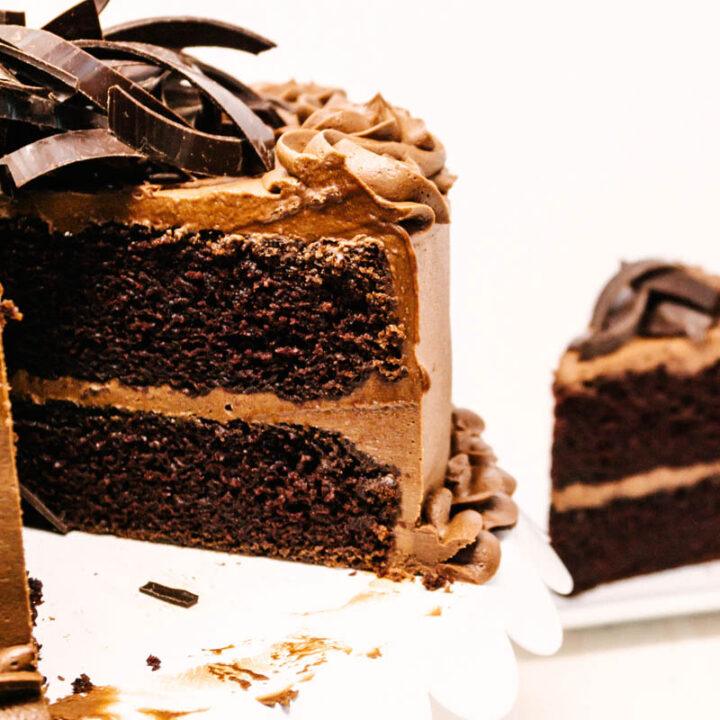
Start by placing one layer of chocolate cake on your cake stand or plate. Layer frosting on top, then add the second layer. Coat the whole cake in Chocolate Buttercream.
I use a Wilton 2D or 1M star tip to decoratively pipe extra frosting onto the cake. You can create swirls or stars of buttercream to make it look pretty.
Add chocolate shavings. I use a potato peeler to shave long curls off of a bar of Hershey’s Milk Chocolate or Hershey’s Special Dark Chocolate.
This cake is divine and every bite is an experience. I hope you love making it and sharing it with your loved ones!
Looking for more delicious cake recipes? Try these:
This Chocolate Cake is THE Chocolate Cake. It has rich chocolatey layers, a smooth chocolate buttercream, and checks every box on the list. It’s really the only cake you need.
Ingredients
Chocolate Cake
2 ¼ C (10 oz) all-purpose flour
½ C + 1 T (2 oz) cocoa powder
2 C (14 oz) white sugar
1 tsp salt
1 tsp baking powder
2 tsp baking soda
2 tsp Dutch-processed cocoa powder
2 C (16 oz) buttermilk
2 large eggs
1 C minus 1 T (7 oz) vegetable oil
1 ½ tsp vanilla
Chocolate Buttercream Frosting
2 C (16 oz) salted butter, room temperature
1 C (3.6 oz) cocoa powder
7 C (32 oz) powdered sugar
2 tsp vanilla
7 T milk + 3 T milk, if necessary
Instructions
Make the Chocolate Cake.
Preheat oven to 325*F for a flat cake top or 350*F for a domed cake top.
Prepare two 9-inch round cake pans by spraying with non-stick spray, lining bottom with a circle of wax paper, then spray with non-stick spray again.
Sift together dry ingredients. Then add wet ingredients and mix to combine. Batter will be thin.
Divide batter equally between two pans (about 25-26 ounces per pan).
Bake for 30 minutes, until you can touch the center of the cake and it bounces back. Let cool in the pan for 5 minutes. Turn out onto wire cooling racks, peel the wax paper off the bottom and cool completely before spreading the frosting or decorating.
Make the Chocolate Buttercream Frosting.
Soften the butter, but do not melt.
Using a stand mixer, beat butter until it is smooth.
Add cocoa and powdered sugar. Beat butter, cocoa, and powdered sugar until combined and looks like a dry uniform mixture of cocoa dust. Scrape bowl.
Add vanilla and milk. Beat until frosting is light and creamy. If too thick add an additional 3 T of milk, one tablespoon at a time. Caution, overbeating will result in too many air pockets while frosting.
Assemble.
Place one cake on a cake stand or plate. Cover top with frosting.
Add second cake. Coat tops and sides with frosting.
Decorate, if desired. I like to pipe swirls of frosting on the top and around the bottom, then add shaved chocolate curls.
Notes
I make my own buttermilk. I add 1 T lemon juice to a cup and then enough milk to equal 1 C or 8 ounces.
If you want to use a 9x13 cake pan this cake mix makes enough for one 9x13 and 6 cupcakes - perfect if you want a treat before serving your cake!
High Altitude - This cake is new to my repertoire. I have not sufficiently tested it at high altitudes. Please adjust according to the altitude in which you live according to your usual pattern.
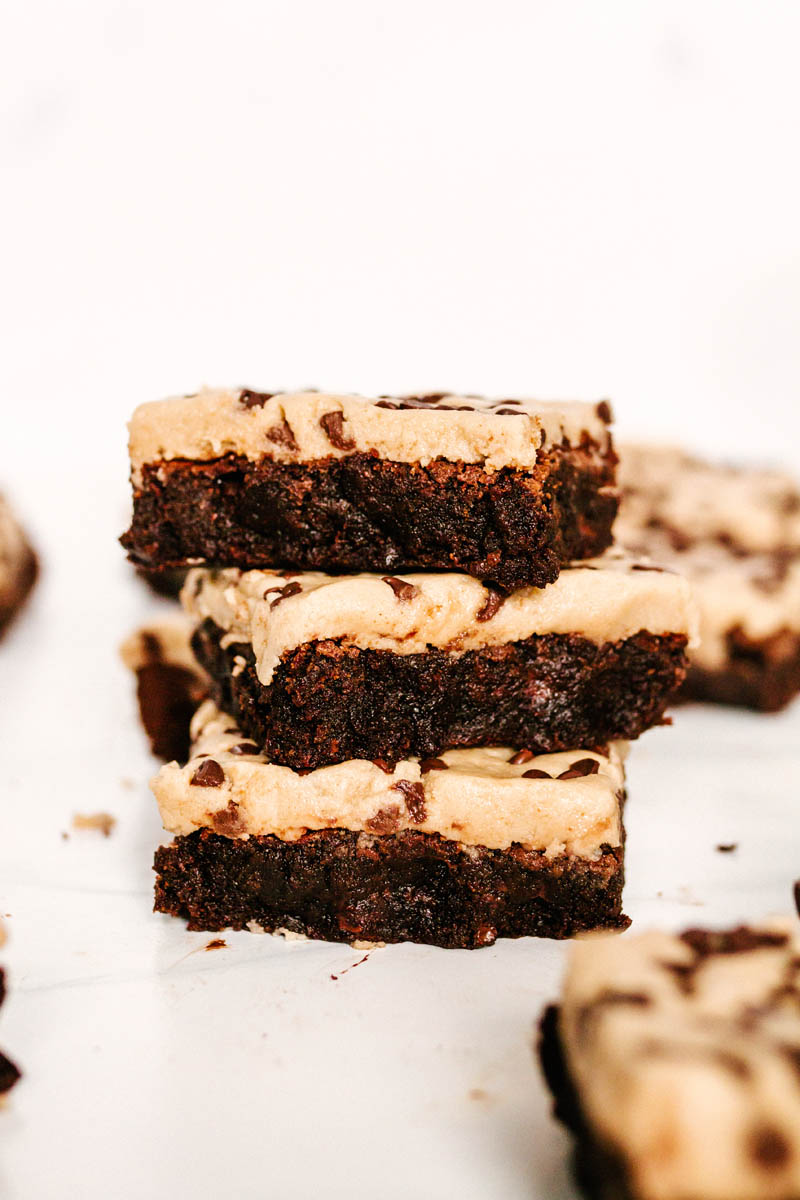
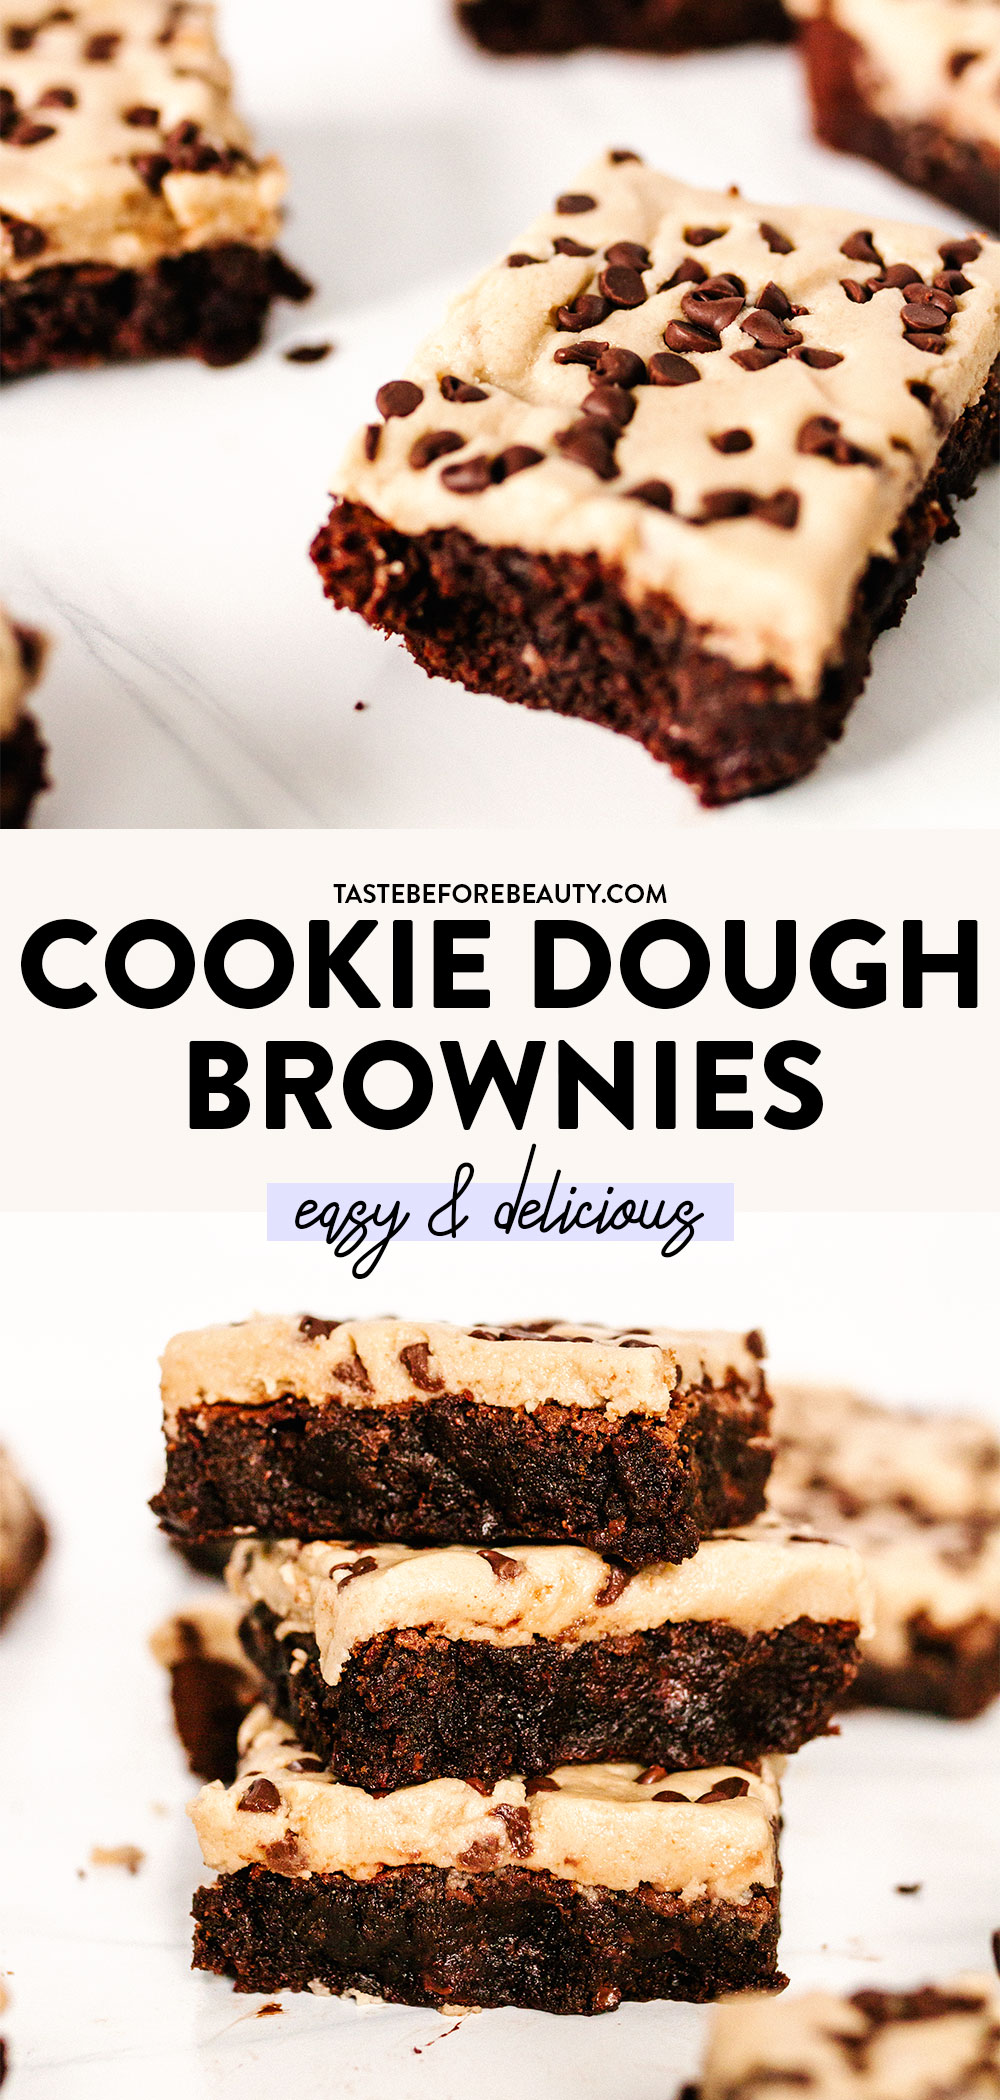
Take two of the best desserts, mash them together, and you get Cookie Dough Brownies! These are the best fudgy rich brownies, with a perfect smooth cookie dough topping that everyone will love!
About the Cookie Dough Brownies
These cookie dough brownies are perfect for those who cannot choose between brownies or chocolate chip cookies! Why not have both of the best desserts at the same time? The cookie dough topping pairs deliciously well with the rich, fudgy brownie base. You need to try this cookie dough brownies recipe!
No matter how good this cookie dough topping tastes, don’t cook it alone. Instead, try out our BEST Chocolate Chip Cookie recipe! These Cookie Dough Brownies are a hit for any occasion, even those late-night cravings. These brownies with cookie dough on top are SO easy to make!
I make this cookie dough brownie recipe often, and the pan is always empty within a day. If you don’t have enough people around to eat them, these brownies are great for freezing! Just cut them up and wrap them in plastic wrap, then throw them in the freezer. I love eating this brownie with cookie dough when they’re halfway defrosted. I can’t get enough of them, and neither will you!
Cookie Dough Brownie Ingredients
Cocoa – What would a brownie be without cocoa? We use Hershey’s 100% cacao cocoa. This cocoa makes the perfect brownie base for our brownie cookie dough bars.
Semi-Sweet Mini Chocolate Chips – We love the taste of the semi-sweet chocolate chips, but if you aren’t a fan, feel free to use milk or dark chocolate to your liking!
Butter – Soften your butter! You can do this by leaving it on the counter for a few hours to soften. Another option that Kailey uses quite a bit is microwaving the butter on each side for 5 seconds. Make sure to turn the butter every 5 seconds, or it’ll be warmed unevenly and most likely start to melt.
How to Make Cookie Dough Brownies
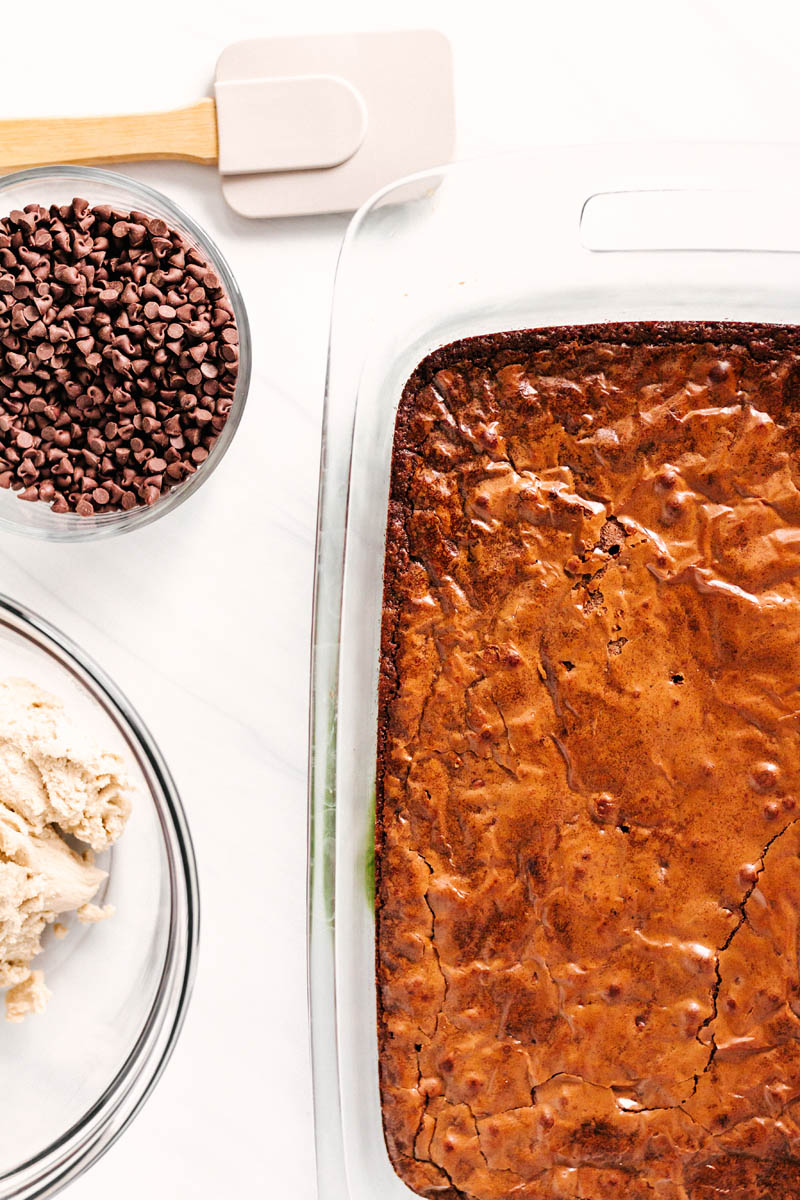
Make the Brownie Base
After preheating the oven, line your baking pan with parchment paper and lightly spray with cooking spray. We recommended using a 10×10 or 9×13 pan.
In a mixing bowl, combine the butter, oil, sugars, cocoa, eggs, vanilla, salt, and flour. Mix until combined. Scrape the bowl and mix again.
Add one cup of mini chocolate chips, and mix until they are incorporated.
Using a spatula, pour the brownie batter into the pan, making sure to scrape the sides of the bowl. Bake the brownies for 25-27 min. Remove the brownies from the oven and cool in the pan.
Make the Cookie Dough Topping
In a mixing bowl, combine the softened butter, sugars, vanilla, salt, and flour. Mix until the ingredients are combined. Scrape the bowl and mix again. The topping should be spreadable and thick, but not too dry. If the topping is still really dry, add a tiny bit of softened butter and mix again. It’s like raw cookie dough, but a bit thicker, and safe to eat, as it’s eggless cookie dough.
Assemble the Cookie Dough Brownies
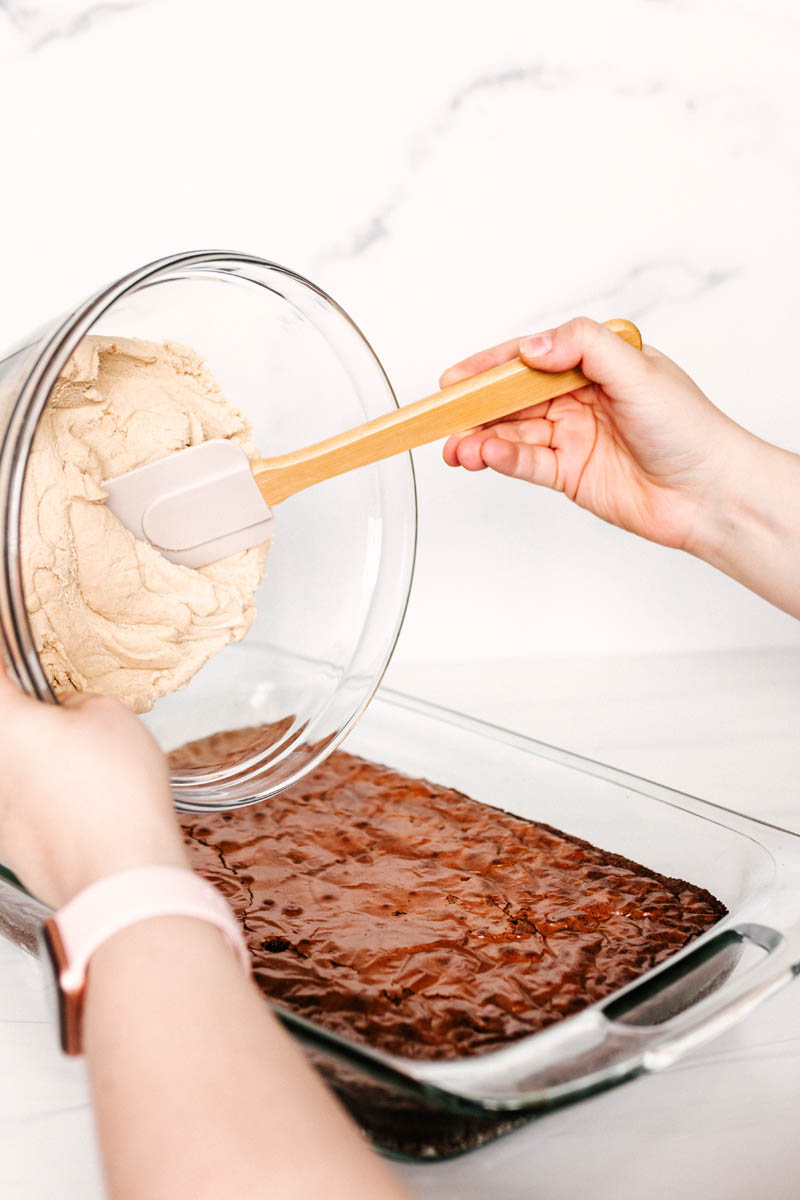
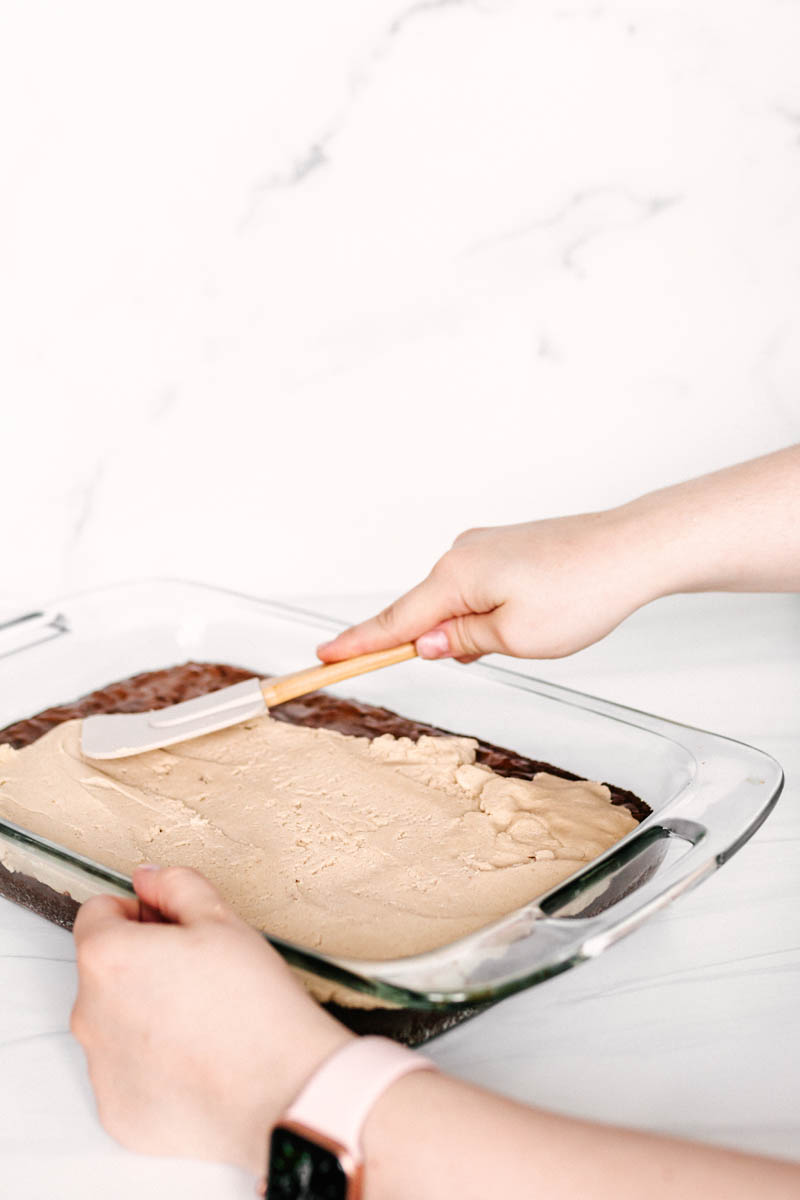
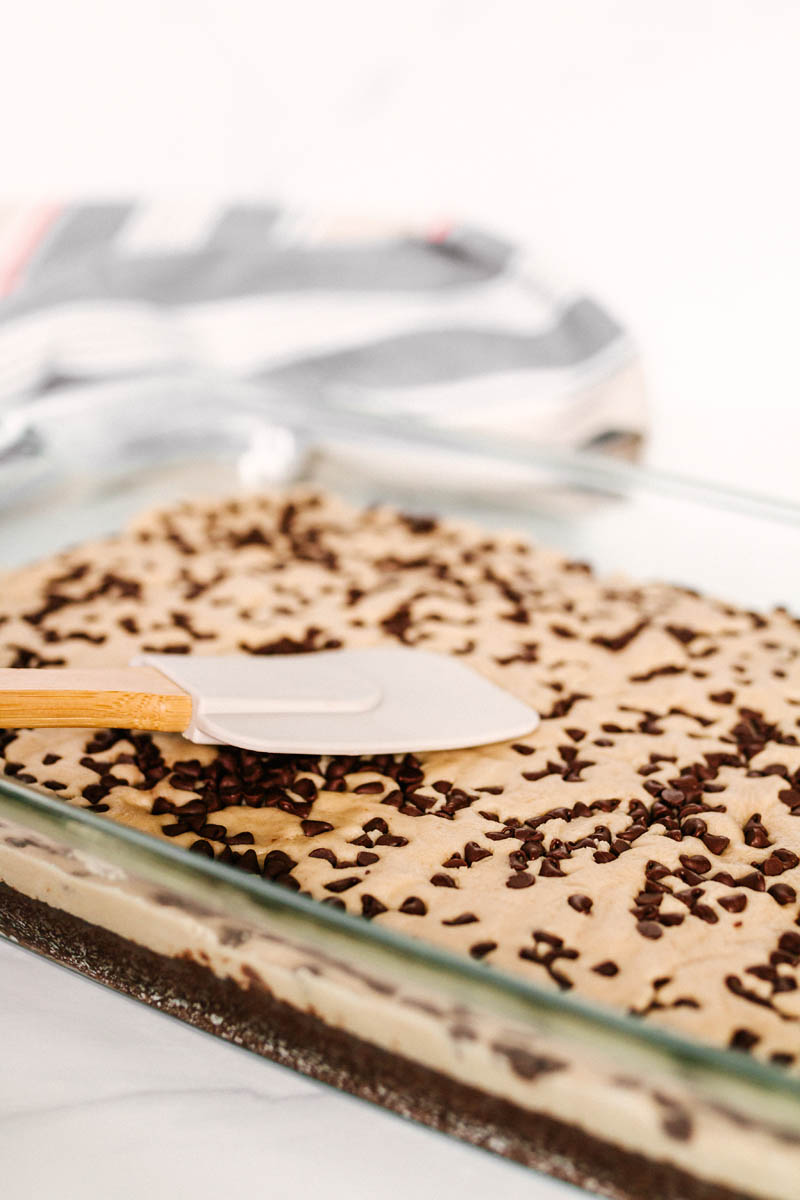
After the brownie has cooled, put the cookie dough topping into the center of the pan. Spread the cookie dough topping by pressing the topping into the brownie from the center to the edges.
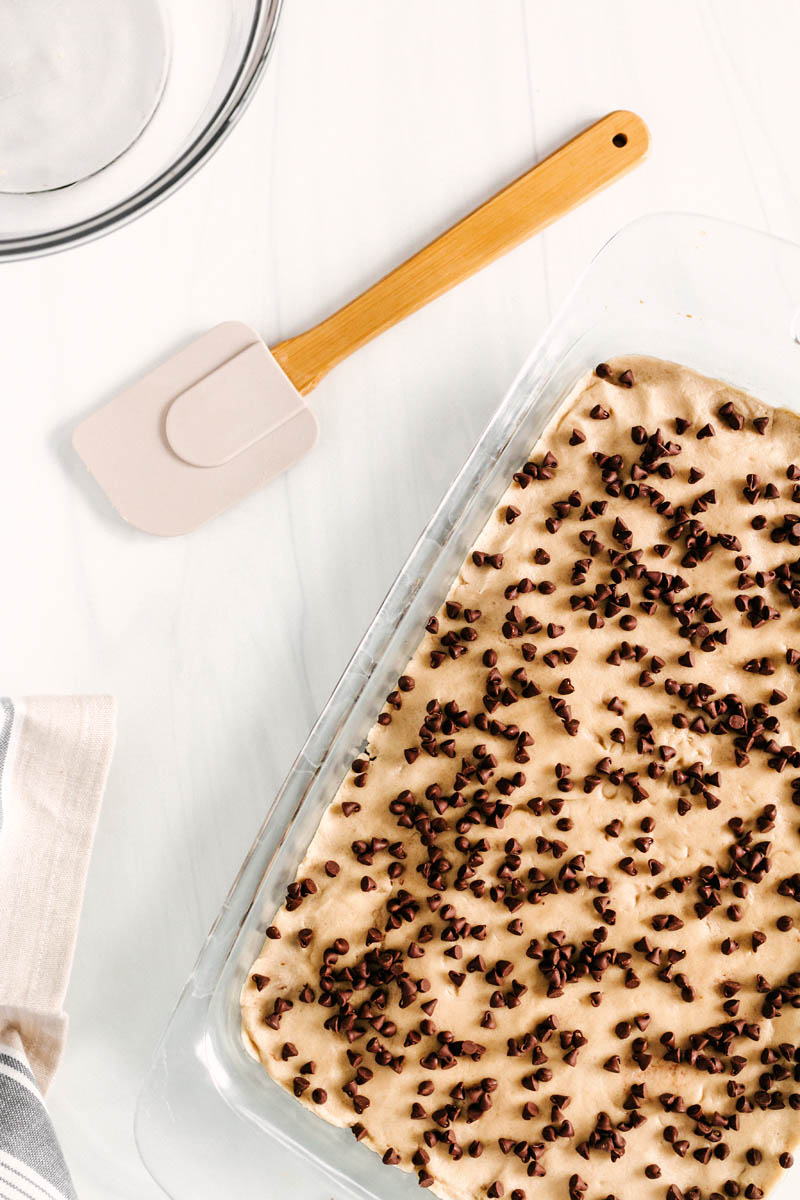
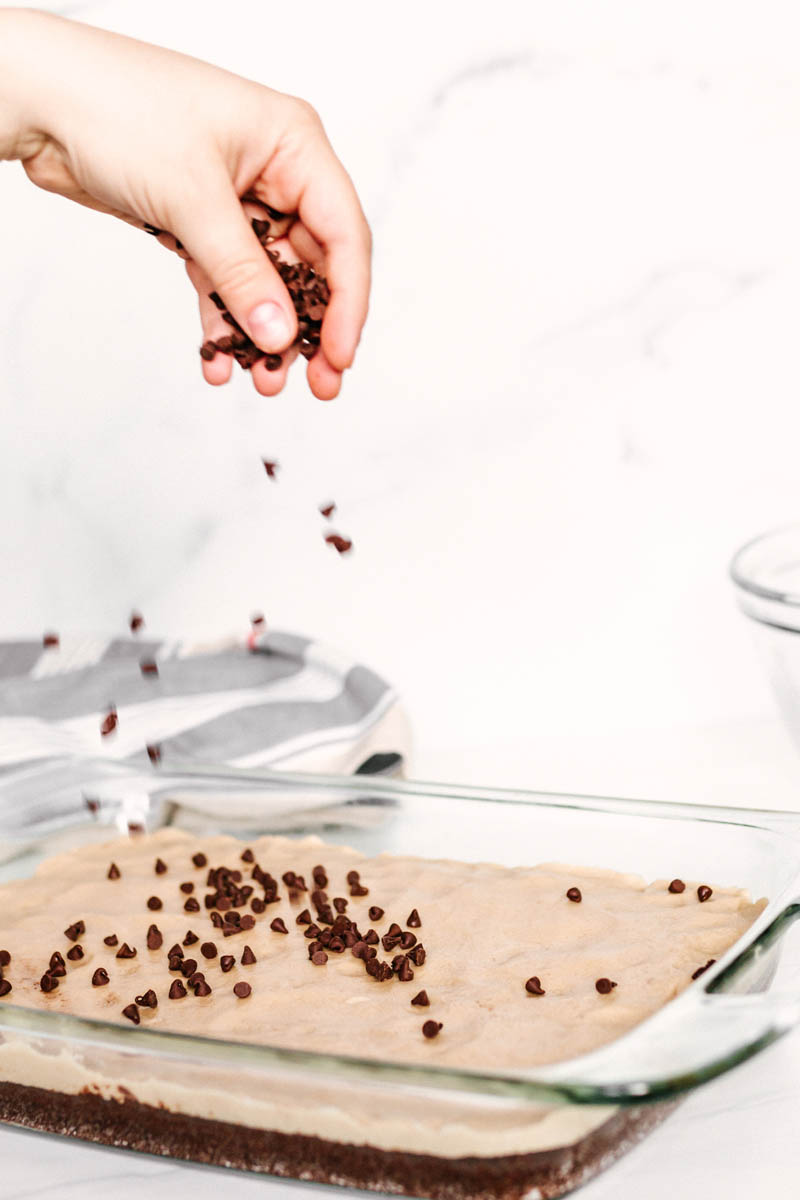
Once the topping has been spread to the edges creating the cookie dough layer, sprinkle the mini chips onto the brownies. Press the chocolate chips into the cookie dough topping.
Cookie Dough Brownies Assembly
Keep the brownies in the pan as they cool, and when you top them. It makes the topping spread out evenly, and it’s so much easier!
When adding the cookie dough topping onto the brownies, use your hands or a spatula to spread the dough. You can do this by spreading the topping, but we find it easier to push the dough from the center to the edges.
Create the look of chocolate chip cookie dough by placing the mini semi sweet chocolate chips on top of the cookie dough layer. Now you have brownies with cookie dough!
We hope you enjoy these cookie dough brownies as much as we do! They are quite the hit not only within our family but with our friends as well! Enjoy baking!
Looking for more delicious brownie recipes? Try these:
Take two of the best desserts, mash them together, and you get Cookie Dough Brownies! These are the best fudgy rich brownies, with a perfect smooth cookie dough topping that everyone will love!
Ingredients
Brownie Base
½ C (4 oz) Salted Butter, melted
½ C (3.8 oz) Vegetable Oil
1 ¾ C (7 oz) Powdered Sugar
¾ C + ⅓ C (7 oz) Brown Sugar
½ C (1.8 oz) Cocoa
4 large Eggs
1 tsp Vanilla
1 tsp Salt
1 C - 2 T (4 oz) All-purpose Flour
1 C (6 oz) Semi-Sweet Mini Chocolate Chips
Cookie Dough Topping
1 C (6 oz) Semi-Sweet Mini Chocolate Chips
¾ C (6 oz) Salted Butter, softened
½ C (3.5 oz) Powdered Sugar
½ C (4 oz) Brown Sugar
1 ½ tsp Vanilla
¼ t + ⅛ t Salt
1 C + 1 T (5 oz) All-Purpose Flour
Instructions
Make the Brownie Base
Preheat the oven to 350*F. Line the baking pan (10x10 or 9x13) with parchment paper and lightly spray with cooking spray.
In a mixing bowl, combine the melted butter, vegetable oil, powdered sugar, brown sugar, cocoa, eggs, vanilla, salt, and flour. Mix until combined. Scrape the bowl and mix again.
Add the mini chocolate chips. Mix until incorporated.
Pour the batter into a pan. Bake at 350*F for 25-27 min.
Remove from the oven and cool in pan.
Make the Cookie Dough Topping
In a mixing bowl, combine the softened butter, powdered sugar and brown sugar, vanilla, salt, and flour. Mix until combined. Scrape and mix again. It should be spreadable and thick, but not too dry. If really dry after mixing, add a tiny bit more softened butter.
Assemble
After the brownie has cooled, spread the cookie dough topping and press the topping into the brownie. Gently press it on so the brownie doesn’t break, but enough to spread the topping.
Once the topping has been spread to the edges, sprinkle the top of the brownies with 6 oz. of mini chocolate chips. Press the chocolate chips into the topping and cut into 1 x 2 ¼ inch brownies.