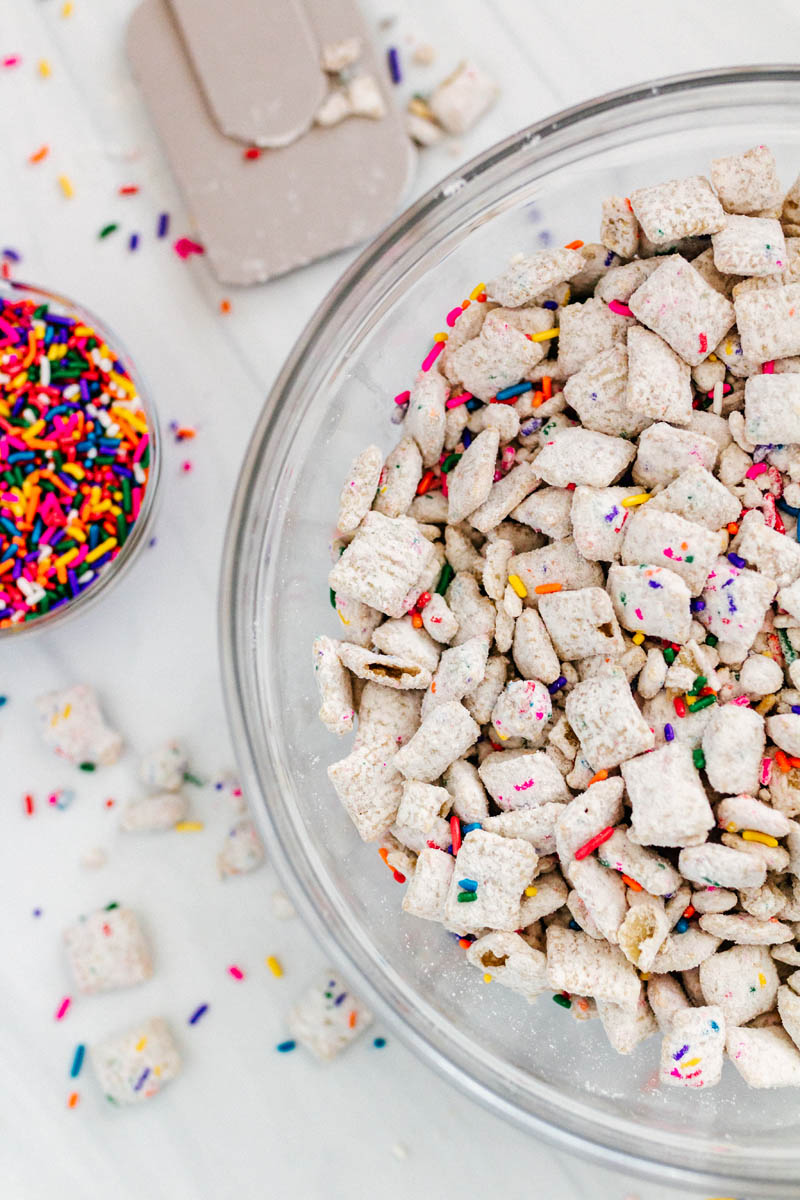
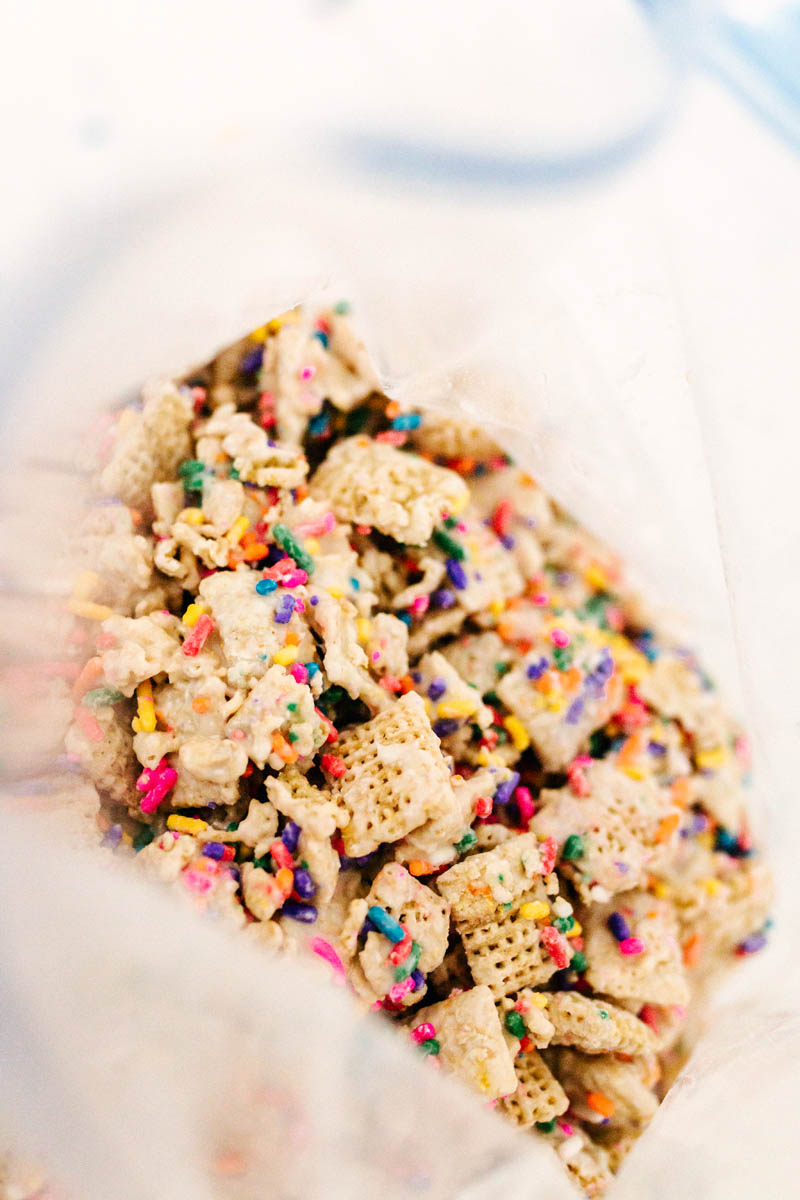
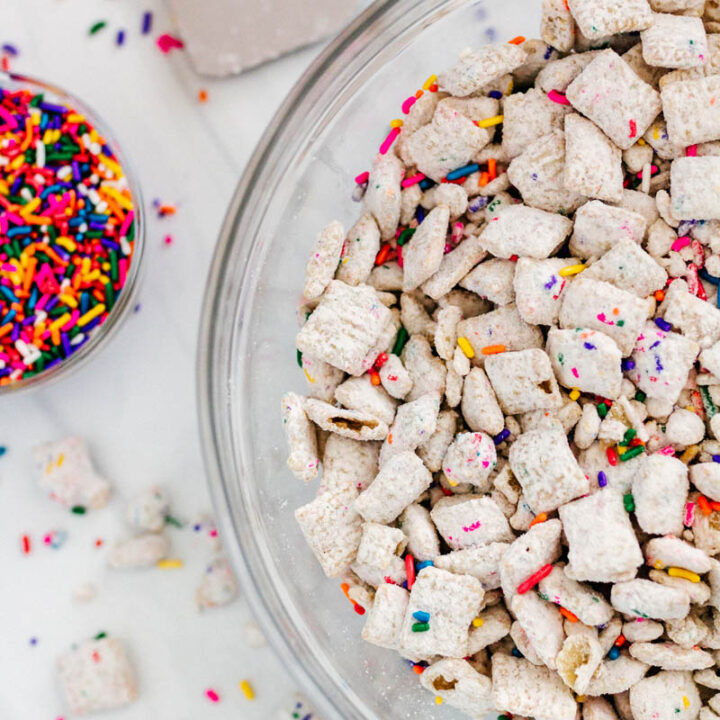
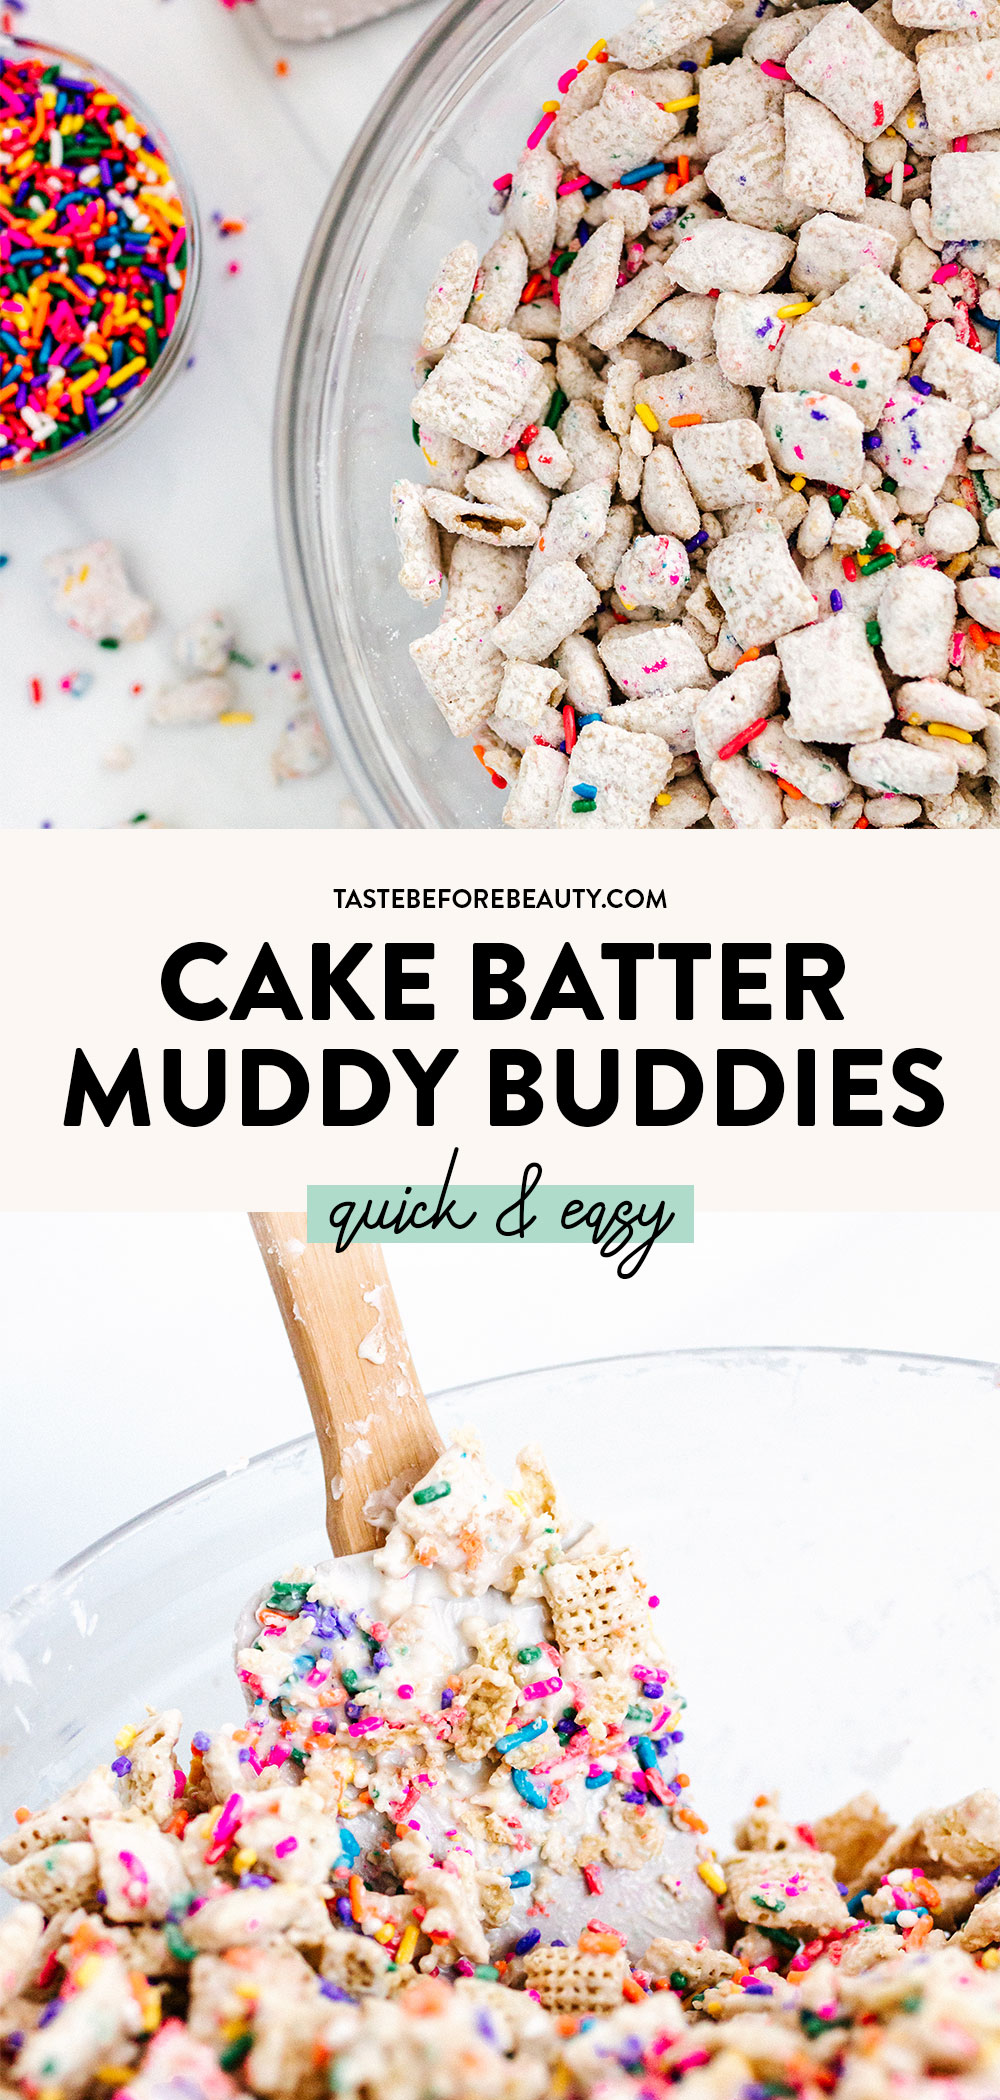
Cake Batter Muddy Buddies are easy to make and are the perfect treat for any occasion. Cake mix flavor meets crunch—it’s delicious, and the colorful sprinkles make it look so tempting!
About the Cake Batter Muddy Buddies
I’m that adult that goes into an ice cream shop and chooses the typical child flavors, like Superman, cake batter, or cookie dough. They are so delicious, and I will always love them. My love for sweet flavors brought me to the idea for this cake batter muddy buddies recipe.
Muddy buddies, also known as puppy chow, are delicious. With its peanut butter and powdered sugar mixture, it is a classic staple for most. But what about birthdays? What about a party? What about holidays like New Year’s Eve, Christmas, or Easter? What about someone (like me…) who craves flavors like cake batter? All of these questions swirled through my mind as I created these cake batter muddy buddies. You are going to LOVE them! They taste just like cake batter, but with a crunch. These Funfetti muddy buddies make the perfect birthday cake snack mix for a party!
You can’t really go wrong with cake batter, let alone Funfetti cake batter. These cake batter muddy buddies are so quick to make. You need a Funfetti cake mix, white chocolate chips, rice Chex cereal, and sprinkles to easily throw this cake batter puppy chow together.
For a simple, delicious upgrade to classic muddy buddies, these birthday cake muddy buddies swap out the powdered sugar coating for Funfetti cake mix! Together they create the perfect flavor and texture combination. It’s basically eating cake, but it’s quicker, doesn’t need to be baked, and it’s crunchy. Perfect for snacking or tossing into a bowl for a party.
Creating this birthday cake puppy chow recipe has got me thinking about other Chex mix muddy buddies flavors that we can create. I guess we’ll see in the future! In the meantime, enjoy this birthday cake Chex mix or funfetti puppy chow, or birthday cake lovers treat… whatever you want to call it. I just love the good ol’ cake batter flavor! Also, how fast can you say “muddy buddies?” I didn’t realize it was a slight tongue twister until I was talking to my friend about these. I kept mixing the words up after a while. Anyways, let’s get into making them!
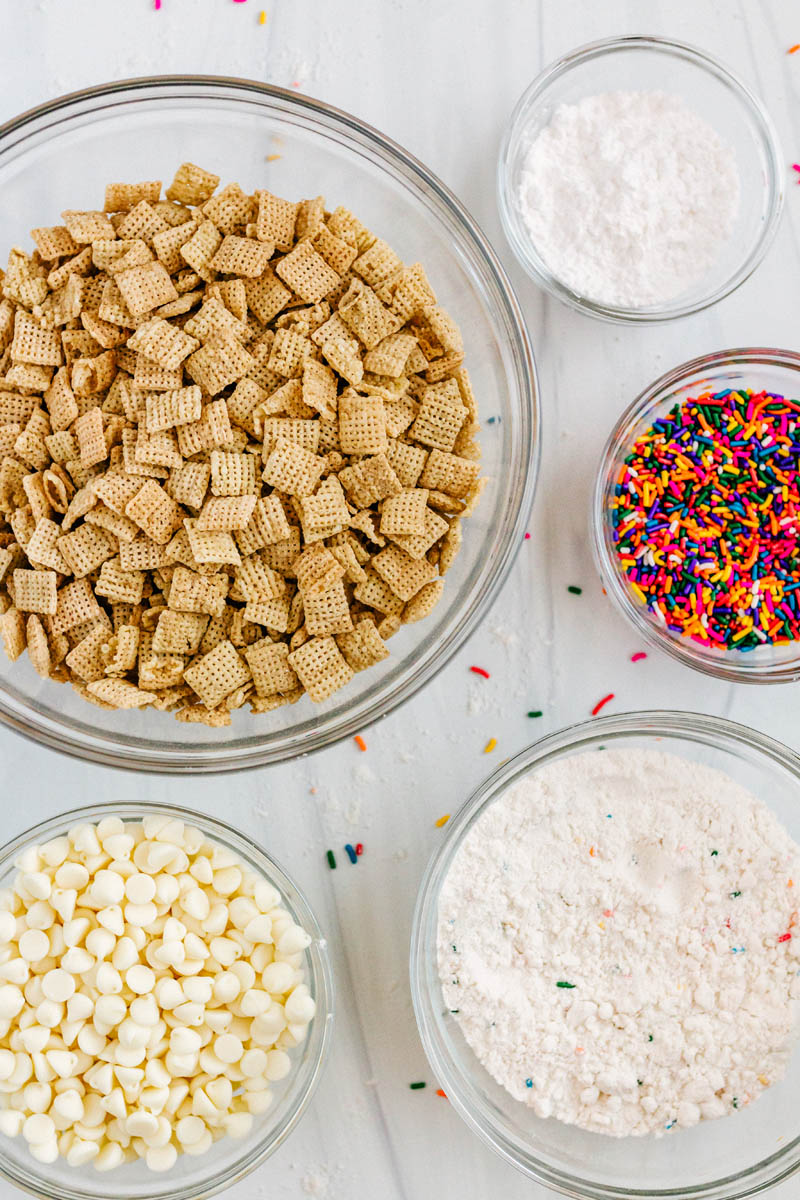
Funfetti Muddy Buddies Ingredients
Funfetti Cake Mix – I used Pillsbury Funfetti cake mix, but you could use any cake mix you would like.
Powdered Sugar – This coats the chex cereal and white chocolate with delicious sugary cake flavor.
Chex Cereal– I used Rice Chex, but, you could use whatever Chex cereal you prefer or have on hand.
White Chocolate Chips– These are used to create a delicious chocolate coating on the Chex mix. They also help the powdered sugar and cake mix stick to the muddy buddies. I used Toll House white chocolate chips.
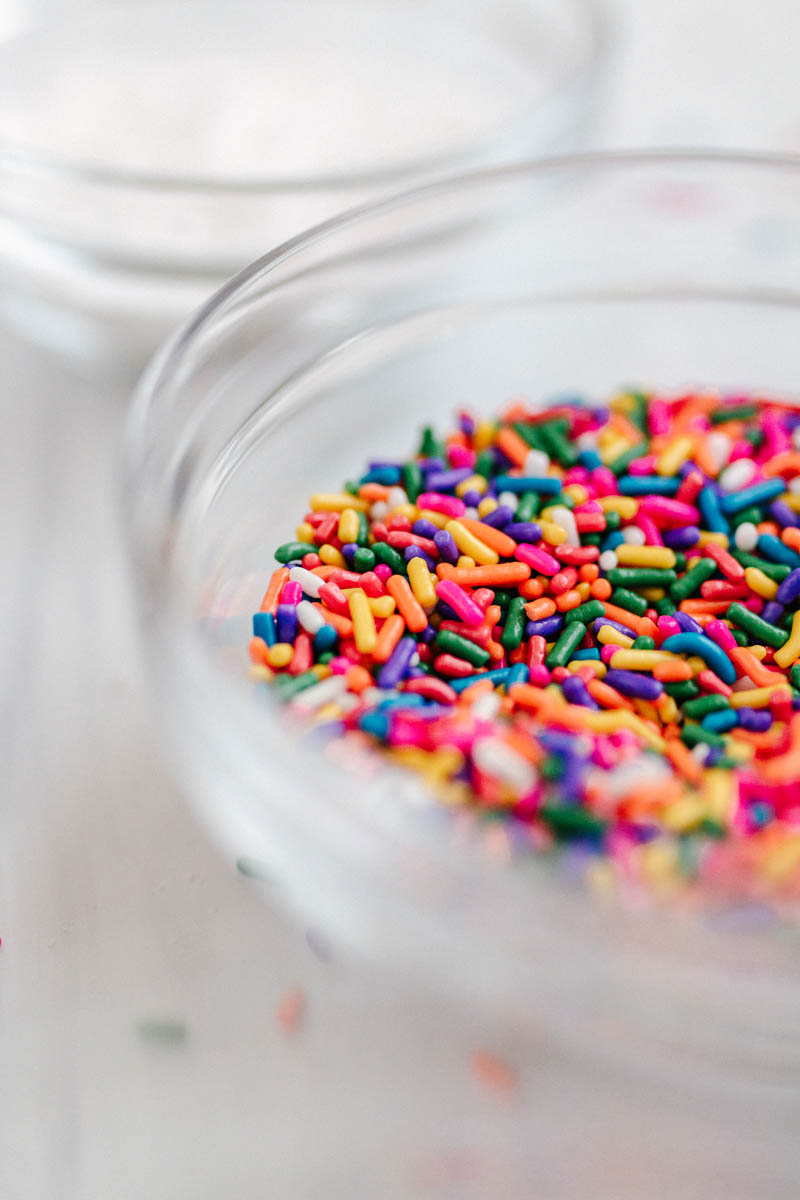
Sprinkles – I LOVE sprinkles! I grabbed a large container of jimmies to make sure I had enough. Feel free to add even more or fewer sprinkles. They help add color to the Funfetti aspect.
How to Make the Cake Batter Muddy Buddies Recipe
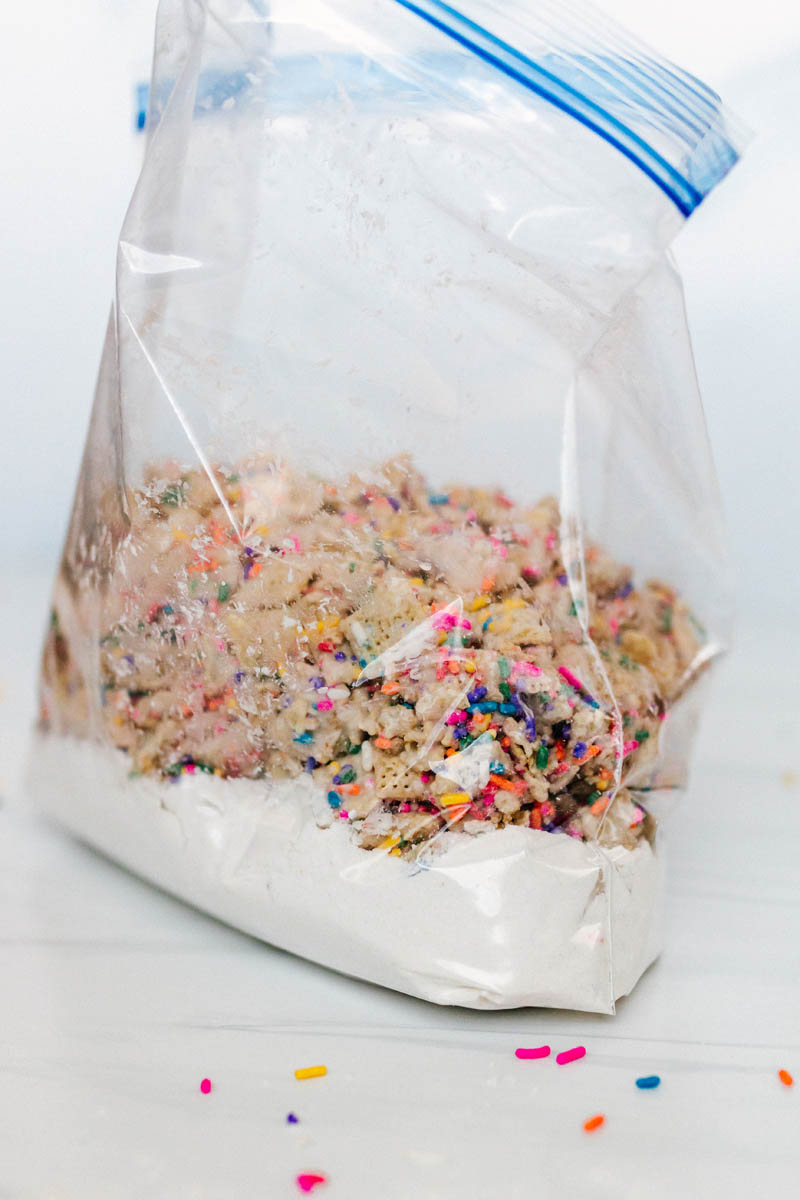
Using a large Ziploc bag, mix together the Funfetti cake mix and powdered sugar. Set the bag aside.
In a large bowl, pour in the Chex cereal.
In a separate bowl, pour the white chocolate chips in. Microwave the white chocolate chips for 40 seconds. After 40 seconds, stir well. Continue to microwave in 30-second intervals and stir until the chocolate chips are completely melted.
Pour the melted white chocolate chips over the Chex cereal, and stir immediately. Make sure almost all of the Chex pieces are coated in white chocolate.
Toss in the sprinkles and fold them in. After fully coated, pour the Chex cereal mix into the prepped bag filled with cake mix and powdered sugar. Close the bag tightly and shake until the Chex are covered well.
Pour the cake batter muddy buddies into a serving bowl, or keep them in an airtight container if you plan on eating them later.
I hope you love this birthday cake puppy chow mix as much as I do! Have fun in the kitchen, and may your apron be a little bit dirty.
Looking for more delicious dessert recipes? Try these:
Cake Batter Muddy Buddies are easy to make, and are the perfect treat for any occasion. Cake mix flavor but with a crunch, it's delicious, and it looks even better with its sprinkles!
Ingredients
5 cups Chex cereal
1 3/4 C (11 oz) white chocolate chips
1 C funfetti cake mix
1/4 C powdered sugar
3/4 C sprinkles
Instructions
In a Ziploc bag, combine both the funfetti cake mix and powdered sugar together. Set the bag to the side.
Place the Chex cereal into a bowl. Pour the white chocolate chips into a separate bowl. Microwave the white chocolate chips for 40 seconds. After 40 seconds, stir. Microwave in 30 second intervals and stir until the chocolate chips are completely melted.
Pour the melted white chocolate chips over the Chex cereal. Coat the Chex cereal until almost all of the Chex have melted white chocolate on them.
Fold in the sprinkles.
Pour the Chex cereal mix into the bag filled with cake mix and powdered sugar. Close the bag, and shake until coated well.
Pour the cake batter muddy buddies into a serving bowl, or keep the in an airtight container.
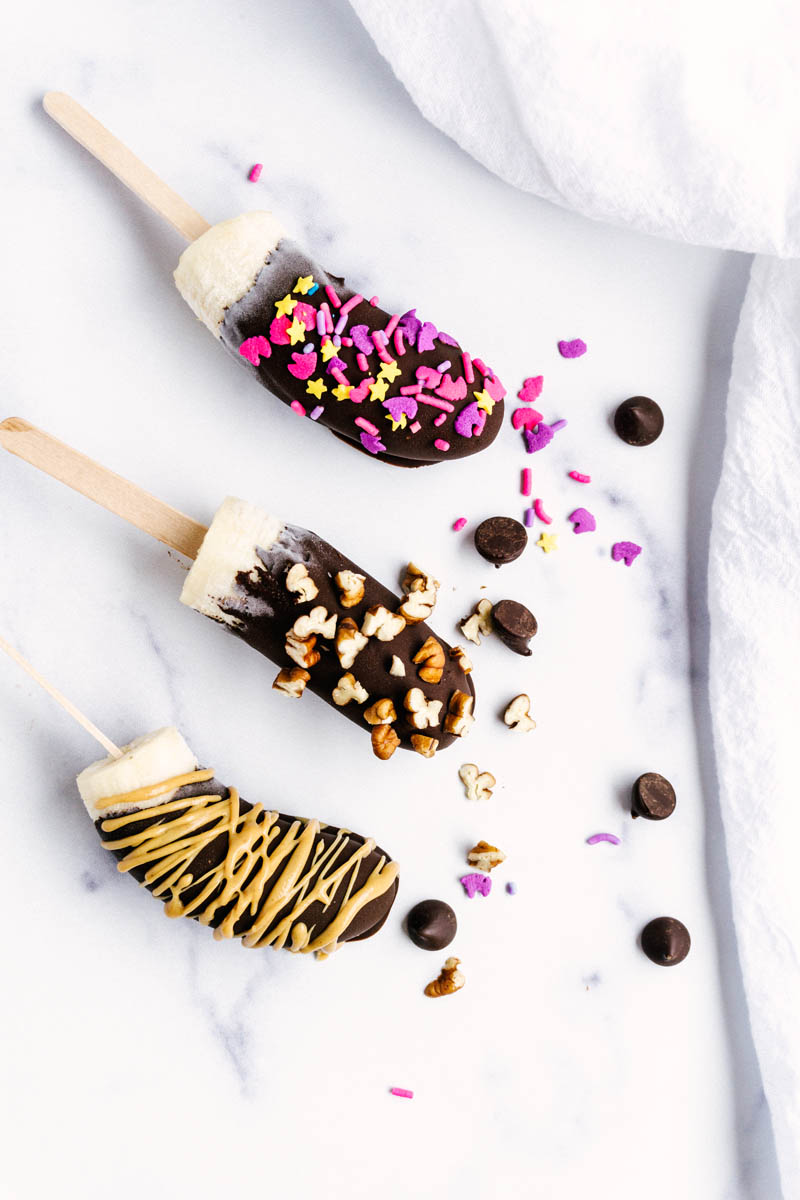
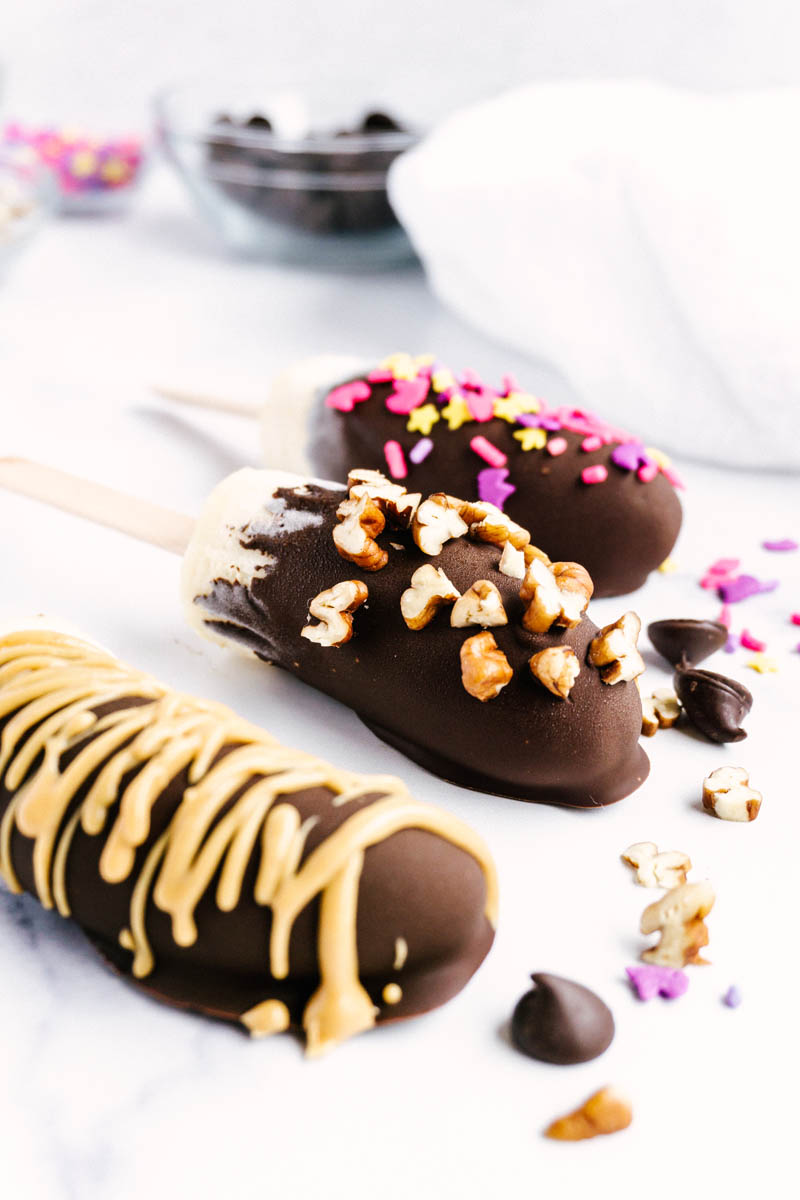
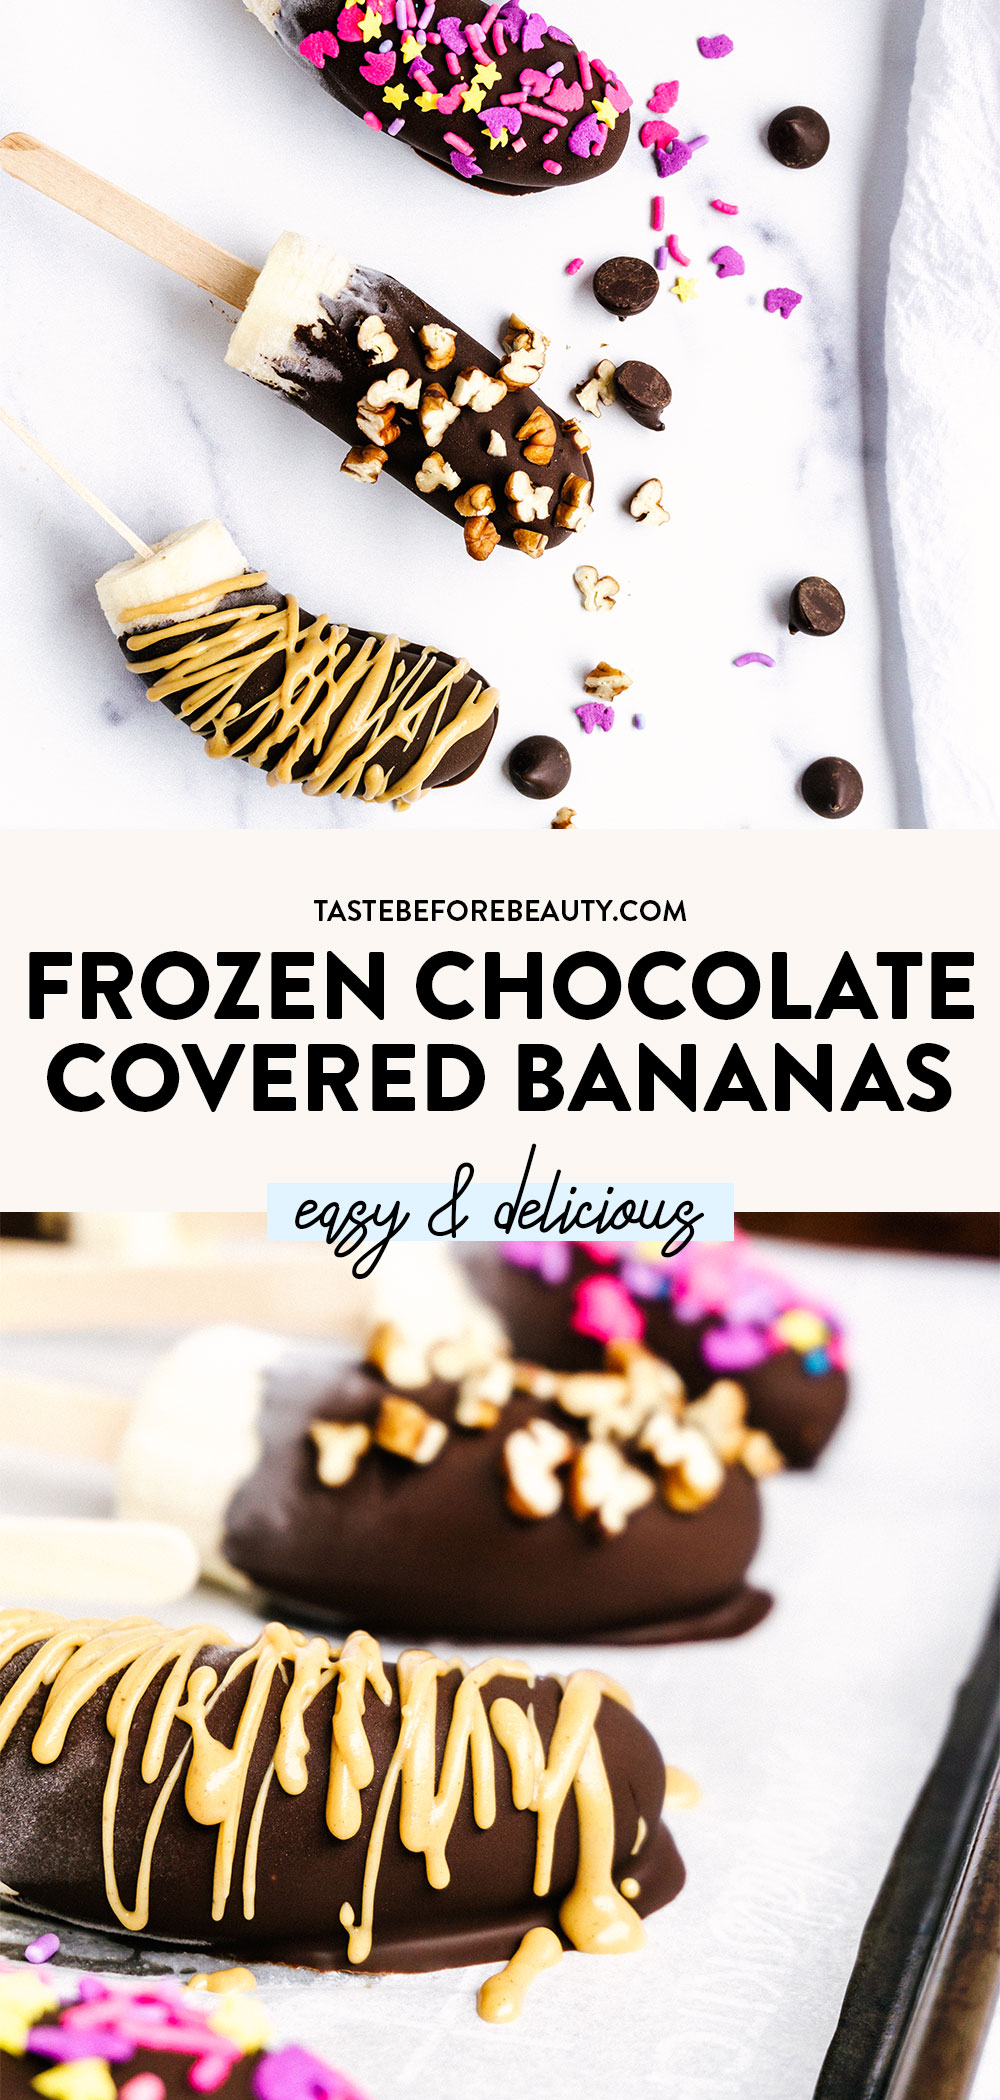
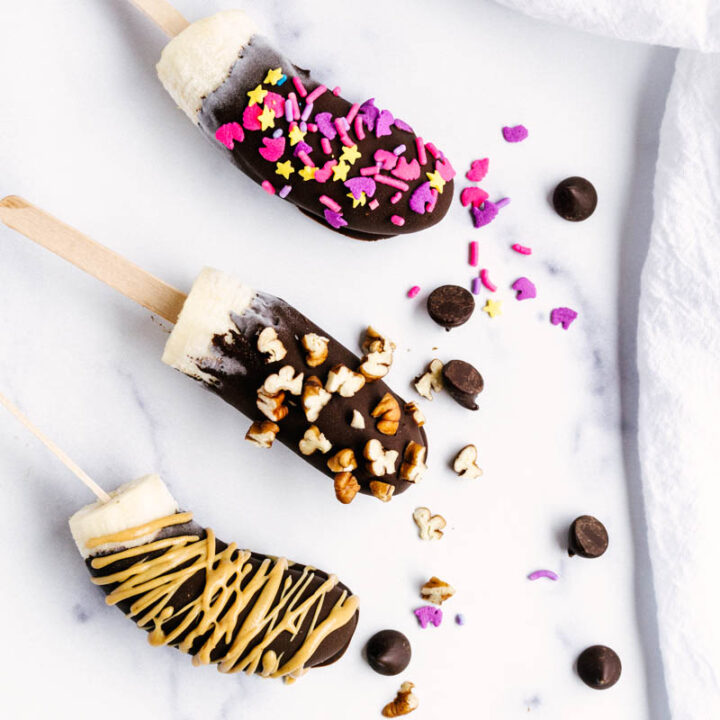
You’ll go bananas for these easy delicious Frozen Chocolate Covered Bananas. With no baking and minimal prep, these are the perfect summer treat!
The Perfect Frozen Summer Treat
Looking for the perfect, cold treat for those hot summer days? You’ve found it! These Frozen Chocolate Covered Bananas are super easy and refreshing. With only a few minutes of actual prep work involved, these are quicker and easier than a trip to the store to buy those popsicles that come in the plastic tubes. Plus they taste way better!
The last time I had a frozen chocolate-covered banana was in 2007 when my family took a trip to Disney World. The temperatures warmed up here in Pennsylvania last weekend and I got a craving for one. With continuing travel restrictions due to the pandemic, I knew I would have to make them at home.
Fortunately, these come together fast. The hardest part is waiting for them to freeze, but even then you’re less than two hours from a delicious frozen treat. And since the main part of it is banana, you can feel good about your mid-afternoon snack.
About the Ingredients
Bananas – I like to use ripe bananas with a few spots on them. They’re nice & sweet and make an ice cream bar-like treat.
Chocolate Chips – chocolate chips melt nicely and I always have lots around. I prefer dark chocolate. You can use any chocolate chips or chopped chocolate you like.
Coconut Oil – helps the chocolate melt and coat the frozen bananas smoothly.
Toppings: I used unicorn sprinkles, finely chopped pecans, and peanut butter. Other ideas could include mini M&Ms, chopped peanuts, chocolate chips, mini marshmallows, white chocolate drizzle, flaky sea salt, coconut flakes, crushed Oreos, or freeze-dried raspberries. They also might be super delicious with cookie dough topping from these Cookie Dough Brownies!
Frozen Chocolate Covered Bananas Assembly Tips
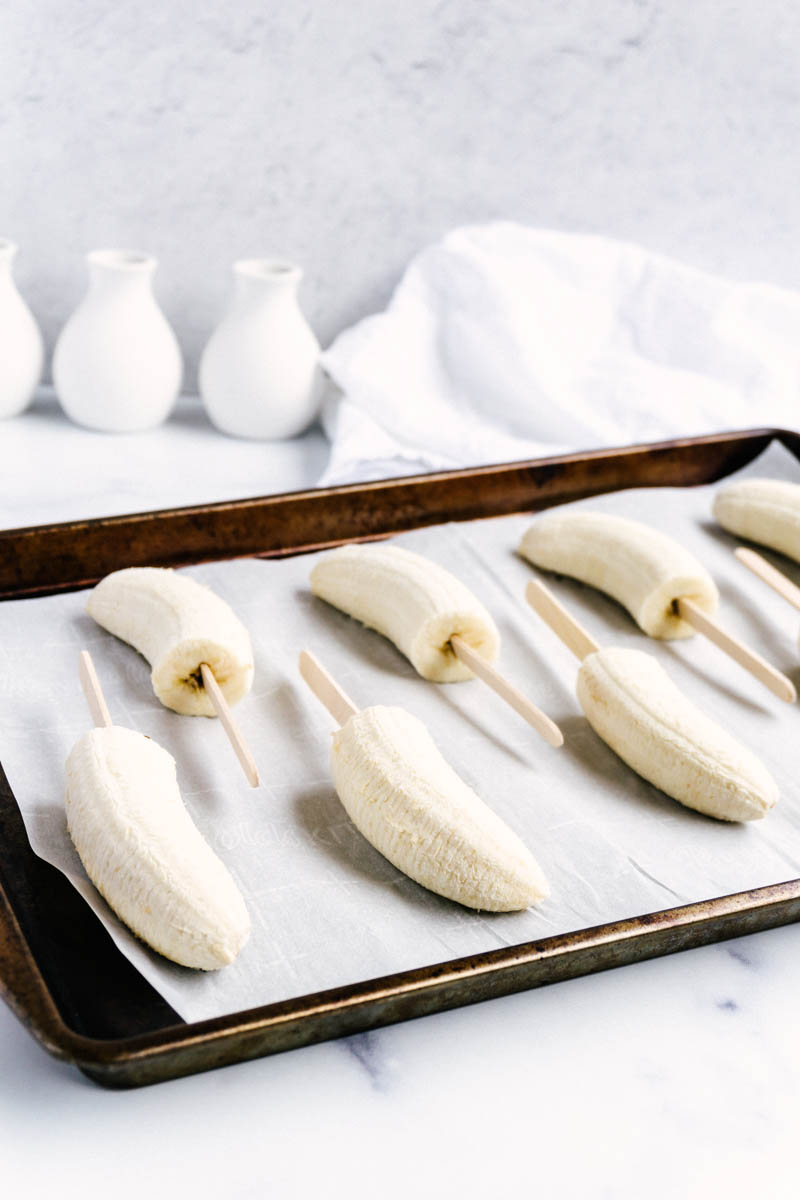
Prepare the bananas: Peel each banana and cut it in half. Place a popsicle stick far enough into each banana half that it stays on, but not so far that it pokes out the other end.
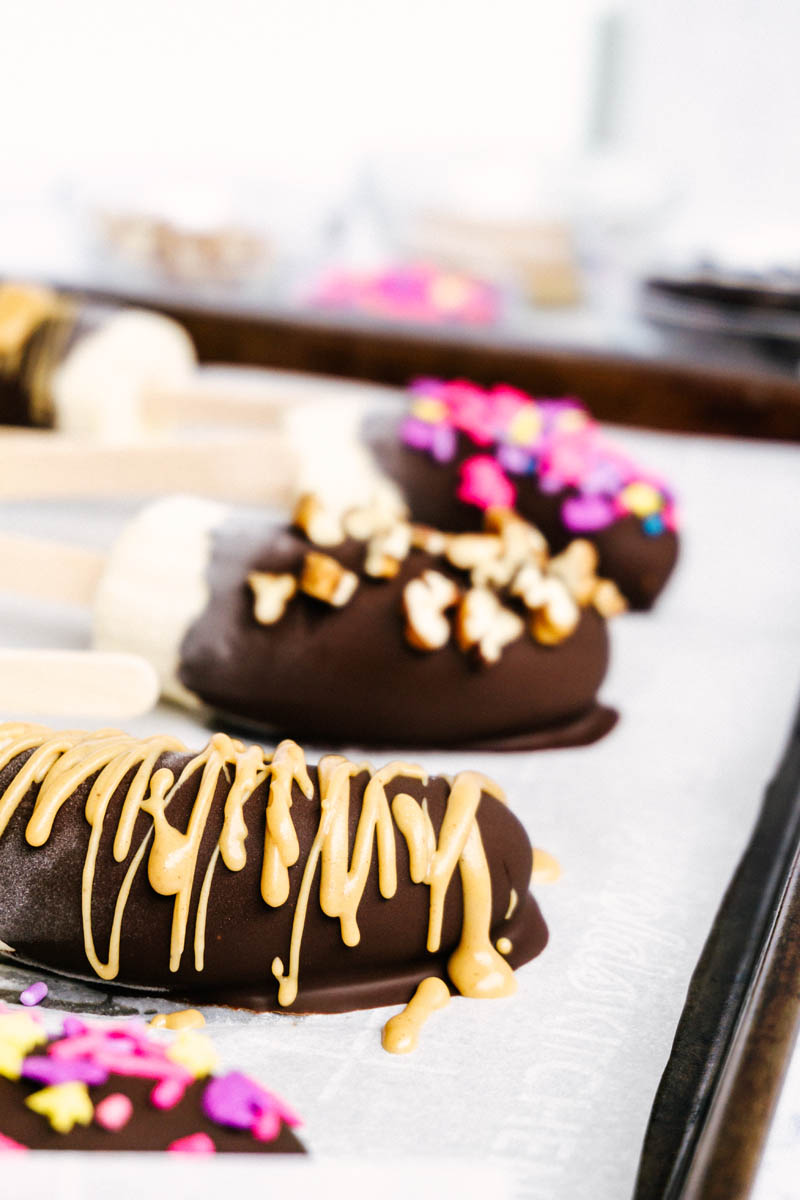
Dip bananas in chocolate: After melting the chocolate and coconut oil, dip each banana into the chocolate. It works best to use a tall, skinny container like a glass. I do just one banana at a time because the chocolate sets up so fast.
Decorate: Immediately after dipping each banana in chocolate, sprinkle with whatever toppings you’d like. The chocolate hardens fast so move quickly!
Drizzle: If you want to use a drizzle, like peanut butter, freeze the chocolate-dipped bananas for 15 minutes or so first so the drizzle doesn’t just blend into the chocolate.
Freeze: After decorating, place the bananas back in the freezer for 20-30 minutes to firm the chocolate up. I like to eat these completely frozen, straight from the freezer. My husband likes them after they’ve thawed for just a few minutes and have a soft, nice cream texture.
However you choose to top these, they are guaranteed to be delicious and the perfect cold treat on a hot day. Enjoy!
Looking for more delicious summer recipes? Try these:
You’ll go bananas for these easy delicious Frozen Chocolate Covered Bananas. With no baking and minimal prep, these are the perfect summer treat!
Ingredients
Frozen Bananas
3-4 medium bananas
Chocolate Coating
1 C (6 oz) dark chocolate chips or chopped chocolate bar
1 T coconut oil
Toppings
Sprinkles
Chopped pecans
Peanut butter
Instructions
Cut & freeze the bananas.
Peel bananas. Cut in half and insert a popsicle stick a few inches into each half. Place on a wax paper-lined cookie sheet.
Repeat with the rest of the bananas. Freeze for at least one hour.
Dip bananas in chocolate & decorate.
Combine chocolate and coconut oil in a microwave-safe bowl. Melt in 15-second bursts until melted and smooth.
Dip frozen bananas in melted chocolate. Place back on cookie sheet and immediately top with desired toppings.
Freeze chocolate-covered bananas for another 20-30 minutes.
Serve frozen. Store in freezer in an airtight container for up to a week.
Notes
If adding peanut butter or other drizzles, freeze chocolate-covered bananas for 15-20 minutes before drizzling, then freeze for another 20-30 minutes before serving.
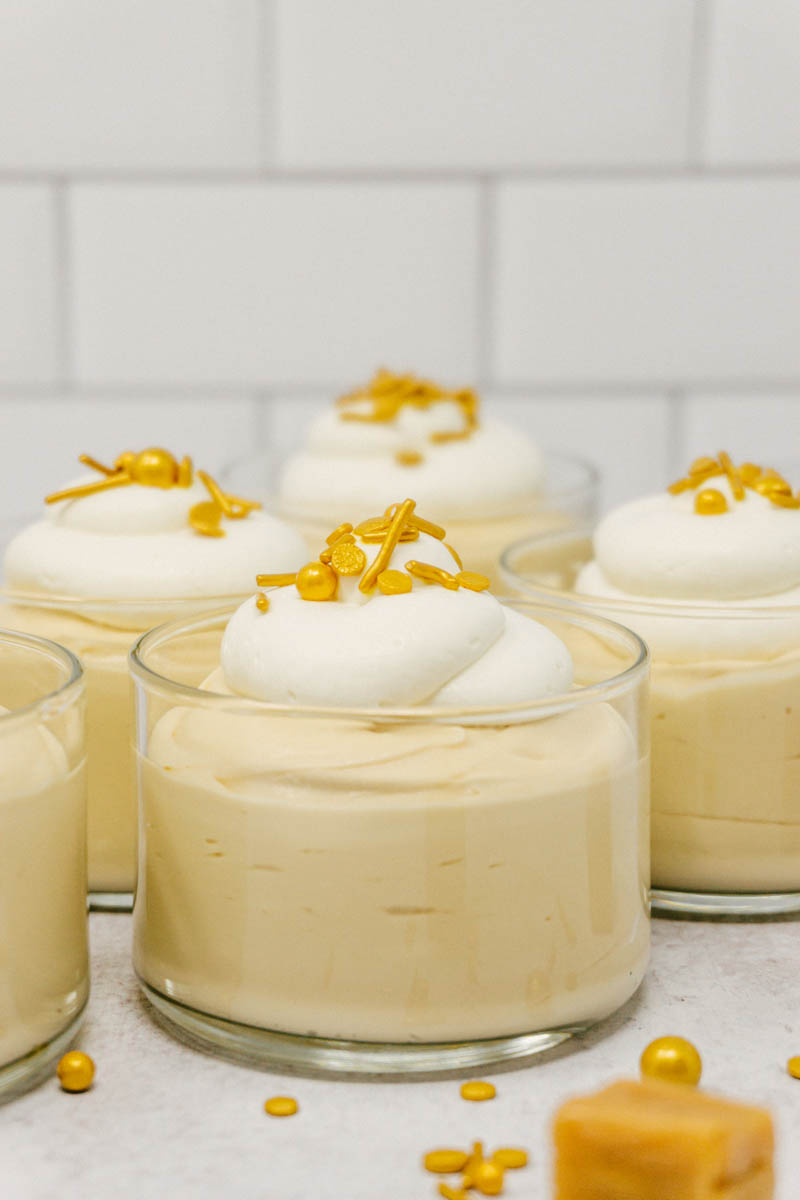
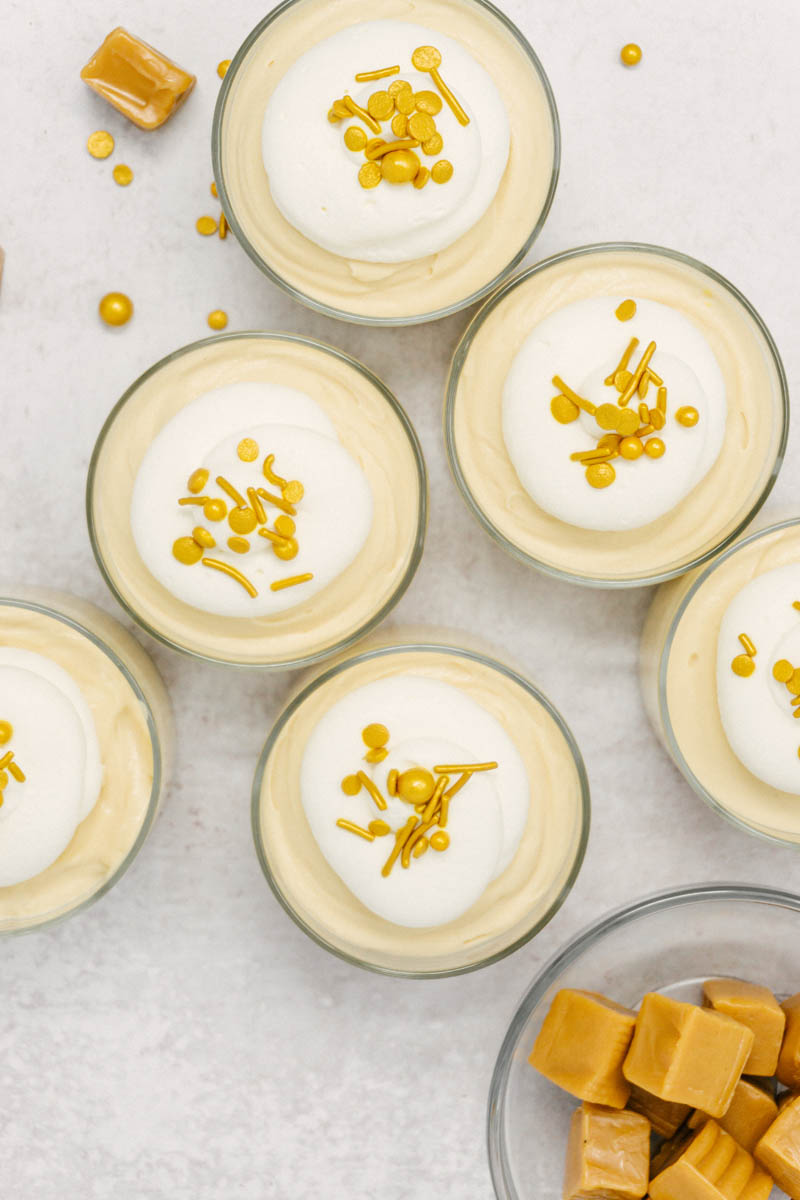
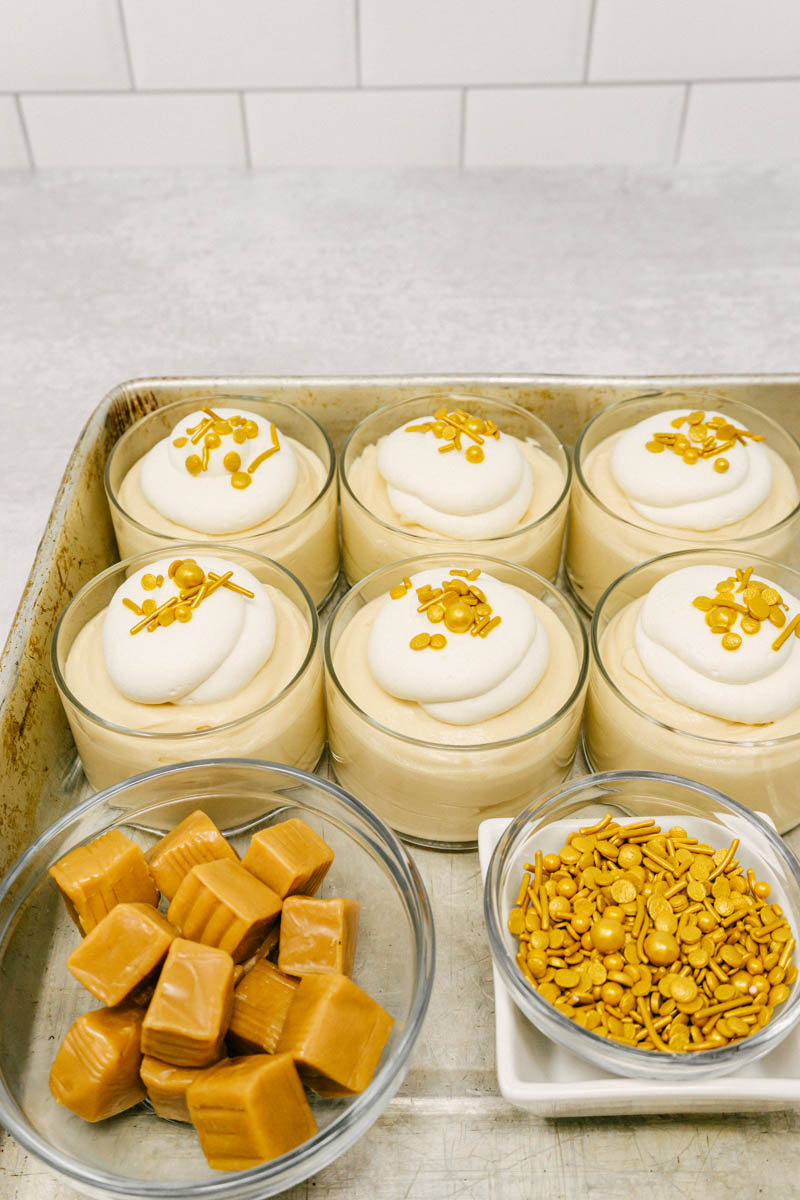
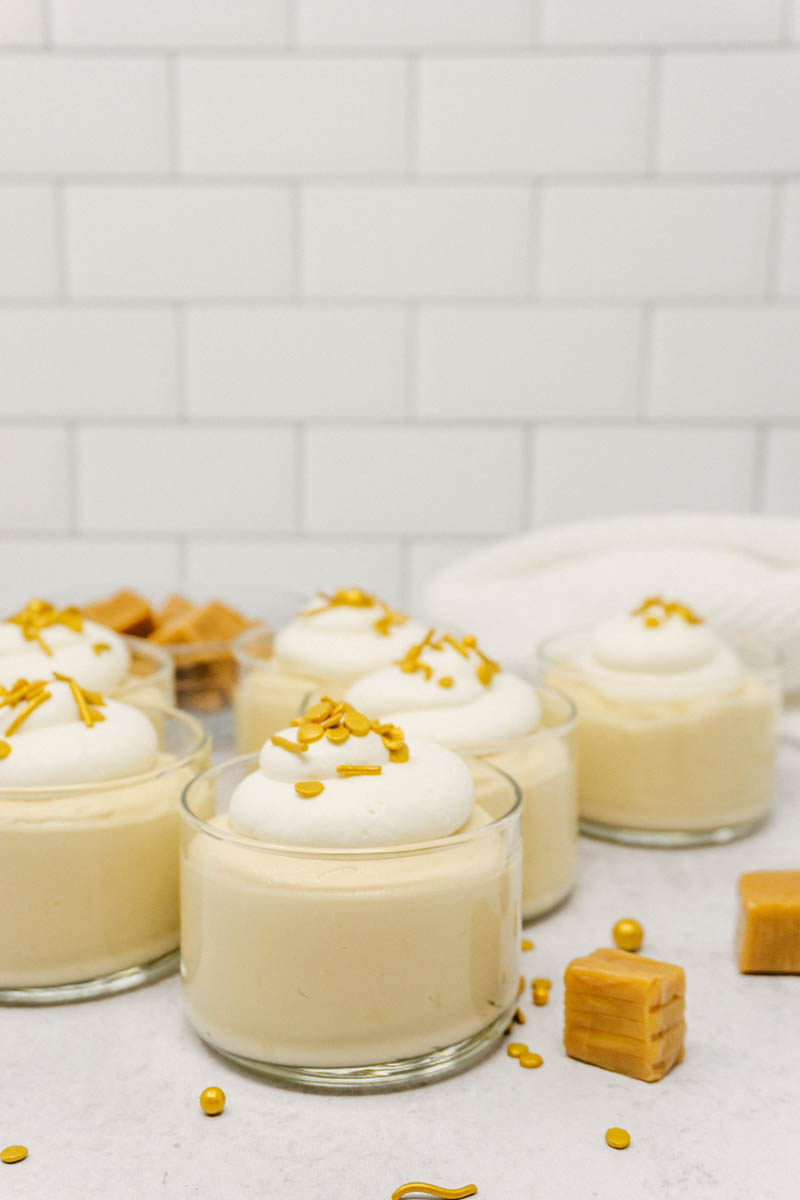
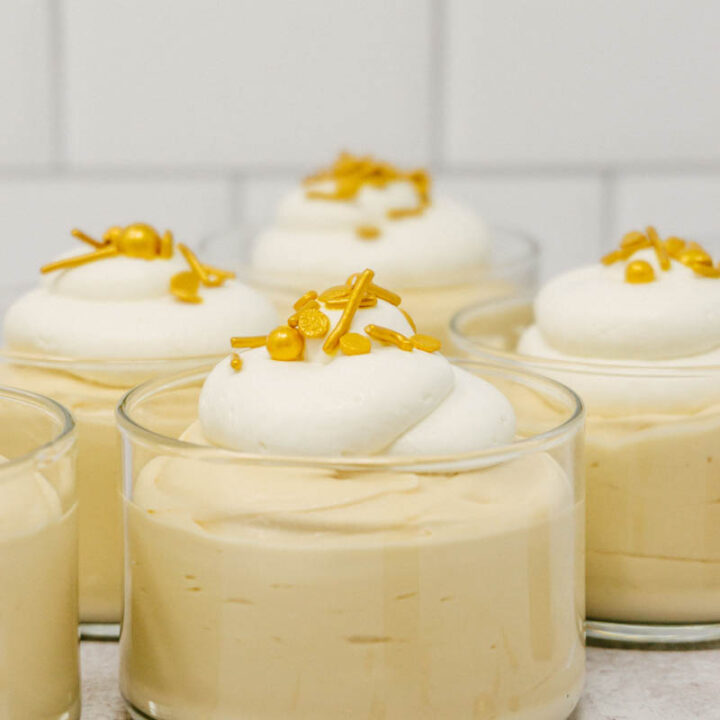
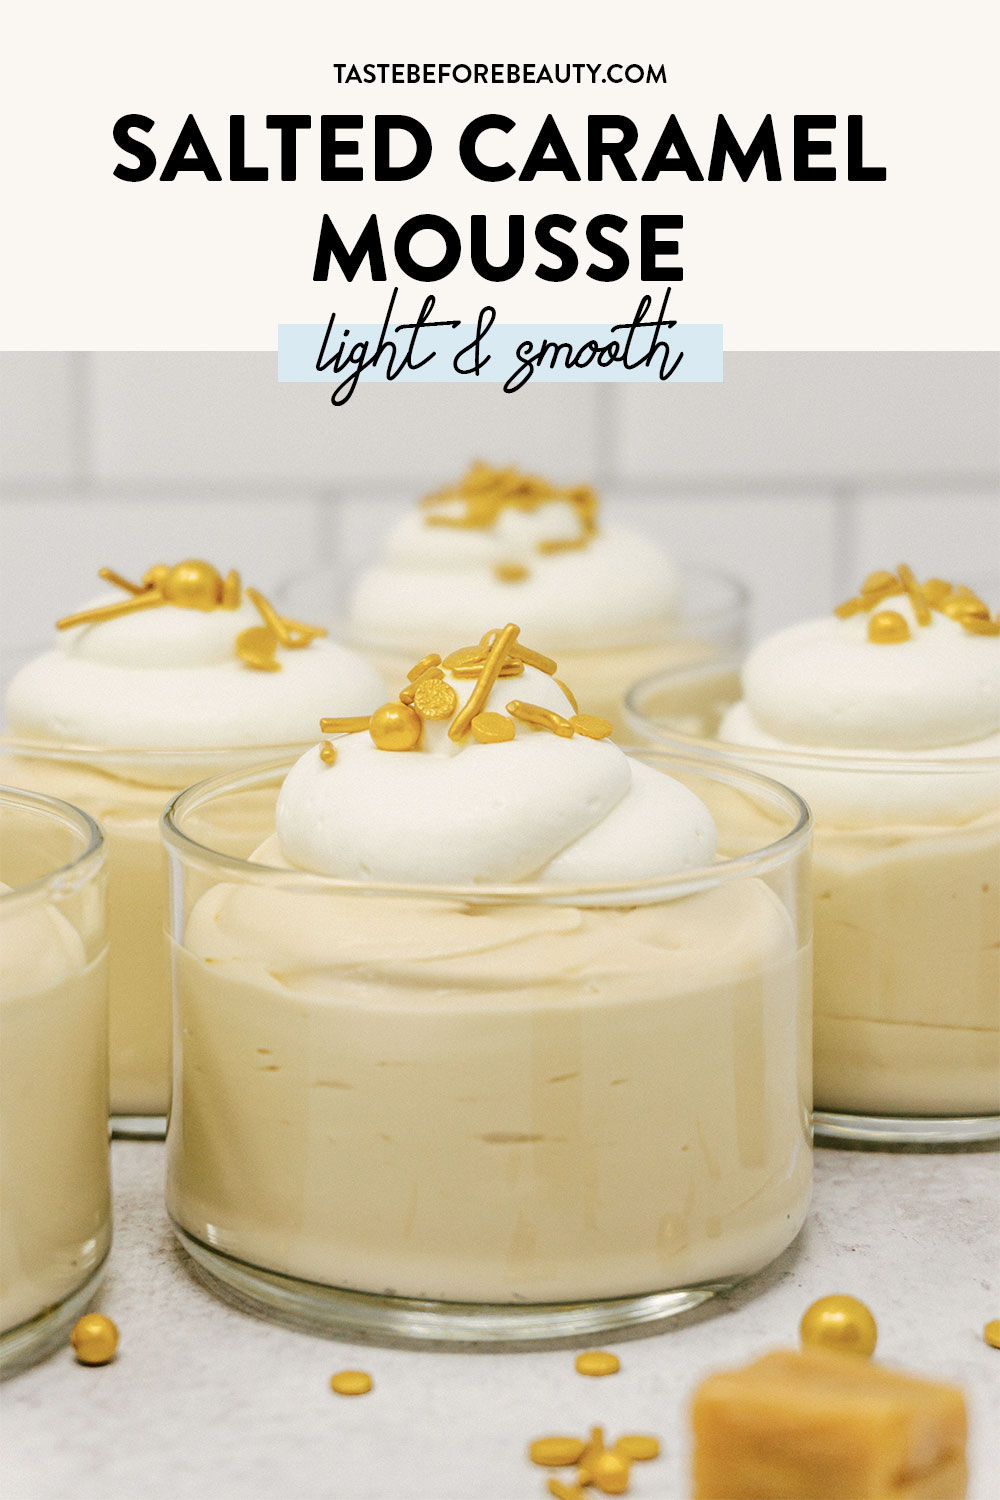
A rich caramel flavor accented with the perfect amount of salt all whipped up into a smooth and light mousse. It’s an edible Pot of Gold!
I like caramel. I like caramel a lot! Caramel rocked my world long before salted caramel became popular in the mainstream. If you asked me, “What two types of candy would you pick to eat for the rest of your life?” Without a doubt, I would choose chocolate and caramel.
The Origin of The Salted Caramel Mousse
Why not make a salted caramel mousse? When we ran the cookie shop, we sold specialty ice creams from a local ice cream maker. Among these delicious ice creams was a salted caramel ice cream. I noticed it tended to be softer than the rest of the ice creams. When I asked the gentleman who made them why that was, he explained that salted caramel ice cream is an industry-wide problem. Salt affects the freezing point and because of the higher salt content, the ice cream always ended up softer than the rest.
Because this mousse does not need to be frozen, you won’t have to worry about that. I just thought it was an interesting observation. Since I didn’t have to worry about achieving the perfect frozen texture, my only consideration in making this mousse was achieving the perfect salted caramel flavor.
How to Make it
I use Kraft America’s Classic Caramels. They are easy to find at almost any grocery store or online. Melt them with half-and-half until they are smooth. I add just a small bit of salt that dials up the caramel flavor with the perfect salty kick.
Whipping the melted caramel with a bit of cream cheese adds body to the mousse and gives it stability to last in the fridge for a few days (if you don’t eat it first!). Fresh cream lightens the mousse and gives melt in the mouth bubbles with hardly any effort.
I hope you enjoy this little pot of gold. It would be the perfect addition to a St. Patrick’s Day dinner or any time you need a simple, yet elegant dessert. Serve it in 2 oz dessert dishes to make it go further, use as the filling to a Classic Cream Puff or Chocolate Cream Puff, or use it to layer in a caramel trifle. The possibilities are endless. Let me know in the comments how you’re using this simple Salted Caramel Mousse.
Salted Caramel Mousse
Yield: 6 (½ C) servings
Prep Time: 25 minutes
Additional Time: 1 hour
Total Time: 1 hour25 minutes
A rich caramel flavor accented with the perfect amount of salt all whipped up into a smooth and light mousse. It’s an edible Pot of Gold!
Ingredients
Salted Caramel Mousse
6 oz unwrapped caramels
¼ C half-and-half
⅛ tsp salt
1 C (8 oz) cream cheese
¼ C (2 oz) brown sugar
½ tsp vanilla
1 C (9 oz) heavy cream
Whipped Cream
⅓ C (3 oz) heavy cream
2 tsp sugar
¼ tsp vanilla
1 T gold sprinkles or edible gold glitter
Instructions
Make the Salted Caramel Mousse.
Unwrap caramels. In a small bowl, gently heat caramels with half-and-half and salt until completely melted and smooth. Let cool to room temperature.
In a separate bowl, whip cream cheese, vanilla, and brown sugar until smooth.
Add completely cooled caramel mixture and heavy cream. Whip until soft peaks form.
Make the Whipped Cream Topping.
In a bowl, add heavy cream, sugar, and vanilla. Whip until stiff peaks form.
Assemble Pots of Gold.
Use a spoon or a pastry bag with a large circular tip to pipe salted caramel mousse into small serving dishes.
Top mousse with a small dollop of whipped cream. Sprinkle with gold sprinkles or edible gold glitter just before serving.
Serve chilled. Store in the refrigerator for up to 4-5 days.
Notes
You can use premade whipped topping instead of homemade whipped cream to save time.
Wait to add sprinkles until a few hours before serving. They will bleed color into the whipped cream if left for longer than 3-4 hours.
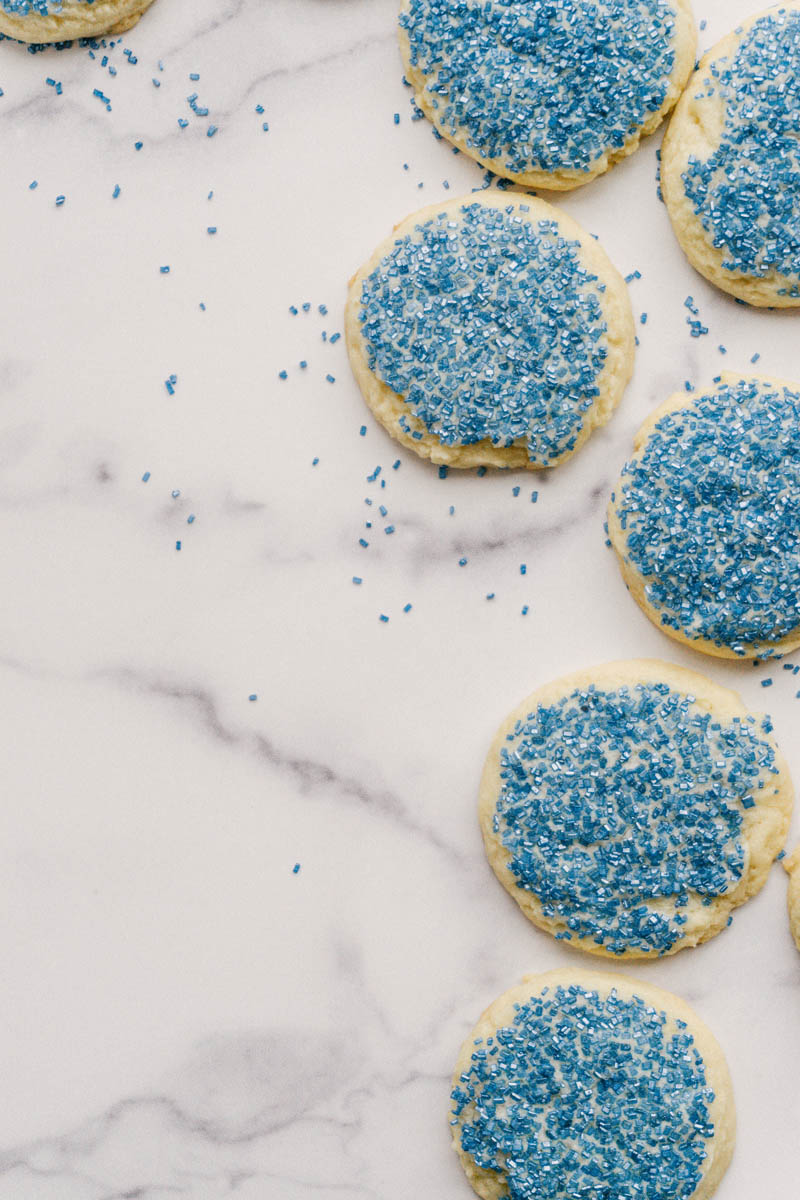
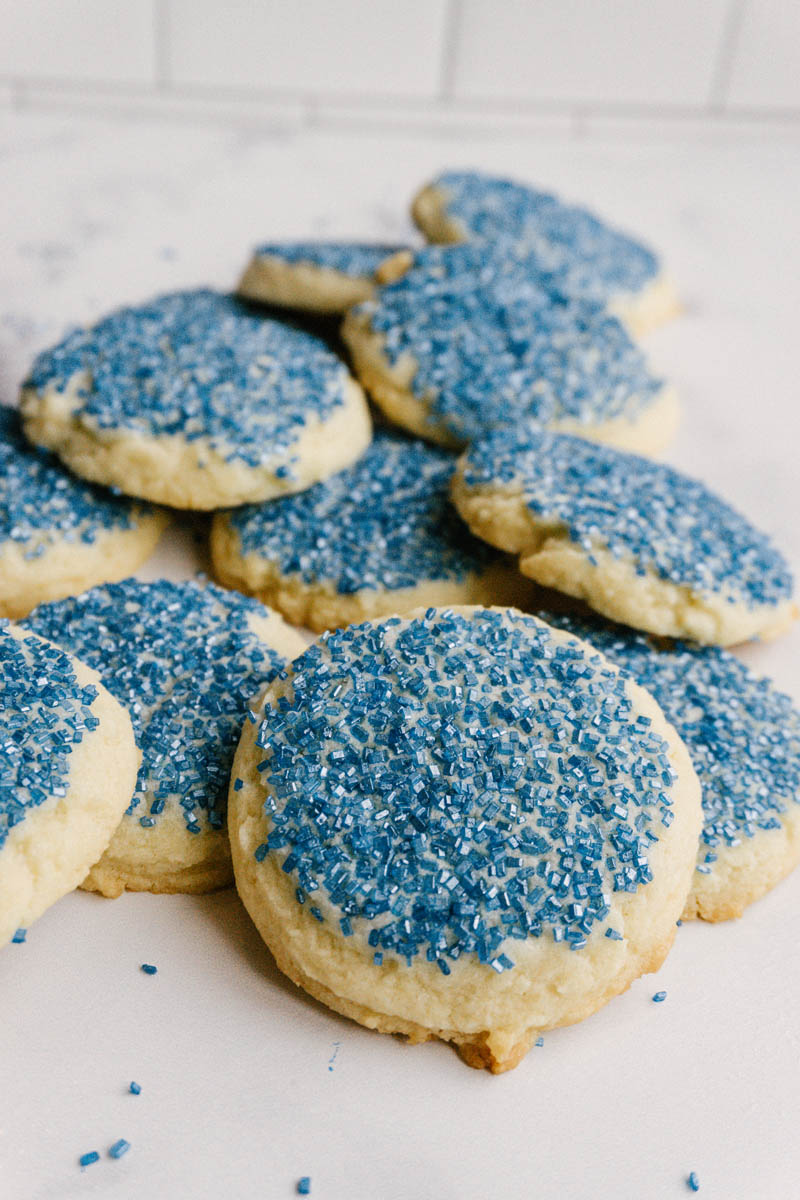
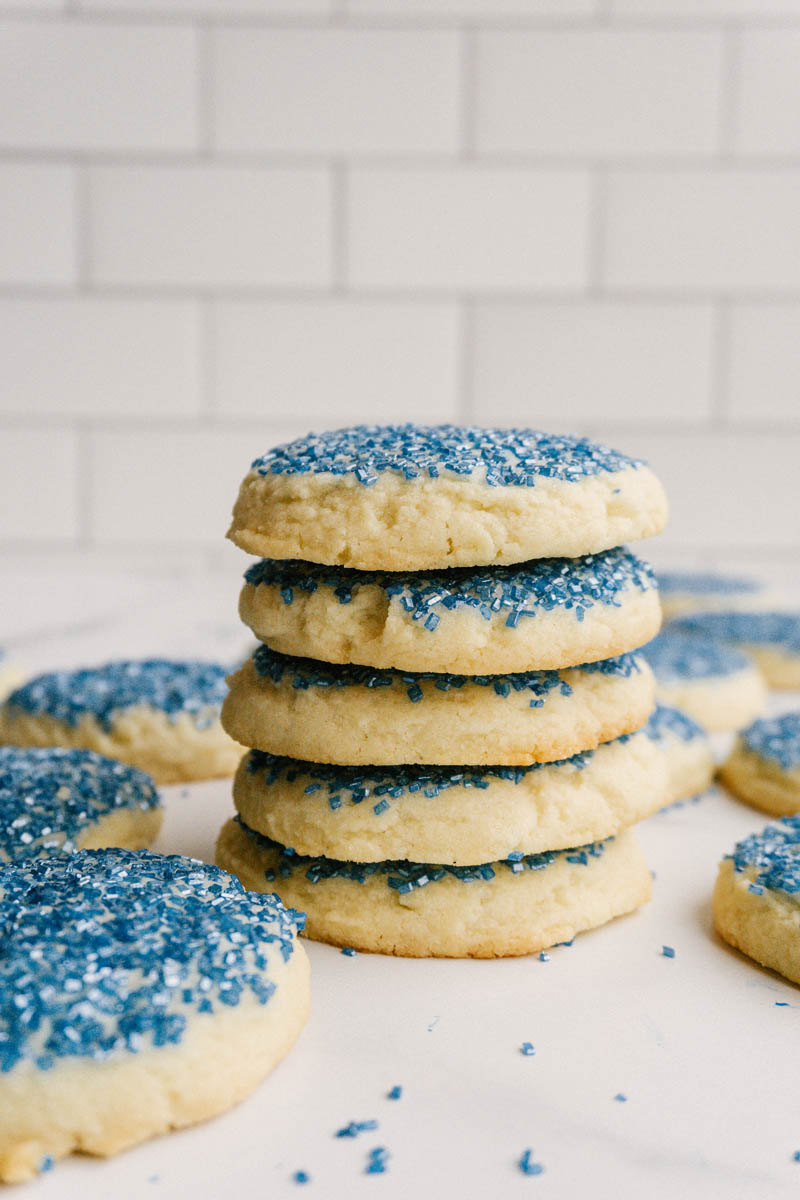
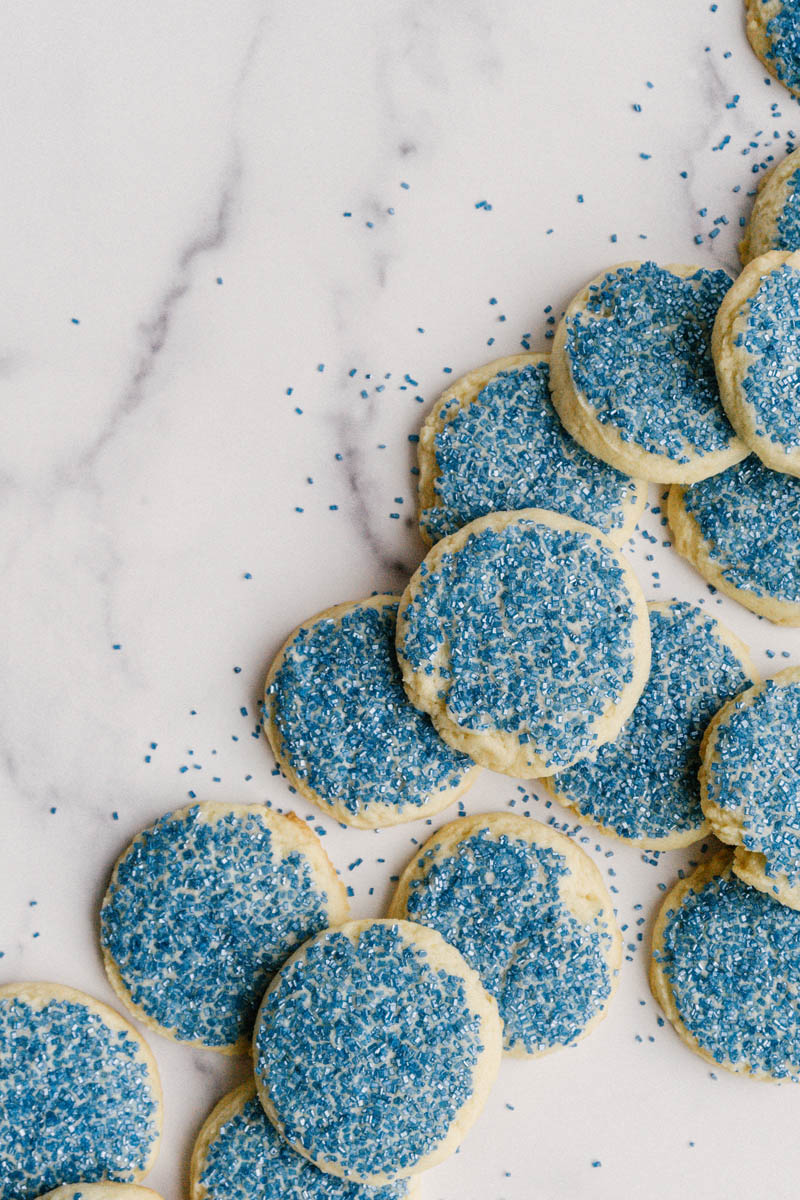
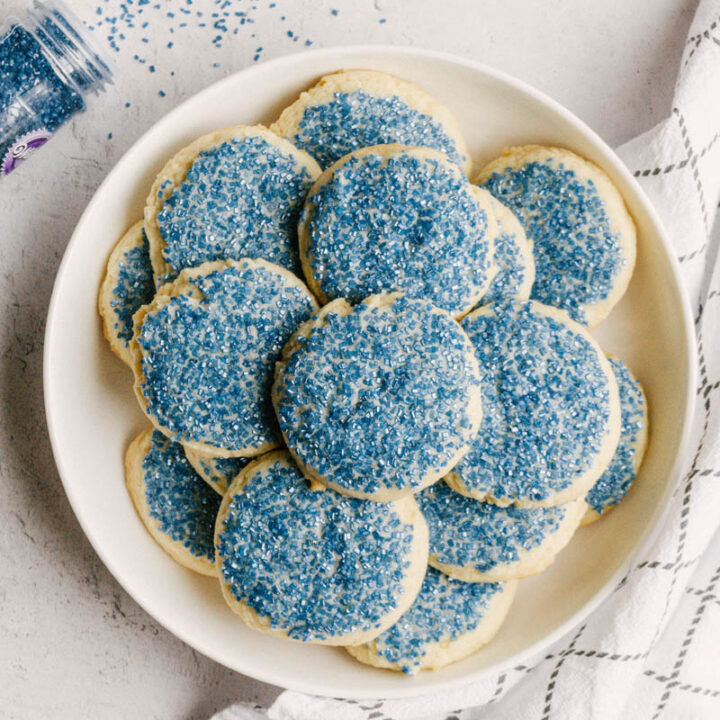
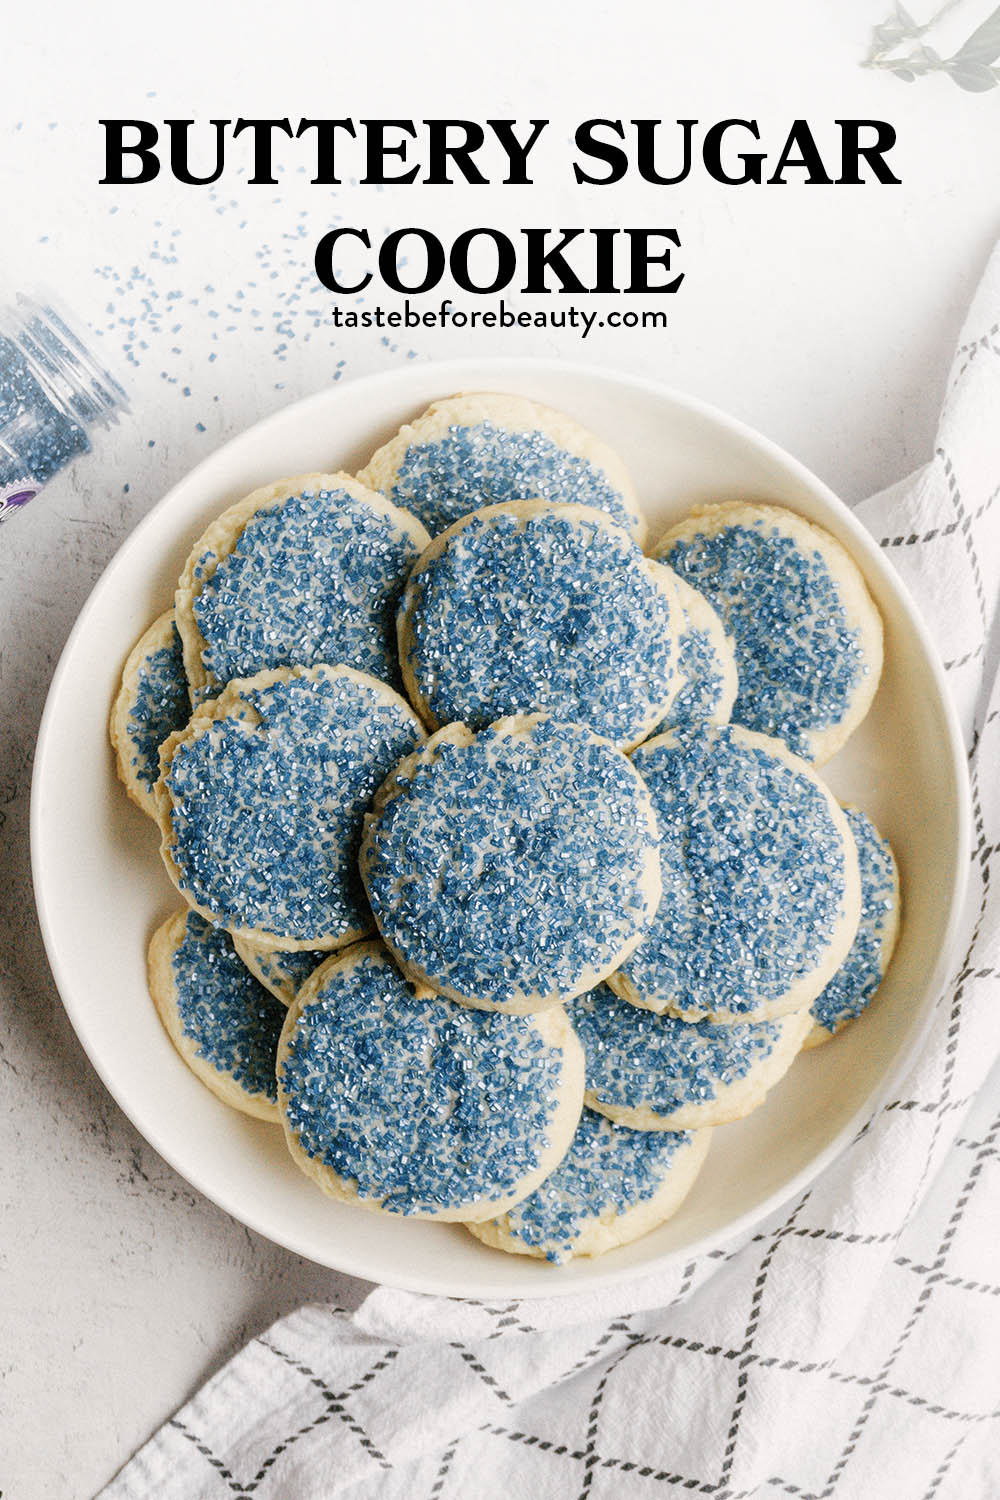
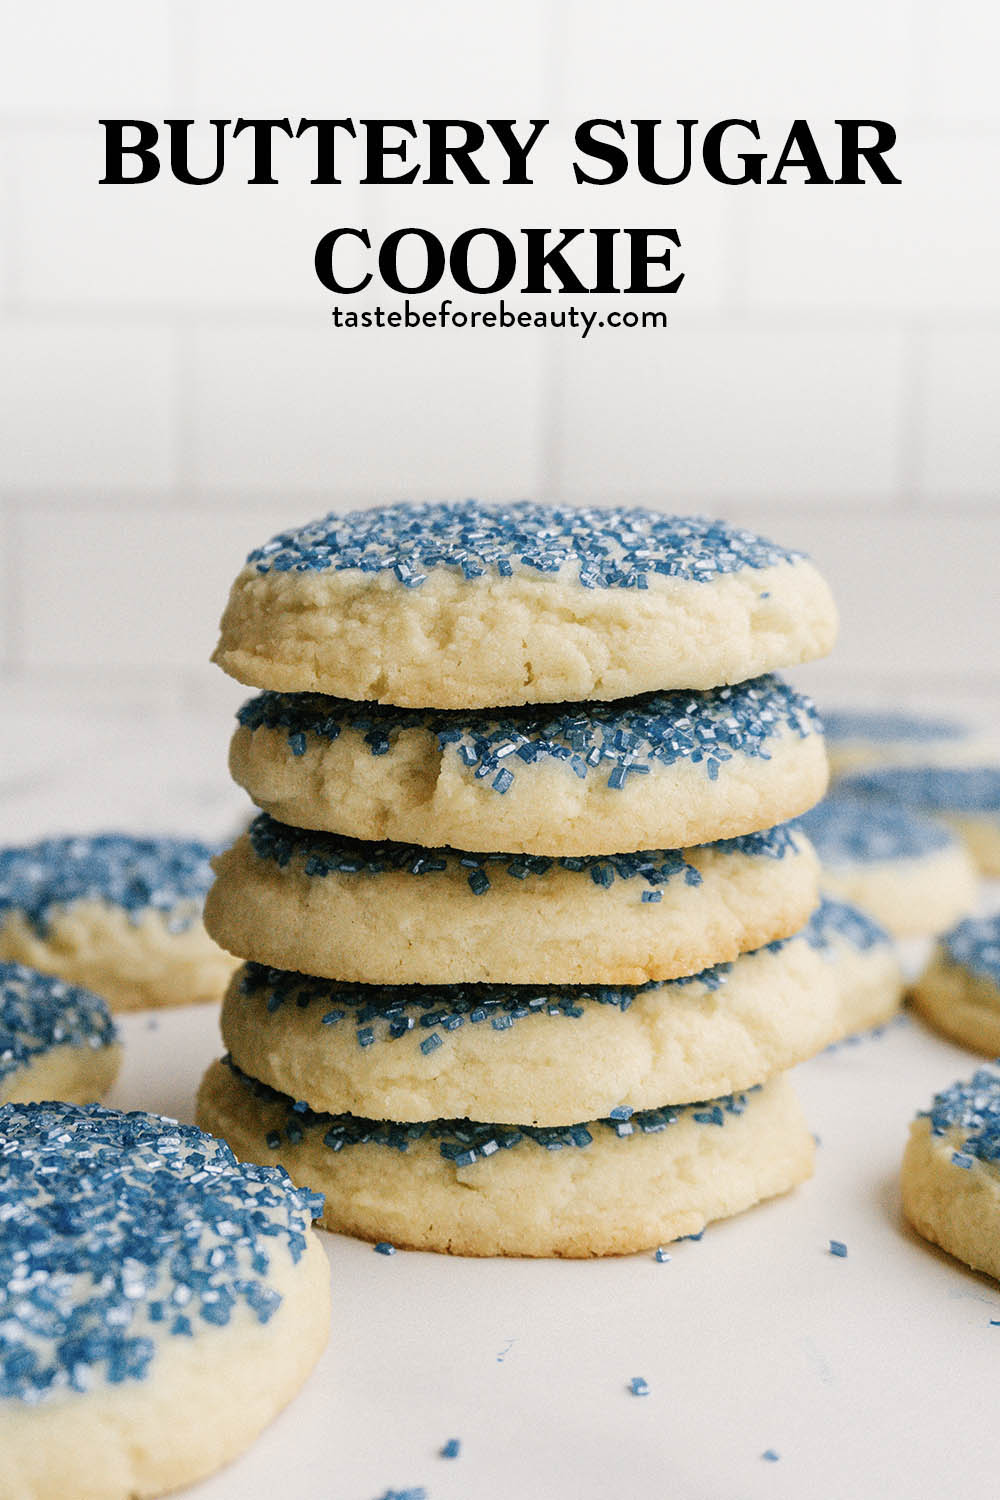
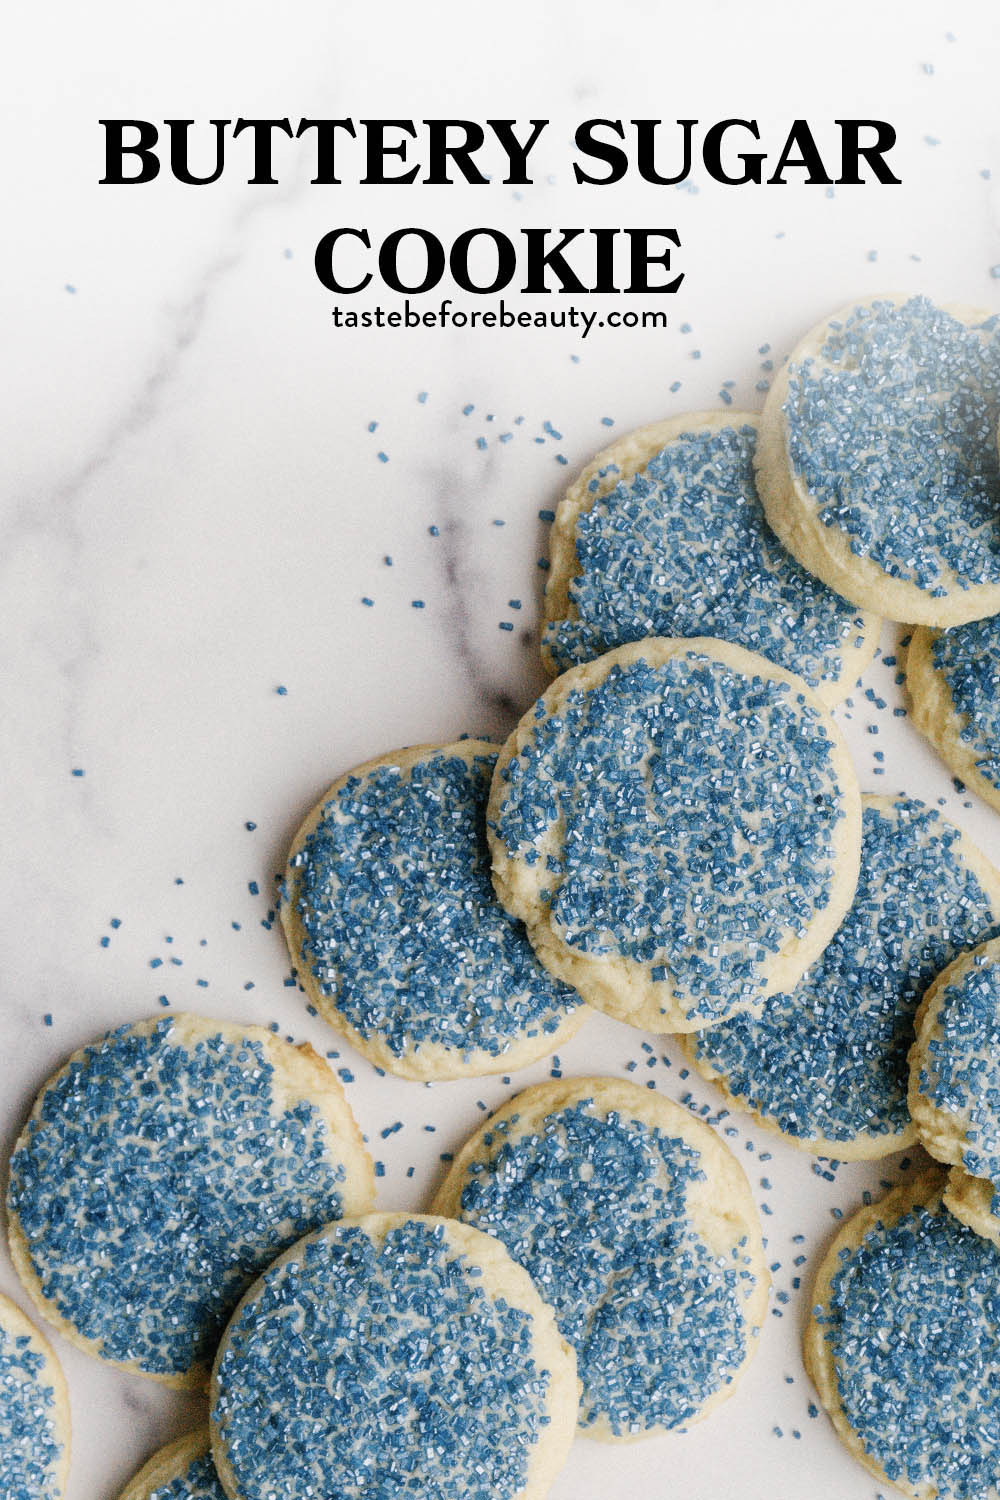
A quick, buttery sugar cookie designed for those who are short on time, but still want a colorful, tasty treat!
These cookies were created in response to a need for a colorful sugar cookie without frosting. People loved our Frosted Sugar Cookies(and you will too! Click here to try them) but they took extra time and space for the frosting layer. These Butter Sugar Cookies are simple to make and look beautiful, no matter where you take them.
Using Sparkling Sugar
This little gem of a cookie needed more butter and sugar in the dough to fully round out the flavor, without adding frosting. It needed to stand out all on its own. The cookie alone needed to stand out. I nailed down the flavor but found the texture a bit boring. Colored sparkling sugar solves this problem, plus adds a fun burst of color.
While you may be tempted to use normal sprinkles, I’ve tried them and they bake up… not as beautifully. The color bleeds into the cookie. Sparkling sugar maintains its color during baking, ensuring a beautiful result.
Always Creating
A friend of mine once said, “You never quit creating, do you?” She was right. Creating in the kitchen makes it so much more fun for me, and adds extra meaning to everything I bake.
These Buttery Sugar Cookies look so fun with the blue sugar sprinkles on top. As I was typing this recipe up, a thought occurred to me to try using turbinado sugar for the top. I hoped it would give the same sweet result while upgrading it to an adult treat. I was right! Using turbinado sugar adds a sophisticated adult flair while keeping the delightful sugar crunch.
Easy Gifting of These Cookies (If You Don’t Eat Them All First)
It would be fun to make these using a #40 (1 ½ T) cookie dough scoop, or even smaller, to make a bunch of little cute cookies. Package them up and add a raffia bow and you’ve got the easiest gift that anyone will love to receive. Play with the colors of sparkling sugar to match any occasion.
I hope your inner child comes out as you make these. I hope you are thrilled with how easy they are to make and how delicious they taste. Let me know in the comments what you think of this Buttery Sugar Cookie!
Products I Love to Use When Making the Buttery Sugar Cookie
A quick, buttery sugar cookie designed for those who are short on time but still want a colorful, tasty treat!
Ingredients
1 C (8 oz) salted butter, slightly softened
1 C (7 oz) white sugar
1 large egg
1 ½ tsp vanilla
½ tsp salt
1 tsp baking powder
2 ⅔ C (12 oz) all-purpose flour
¼ C colored sprinkling sugar, for decorating
Instructions
Preheat oven to 350*F and line cookie sheet with parchment paper.
Cream together butter and white sugar for one minute.
Add egg and vanilla and mix.
Add dry ingredients and mix well.
Pour colored sugar sprinkles onto a plate. Using a #30 (2 ½ T) cookie dough scoop, scoop dough. Carefully take each dough ball and turn it upside down into the sprinkles. Press down to ½ thick, then place on parchment paper, sprinkle side up.
Bake for 8 minutes or until edges barely start to brown.
Let cool before storing. These freeze well.
Notes
Only use coarse or sanding sugar. Other types of sprinkles bleed their color into the cookie and are less pretty.
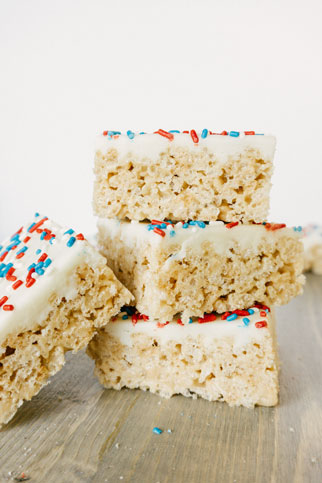
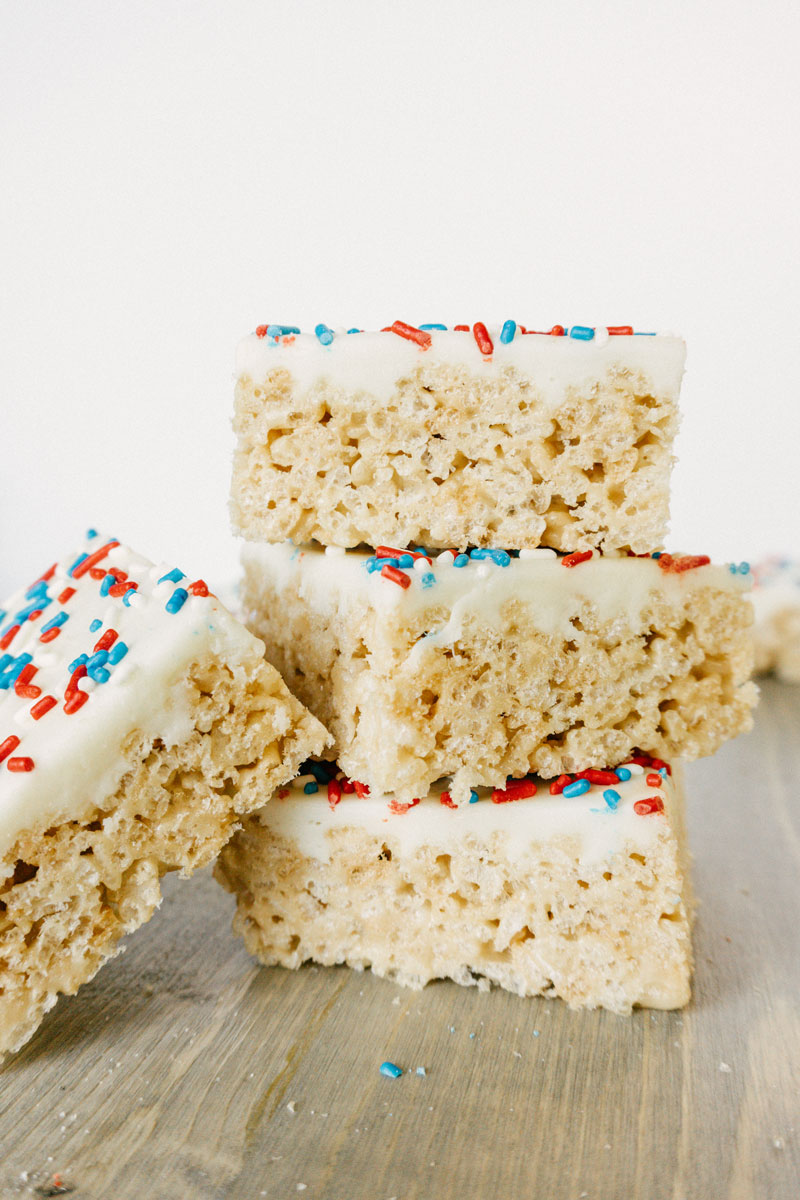
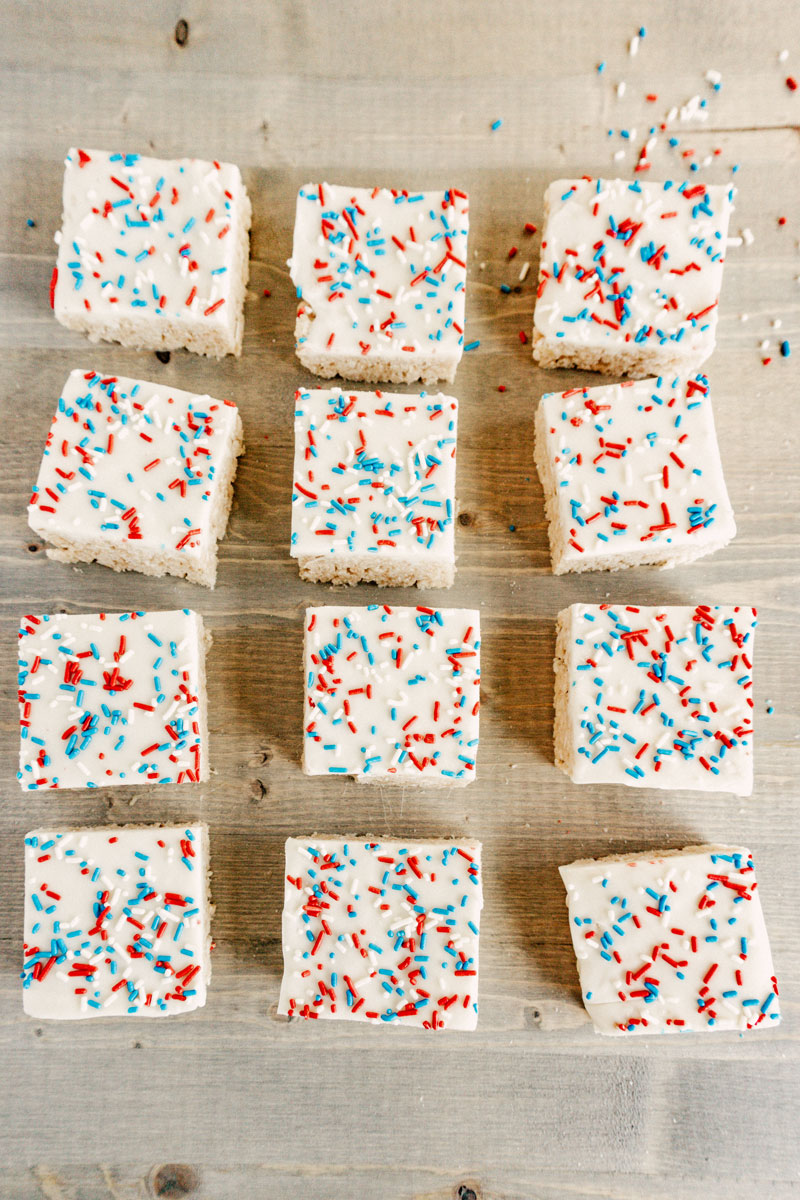
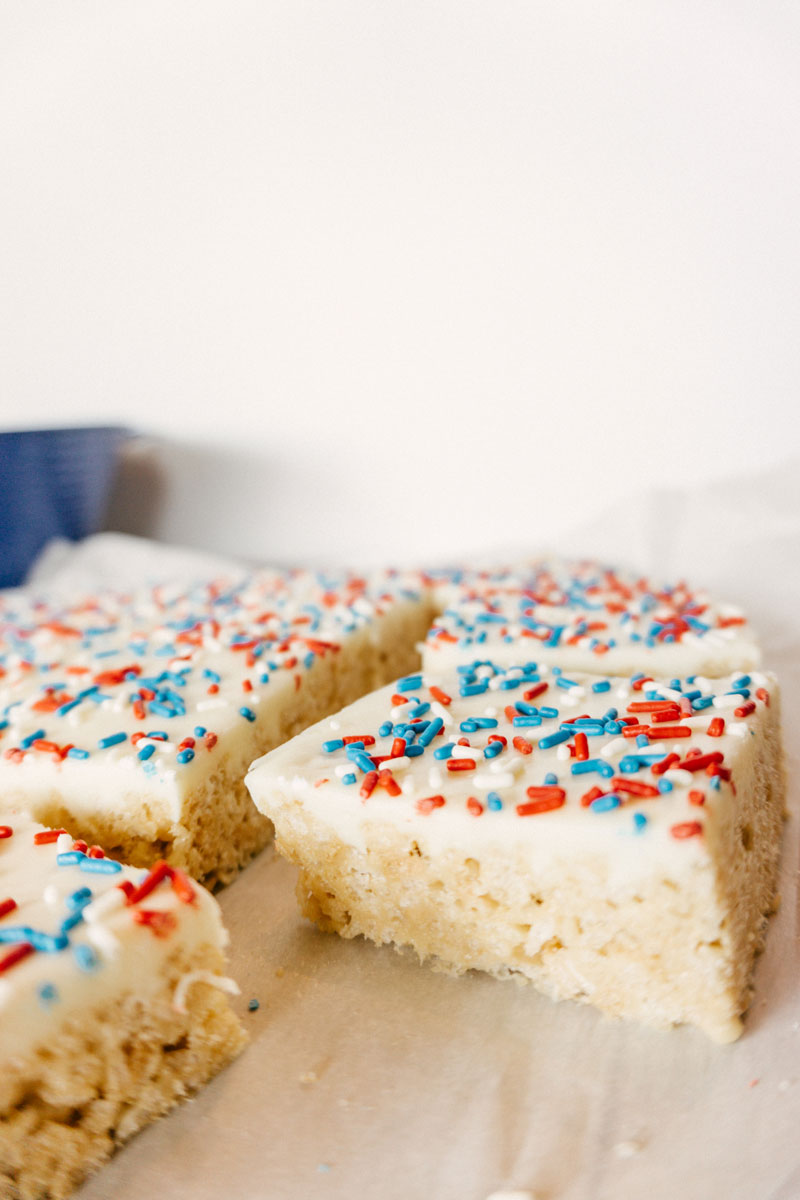
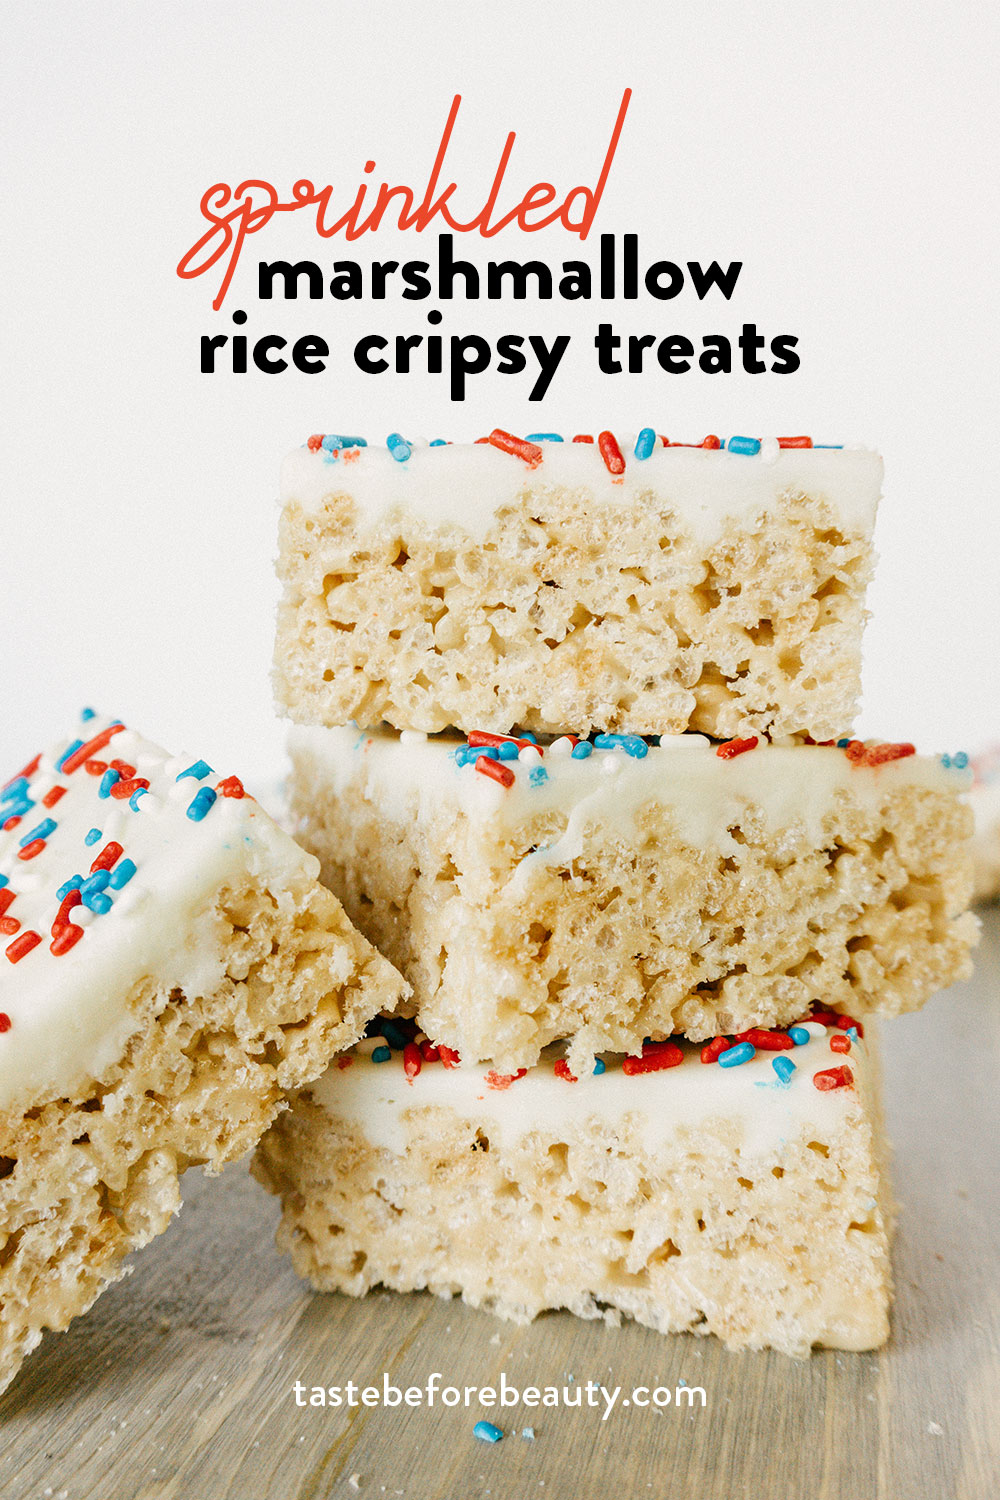
These crispy rice bars have a chewy, marshmallow topping and can be customized with colored sprinkles for any occasion.
During our time in the cookie shop, holidays were the most fun time of all. With the delicious scents of cookies baking all around us, the creative juices flowed constantly. Motivated by the wild success of the Peanut Butter Chocolate Crispy Rice Bar, we couldn’t help but wonder what else a simple Crispy Rice Bar could be transformed into. I developed a sweet, chewy marshmallow and white chocolate topping for these bars that acts as a blank slate for endless combinations of decorations.
From there, it was a fun exploration into colored sprinkle and cookie cutter combinations. For Christmas, we used stars, candy cane, and tree-shaped cookie cutters with red and green sprinkles. You could transform these into an easy Valentine’s Day treat by using a heart shape cutter and topping with red, pink, and white sprinkles. To turn these into an elegant, more grown-up treat, simply place a cup of white chocolate wafers into a plastic bag and use your kitchen hammer (if you don’t have one I’m telling you to go get one. You’ll use it more often than you think) to smash them into pieces.
Please do note that sturdy cookie cutters work best for this. The thin ones often have trouble pressing through the crispy bar.
I use a 16-quart stockpot to stir it all together. You know those giant drums they use for kettle corn at theme parks? A big drum keeps the popcorn inside and helps coat it evenly in the syrup mixture. The giant pot principle is the same here and much more helpful to this recipe if you have a stockpot to use instead of two big bowls. You won’t have dry rice cereal escaping to every corner of the kitchen and the whole process will be sped up. Once I pour the marshmallow mix over the cereal, I just use a long wooden spoon to stir while holding the pot at about a 45-degree angle. I’ve also found that a straight edge plastic dough scraper is the easiest tool to use to make sure you scrape all the delicious marshmallow and cereal pieces off the sides of the pot.
Once you’ve mixed the marshmallow mixture into the crispy rice cereal and pressed it into the pans, the fun part starts! Pressing the white chocolate mixture on top is a bit like playing with playdough, except that it smells and tastes great! If you are using sprinkles, spread them on top right away. If the white chocolate cools too much, the sprinkles won’t stick.
Once they have cooled completely, cut into whatever shapes you desire. Wrap in plastic wrap to make them easy to share. Store in an airtight container. These have a shelf-life of two weeks in the refrigerator and three months if stored in the freezer. To serve, let come to room temperature and unwrap. If layering on a tray, place wax paper between the layers to prevent sticking.
When you make these, please share your color and shape combinations. We love to see your creativity. Comment or tag us on Instagram!
Marshmallow Sprinkle Crispy Rice Bars
Yield: 70 2x2 inch bars
These crispy rice bars have a chewy, marshmallow topping and can be customized with colored sprinkles for any occasion.
Ingredients
Crispy Rice Bars
1 C (8 oz) salted butter
2 C (16 oz) light brown sugar
1 scant C (11 oz) light corn syrup
5 C (10 oz) mini marshmallows
15 C (18 oz) crisp rice cereal
Marshmallow Topping
3 C (18 oz) white chocolate melting wafers
6 ½ C (12 oz) mini marshmallows
3 T heavy cream
Sprinkles
Any color, shape, or size
Instructions
Make the Crispy Rice Bars.
Prepare two pans (see note) by lining with parchment paper. Pour cereal into two big bowls or one 16 quart stockpot for mixing later.
In a large saucepan, melt butter, brown sugar, and corn syrup together and bring to a boil. Stir constantly. Remove from heat and add mini marshmallows. Stir until melted and combined. Pour over cereal and stir to coat. Press into pans using plastic gloved hands or a rubber spatula.
Make the Marshmallow Topping.
Melt marshmallows, white chocolate, and cream together in the microwave. The texture will be similar to play-dough. Quickly top crispy bars with balls of white chocolate mixture and press to edges with plastic gloved hands. Sprinkle immediately with desired sprinkles.
Let cool and cut to serve. Wrap in plastic wrap and place in an air-tight container to store. These last up to two weeks if stored in the refrigerator.
Notes
We recommend using one 11x15 pan and one 10x10 or 9x13 pan to press the bars into, or two 11x15 pans for thinner cut-outs when using cookie cutters.
These can be cut into fun, holiday shapes using a sturdy cookie cutter.
Hi, I’m Missy. Welcome to Taste Before Beauty. For 28 years I’ve been developing recipes that taste delicious, before they look delicious.