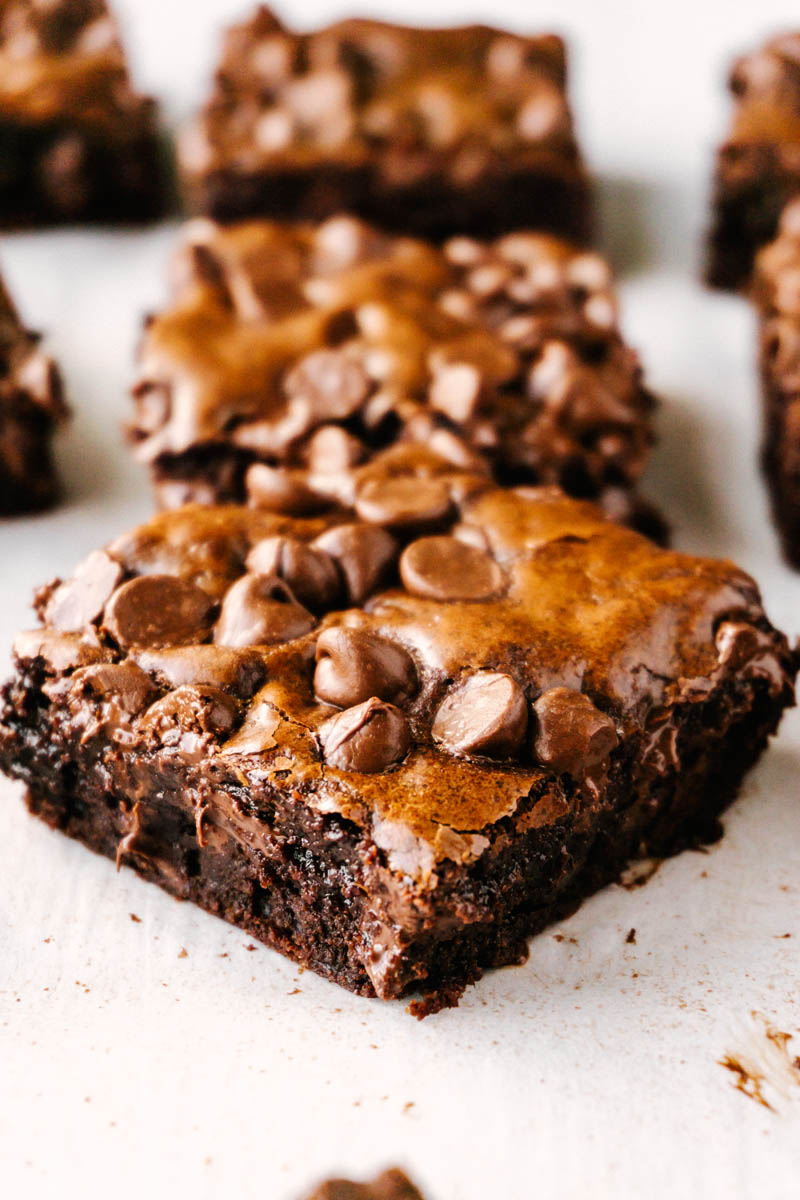
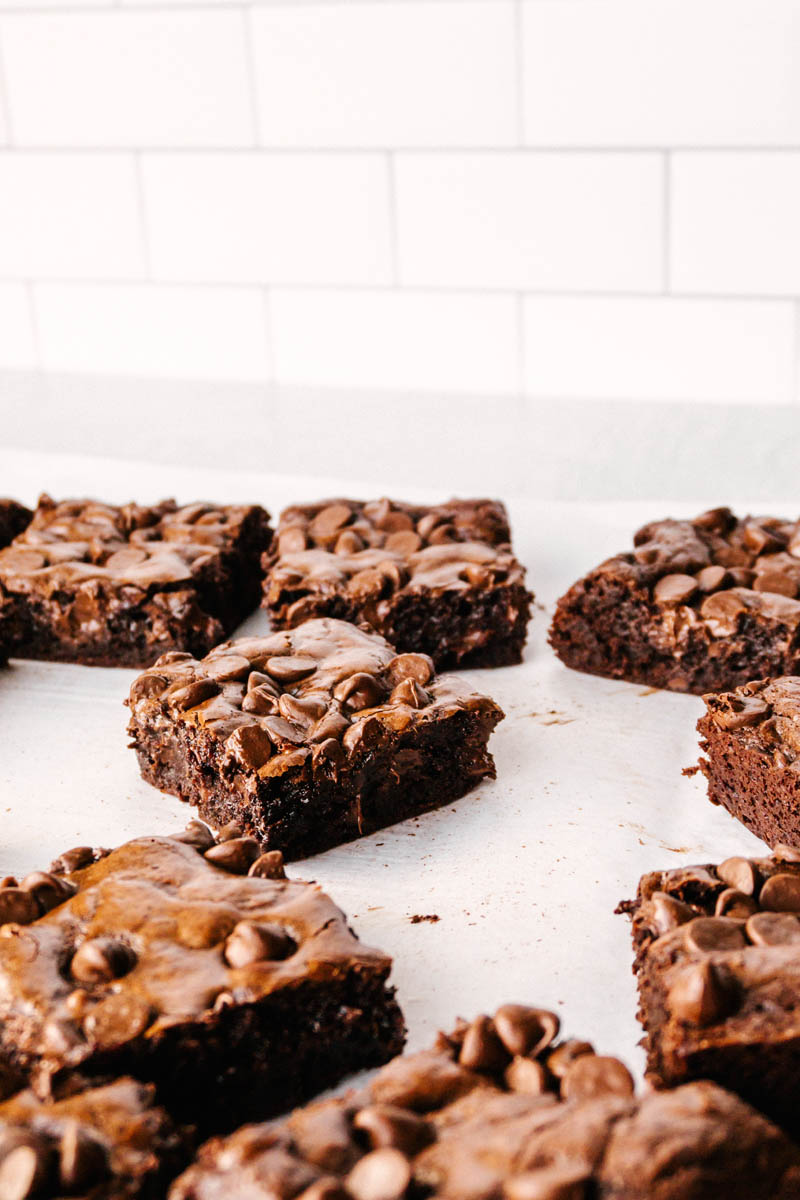
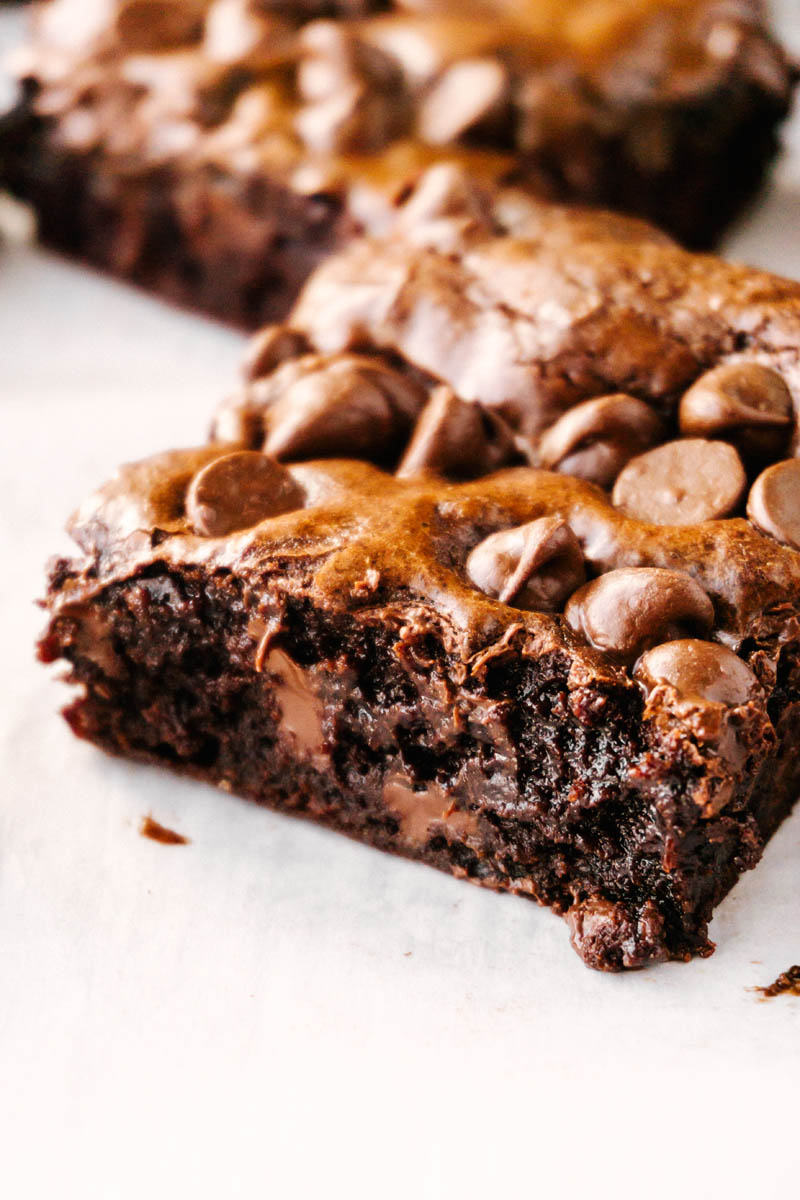
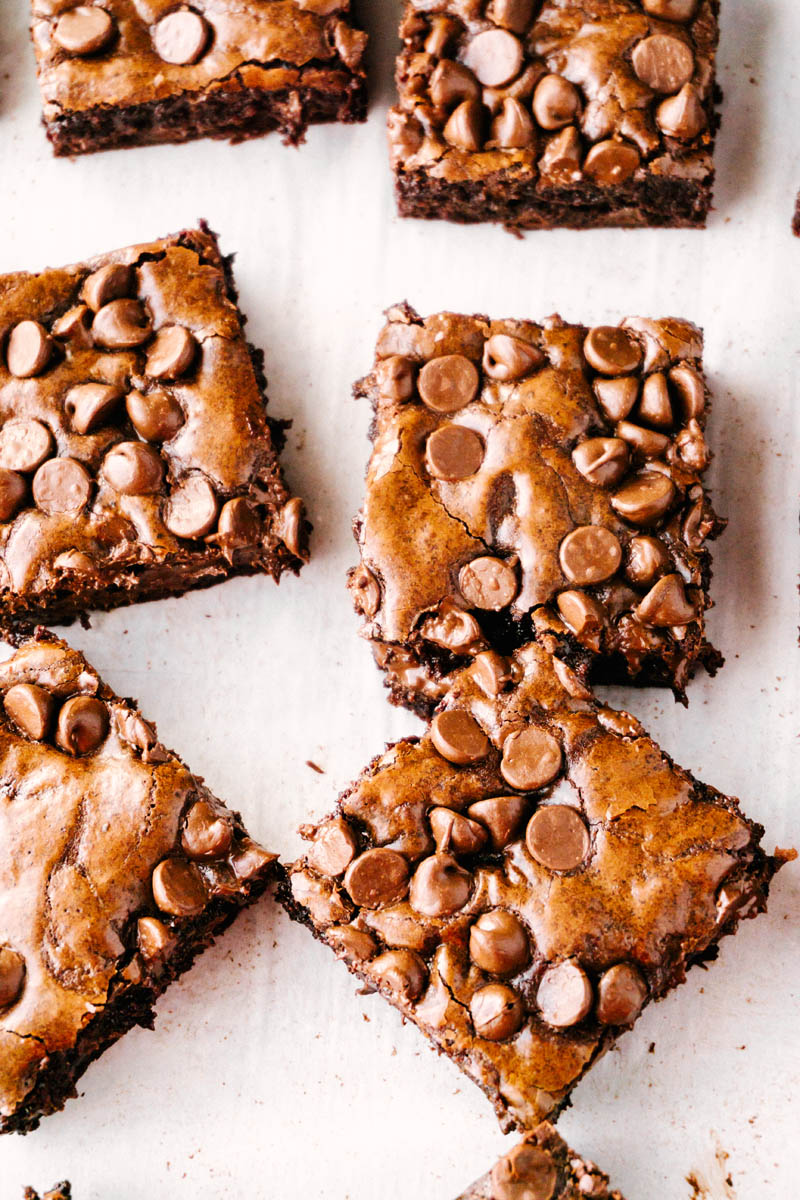
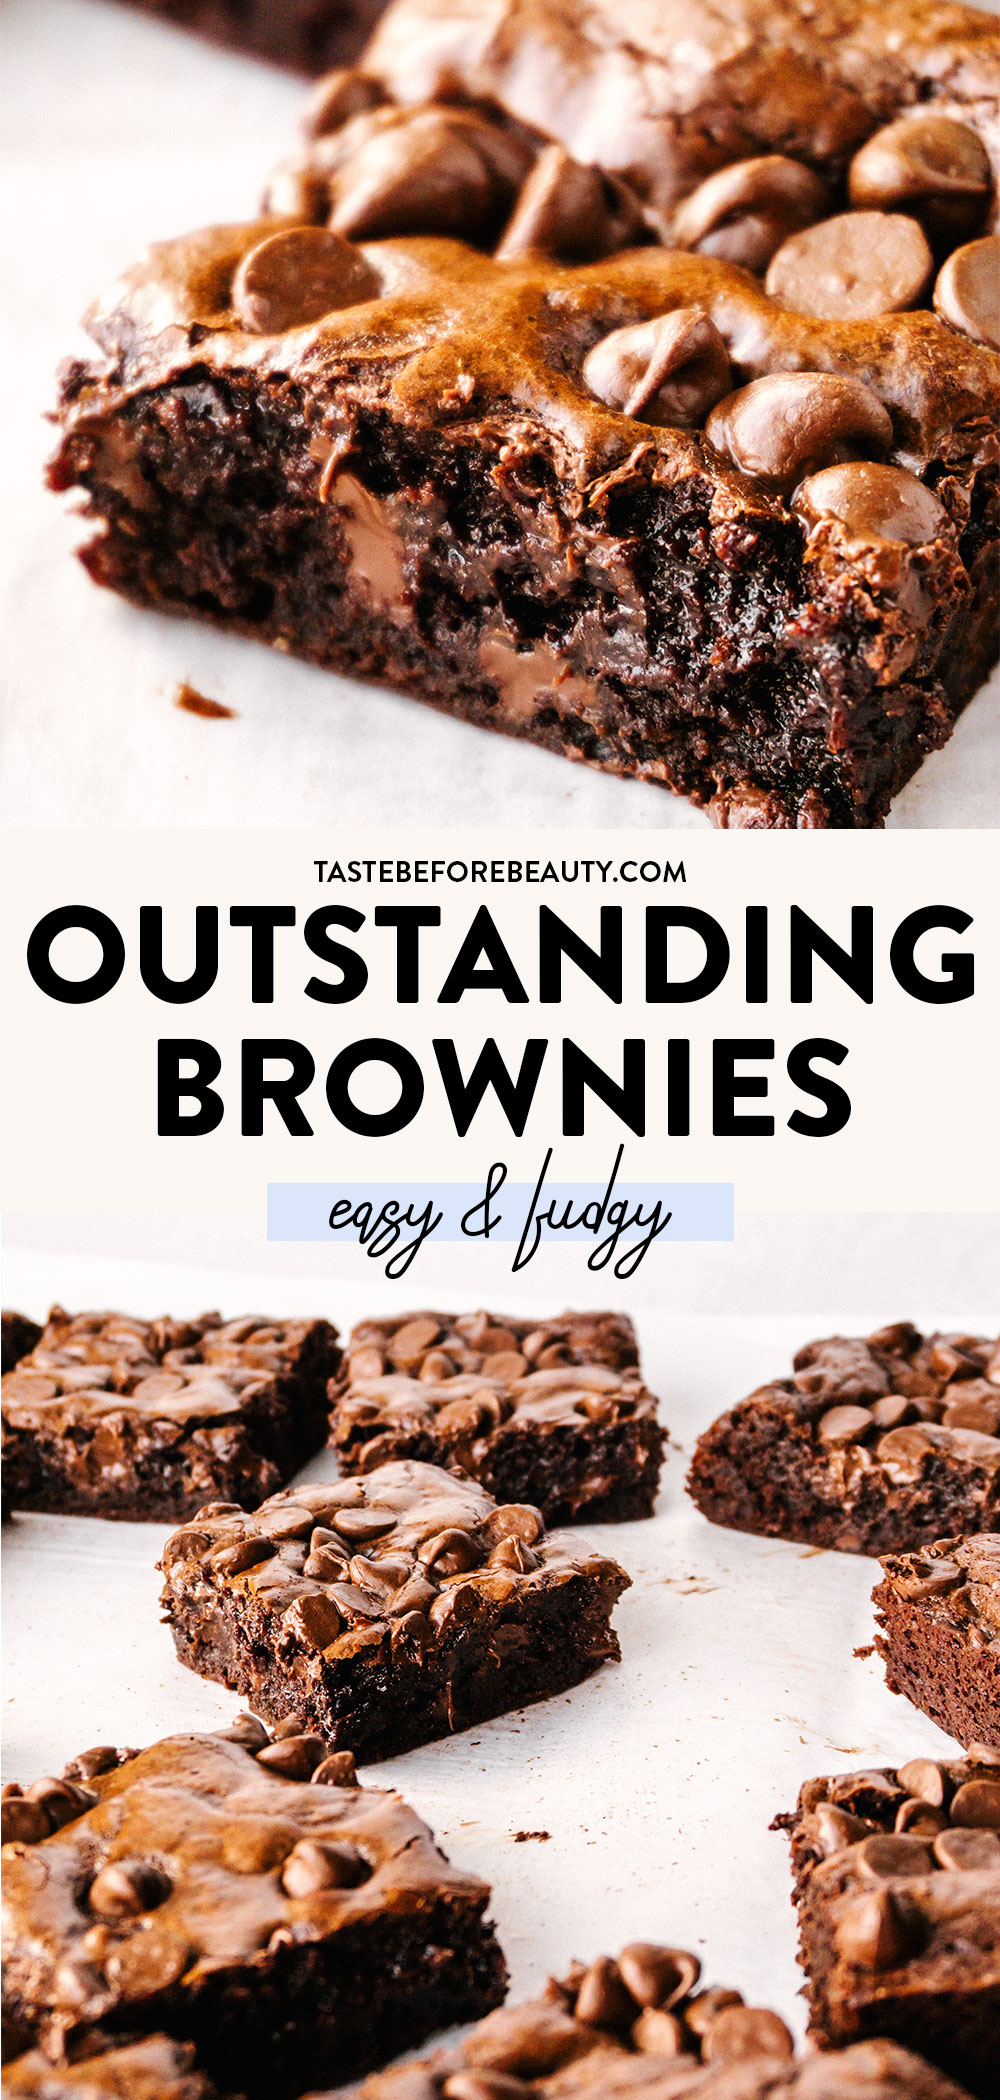
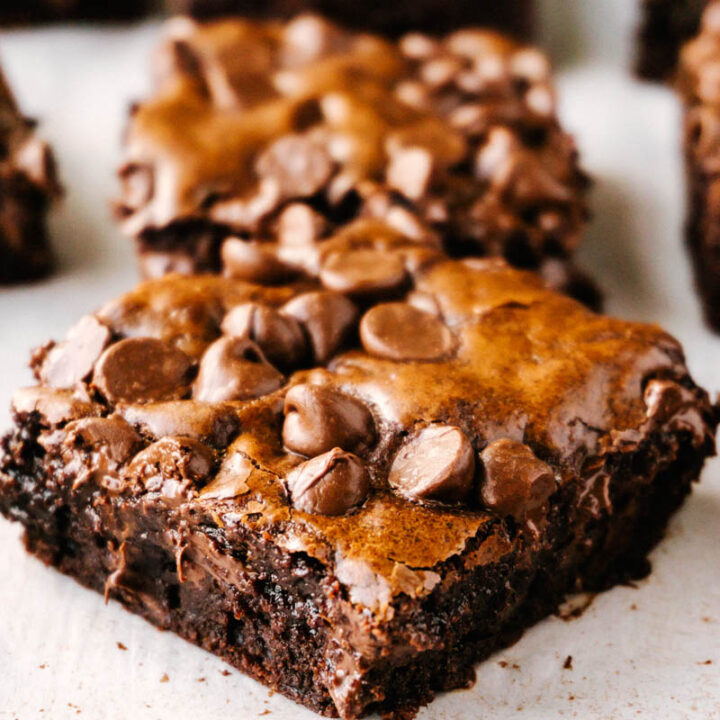
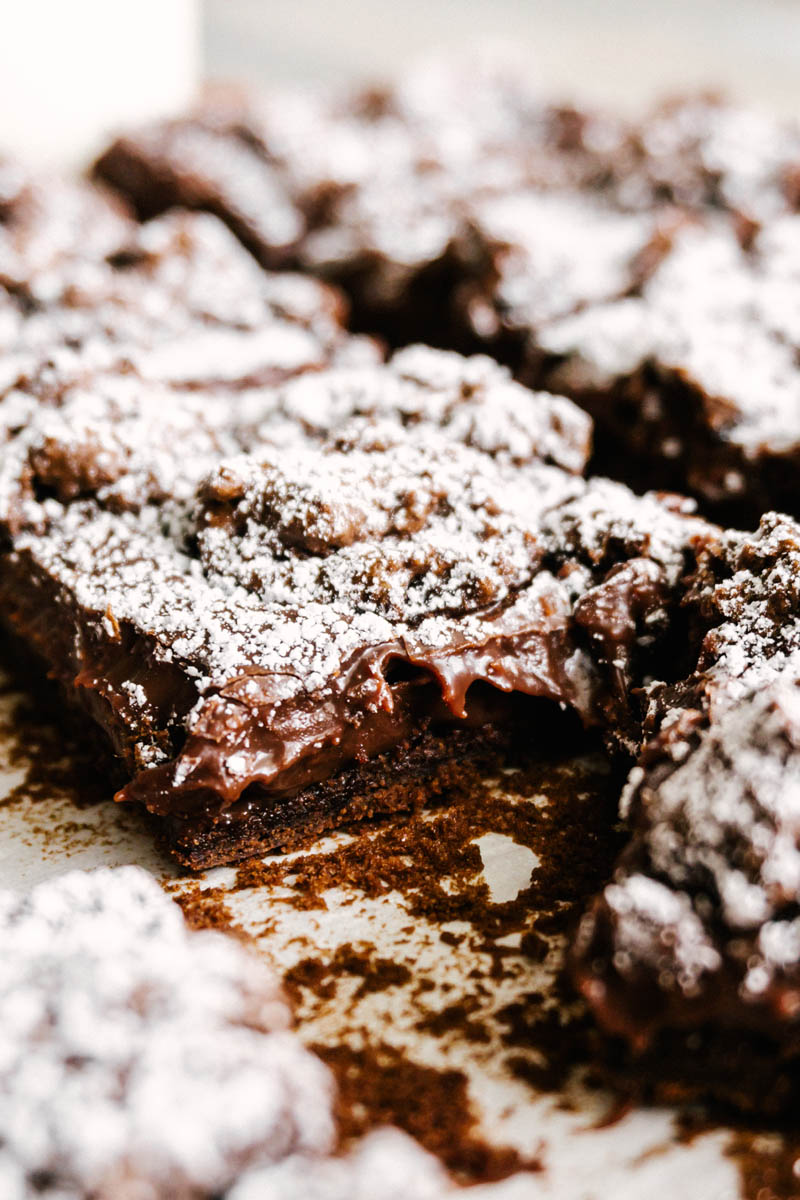
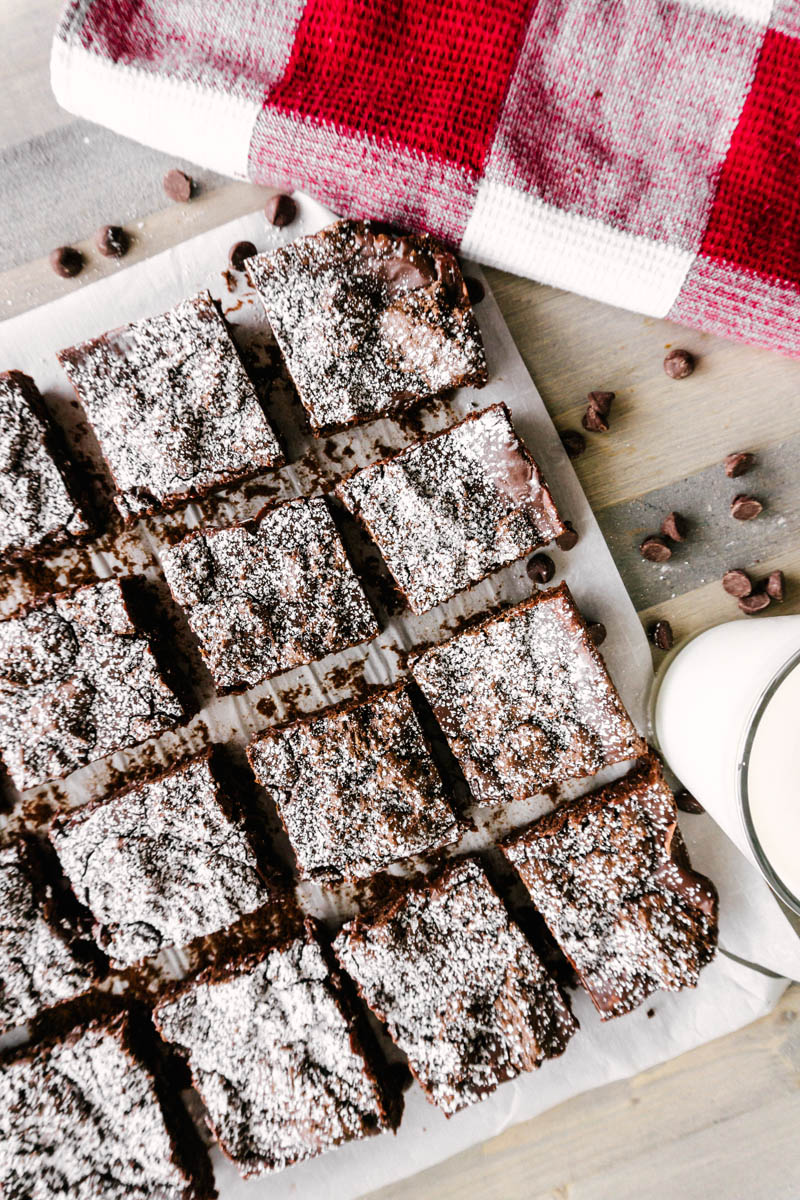
They’re not called “Outstanding Brownies” for nothing! A crinkly top hides a fudgy interior packed with rich cocoa and melty chocolate chips. You’ll definitely need a glass of milk with these.
Subtle Changes Matter
I have made many brownies. Not every brownie handles mix-ins, like chocolate chips, or a frosting on top, or is able to be a stand-alone brownie. Brownie recipes are generally simple and always a favorite for bakers of any skill and experience level.
But, due to their simplicity, brownies can easily be overbaked, overmixed, and underwhelmed by an improper balance of ingredients. I have spent many years of hard work developing a variety of brownie batters for every occasion. Just a few subtle changes make for a stellar brownie. These Outstanding Brownies are a shining star.
A Brownie For Every Occasion
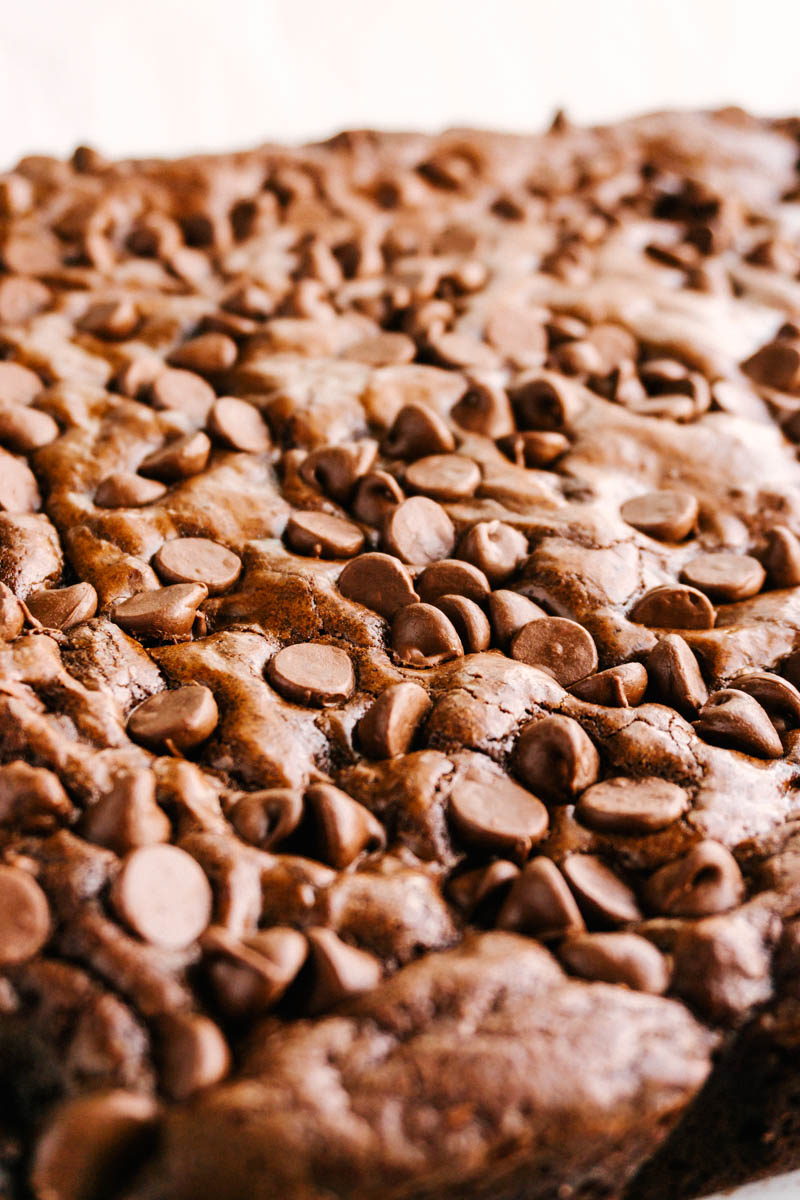
If you want a moist brownie that begs to be topped with marshmallows and frosting, try this Frosted Marshmallow Brownie. If you’re craving the irresistible pairing of chocolate and mint, try these Fudgy Mint Brownies. If you want a beautiful, crackly top homemade brownie, you are in the right place!
Looking to take these Outstanding Brownies to the next level? Kenzie recently created a Raspberry Cheesecake Brownie that will knock your socks off!
Better Than Boxed
All of the testing I have done on brownies has been fun. It doesn’t take expensive melted chocolate to make a great brownie. It’s easier to make using regular cocoa and cheaper, too. These are just as easy as a boxed brownie mix but so much better tasting. All you need is one mixing bowl and a sturdy spoon. Learning to use the right recipe with the right ingredients will get your chewy, fudgy brownie recipes to match your craving needs.
I would happily bring any (and every) brownie recipe on Taste Before Beauty to any event. Serve them in a white cupcake liner and they become gourmet. Making them all would make a great brownie table at a wedding – yes, they are that delicious!
Recipe Ingredients
Butter – Adds warmth to the brownie flavor.
Vegetable Oil – Keeps the cookie fudgy and chewy. Using only butter would lend to a more cake-like texture.
Cocoa – The star of the show. It has amazing thickening powers and with the right balance, you don’t need much flour.
White and Brown Sugar – White sugar helps the brownie spread and dissolve in the butter for a shiny finish. Brown sugar deepens the flavor of the brownie.
Powdered Sugar – Has a tendency to become a thickening agent. Including this type of sugar helps the crackle top and decreases the amount of flour needed to really increase that chocolate flavor.
This brownie doesn’t need much – the chocolate chips make it complete and then some. It’s great alone or in a brownie sundae!
Looking for more delicious brownie recipes? Try these:
They're not called the “Outstanding Brownies” for nothing! A crinkly top hides a fudgy interior packed with rich cocoa and melty chocolate chips. You’ll definitely need a glass of milk with these.
Ingredients
½ C (4 oz) salted butter, melted
½ C (3.8 oz) vegetable oil
1 ½ C (8 oz) powdered sugar
½ + 2 T (5 oz) brown sugar
¼ C + 2 tsp (2 oz) white sugar
1 C (3.6 oz) cocoa
4 large eggs
1 tsp vanilla
1 tsp salt
1 tsp baking powder
1 C + 2 T (5.5 oz) all-purpose flour
2 C (12 oz) semi-sweet chocolate chips, divided
Instructions
Preheat oven to 350*F.
Line 10x10 or 9x13 pan with parchment paper and lightly spray with nonstick cooking spray.
Melt butter. Add white and brown sugars, and stir for 2 minutes to help dissolve the sugars a bit. This is important for the crackly top finish.
Add oil, powdered sugar, and cocoa. Stir until combined.
Add eggs, vanilla, and salt. Stir until combined.
Add flour, baking powder, and 1 ¼ C (8 oz) semi-sweet chocolate chips to the wet ingredients. Stir until all is combined.
Pour into prepared 10x10 or 9x13 pan. Sprinkle reserved ¾ C (4 oz) chocolate chips over the top.
Bake for 25-30 minutes or until brownie is set.
Remove from oven and let cool completely. Cut to serve.
Notes
The sugars are not fully dissolved when stirred into the butter and oil, but it starts the process. Stirring the white and brown sugar into the butter is an important step for that crackle finish.
I prefer imitation vanilla in a brownie. The cocoa takes center stage and imitation vanilla acts in a supporting role to round out the flavor of the dessert.
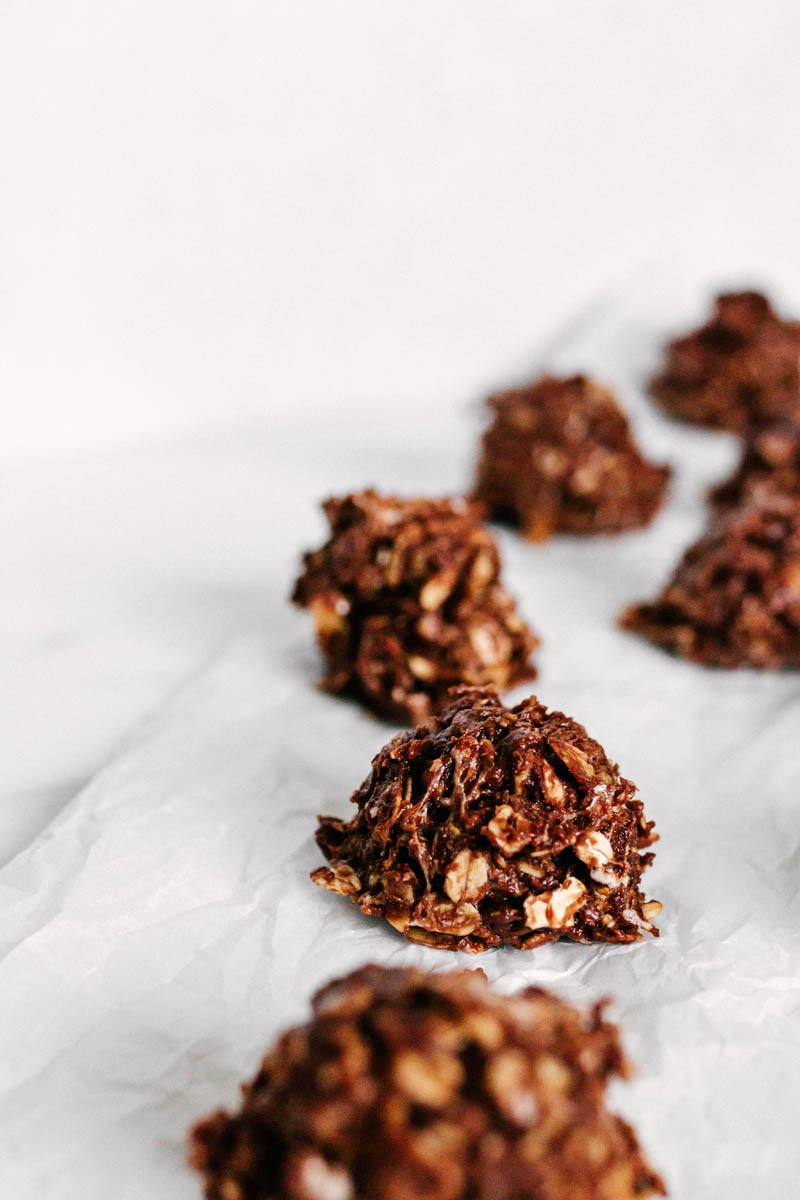
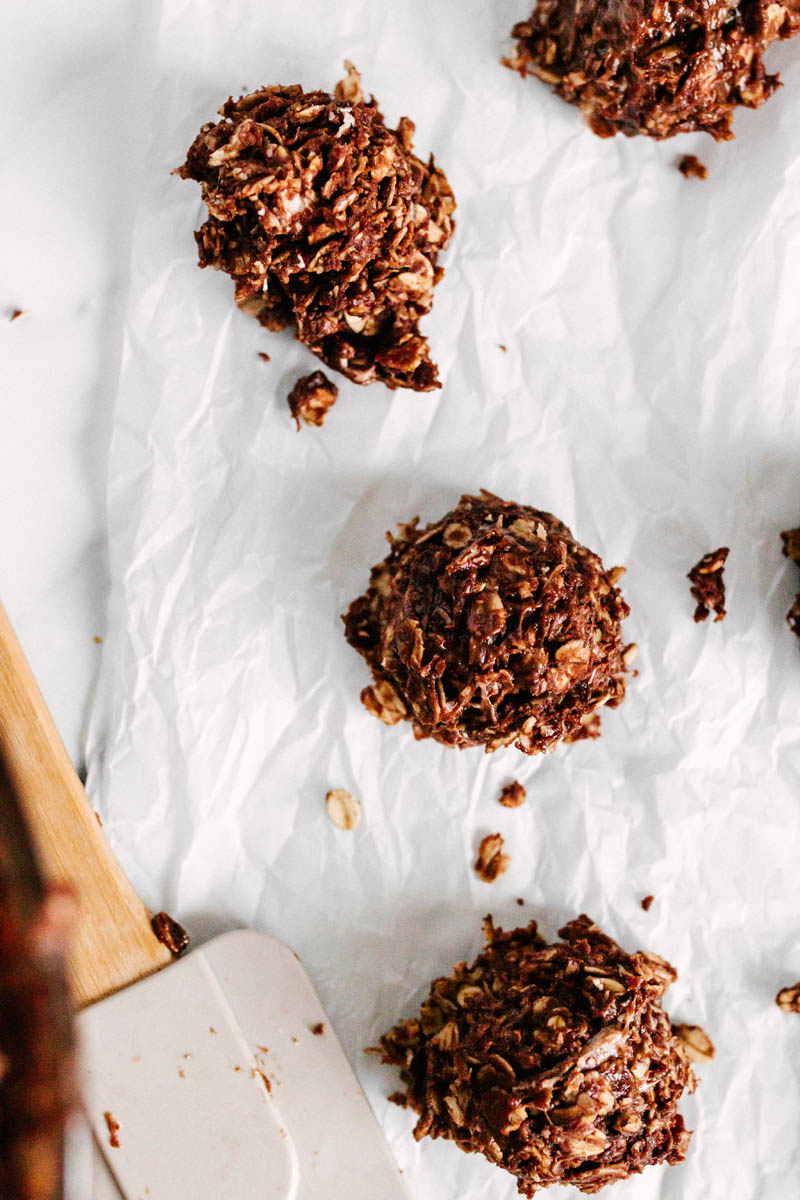
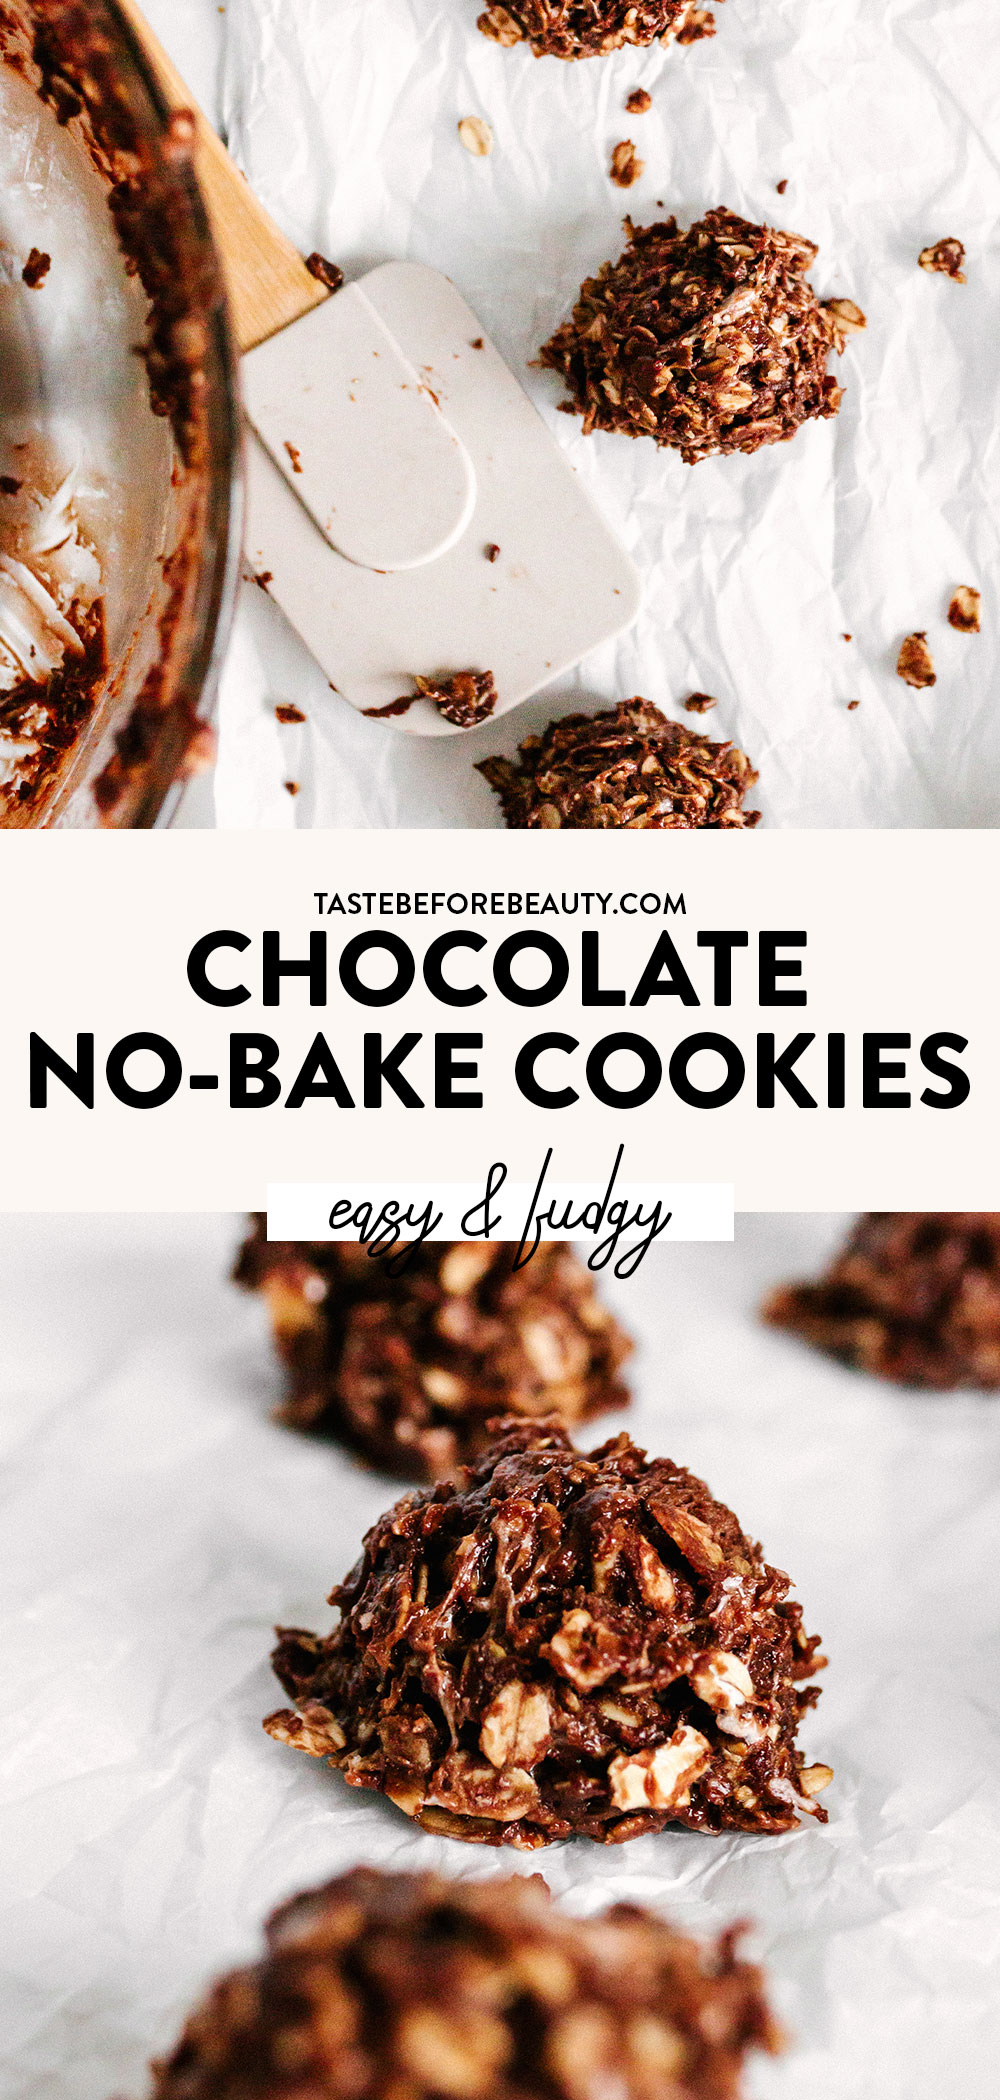
Although these Chocolate No-Bake Cookies don’t have any peanut butter, you’ll only complain until you take a bite. Then you’ll taste those rich, fudgy notes that peanut butter normally hides, and you’ll be sold!
About the Chocolate No Bake Cookies
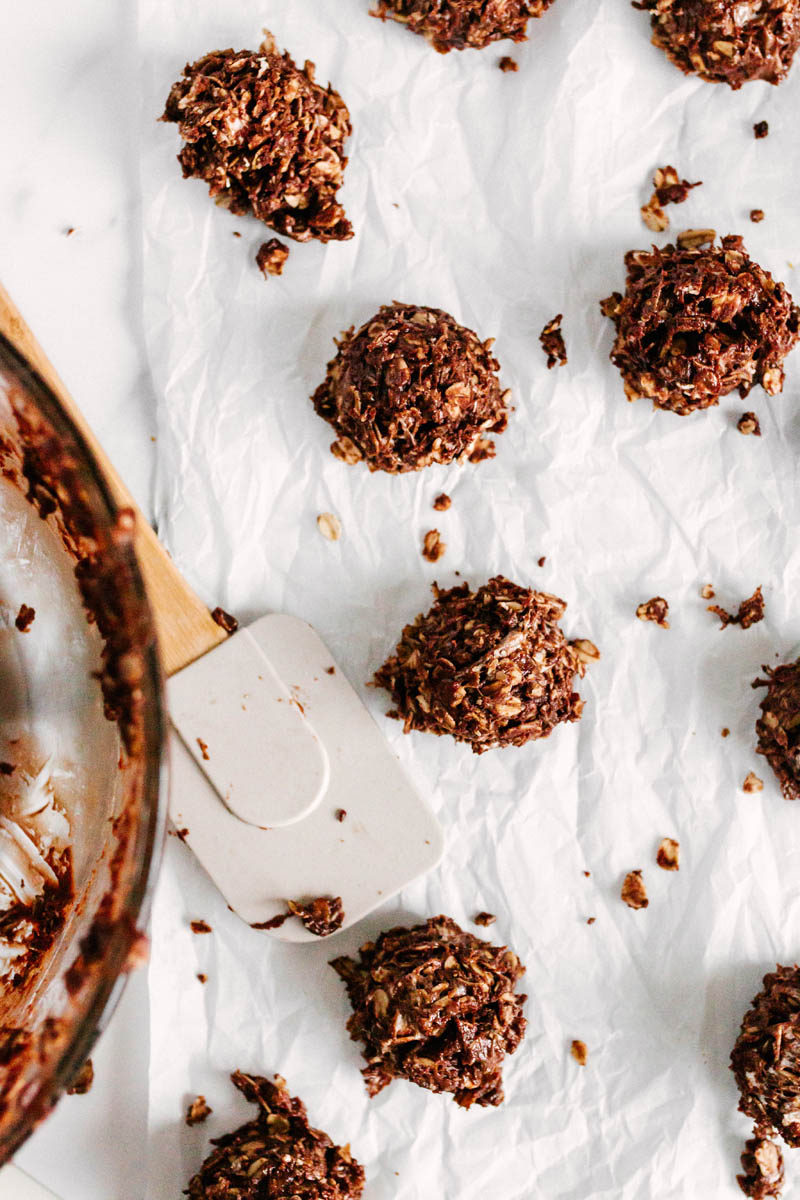
A classic no-bake cookie is the perfect quick and easy sweet treat for any event… and especially the best event of all: midnight snacks! These no bake chocolate cookies are my guilty pleasure, and I love to make and enjoy them at night when I’m feeling peckish for something sweet and chocolatey.
Many no-bake cookies out there have creamy peanut butter with them, but we love these sans peanut butter! These are the BEST chocolate no bake cookies without peanut butter! We know you’ll be obsessed with these as much as we are. These are definitely a late-night hit here in my household and with friends and family.
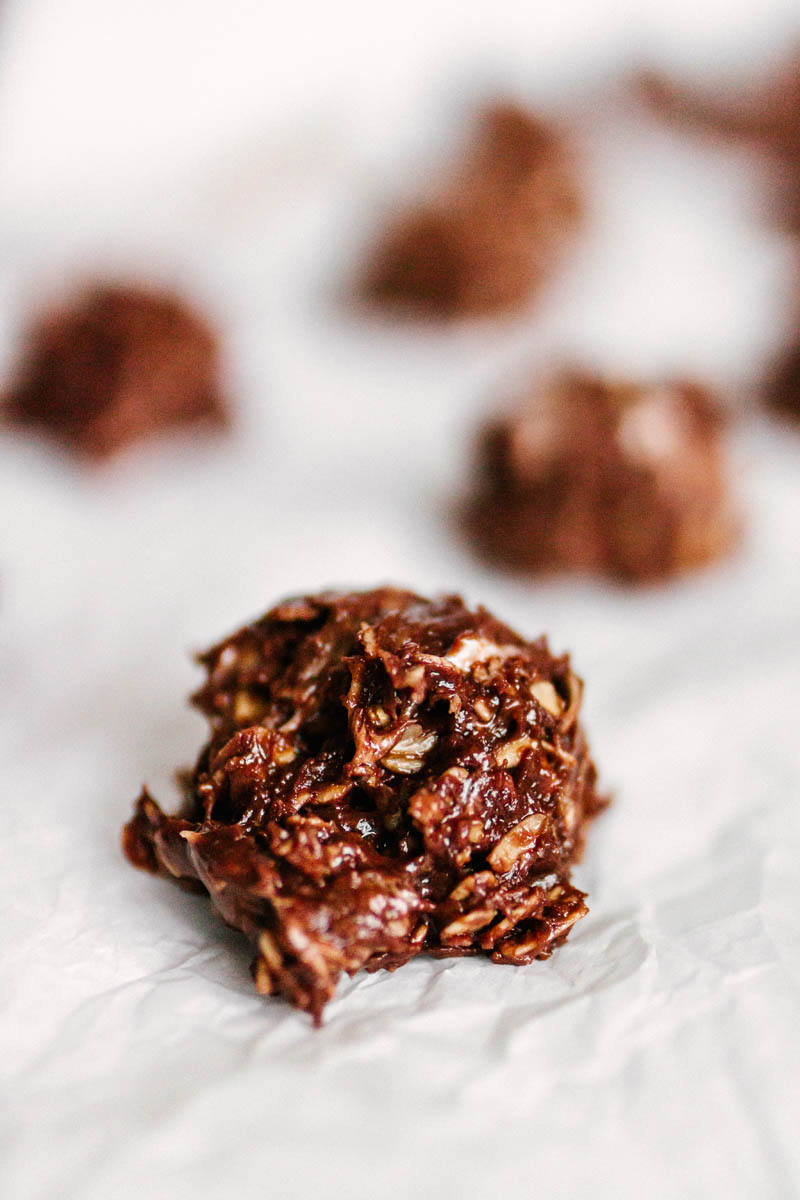
Ooey gooey marshmallows set into the chocolate and oats for perfect texture and delicious chocolate no-bake cookies!
Chocolate No-Bake Cookies Ingredients
Cocoa – We love to use Hershey’s cocoa. It tastes great and you can find it anywhere. Plus, we have a thing for Hershey products as we are from Hershey, PA!
Semi-Sweet Chocolate Chips – We LOVE semi-sweet chocolate chips in this chocolate no-bake cookies recipe! Feel free to use milk or dark if you aren’t a fan of semi-sweet, but we are sure you’ll love the taste.
Marshmallows – It might seem counterintuitive to add sweet marshmallows to a sweet cookie, but they lighten up the cookie and add a fluffy mallow texture that is amazing to this chocolate no bake cookie recipe
Rolled Oats – We use old fashioned oats in this recipe, and it helps create a good chew.
Chocolate No-Bake Cookies Tip
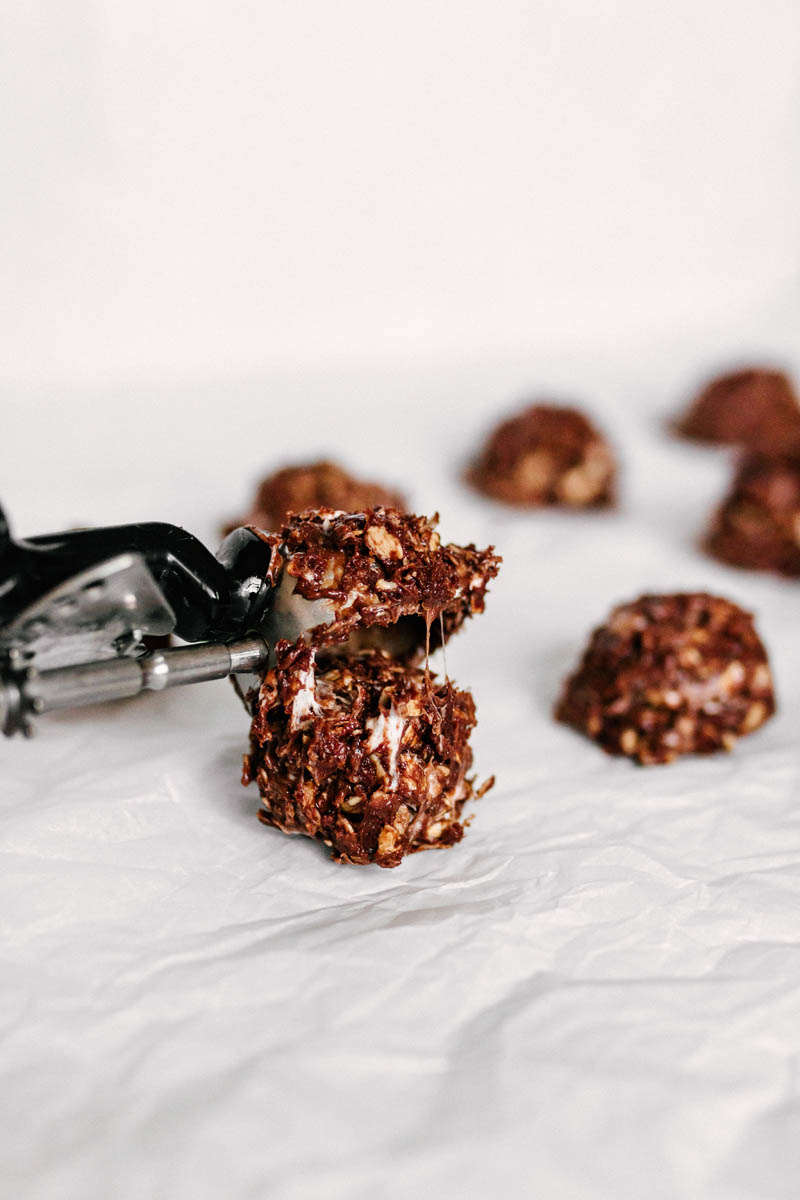
These cookies will set faster if put in the fridge, but they will set up nicely outside of the fridge. They take at least 30-45 minutes to set up. We love them when they are still warm and slightly gooey, so we choose to let them set on our counter.
Chocolate No-Bake Cookies Instructions
Grab a heat-safe bowl and place the oats in the bowl.
In a microwave-safe dish, melt the butter. Pour the melted butter into a cold saucepot.
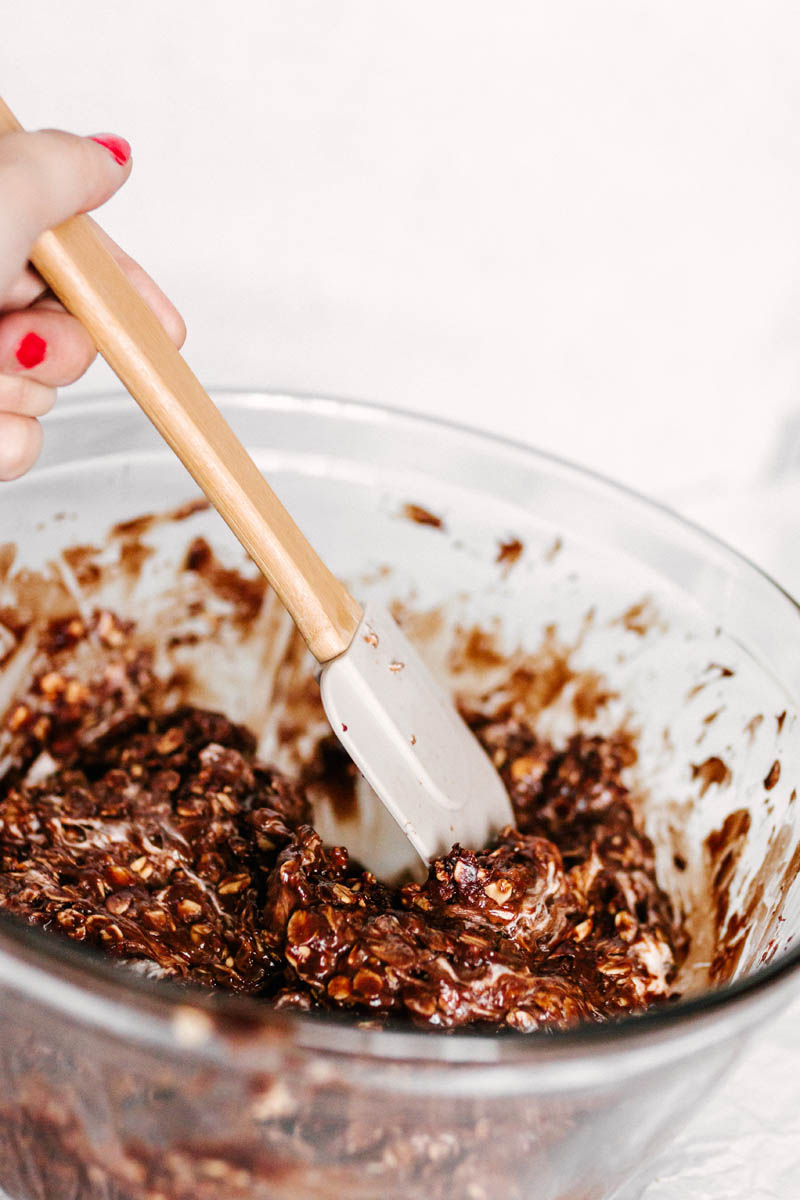
Add corn syrup, sugar, salt, cocoa, and eggs. Turn on the heat and bring the mixture to a rolling boil, stirring constantly. Boil for 2 minutes.
Remove the pot from the heat and stir in the chocolate chips. Pour the mixture over the old fashioned rolled oats and stir to combine. When combined, add the mini marshmallows and fold them in.
Drop the cookie dough immediately onto wax or parchment paper by large tablespoons.
Let the cookies set for 30-45 minutes on the counter or in the fridge.
To store, put them in an airtight container.
We hope you love these easy and delicious chocolate no-bake cookies as much as we do!
Looking for more delicious chocolate recipes? Try these:
Although these Chocolate No-Bake Cookies don’t have any peanut butter, you’ll only complain until you take a bite. Then you’ll taste those rich, fudgy notes that peanut butter normally hides, and you’ll be sold!
Ingredients
¾ C (6 oz) butter, melted
2 T corn syrup
1 ½ C (10.5 oz) white sugar
¼ t salt
2 large eggs
1 t vanilla
¼ C (0.9 oz) cocoa
½ C (3 oz) semi-sweet chocolate chips
3 C (10.2 oz) oats
2 ½ C (5 oz) mini marshmallows
Instructions
Place the oats into a heat-safe bowl.
Melt butter in the microwave. Pour melted butter into a cold saucepot. Add corn syrup, sugar, salt, cocoa, and eggs. Turn on the heat and bring to a boil, stirring constantly. Boil for 2 minutes.
Remove from heat and stir in chocolate chips and vanilla. Pour over oats and combine. When combined, add the mini marshmallows and fold in.
Drop immediately onto wax paper by large tablespoons.
Let set for 30-45 minutes on the counter or in the fridge.
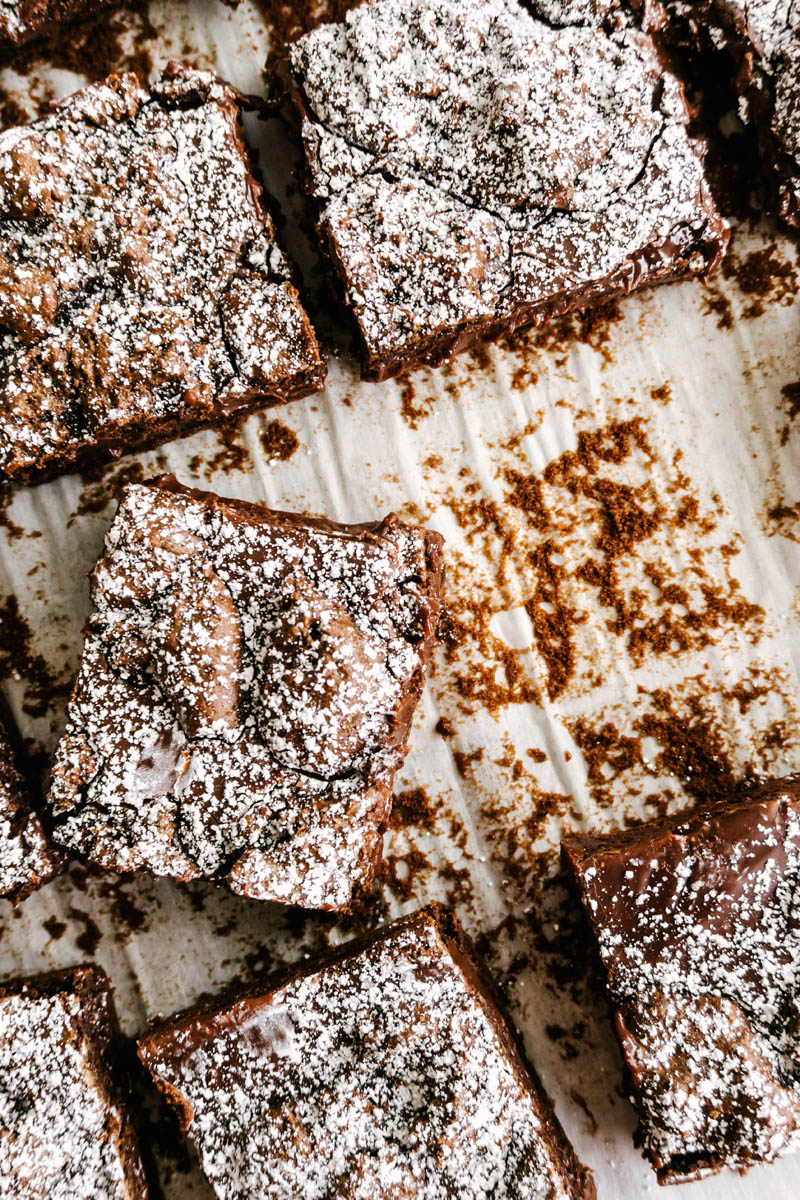
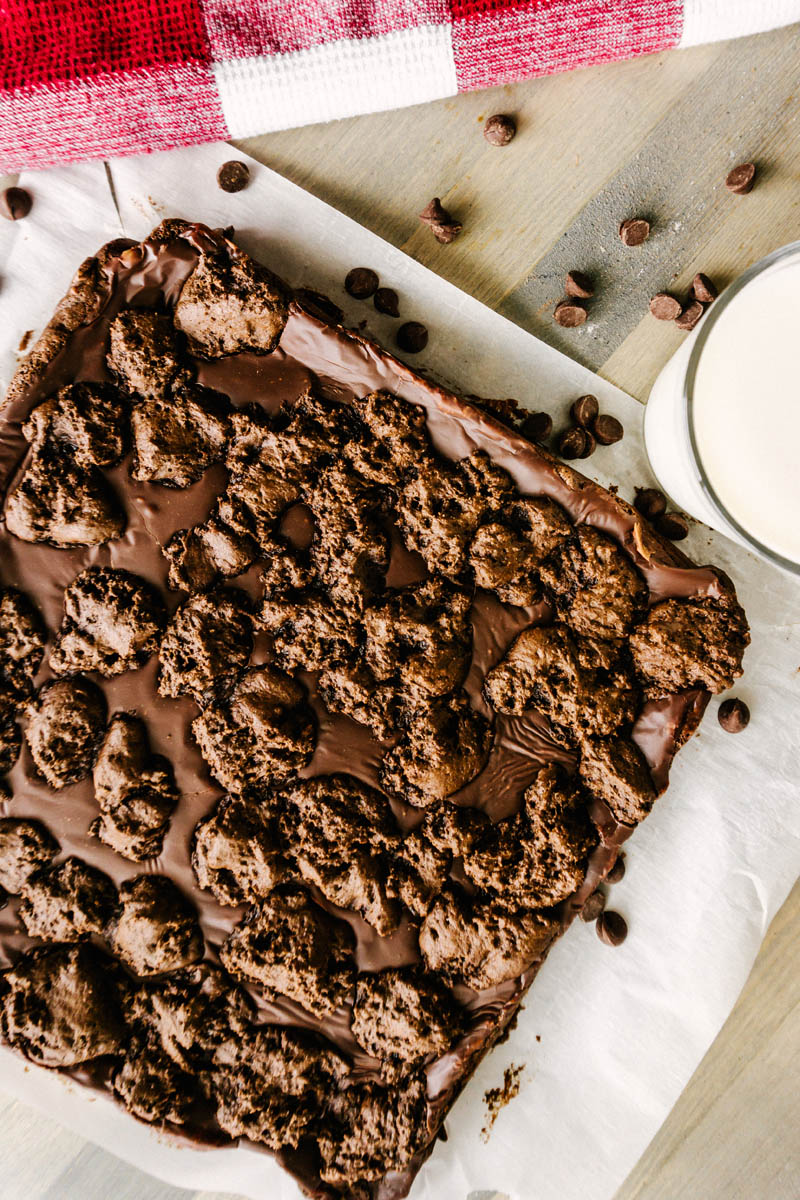
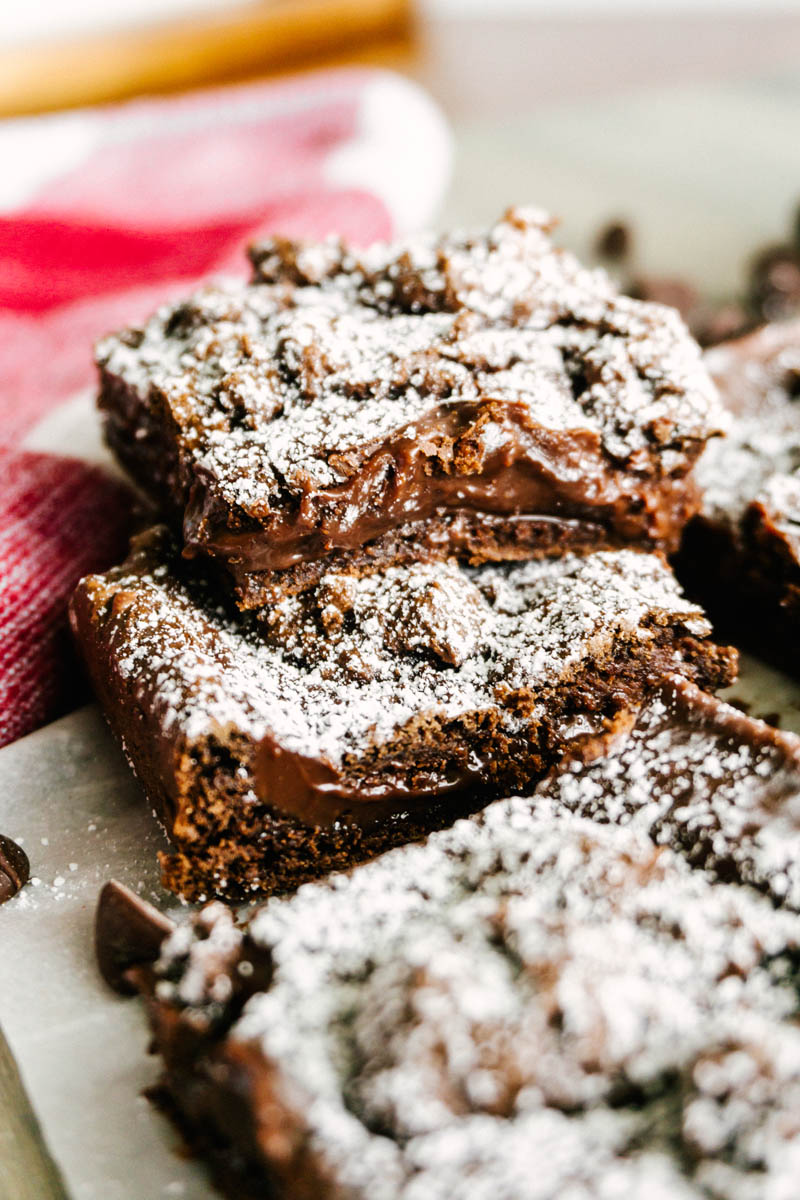
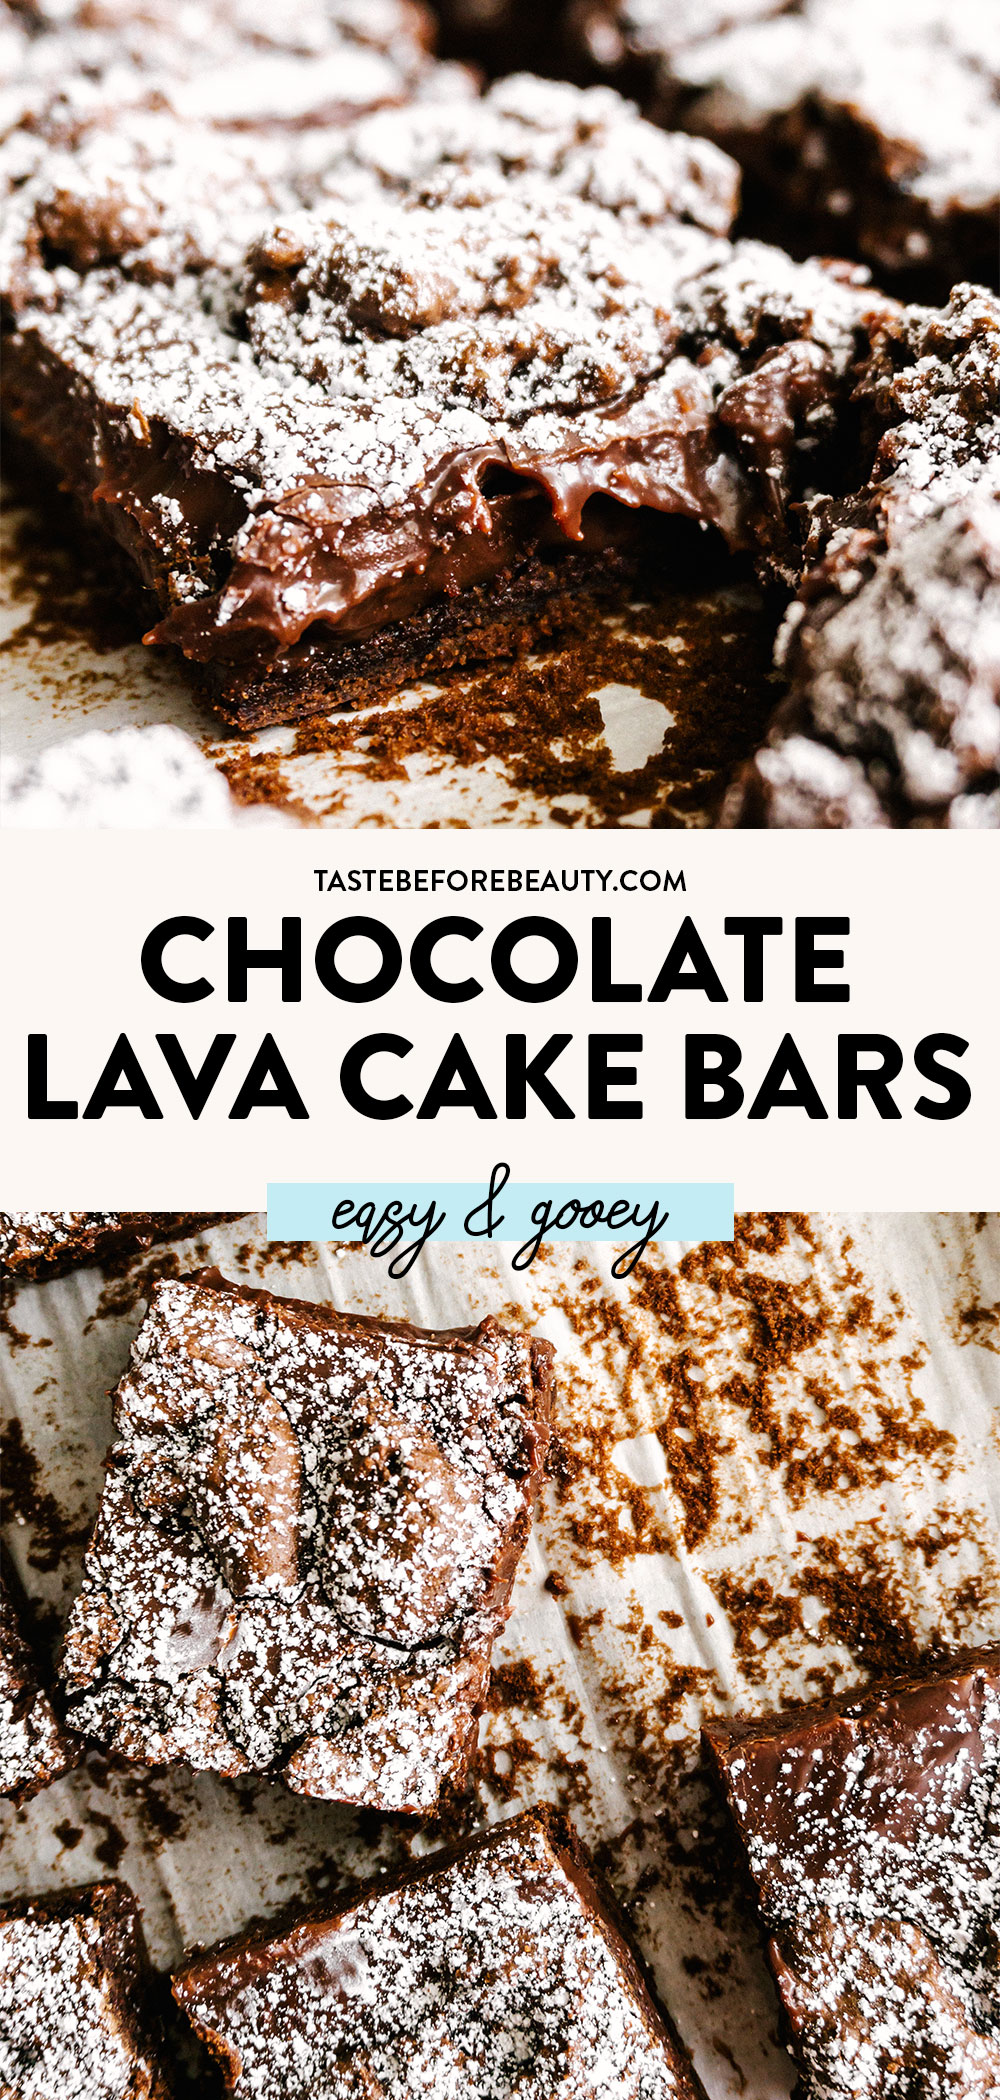
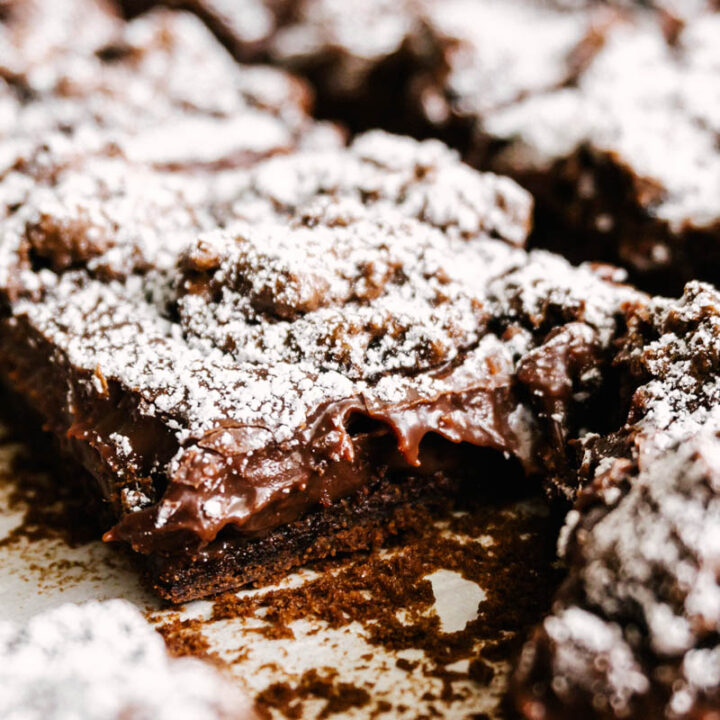
No need to peek inside a volcano when you can make these rich, gooey, chocolate lava cake bars. A unique twist on a decadent dessert that will have you saying “I lava these!”
Who Needs To Be Rich When You Can Eat Rich?
These chocolate lava cake bars are worth their weight in gold! With a silky chocolate layer in between soft cake dough, these are tremendously rich. Do you have a wallet… I mean a stomach big enough to hold all the richness?
To make this dessert even better, replace the semi-sweet chocolate chips with dark chocolate chips.
Margarine Versus Butter
This recipe calls for margarine, but if you do not have that on hand you can use butter interchangeably. Margarine is preferred in this recipe because of its high water content. Commercial butter has 15% water content compared to margarine’s 26%. A lower water content means the baked good will fry a bit more, like how a cookie gets its slightly crunchy texture.
Margarine will help make these Chocolate Lava Cake Bars deliciously soft. It also helps add height, so even if the bottom cake dough layer is thin, it will puff up in the oven.
Cool Down!
Hold your horses partner! These Chocolate Lava Cake Bars need time to cool after coming out of the oven. If you dig straight in you will be in a lava of a mess! If that’s how you like it, go ahead and dish yourself up some with a scoop of ice cream. Yum! But if you want to have clean-cut bars, wait at least 1-2 hours before cutting. Chilling in the fridge or freezer will help decrease cooling time.
Recipe Ingredients
Dutch Processed Cocoa: The Dutch cocoa added in this recipe is not only to fancify this decadent dessert, but to liven up the color and add a slightly different flavor than a typical chocolate cake bar. I like to use Ghirardelli 100% Cocoa, Dutch-Processed.
Margarine: Margarine is the preferred fat to use in this recipe because of its higher water content, but butter can also be substituted interchangeably.
How to Assemble the Chocolate Lava Cake Bars
Sifting the Dry Ingredients:
Be sure to sift all the dry ingredients for the cake dough. This helps everything combine evenly with the wet ingredients.
Wet Ingredients:
The margarine needs to be melted first, and then you can add the vanilla. Be sure to wait a few minutes to add the egg or it may cook and turn into a chunky scrambled egg mess. Work on the chocolate lava portion of this recipe while you wait for the margarine to cool before adding the egg.
Pressing the dough into the pan:
The cake dough is not a runny, spreadable batter. It is thick and soft, so spreading it can be tricky. Here are a few tips to help.
Crumble one cup of cake dough into the bottom of the 10×10 pan.
Hold the parchment paper lining the 10×10 with one hand to prevent it from ripping while spreading the dough.
Using the end of the spatula, apply pressure to distribute the dough underneath. Applying pressure will help spread out the dough instead of breaking it into smaller bits, which is what would happen if you tried to spread it with a back and forth motion.
Use your hands to press out areas the spatula didn’t get or to squeeze into the corners.
The dough layer may look thin but it will puff up in the oven.
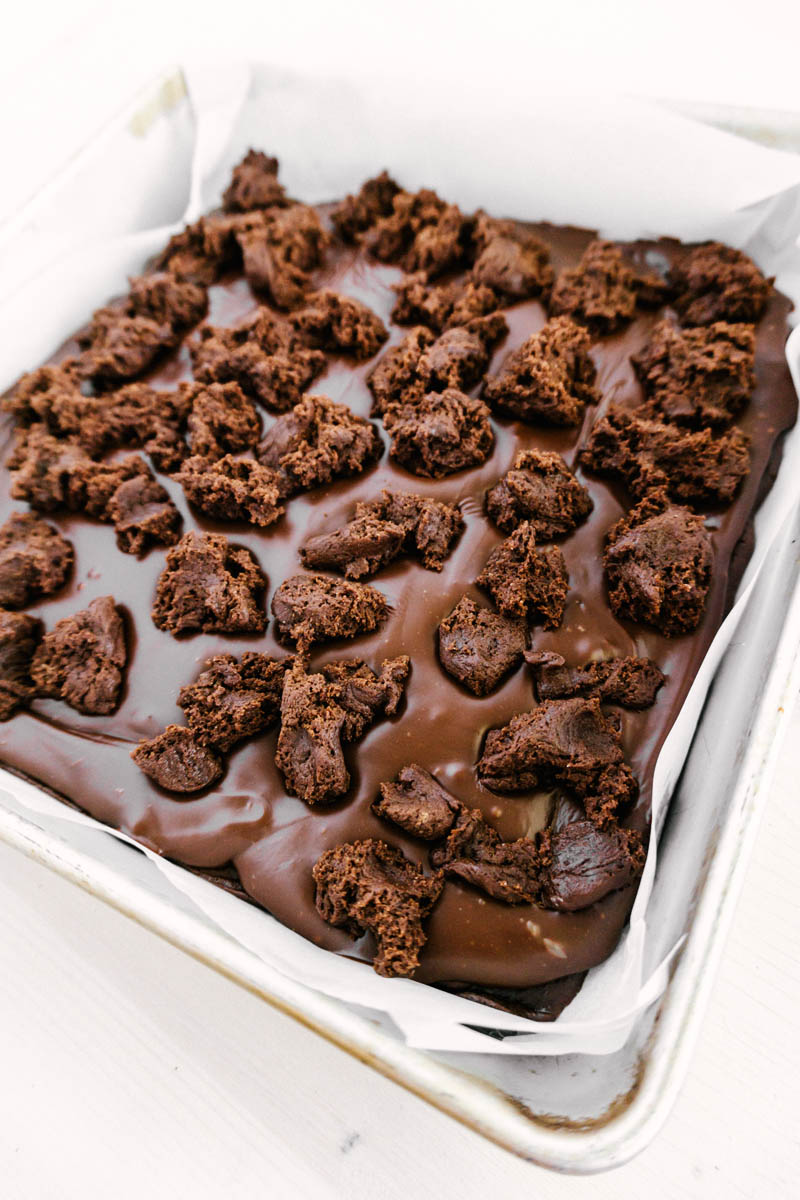
Crumble the dough on top:
After adding the Lava Layer, crumble the remaining half of the cake dough on top using your fingers. It can get pretty sticky, so I make the chunks a bit bigger to eliminate any extra work. It doesn’t have to be pretty because we are trying to make this look like a rocky volcano, right? And you have the option of dusting the final product with powdered sugar, which will hide the clumps of dough on top anyway.
This dessert is a decadent, rich, chocolatey creation, made to satisfy your craving for a fancy lava cake, with half the work! Let us know how you like it!
Looking for more delicious bar recipes? Try these:
No need to peek inside a volcano when you can make these rich, gooey, chocolate lava cake bars. A unique twist on a decadent dessert that will have you saying “I lava these!”
Ingredients
Cake Dough
1 ¾ C (8 oz) all-purpose flour
¼ C (1 oz) natural cocoa powder
1 T dutch processed cocoa powder
¼ C (2 oz) light brown sugar
1 C (4 oz) powdered sugar
⅜ tsp salt
1 tsp baking soda
½ C (4 oz) margarine, melted
1 tsp vanilla
1 egg
Chocolate Lava Layer
2 T margarine
1 can (14 oz) sweetened condensed milk
1 ½ C (9 oz) semi-sweet chocolate chips
Instructions
Make Cake Dough.
Sift together flour, cocoas, sugars, salt, and soda into a bowl.
In a separate bowl, melt margarine, then add vanilla. Let cool and then add egg and mix. If egg is added while mixture is hot the egg will scramble.
Add wet ingredients to dry ingredients and mix until combined. Set aside.
Make Chocolate Lava.
In a microwaveable container, heat margarine, sweetened condensed milk, and chocolate chips for one minute. Stir and continue to microwave in bursts until chocolate chips are melted and mixture becomes smooth.
Assemble Chocolate Lava Cake Bars
Preheat oven to 350*F.
Line a 10x10 pan with parchment paper.
Press half of cake dough (about 1 cup (10.5oz)) into the bottom of the pan.
Pour chocolate lava layer onto dough and spread.
Crumble remaining cake dough (about 1 cup (10.5 oz)) onto top of chocolate lava layer.
Bake for 12 minutes. Let cool completely before cutting.
Notes
Use stick margarine. Tub margarine has a different moisture content and will not work.
This dough is not very spreadable, so I use a sturdy spatula to spread the dough as much as possible. I then use my hands to spread any parts the spatula couldn’t get.
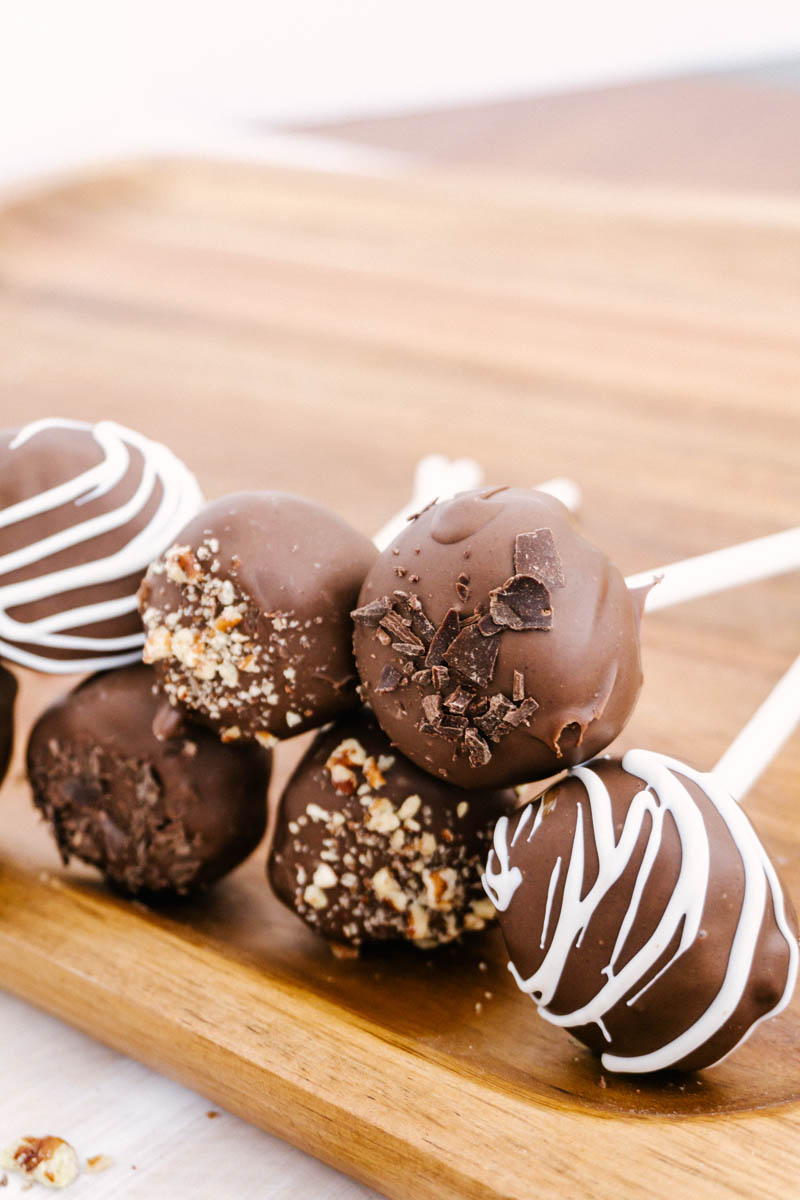
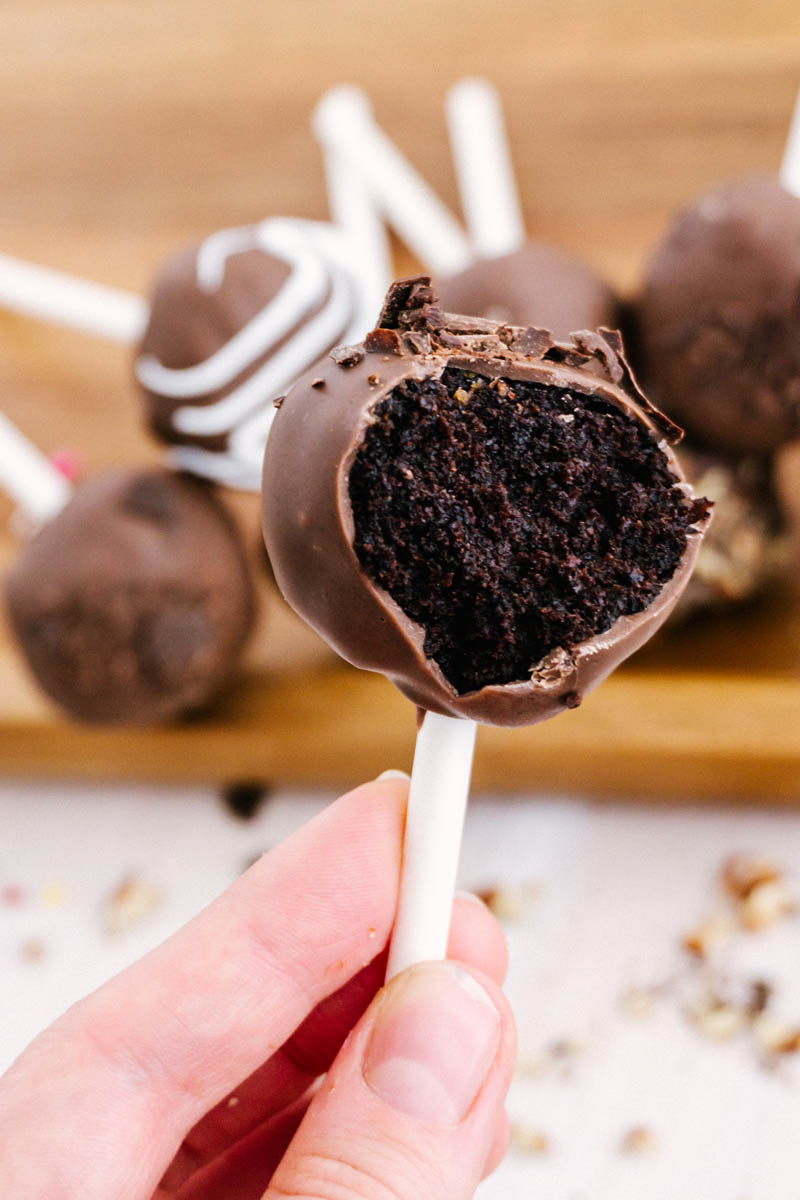
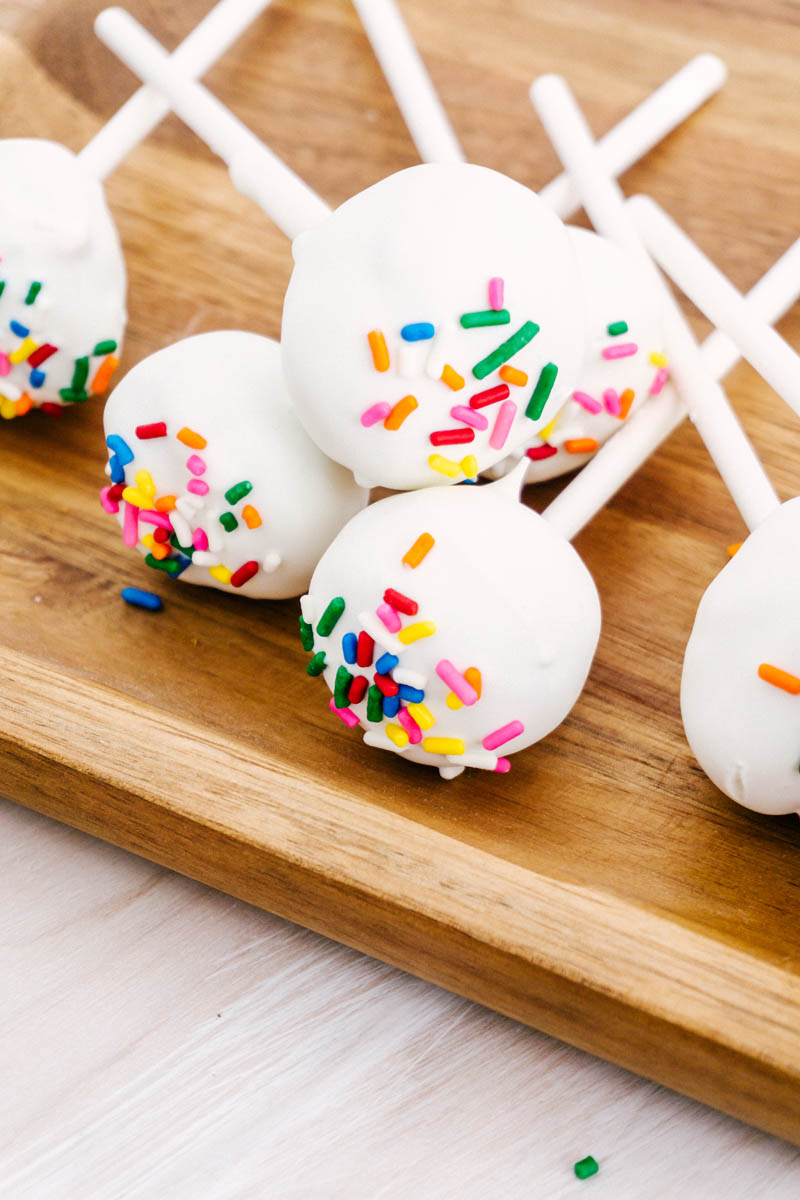
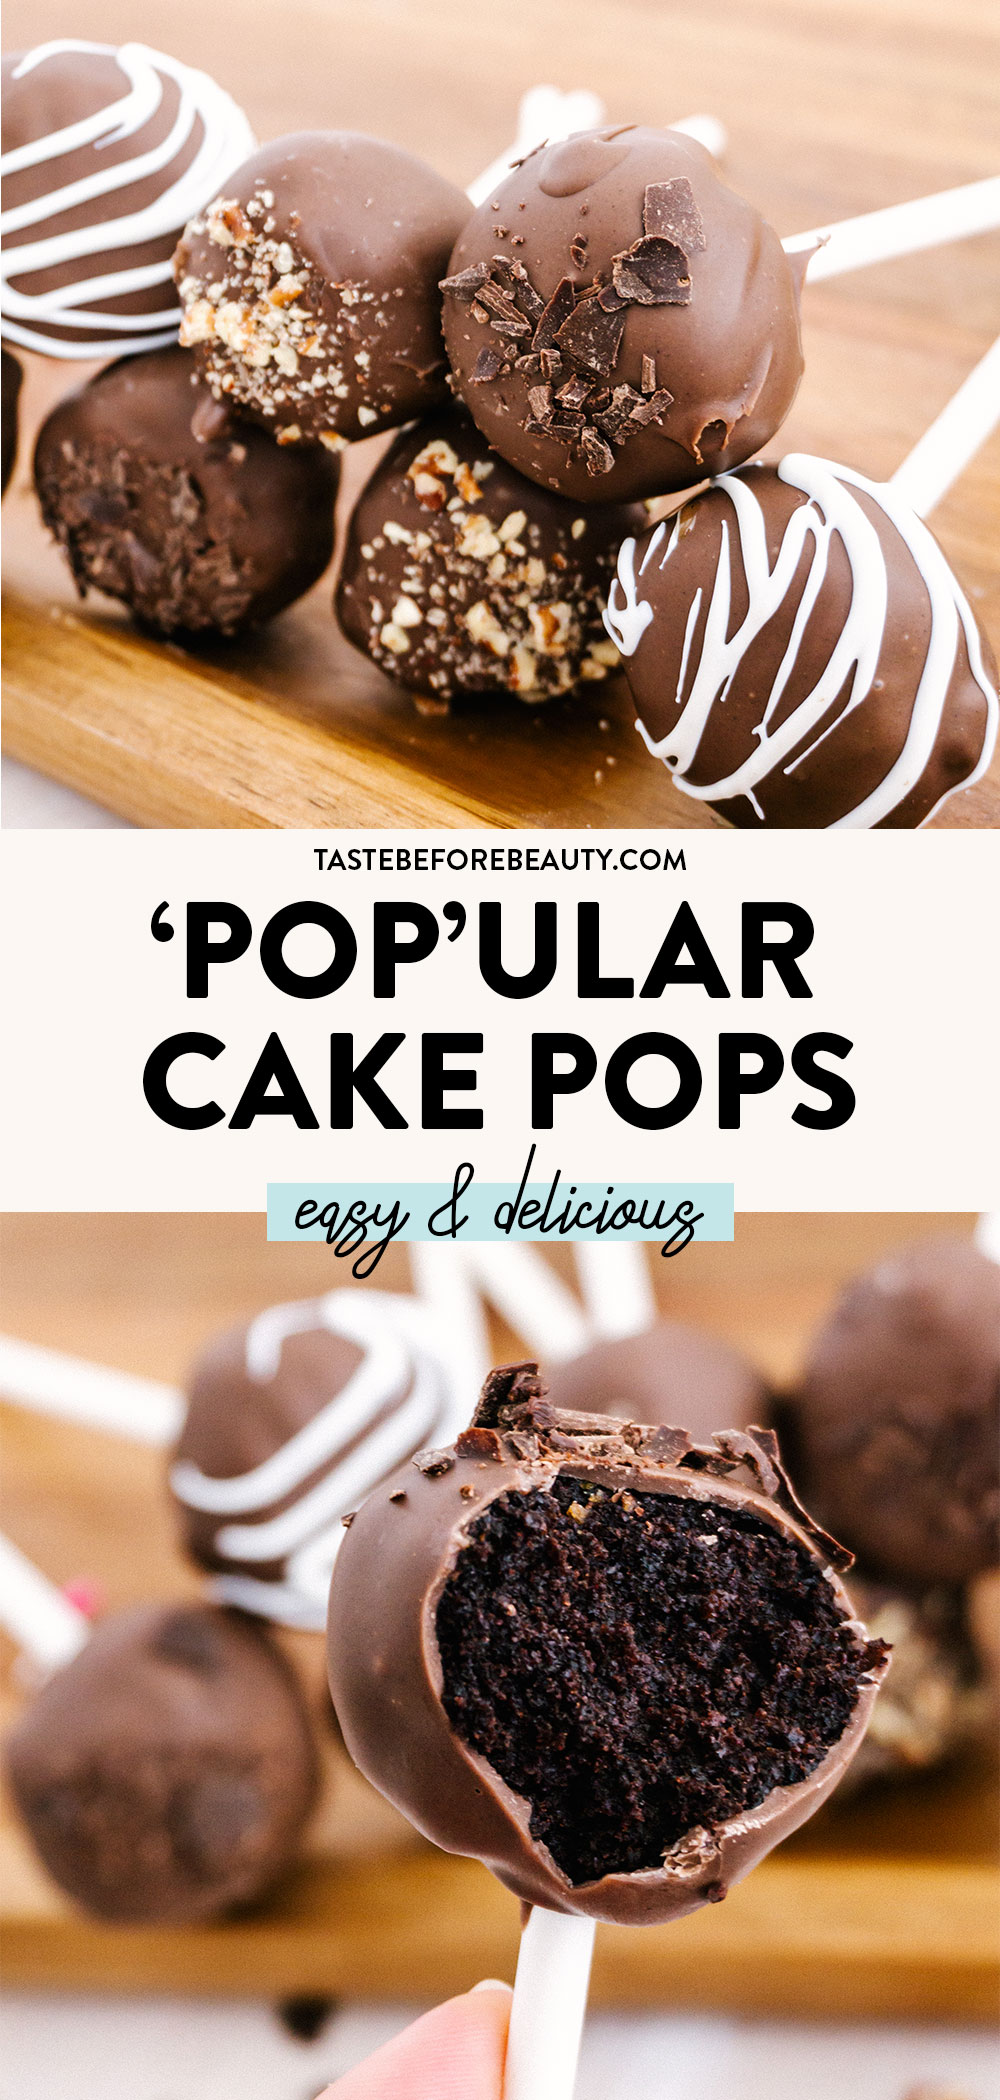
Bake, roll, dip! These sweet Cake Pops will be ‘pop’ular wherever you decide to take them, even if that place is your couch.
Cake pops, cake pops, we all scream for cake pops!
Cake pops are fun because you can flavor and decorate them however you want, just like an ice cream sundae! Making these are exciting and because we recommend using a boxed cake mix it will take less of your time. No one will even notice you are using boxed cake after you add our homemade frosting. (If you do want to make a cake from scratch, try this Rich Chocolate Cake.)
You can also involve your family and friends to help make them with you and enjoy their company as you do so. We are all about spending time with people and having quality conversations while making treats!
Because these ‘Pop’ular Cake Pops are so quick and easy, they make the perfect addition to any baby shower, birthday party, or family night. Customize the toppings to whatever occasion you’re hosting and you’ll have the most popular treat on the table!
Make sure to read my tips so the process goes smoothly for you.
Recipe Ingredients
Boxed Cake Mix (any flavor) – Choose your favorite flavor of boxed cake mix. No one will know!
Vanilla Buttercream Frosting – use to complement any fruity, white, yellow, or chocolate cake mix.
Chocolate Buttercream Frosting – use to complement any chocolate, fruity, or yellow cake mix.
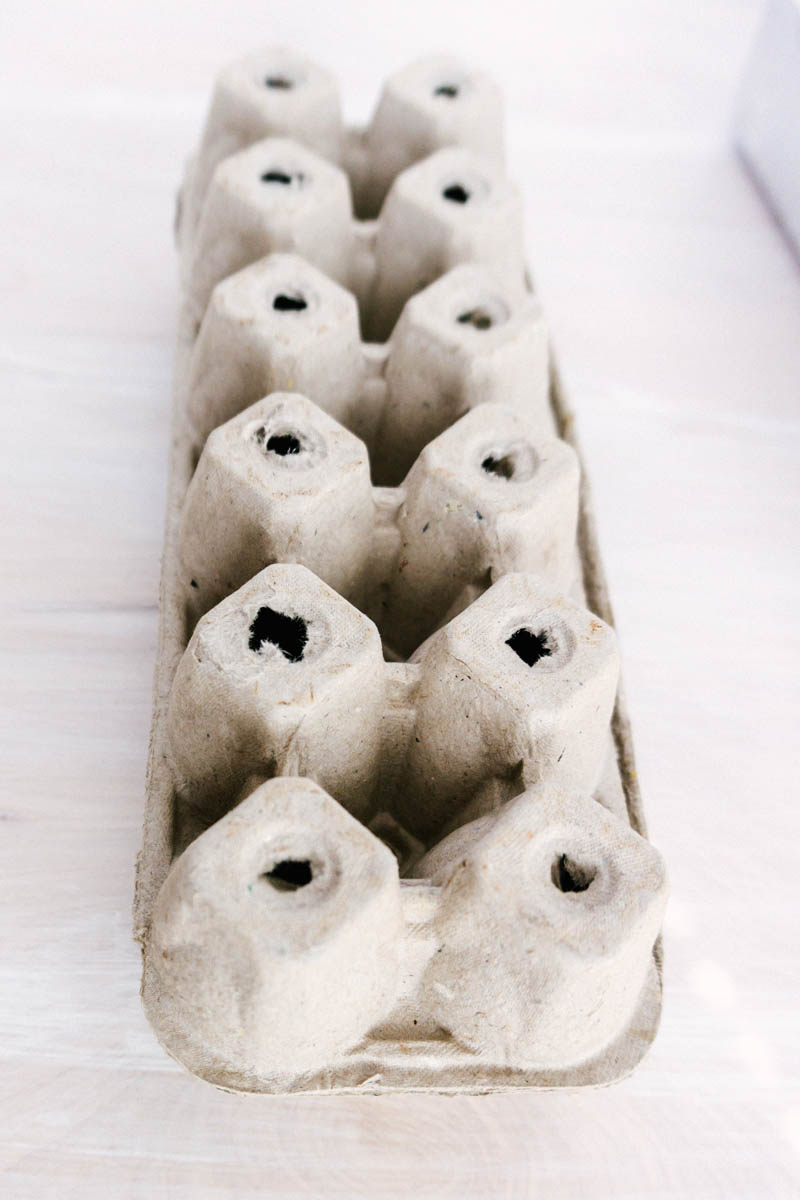
DIY Cake Pop Decorating Stand
I am not the type of person with blocks of styrofoam hanging around, but I always have eggs in my fridge. Just flip over an empty egg carton and put it in a pan to catch extra chocolate drippings. Poke holes where the carton naturally has holes on the bottom and put your cake pops there.
IMPORTANT: The egg carton can tip over if you don’t have something to weigh it down inside. You could also push two heavy bowls or pans on the sides of the carton to prevent tipping.
More Details on Assembly
Cool Cake: Make sure the cake is completely cooled before attempting to add the frosting. If not, it will melt the butter in the frosting and you will have a mushy mess.
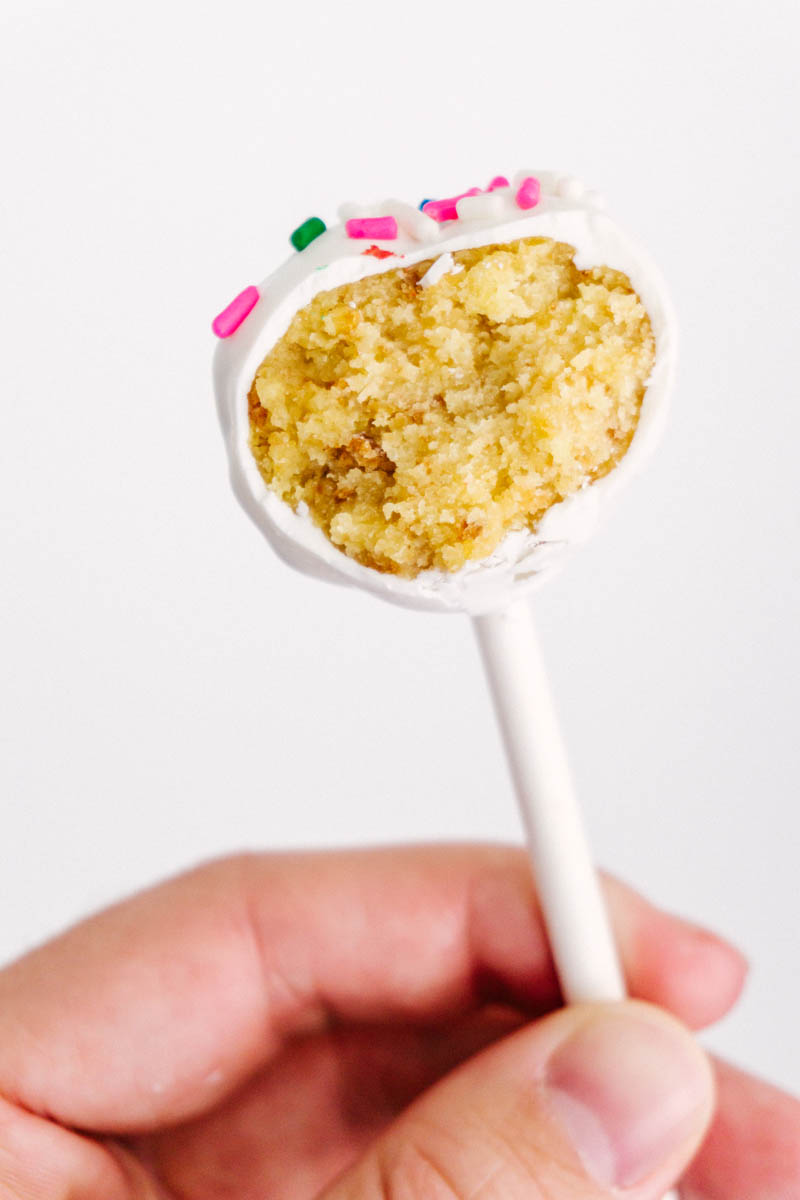
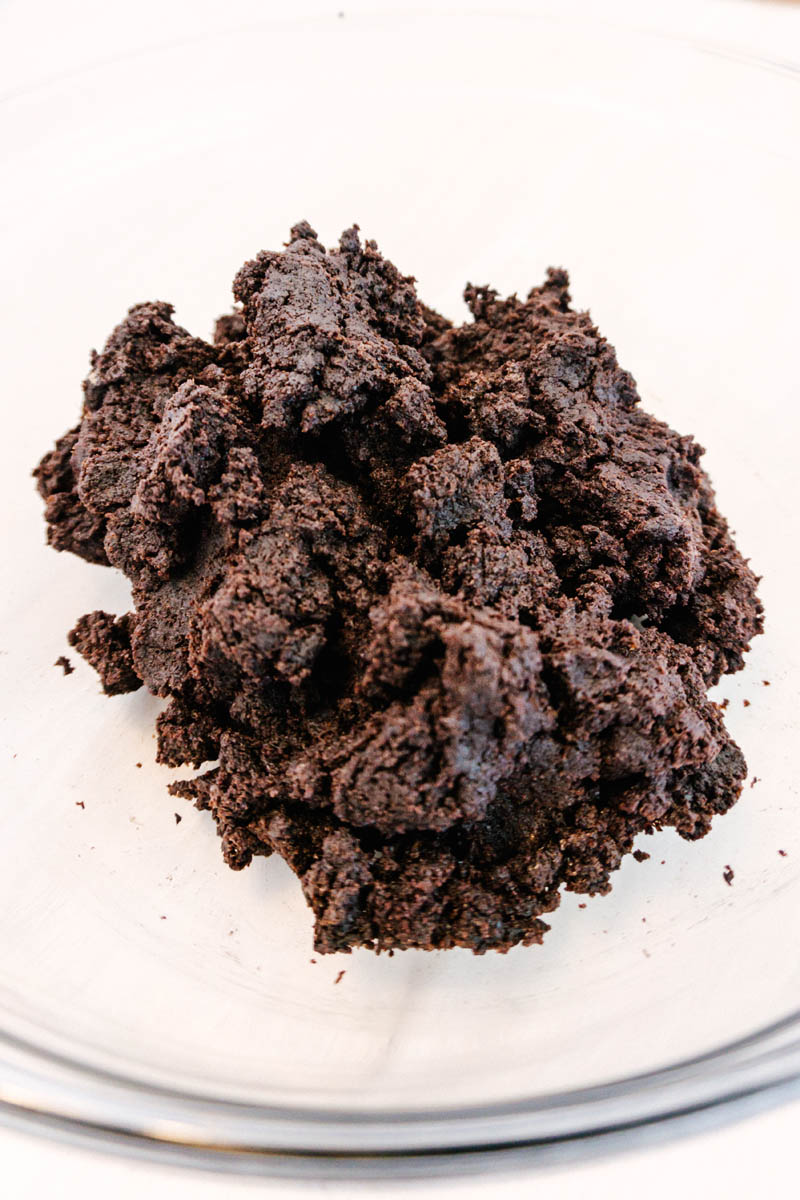
2. Perfect Amount of Frosting: When adding frosting to your crumbled cake, you will know you have enough when you can easily roll the mixture into a ball with your hands without crumbs falling off. You have added too much frosting if your mixture is very mushy and soft and won’t hold its shape.
3. Prevent Cake Pop from Falling Off Stick: Dip the cake pop stick slightly into the candy melts before putting it into the cake ball. This helps the cake pop not slide off while dipping.
4. Necessary Cooling Time: Cooling time is necessary in this recipe. If cake balls are not chilled before dipping into the candy melts they will fall off the stick. I let mine cool in the freezer for over an hour and it made dipping them in candy melts SUPER easy. The colder the better, if you have time!
4. Dipping Cake Pops: I find it most convenient to use a Pyrex glass measuring cup to dip the cake balls. It allows me to easily remelt the candy melts if starting to harden. If you don’t have one, use a deep microwavable bowl.
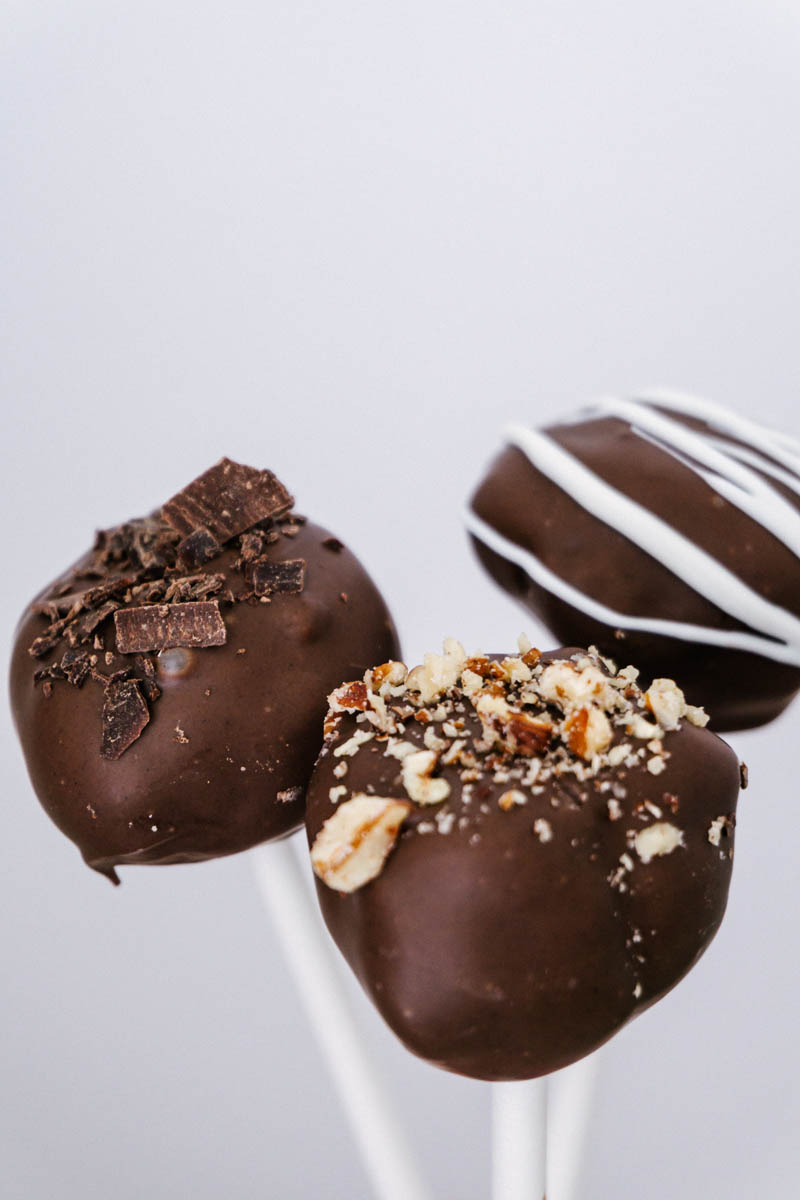
5. Decoration: Decorate the top of the cake pops with sprinkles, nuts, more chocolate, or crushed candies. If adding a chocolate drizzle as decoration, wait till dipped cake pop has completely set to prevent blending.
Bake, roll, dip! These sweet Cake Pops will be ‘pop’ular wherever you decide to take them, even if that place is your bed.
Ingredients
Cake (any flavor)
Bake according to package directions
Chocolate Buttercream Frosting OR
1 C (8 oz) salted butter, room temperature
1/2 C (1.8 oz) cocoa powder
3 1/2 C (16 oz) powdered sugar
1 tsp vanilla
3 T milk
Vanilla Buttercream Frosting
1 C (8 oz) salted butter
3 ½ C (16 oz) powdered sugar
1 tsp vanilla
3 T milk
Instructions
Make Cake
Make it easy on yourself and use your favorite boxed cake mix.
Bake according to package directions and let cool completely.
Make Chocolate Buttercream Frosting OR
Soften the butter, but do not melt. Beat butter with a mixer until it is smooth.
Add cocoa and powdered sugar. Beat butter, cocoa, and powdered sugar until combined and mixture looks dry and uniform. Scrape bowl.
Add vanilla and milk. Beat until frosting is light, creamy, and soft.
If the frosting is too thick, add a teaspoon of milk at a time.
Make Vanilla Buttercream Frosting.
Soften the butter. Do NOT melt. Beat butter with a mixer until smooth.
Add powdered sugar. Beat together until combined and the mixture looks dry and uniform. Scrape bowl.
Add vanilla and milk and beat until frosting is light and creamy. If too thick, add a teaspoon of milk at a time.
Assemble.
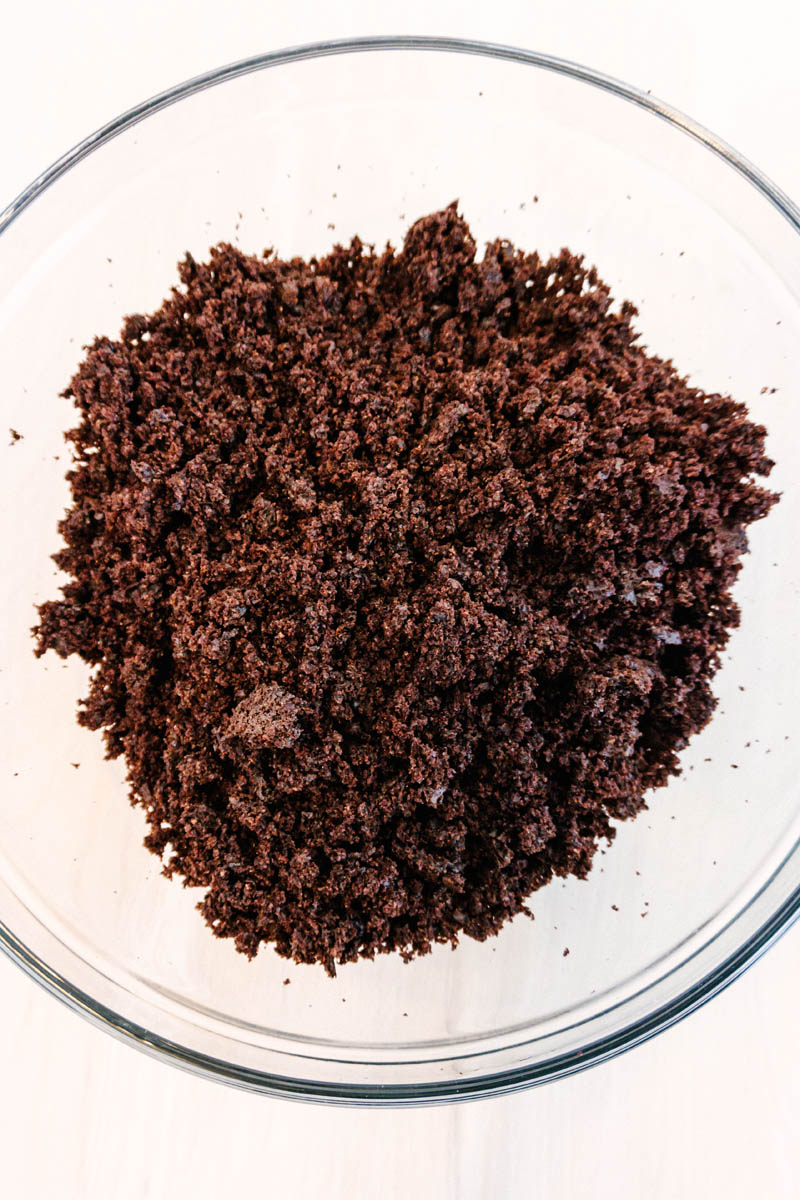
Crumble baked and cooled cake into a large bowl. Add 6 oz of chocolate or vanilla buttercream frosting. Mix together. If the mixture still looks too dry add additional frosting, a small amount at a time.
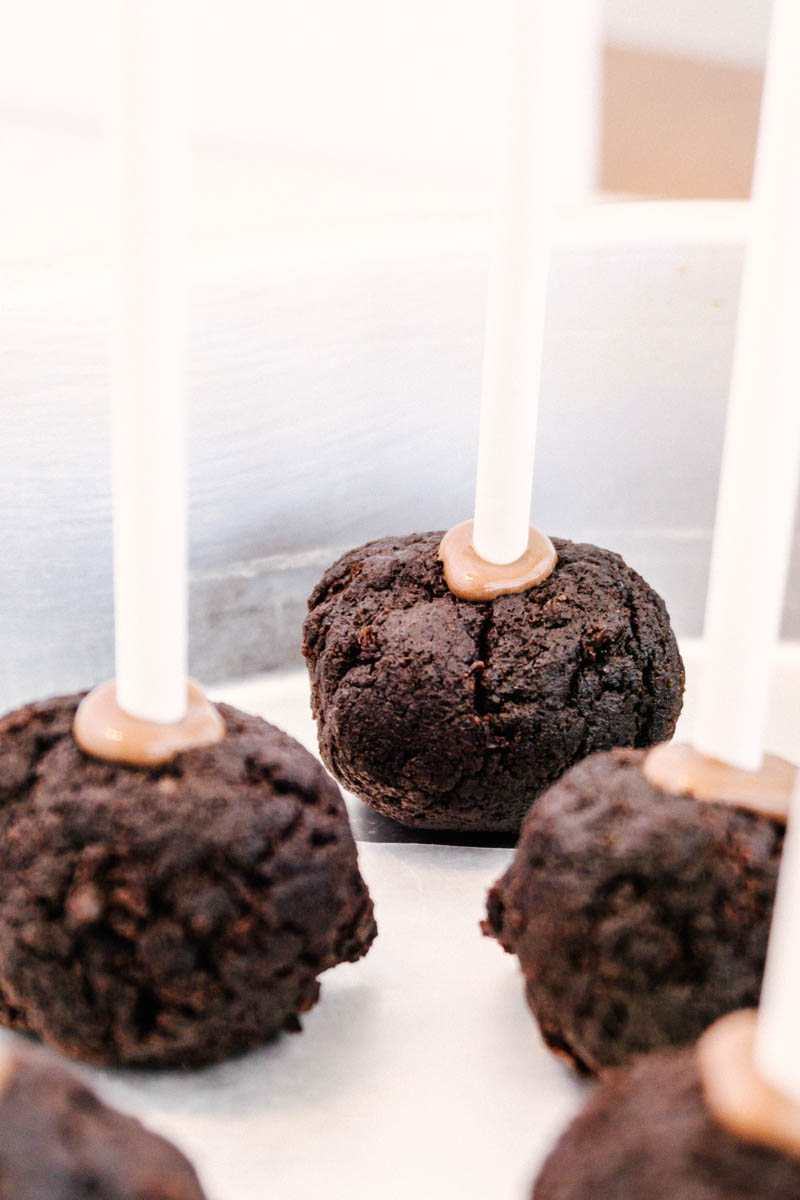
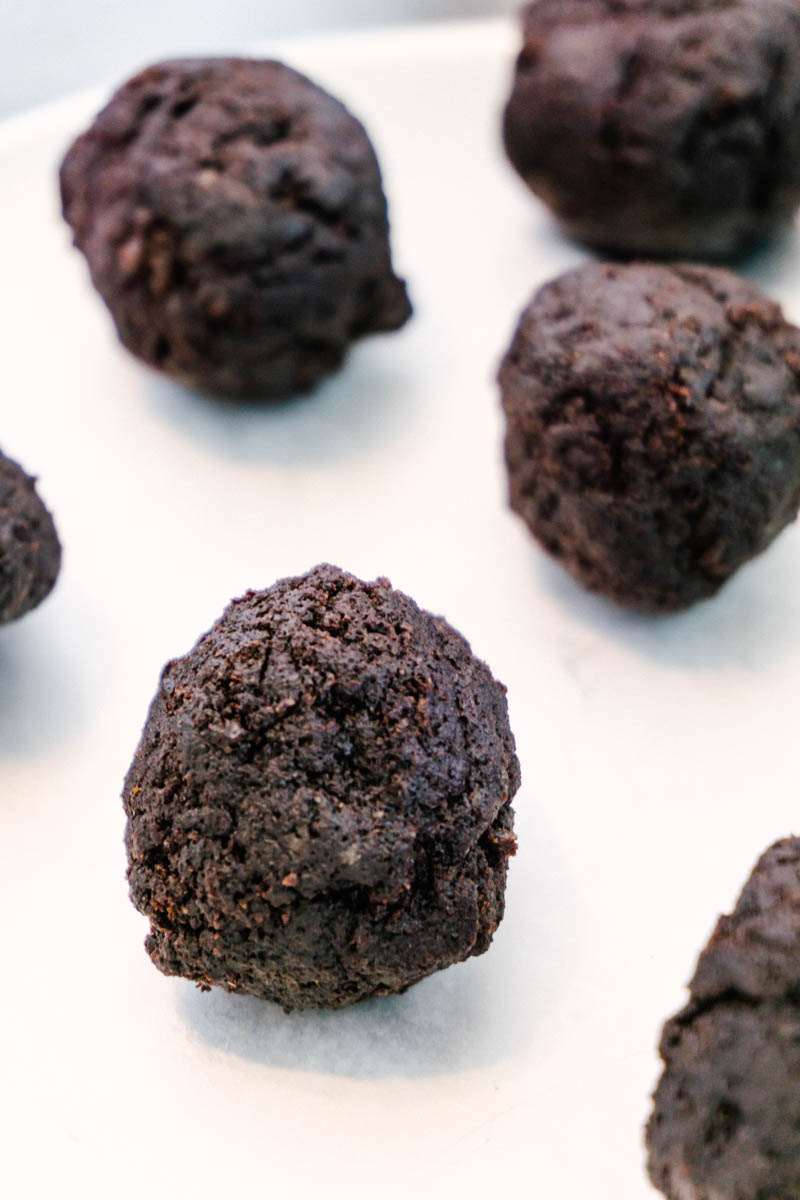
Using a #40 scoop (1 ¾ T), roll mixture into balls and place on a wax paper-lined tray.
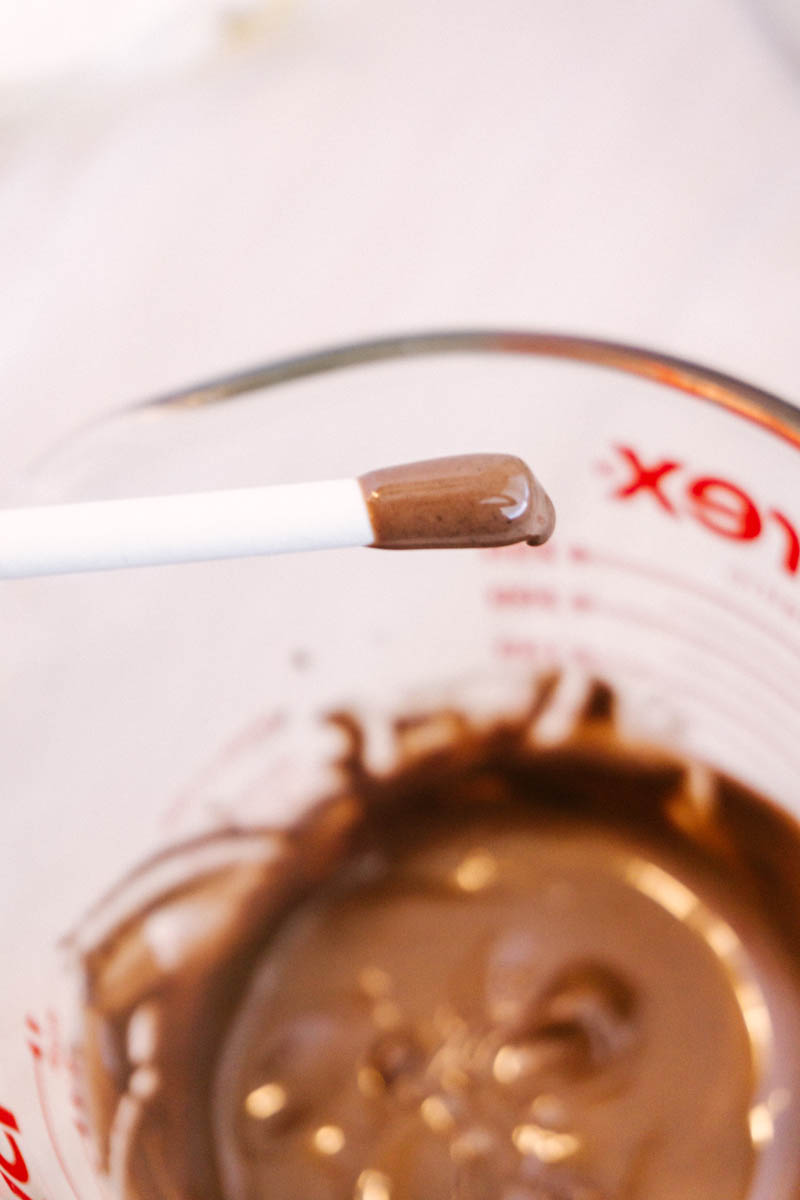
Melt 2 oz of white chocolate or chocolate candy melts in a microwavable bowl.
Dip tip of the cake pop stick slightly into the candy melts and insert into each cake pop, about halfway through the ball.
Place in fridge or freezer until completely cool, about 30 minutes to one hour. The colder the better.
Prepare decorations, if any, and melt remaining candy melts in a microwavable bowl.
Remove cake pops from the freezer and dip into the bowl of melted chocolate, completely submerging the cake pop.
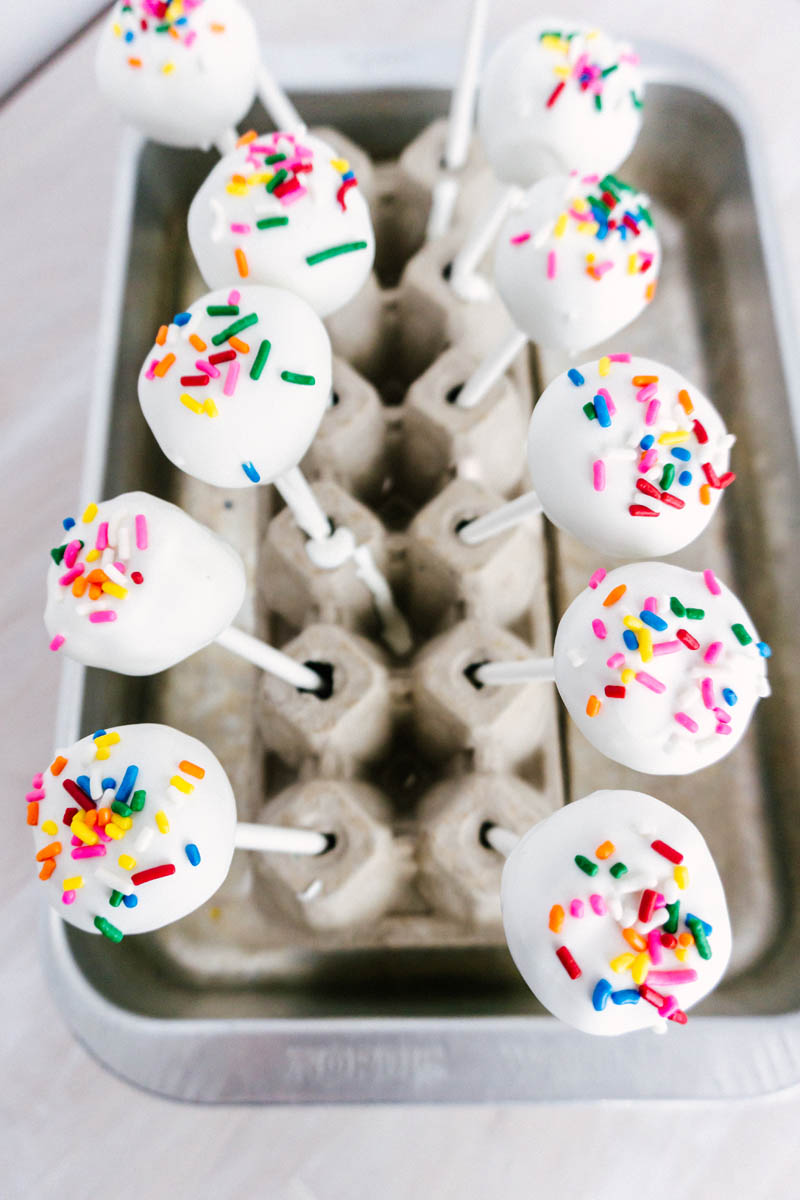
Gently swirl or let excess chocolate drip off and place into styrofoam or DIY cake pop holder (see pictures).
Add any decorations (nuts, sprinkles, crushed candy) to top of ball while chocolate is still wet. Chocolate will cool very quickly.
Let set until hardened, or place in freezer for quicker set-up time.
If not eaten that day, cake pops are best if stored in an airtight container in the fridge.
Notes
Make either the vanilla or chocolate buttercream frosting to compliment the flavor of cake you chose to make.
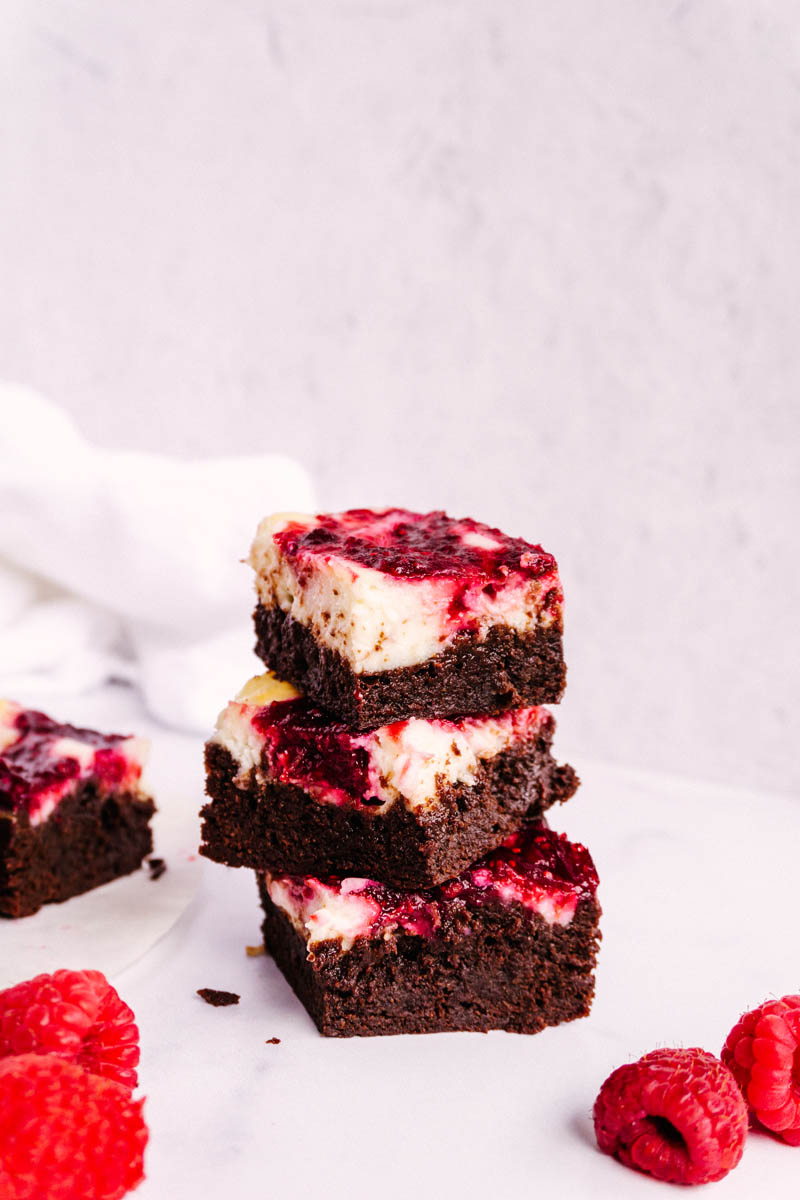
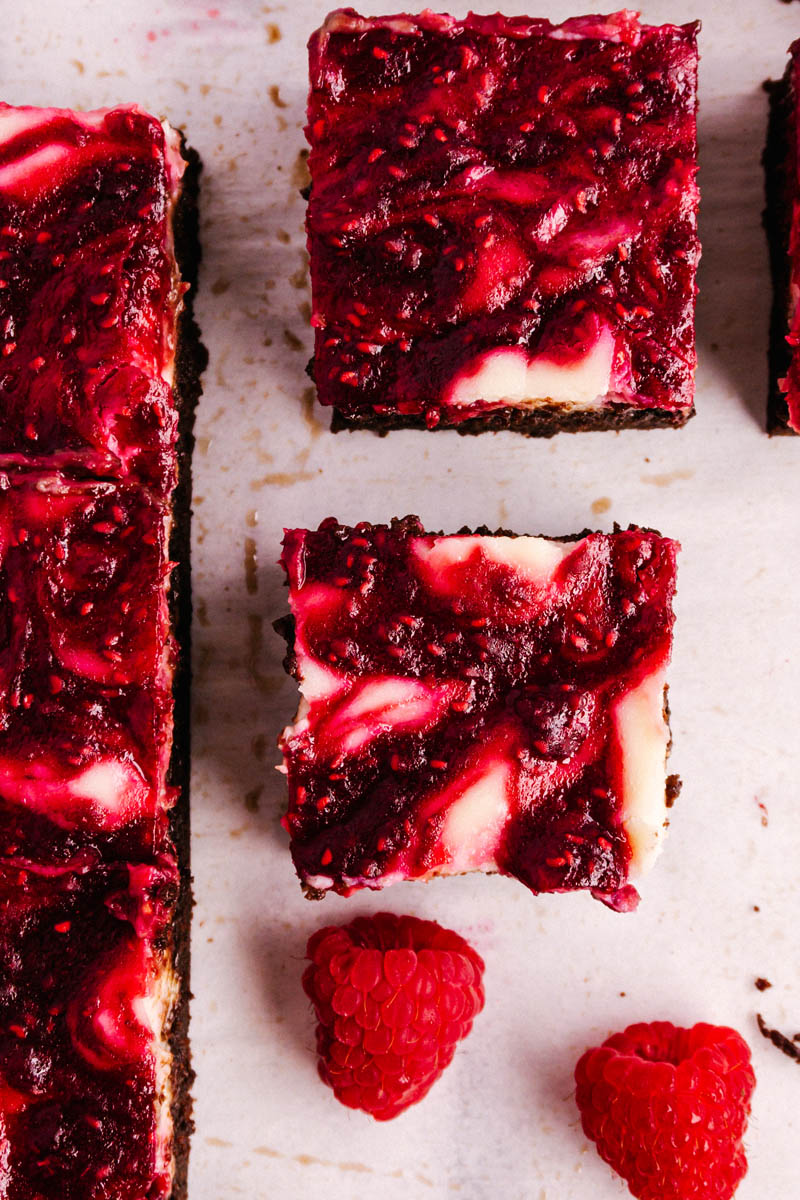
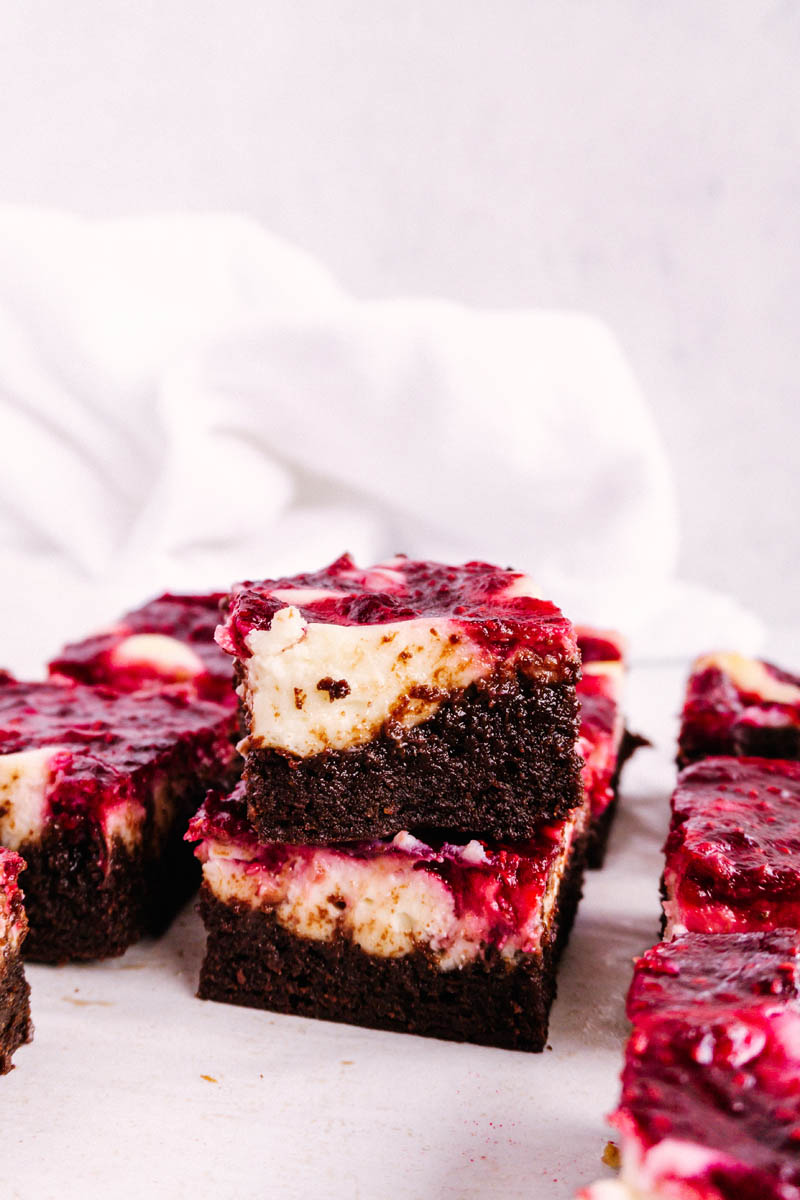
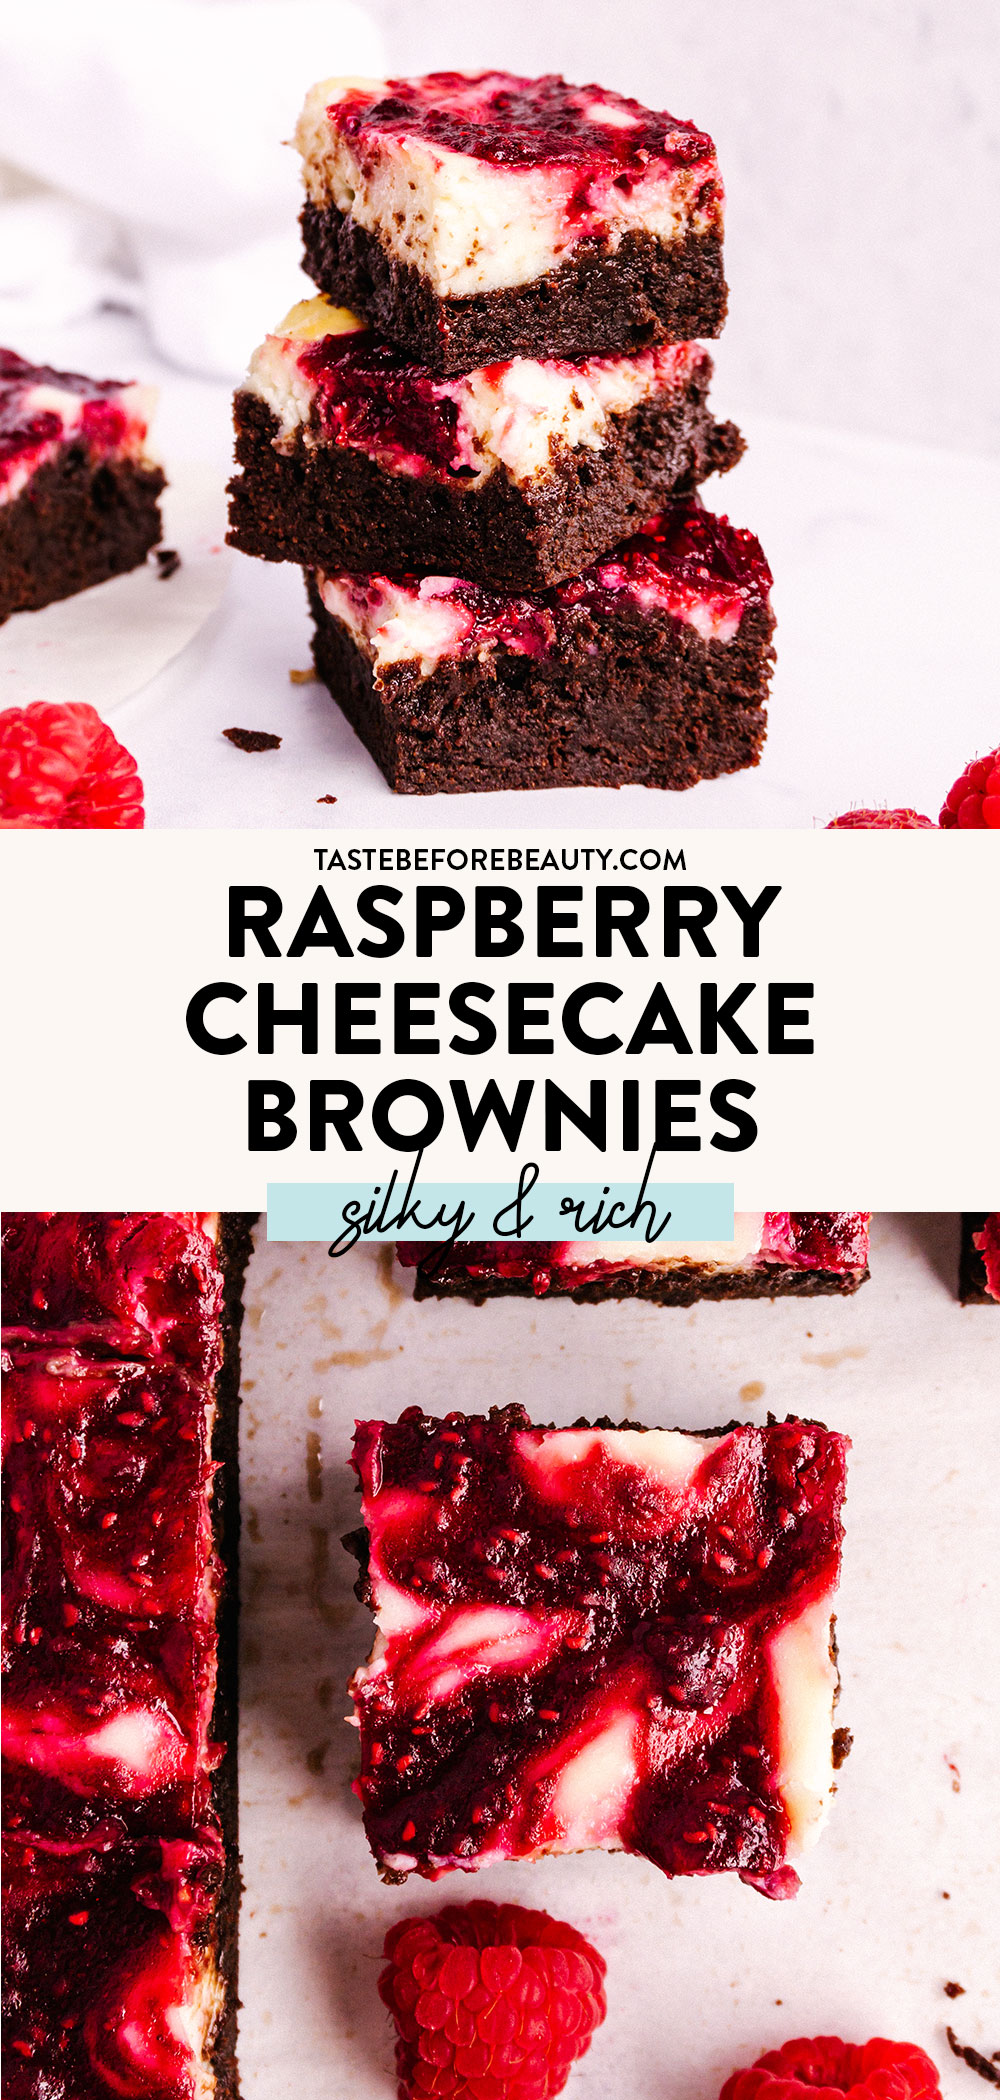
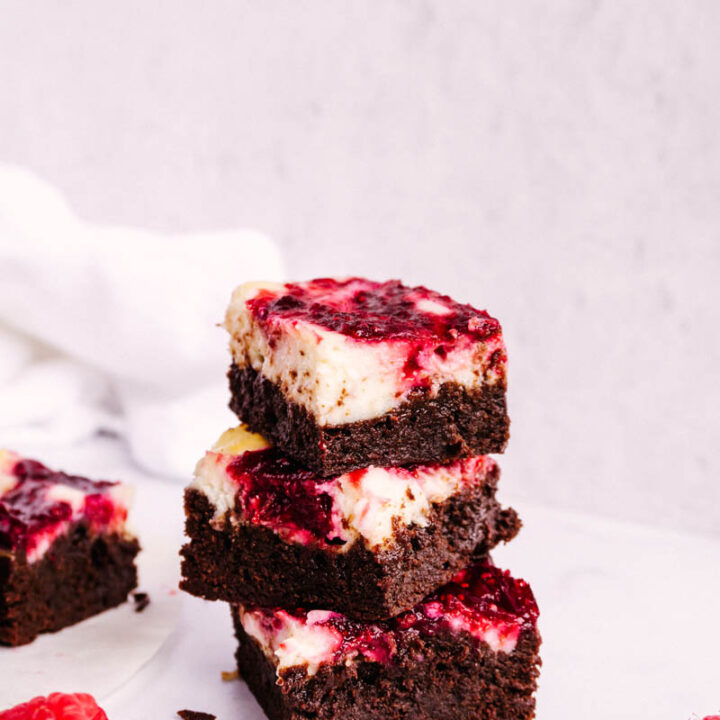
These Raspberry Cheesecake Brownies are two desserts destined to be together. With a tart raspberry filling, silky cheesecake, and a rich, fudgy brownie base, you won’t be able to stop at one!
The Raspberry Cheesecake Brownie Recipe – An Idea I Just Had to Try
I could probably eat a brownie every day of life. One day, I was binge-watching a baking show and one of the contestants made Raspberry Cheesecake Brownies. Although hers were a total flop, I couldn’t stop thinking about them. I probably thought about this idea for three weeks before I decided to come up with a plan and try it.
I started with one of Missy’s tried-and-true brownie bases, the Outstanding Brownie. My first attempt included chocolate chips, but I felt like they detracted from the creamy cheesecake layer, so I omitted them. Feel free to add them if you’d like!
I also ended up doubling my original amount of cheesecake. The brownie to cheesecake ratio I’ve developed is simply perfect. It captures the best of both worlds. No need to choose between making brownies and cheesecake when you can have them both, making a brownie raspberry cheesecake!
Important Ingredients
Salted Butter – adds flavor to the fudgy brownie batter
Cocoa Powder – use either natural or Dutch-processed cocoa. I used Hershey’s natural cocoa powder.
Cream Cheese – use block cream cheese to achieve the perfect silky smooth texture for the raspberry cream cheese brownies.
Vanilla Extract – I like to use a good vanilla extract for this, especially in the Cream Cheese Layer, to round out the raspberry and chocolate flavors.
Frozen Raspberries – an essential component to a good raspberry brownie cheesecake recipe. These will break down during cooking and turn into a tart, fruity filling that preserves the flavor of a fresh raspberry without becoming overly sweet.
About Each Layer
Raspberry Filling: this raspberry filling is deceptively easy to make and so delicious. It preserves the tart, sweet raspberry flavor of fresh raspberries. It helps us create the perfect raspberry swirl brownies. Any leftover filling can be frozen and used later in our Sweet Raspberry Twists or Raspberry Trifle. Or serve it over ice cream!
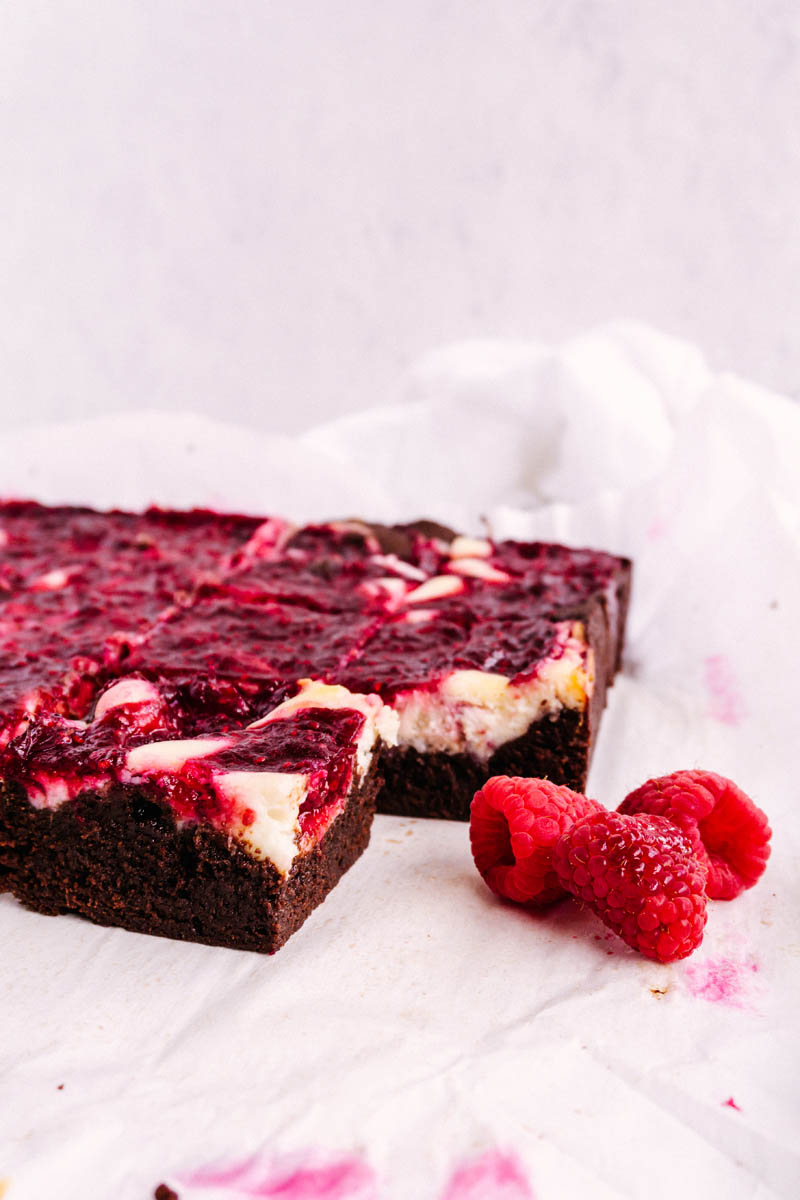
Brownie Batter: fudgy and rich, this is the perfect base for silky cream cheese and tart, sweet raspberries. The perfect homemade brownie mix!
Cream Cheese Layer: with only three ingredients, this is probably the easiest cheesecake you’ve ever made. It bakes up soft and creamy and is totally irresistible.
How to Successfully Assemble Raspberry Cheesecake Brownies
Prepare the pan by lining it with parchment paper and lightly spraying it with cooking spray. This ensures that the brownies won’t stick to the pan after cooking.
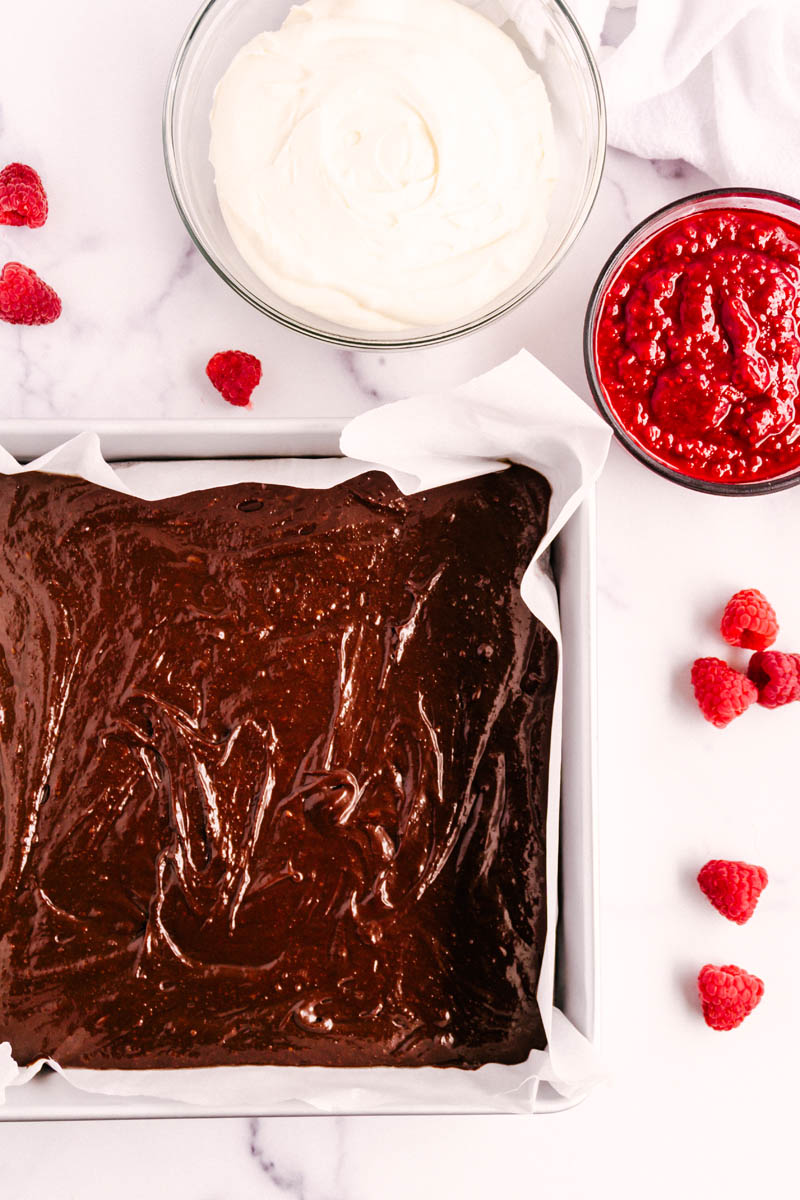
Spread the brownie batter in the pan. It doesn’t need to be perfect, but it is easier to swirl the cheesecake and raspberry filling in if the top is level.
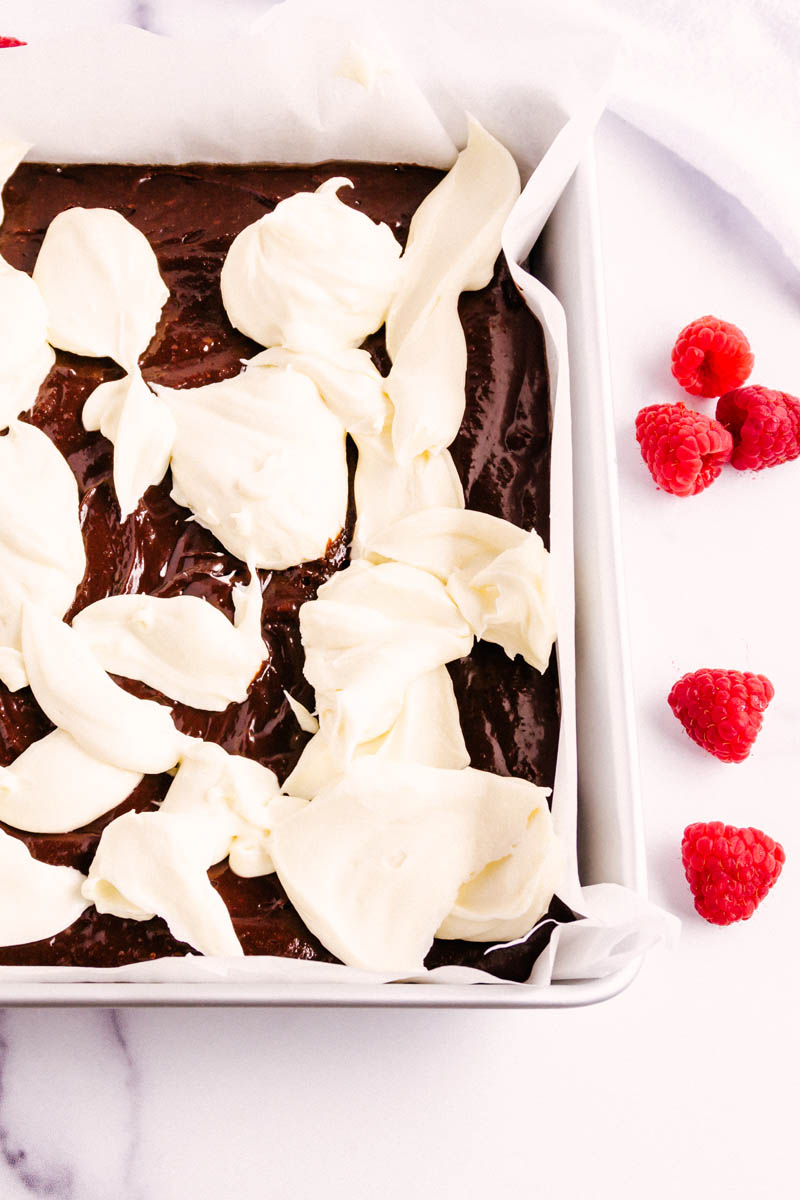
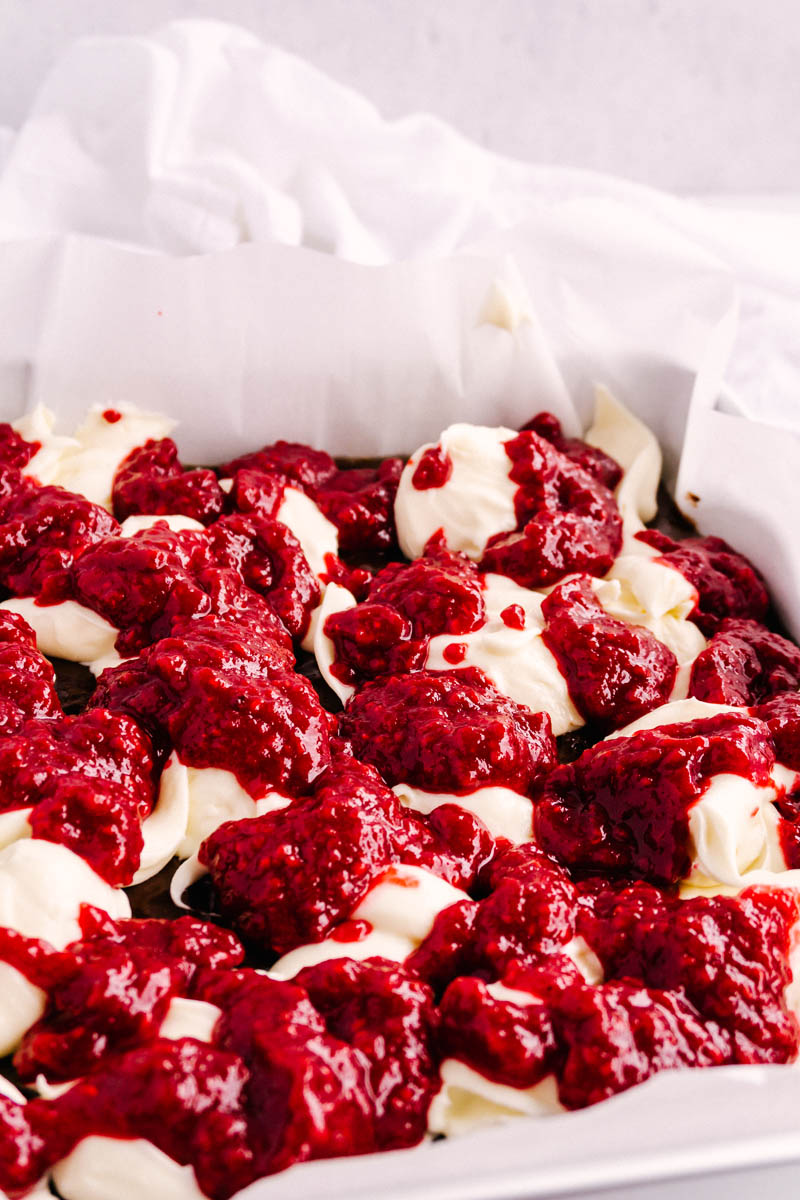
Dollop the cheesecake over the brownie batter. Big messy dollops are fine. Then, spoon the raspberry filling over the whole thing. The cheesecake mixture doesn’t need to look pretty at this point.
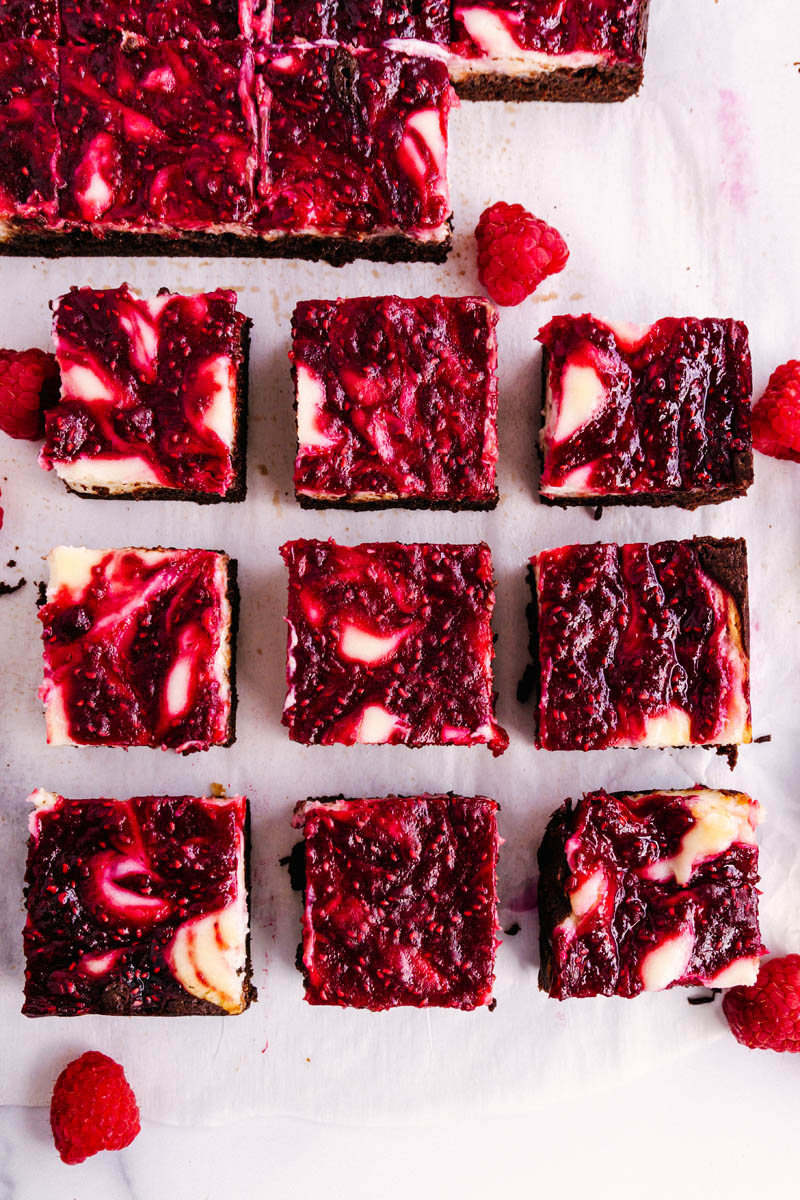
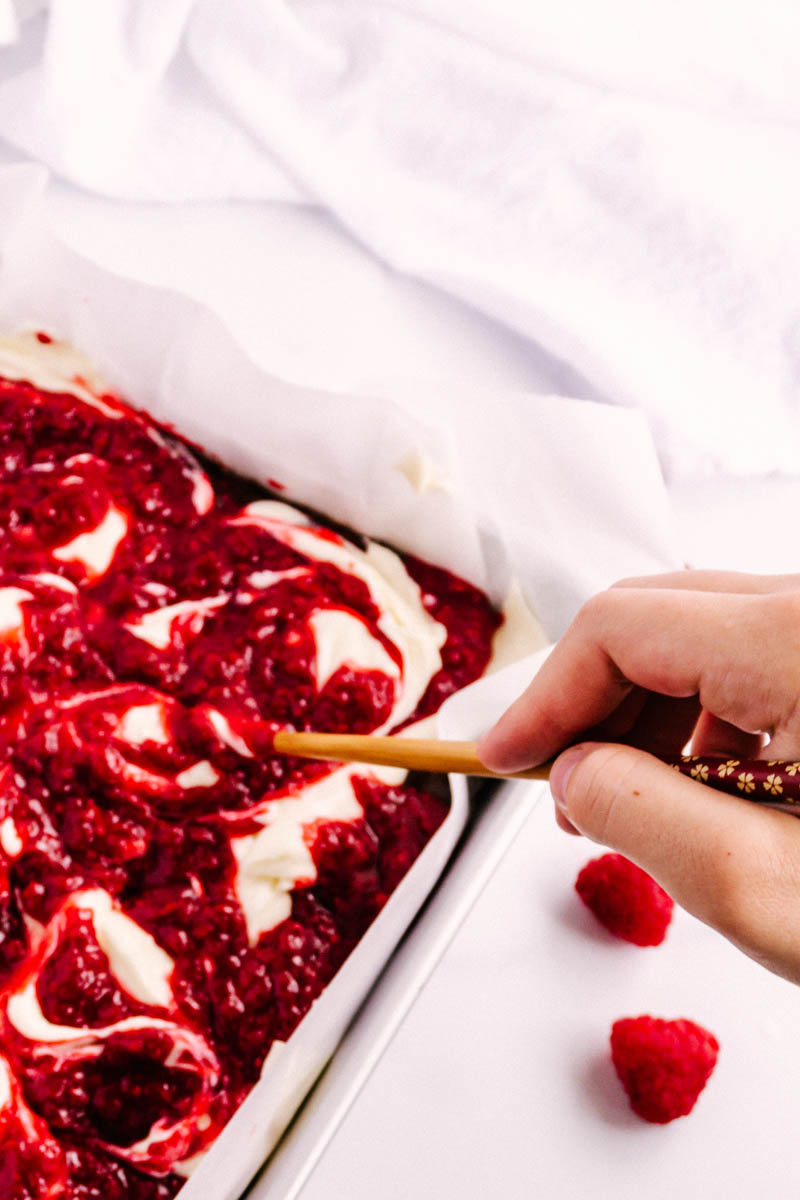
Use a chopstick or a knife to swirl the cheesecake and raspberry filling slightly into the brownie batter. Swirl it just enough to make it look pretty and swirled, but don’t overmix.
Bake the brownies until the edges are set and the top has just a slight wobble in the middle.
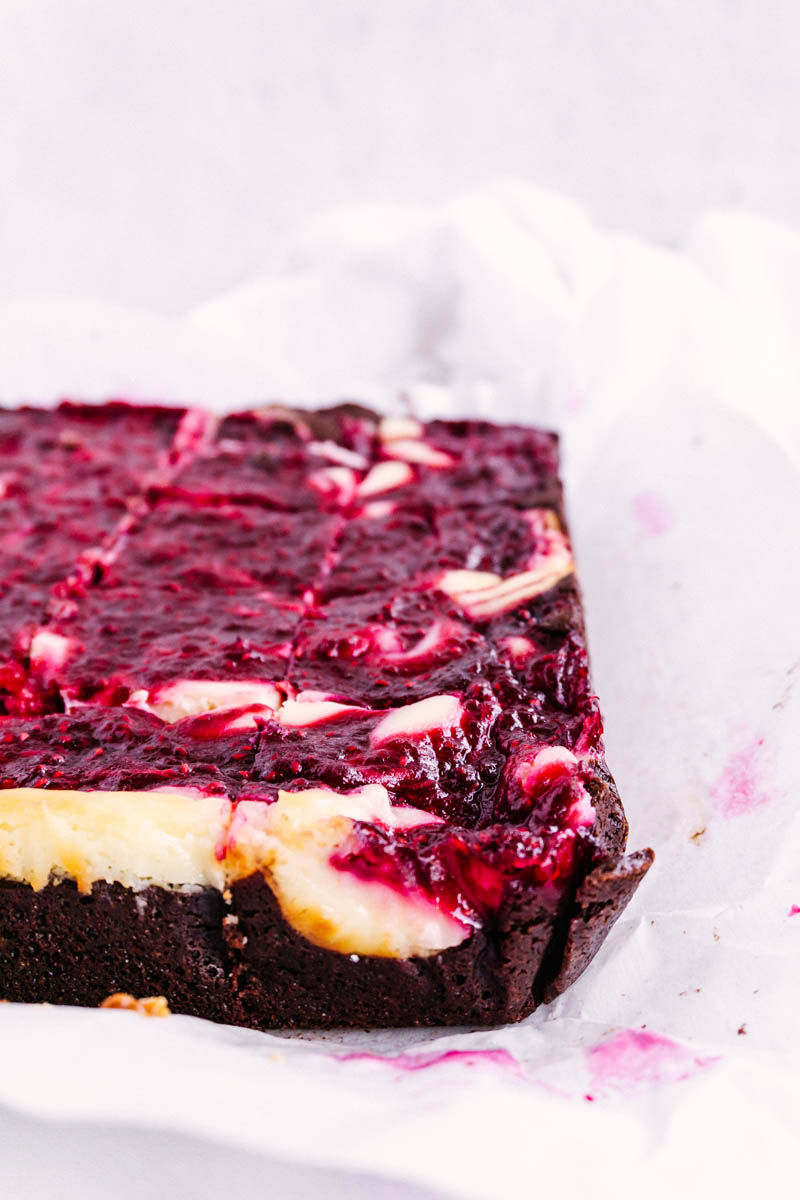
Cool completely at room temperature, so the cheese mixture with raspberry jam can settle and become the perfect brownie bars!
I already can’t wait to make these raspberry cheesecake brownies again. They’re fudgy, creamy, fruity, and the perfect treat for any time. Enjoy baking our delicious raspberry cheesecake brownies recipe!
Looking for more delicious brownie recipes? Try these:
These Raspberry Cheesecake Brownies are two desserts destined to be together. With a bright raspberry filling, silky cheesecake, and a rich, fudgy brownie base, you won’t be able to stop at one!
Ingredients
Raspberry Filling
1 (12 oz) bag frozen raspberries, thawed, divided
3 T (0.9 oz) cornstarch
1 T lemon juice
½ C + 2 T (4.4 oz) granulated sugar
Brownie Batter
½ C (4 oz) salted butter, melted
½ C (5 oz) light brown sugar, packed
¼ C (2 oz) granulated sugar
½ C (3.8 oz) vegetable oil
1 ½ C (8 oz) powdered sugar
1 C (3.6 oz) cocoa powder
4 large eggs
1 tsp vanilla extract
1 tsp salt
1 C + 2 T (5.5 oz) all purpose flour
Cheesecake Layer
2 C (16 oz) cream cheese
½ C (3.5 oz) granulated sugar
1 tsp vanilla extract
Instructions
Make Raspberry Filling.
Thaw raspberries. Reserve 3 T of juice to mix with cornstarch.
Using a fine sieve, strain half of the raspberries to remove seeds. Be sure to push as much raspberry meat through the sieve as possible.
Mix the sieved berries with the remaining berries and any remaining juice.
In a small saucepan, add reserved 3 T raspberry juice, lemon juice, cornstarch, and sugar. Bring to a boil, stirring continuously.
Once boiling, add berries and bring to a simmer. Simmer for one minute while continuing to stir. Remove from heat.
Place in a bowl and cover. Refrigerate until cooled completely, 2-3 hours or overnight.
Make Brownie Batter.
In a large mixing bowl, add melted butter, brown sugar, and granulated sugar. Mix together for a minute to help dissolve the sugars.
Add vegetable oil, powdered sugar, and cocoa powder. Mix until all lumps of powdered sugar and cocoa are incorporated.
Then add eggs, vanilla, and salt. Mix thoroughly then stir in flour.
Make Cream Cheese Layer.
In a mixing bowl, add cream cheese. Using a hand mixer, beat until completely smooth and soft.
Add sugar and vanilla. Mix to combine.
Assemble.
Preheat oven to 350*F. Line a 10x10 pan with parchment paper and lightly spray with cooking spray.
Pour brownie batter into prepared pan.
Dollop cream cheese over brownie batter.
Spoon about 1-1 ½ cups of raspberry filling over cream cheese layer.
Swirl cream cheese and raspberry filling into brownie batter to make a swirl pattern. Do not overmix.
Bake for 40-45 minutes until edges are done and the center has a slight wobble. Let cool before cutting.
Notes
The raspberry filling can be made in advance. Refrigerate or freeze until ready to use. Let thaw before spooning over brownie batter.