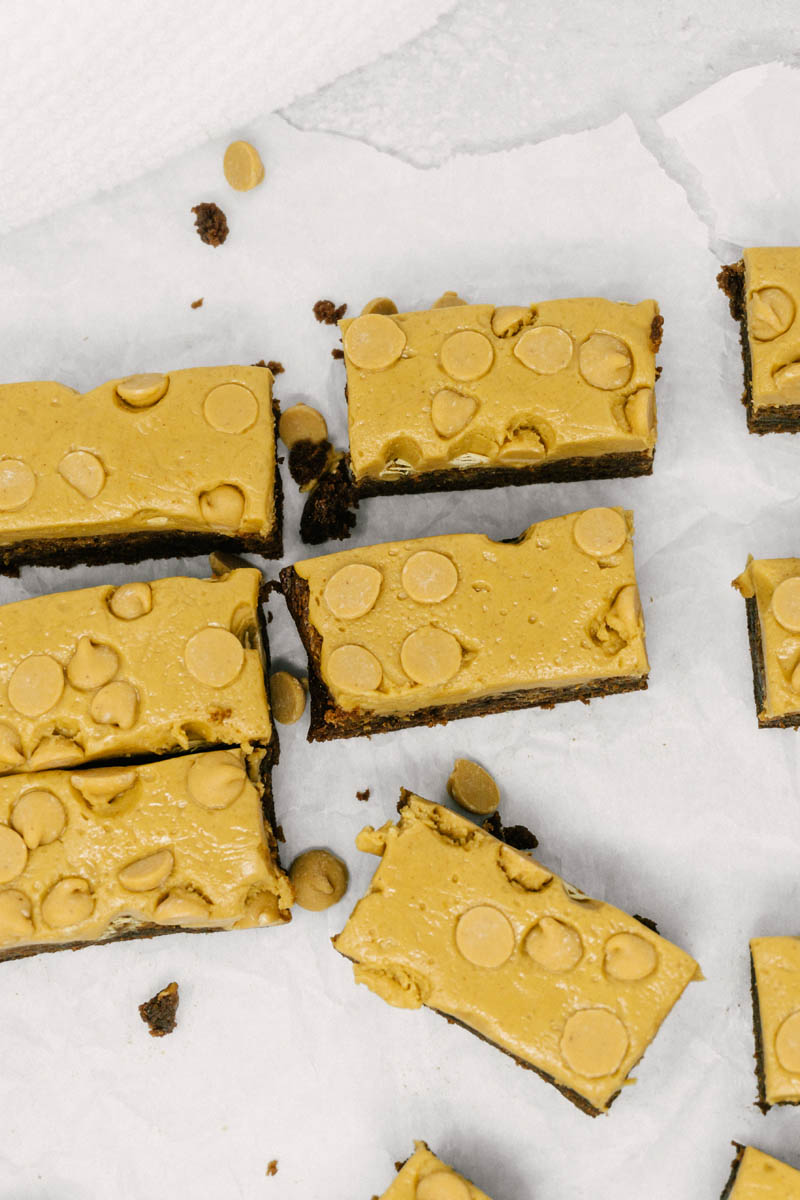
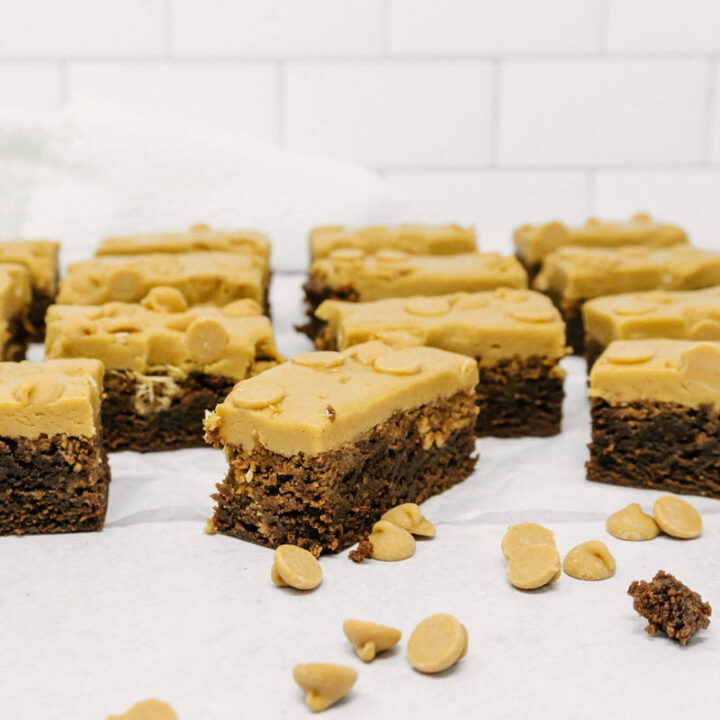
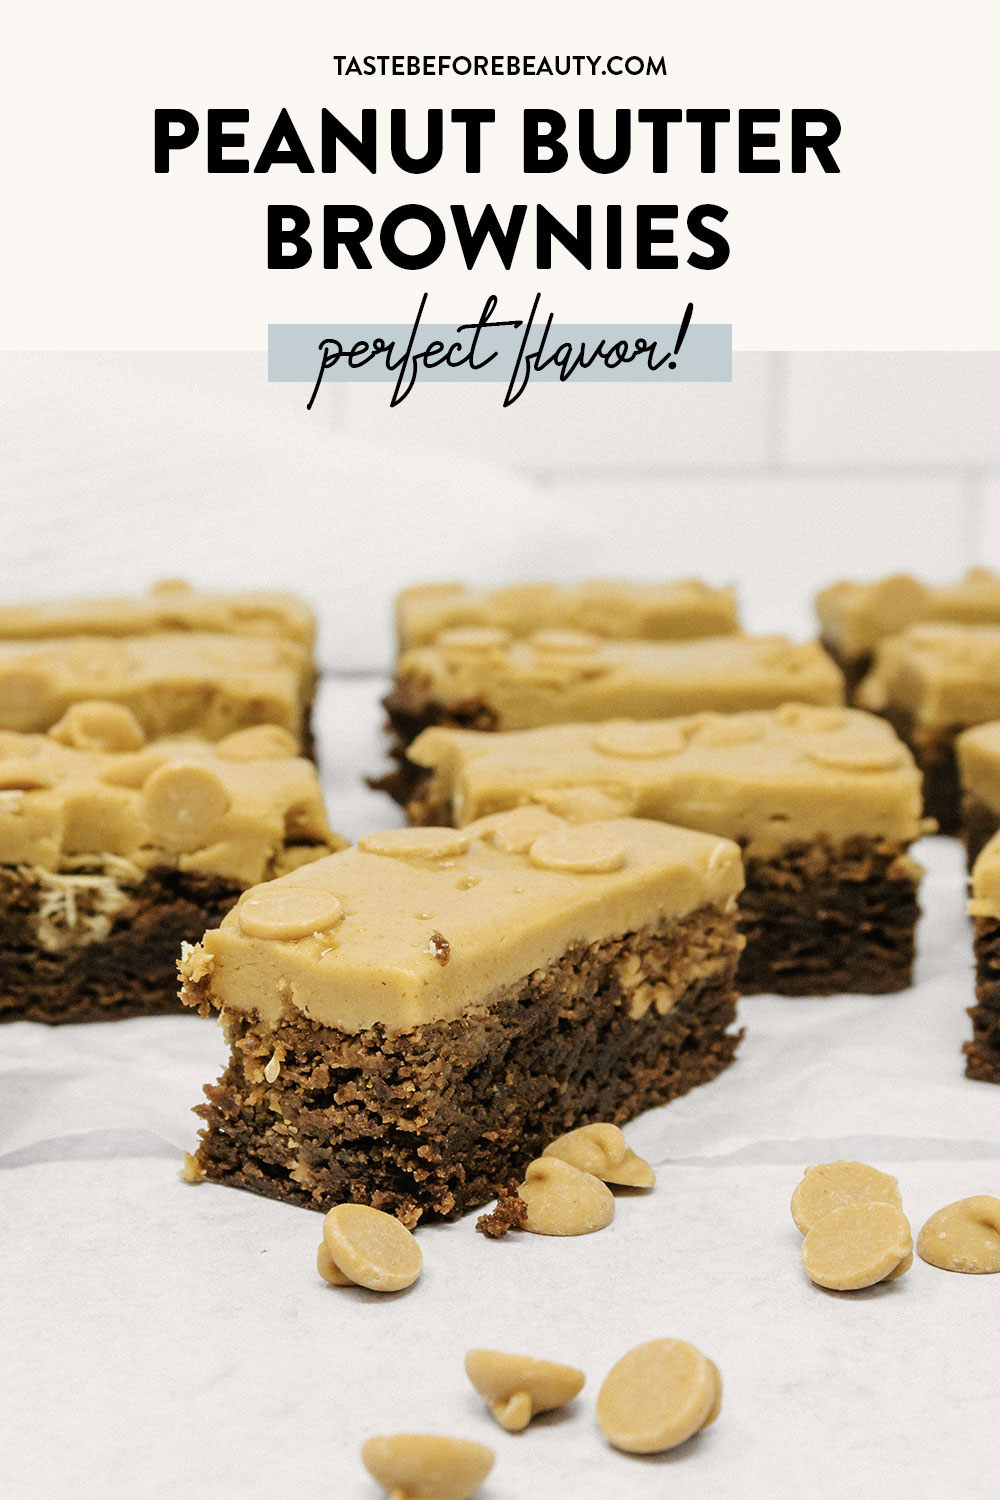
Pure bliss for the Peanut Butter Chocolate lover. You’ll need a large jar of peanut butter for this recipe. It’s worth every ounce!
Peanut butter and brownies seem like a no brainer. The trick is to let the peanut butter AND the chocolate brownie shine. You would think this was easy, but it’s not. How do you combine the chewiness of a perfect brownie with the creaminess of a spoonful of peanut butter?
Local Inspiration for the Peanut Butter Brownies
I live close to Hershey, Pennsylvania, home of the Reese’s Peanut Butter Cup. This perfectly balanced chocolate and peanut butter candy has inspired me before (like with the Pennsylvania Tango Cookie) and it inspired me here too.
Many people in the area love chocolate peanut butter treats, and it’s no wonder. Driving through downtown Hershey, you can smell the roasting cocoa beans every morning. I found many peanut butter treats were too sweet for my liking though.
Although the peanut butter cup is a wonderful candy, I wanted chocolate and peanut butter in the form of a stable, irresistible brownie. I wanted it to be easily transferable to a church youth event and easy to pick up from a dessert table.
More Peanut Butter, Please!
Sometimes we throw peanut butter at a chocolate recipe and hope for the best, to disastrous results. One flavor outshines the other, or it’s too rich. They need to be in perfect harmony to create the perfect treat.
To solve a common problem of the peanut butter layer being too sweet, I simply added more peanut butter to the mixture. It gives a true peanut butter taste without overwhelming you.
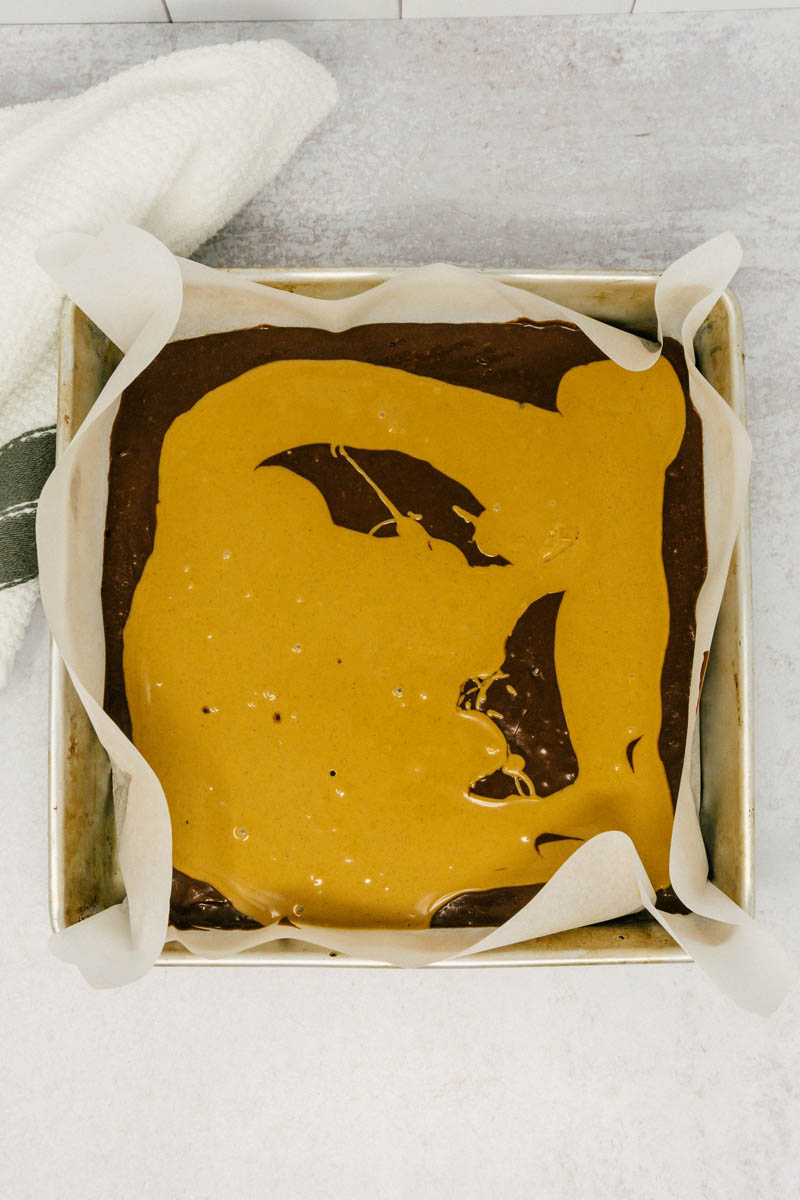
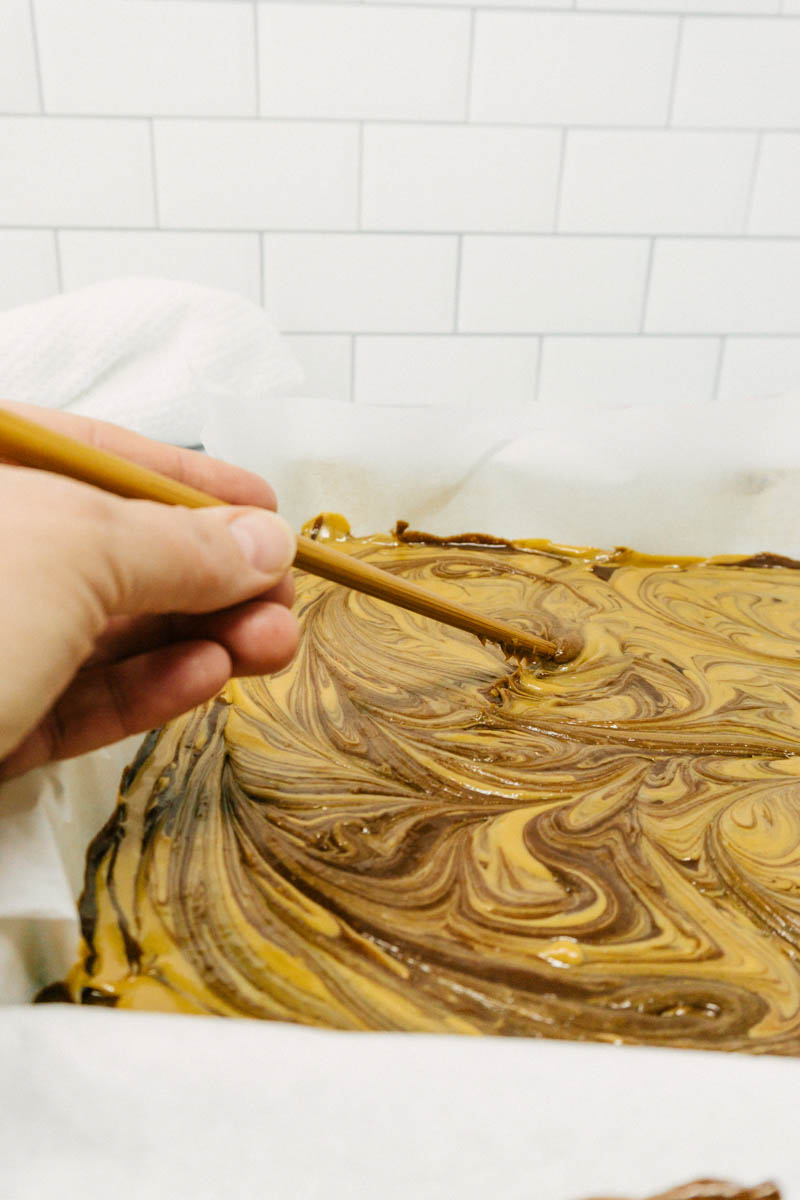
Now that I had the perfect topping, I felt like the brownie needed an additional kick of smooth peanut butter flavor to make it cohesive with the topping. Using peanut butter chips would add a texture I didn’t want. On a whim, I melted some creamy peanut butter and swirled it through the top of the batter. Not only does it look beautiful, it tastes great!
Recipe Tips
The peanut butter topping is thick, almost like edible peanut butter playdough. It slices nicely and blends well with the brownie. If you want a smooth top, use a piece of wax paper to lay over top and then smooth out the peanut butter layer with your hand.
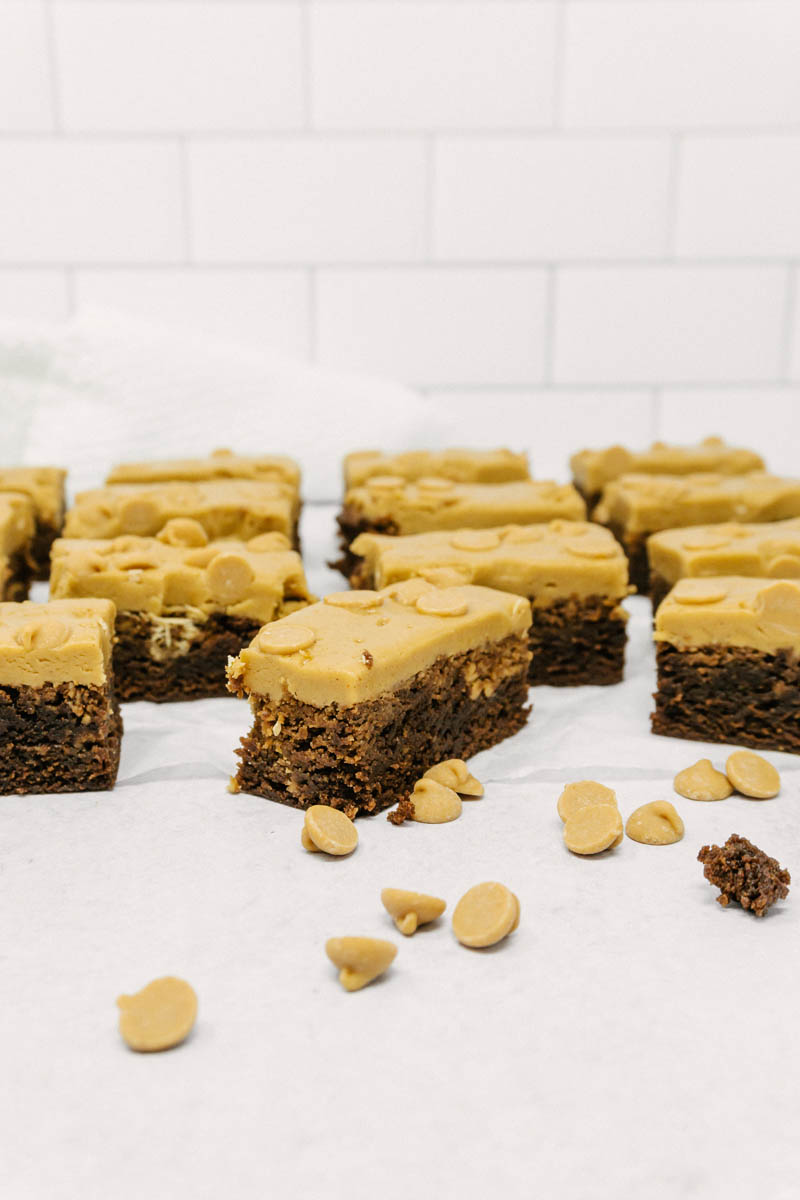
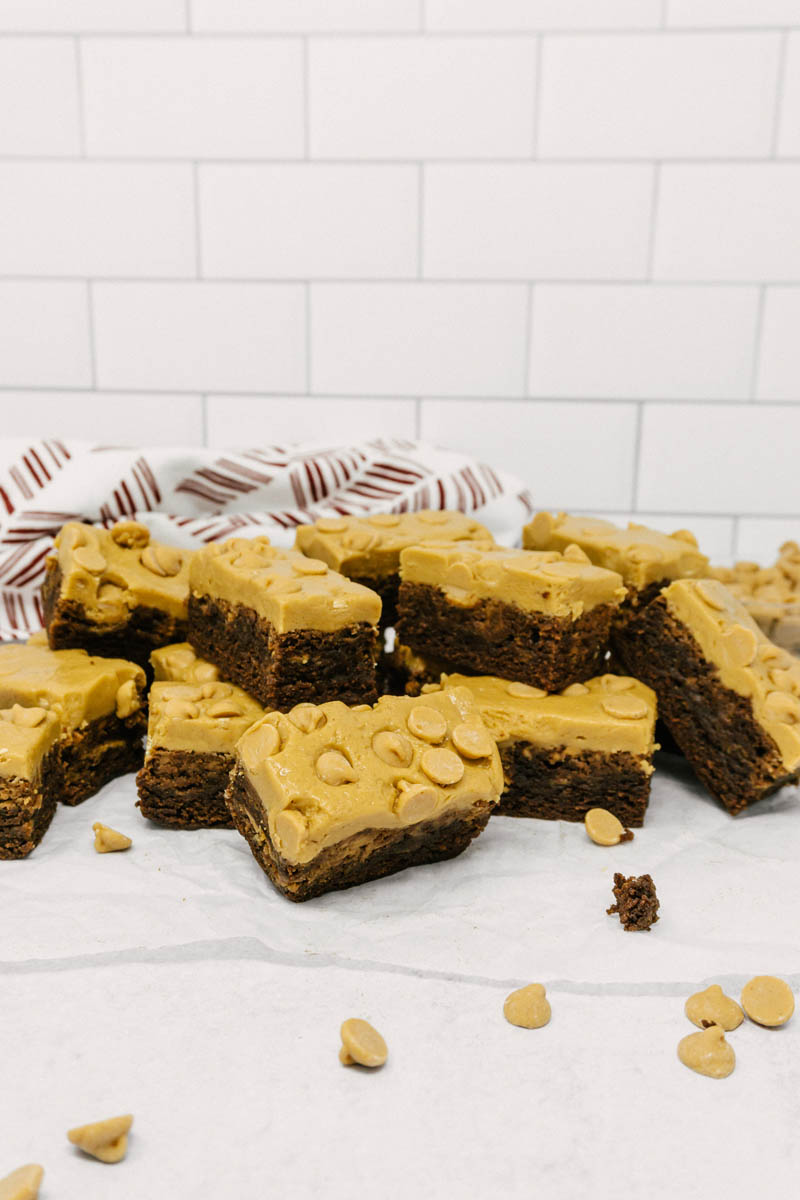
The peanut butter chips on top are just for fun. You could leave them off, but I think they add visual appeal. You could also use shaved chocolate or mini chocolate chips.
This brownie is best served in small portions. It packs a punch of peanut butter and chocolate flavor. You don’t need much to satisfy that craving. These freeze well if you want to save some for later.
An “ode” is an elaborate poem meant to praise something. I would say these Peanut Butter Brownies are my lyrical recipe effort to the peanut butter and chocolate brownie pairing. Let me know what you think of it in the comments, and don’t forget to leave a review!
Peanut Butter Brownies
Yield: one 10x10 pan, 32 servings
Prep Time: 20 minutes
Cook Time: 25 minutes
Additional Time: 20 minutes
Total Time: 1 hour5 minutes
Pure bliss for the Peanut Butter Chocolate lover. You’ll need a large jar of peanut butter for this recipe. It’s worth every ounce!
Ingredients
Brownie Batter
½ C (4 oz) salted butter, melted
½ C (3.8 oz) vegetable oil
1 ¾ C (7 oz) powdered sugar
1 C minus 2 T (7 oz) light brown sugar
½ C (1.8 oz) cocoa powder
4 large eggs
1 tsp vanilla
1 tsp salt
1 C minus 2 T (4 oz) all-purpose flour
1 C (9.5 oz) creamy peanut butter, melted
Peanut Butter Topping
6 T (3 oz) stick margarine
2 C (9 oz) powdered sugar
1 ¾ C (16.5 oz) creamy peanut butter
⅔ C (4 oz) peanut butter baking chips (optional)
Instructions
Make the Brownies.
Preheat oven to 350*F.
Line the bottom and sides of 10x10 or 9x13 cake pan with parchment paper.
In a medium bowl, mix butter, oil, sugars, and cocoa. Add eggs, vanilla, salt, and flour and mix until combined. Pour into prepared pan.
Melt 1 C (9.5 oz) of creamy peanut butter. Pour over brownie batter and swirl through with a knife or chopstick.
Bake for 25 minutes. Let cool completely.
Make the Peanut Butter Topping.
Using a stand mixer, mix margarine, peanut butter, and powdered sugar until completely combined. It will be very thick.
Press onto the top of the brownie. Use a plastic gloved hand to spread evenly over brownie.
Top with peanut butter baking chips and press in lightly.
Cut into 32 rectangular bars.
Notes
Be sure to use stick margarine, not tub margarine, for the peanut butter topping.
To smooth the peanut butter topping, lay a piece of wax paper over the top and use your hand to smooth any ridges out.
These bars should be served in small portions. I serve them in white cupcake liners on a tray.
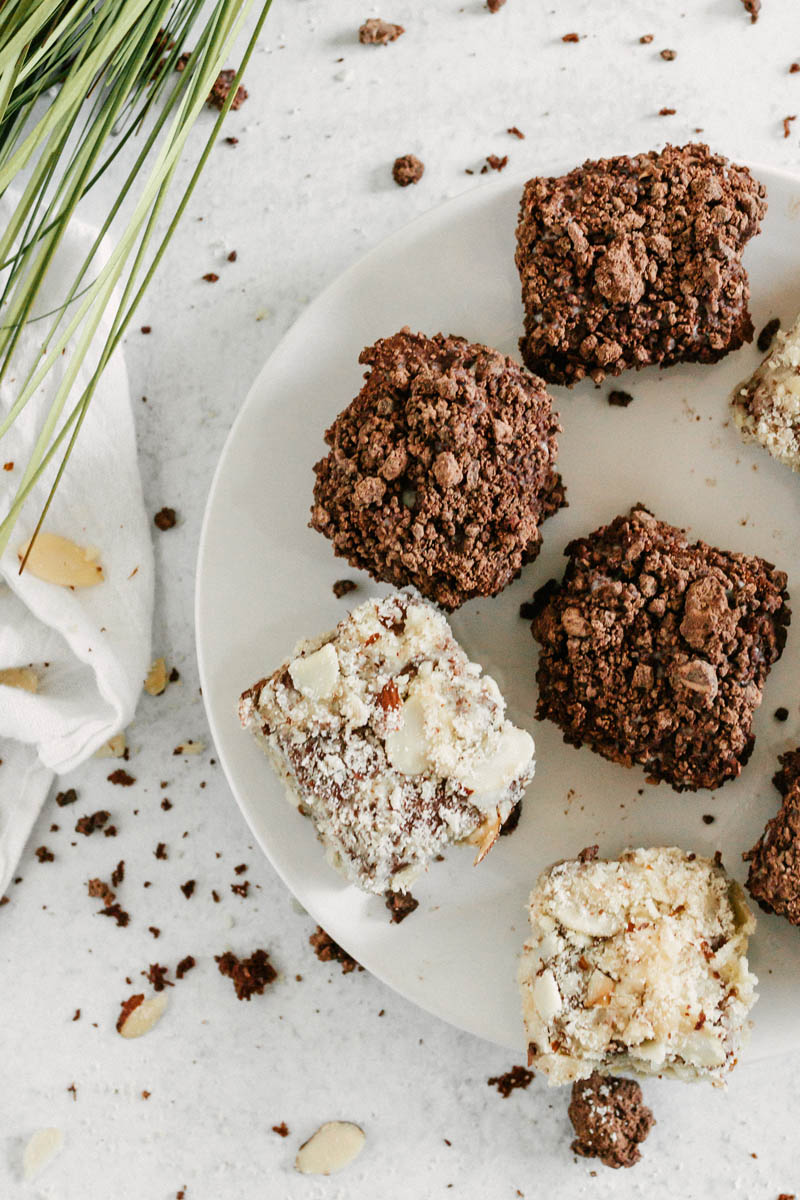
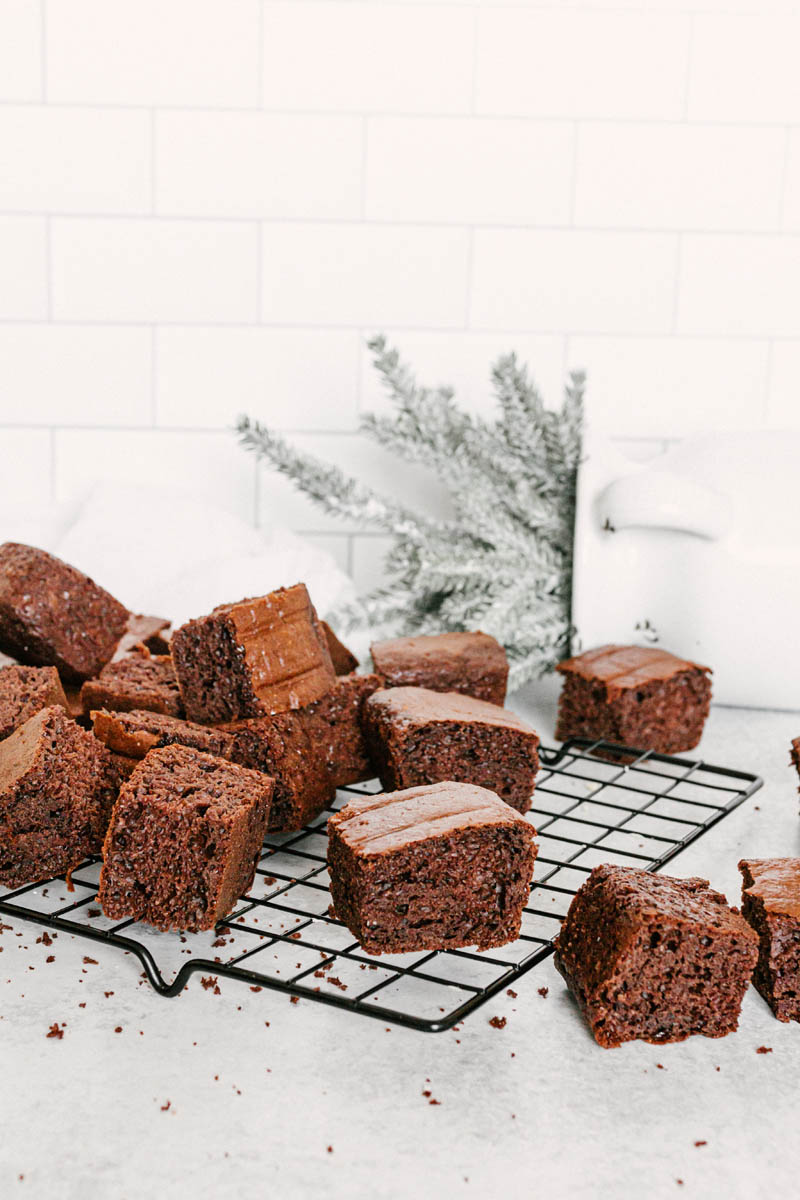
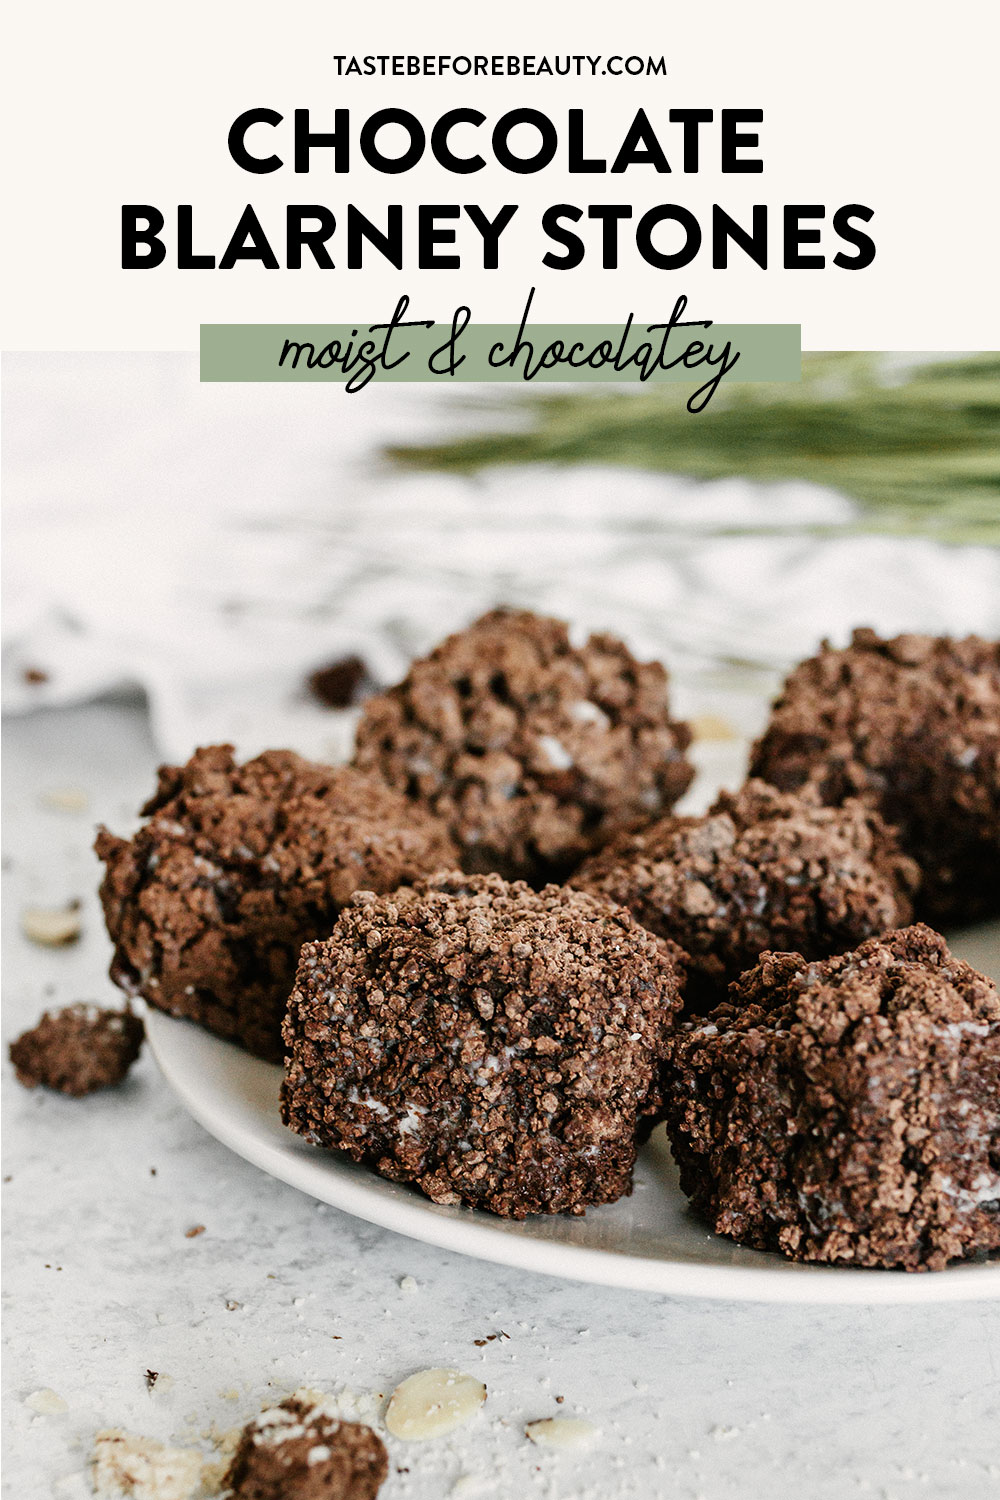
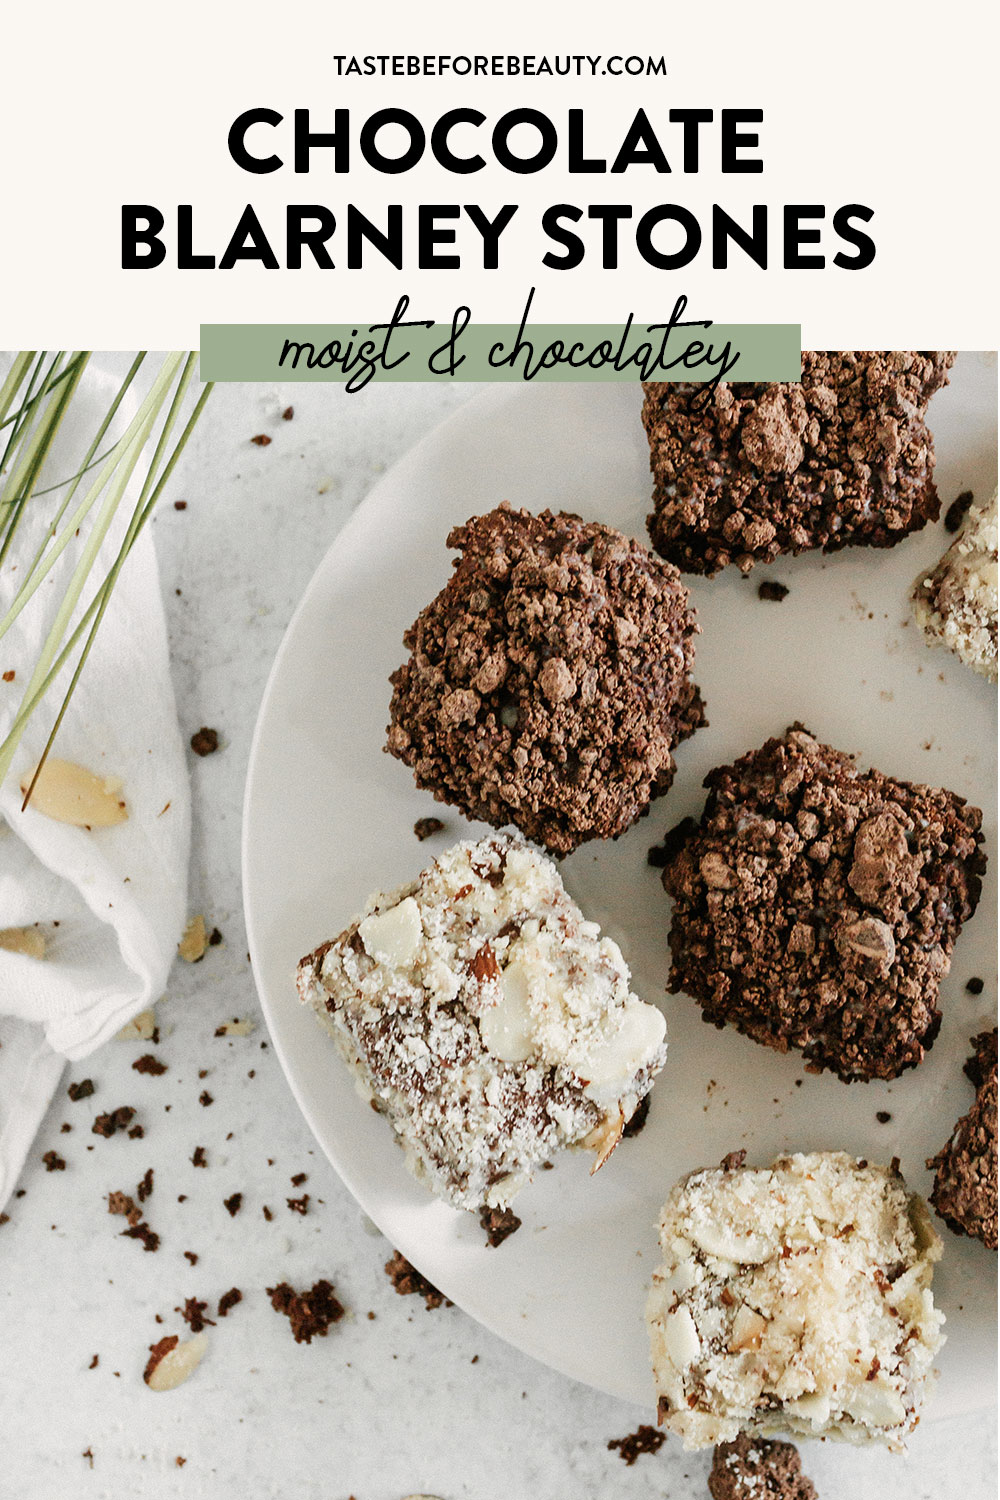
An easy, moist chocolate cake center, a light whipped cream topping, and creamy milk chocolate coating. Talk may not fill the stomach (Irish proverb) but this little gem of a cake will fill all the right corners.
The Blarney Stone
Years ago, I was at a “Planning For A Dinner Party” class and the guest presenter showed us how to make these darling, easy chocolate petit fours. Sometime after that, I was reading a magazine and saw a recipe for a St. Patrick’s Day-themed petit four similar to the ones from my class. They were called a “Blarney Stone” but were just pound cake covered in frosting and rolled in crushed peanuts.
It didn’t look much like a stone to me. They were golden, rather than grey, as I imagine the Irish castles are from photos I’ve seen. Perhaps they meant it to look like a nugget of gold. Either way, I thought the idea was cute and would be an easy, quick treat for a St. Patrick’s Day party or even any time of year.
Chocolate Blarney Stone For Some Irish Luck
I opted for a chocolate center and I knew at least some of my “Blarney Stones” needed to be rolled in chocolate. Not just any chocolate, milk chocolate. I was doing some research about food trends in Ireland and ran across an article stating that milk chocolate is the preferred chocolate in Ireland. It was perfect for the chocolate blarney stone!
Hershey Chocolate Company developed a “Symphony Bar” years ago. Its flavors are more European and remind me of Cadbury chocolate flavors. I love chocolate with toffee undertones and the Symphony Chocolate Bar checks that box. So it was the choice for this petit four.
Never Underestimate the Power of the Boxed Cake Mix
You can make the chocolate cake from scratch, but if you do, I would only suggest a devil’s food cake, like this Rich Chocolate Cake. The deep chocolate flavor is perfect to balance the richness of the milk chocolate on the chocolate blarney stone. But because this recipe is meant to be a time-saver, I use a boxed Devil’s Food Cake mix. Adding the instant pudding gives it some additional structure so it holds up to being handled for decorating.
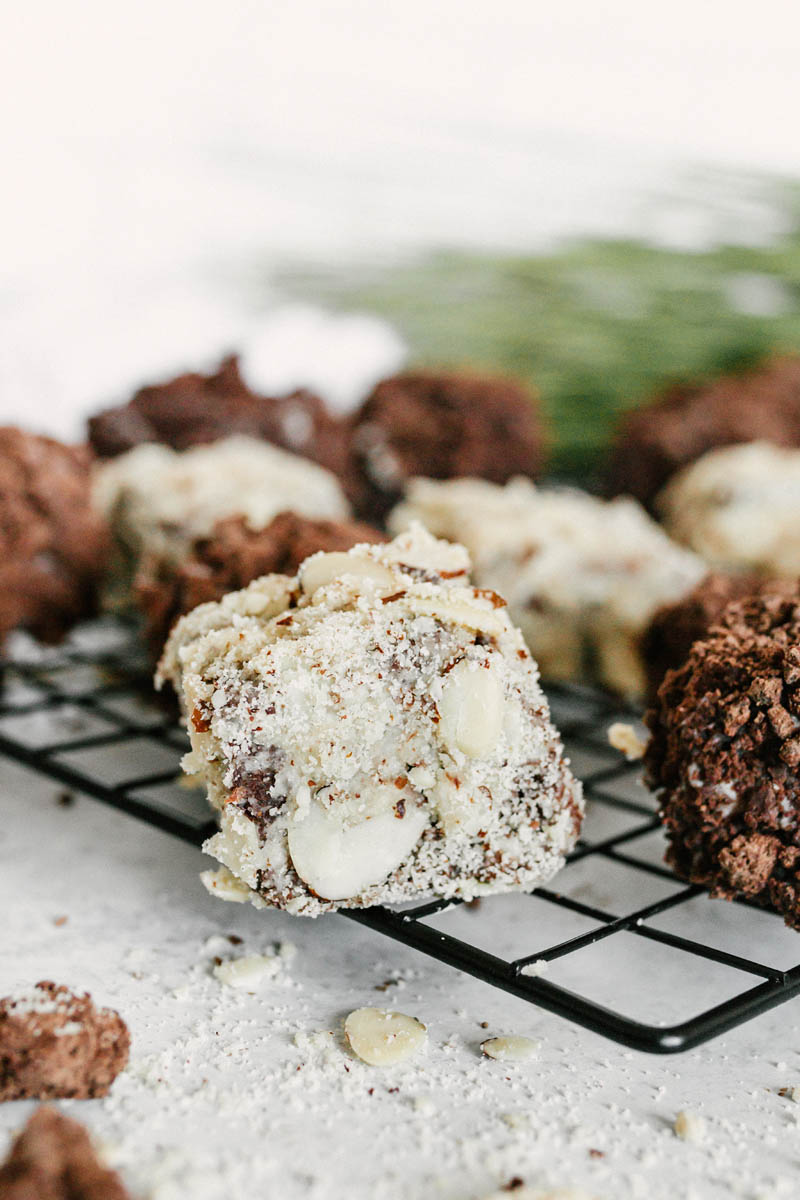
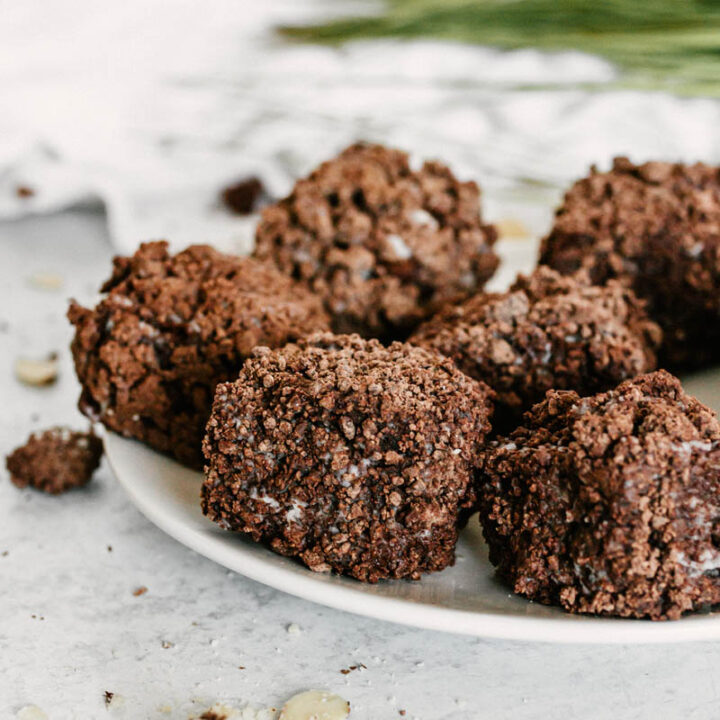
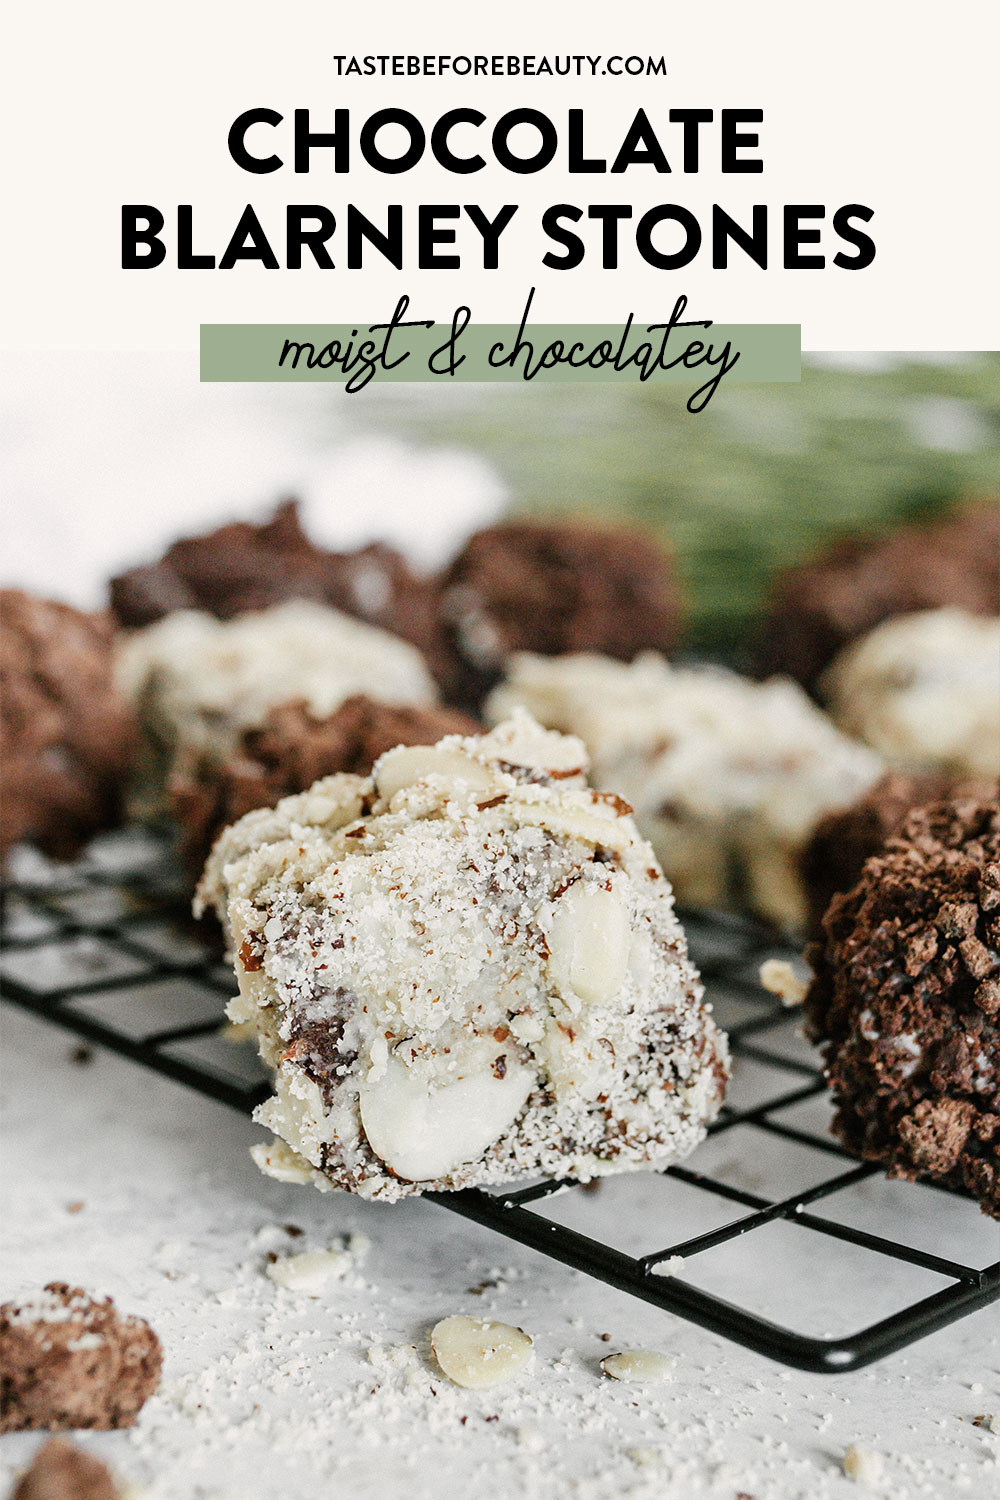
The original idea for these was a petit four surrounded in frosting. It seemed a bit too rich for me to have a small bite of cake completely encased in a layer of frosting. So I lightened it up with a stabilized Cream Cheese Whipped Cream that has just a touch of cream cheese flavor. I love using creamy Symphony Bar milk chocolate to coat these in, but you could also use almonds or coconut for contrast and variety.
Build A Better Chocolate Blarney Stone
There are a couple of Irish Proverbs related to food and famine. “You don’t know what is in the pot until the lid is lifted” and “Talk doesn’t fill the stomach”. I hope you try “lifting the lid” and experience this chocolate blarney stone recipe for yourself, and as talk (and writing) doesn’t fill the stomach – get to it. Be sure to share your opinions and experience in the comments and reviews section.
“May the holes in your nets never be larger than the fish in it,” and may this little chocolate blarney stone cake delight your belly.
Chocolate Blarney Stones
Yield: 30 squares
Prep Time: 45 minutes
Cook Time: 25 minutes
Additional Time: 3 hours
Total Time: 4 hours10 minutes
An easy, moist chocolate cake center, a light whipped cream topping, and creamy milk chocolate coating. Talk may not fill the stomach (Irish proverb) but this little gem of a cake will fill all the right corners.
Ingredients
Cake Squares
1 box Devil’s Food Cake Mix
1 (3.4 oz) box instant chocolate pudding
3 eggs
1 C (8 oz) buttermilk
¼ C (2 oz) vegetable oil
Cream Cheese Whipped Cream
1 (8 oz) package cream cheese, room temperature
½ C (3.5 oz) white sugar
1 tsp vanilla
1 ¾ C (14 oz) heavy cream
Topping
1 ½ Milk Chocolate Symphony Bars, grated (10 oz total)
1 ½ C (6 oz) sliced almonds (optional)
Toasted coconut (optional)
Instructions
Make the Cake.
Preheat oven to 325*F. Spray a 9x13 cake pan with nonstick cooking spray. Set aside.
In a large mixing bowl, sift together cake mix and instant pudding mix. Add eggs, buttermilk, and vegetable oil. Using a hand mixer, mix for two minutes to combine.
Spread batter evenly into prepared pan.
Bake for 25 minutes, or until center bounces back when lightly pressed.
Let cool completely, then cut into 1.5-inch squares.
Make the Cream Cheese Whipped Cream.
Place cream cheese in a medium-sized mixing bowl. Use a hand mixer to beat cream cheese until completely smooth. Add sugar and vanilla and beat until smooth.
Scrape the bowl (don’t skip!) then add heavy cream. Mix for a bit, then stop and scrape the bowl again. Repeat once or twice, then continue to beat until stiff peaks form.
Assemble the Blarney Stones
Place chopped/grated chocolate into a flat container or on a plate.
Place cream cheese whipped cream into a piping bag or gallon-size plastic bag. Snip the end so it is ready to pipe.
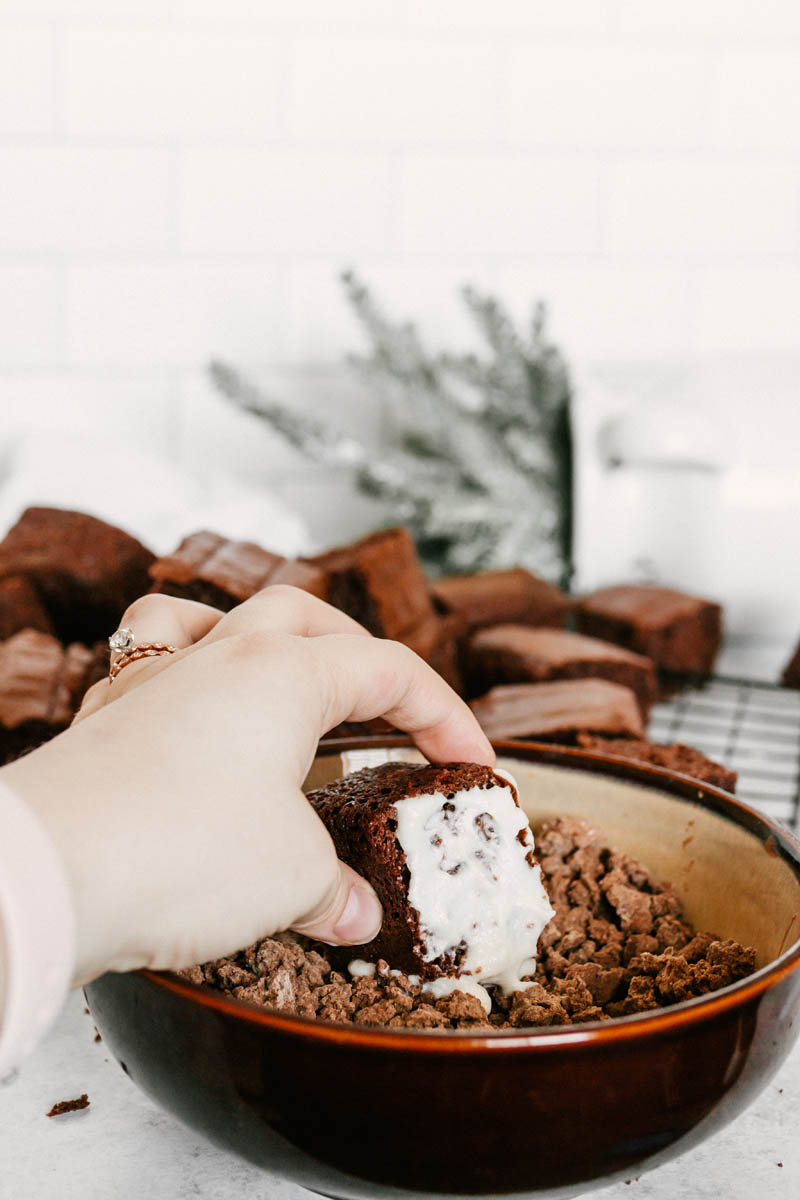
Pipe Cream Cheese Whipped Cream onto sides of cake square. Cream should be piped just thick enough so that the grated chocolate will stick, but not so thick that the cream falls off. Press into chopped or grated chocolate. Pipe cream onto the top and bottom and roll in chocolate. All six sides should be covered.
Optional: press cream-covered cake squares into sliced almonds or toasted coconut instead of grated chocolate. Mix and match as you please.
Place into a cupcake liner or serving dish to serve.
Notes
Can also use a 10x10 pan in place of 9x13 pan.
You may not need all the cake squares. Freeze remaining and use in a chocolate trifle or for petit fours another day.
Keep Cream Cheese Whipped Cream chilled and beat until stiff peaks form. If it is too soft, it may drip off of cake squares.
These can be made 3-4 days in advance. Place in white cupcake liners for easy serving.
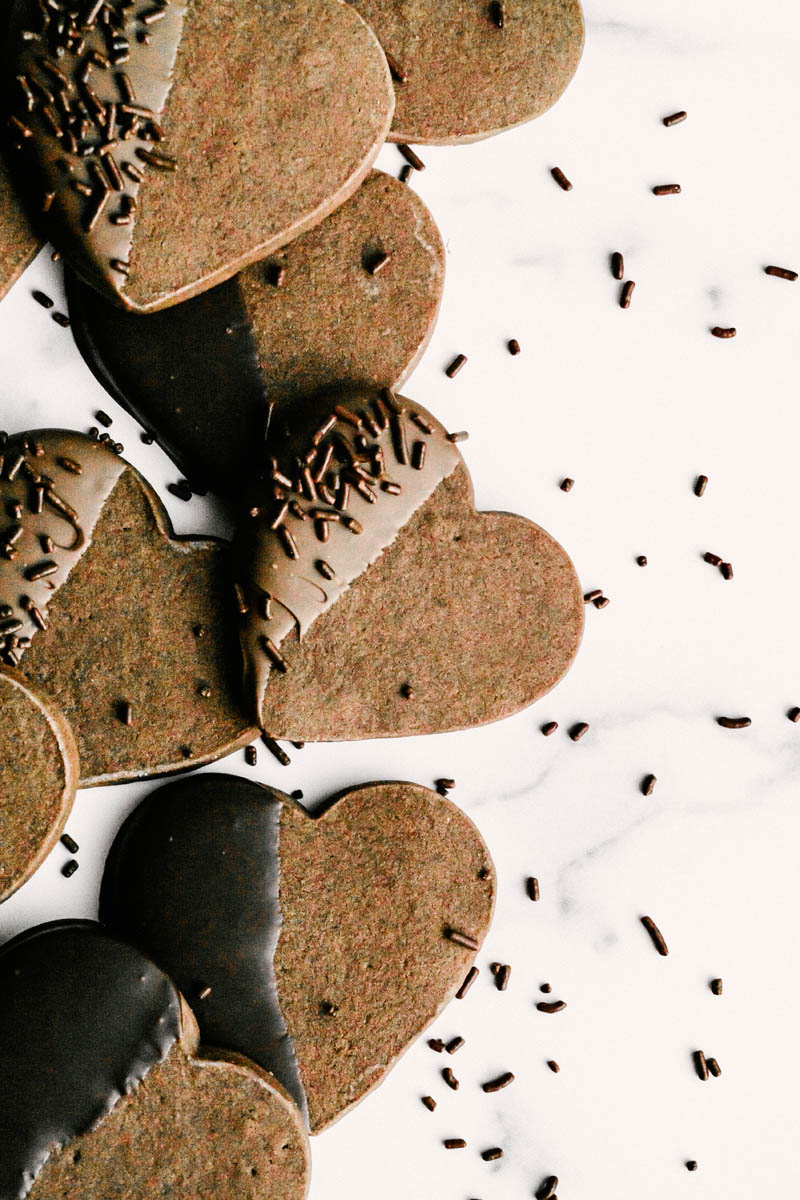
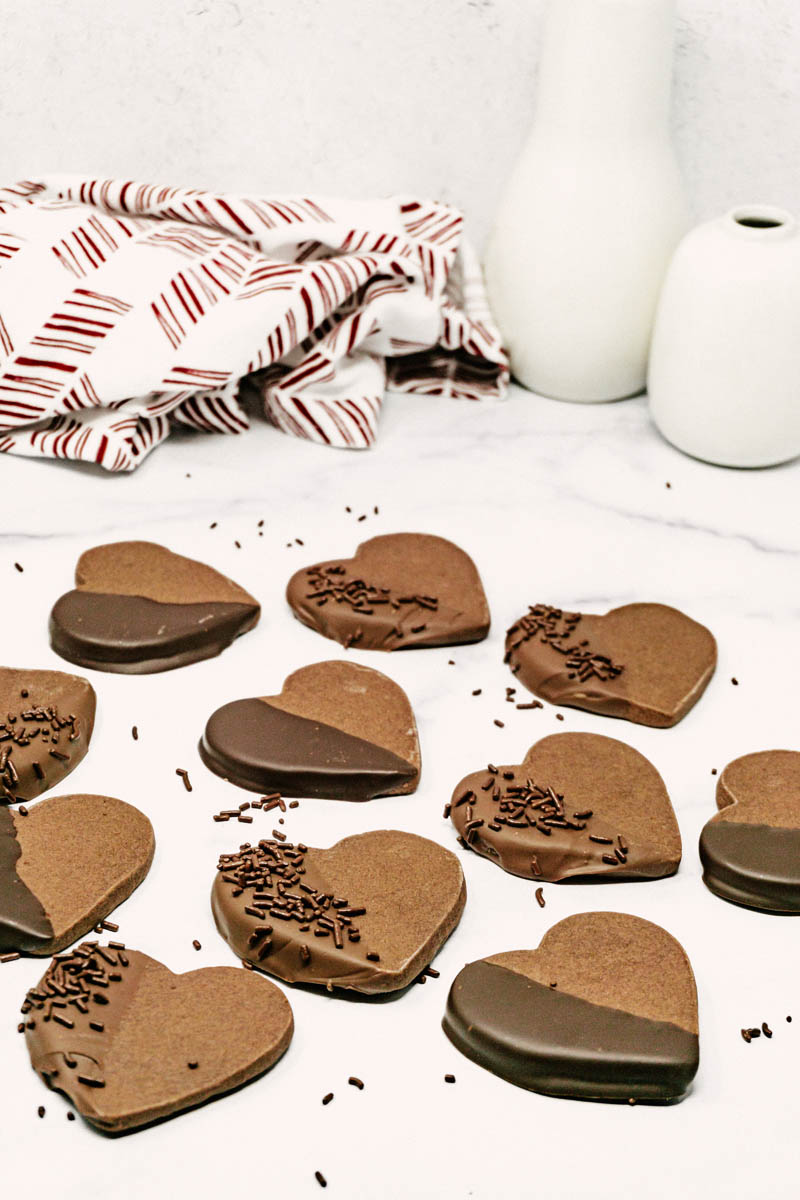
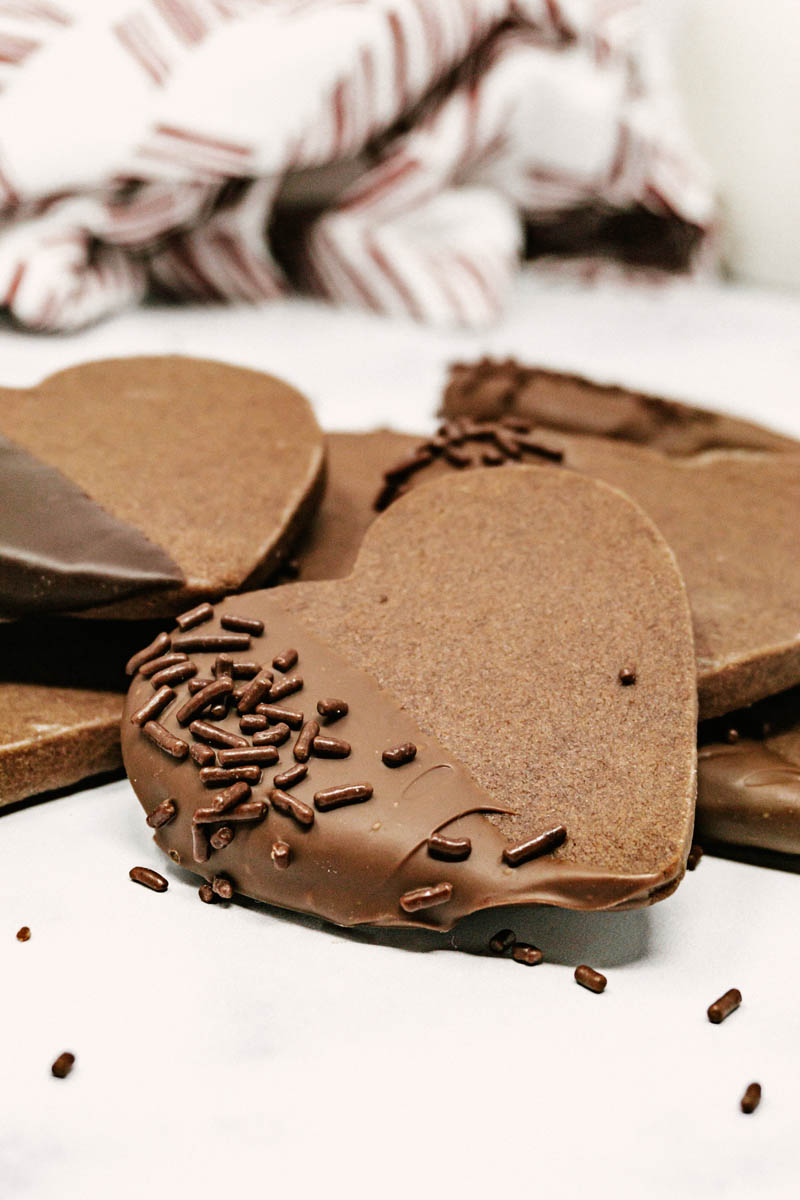
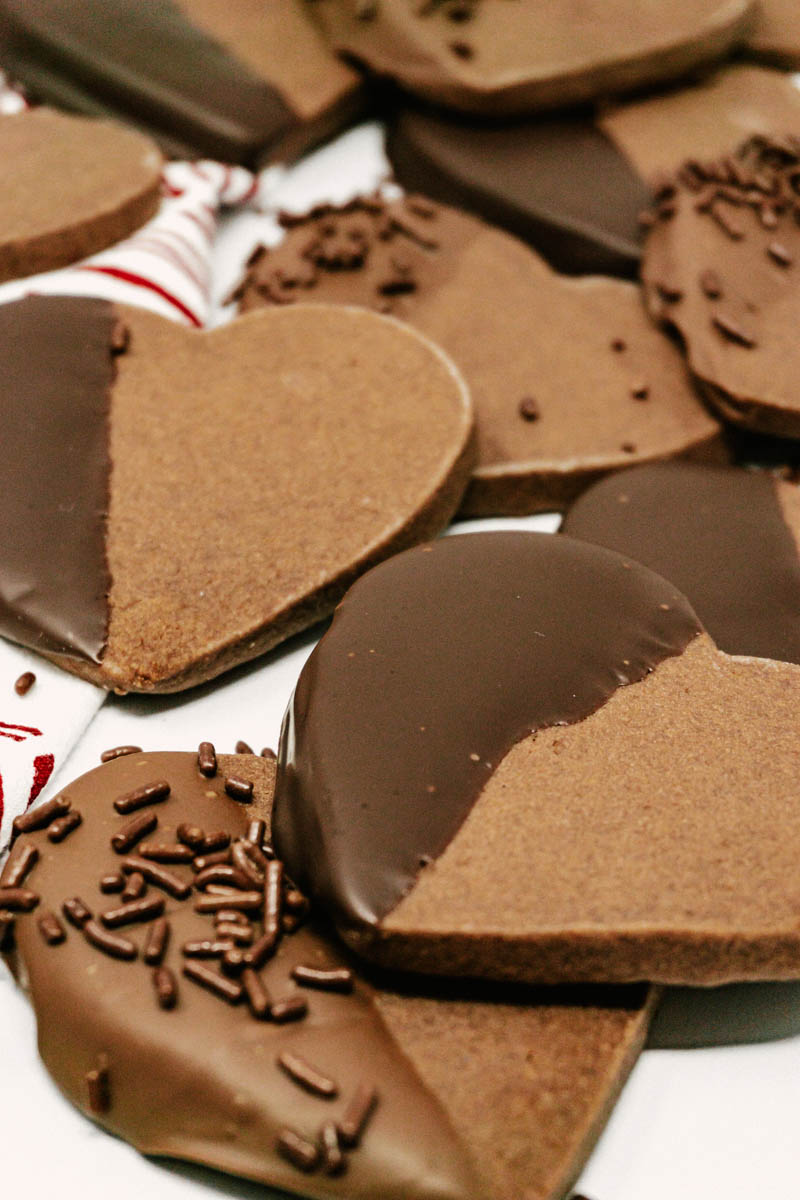
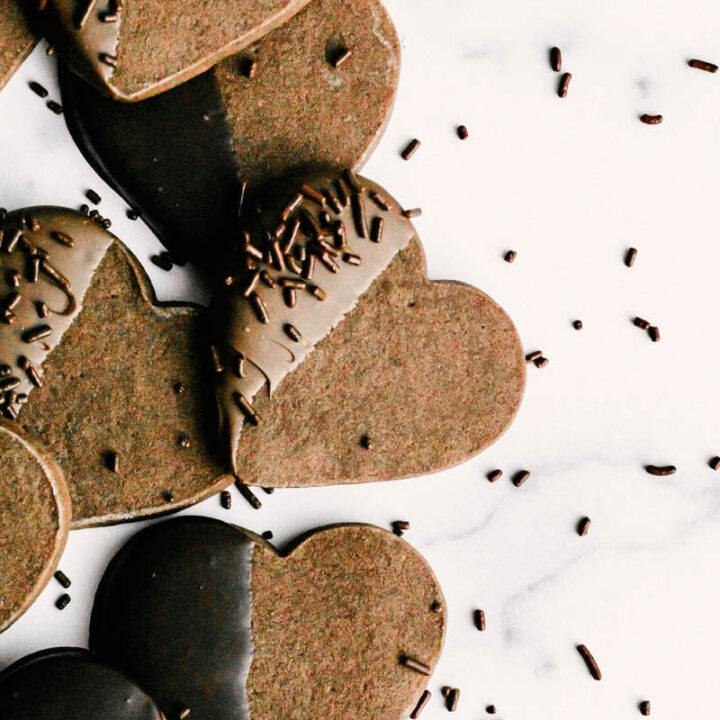
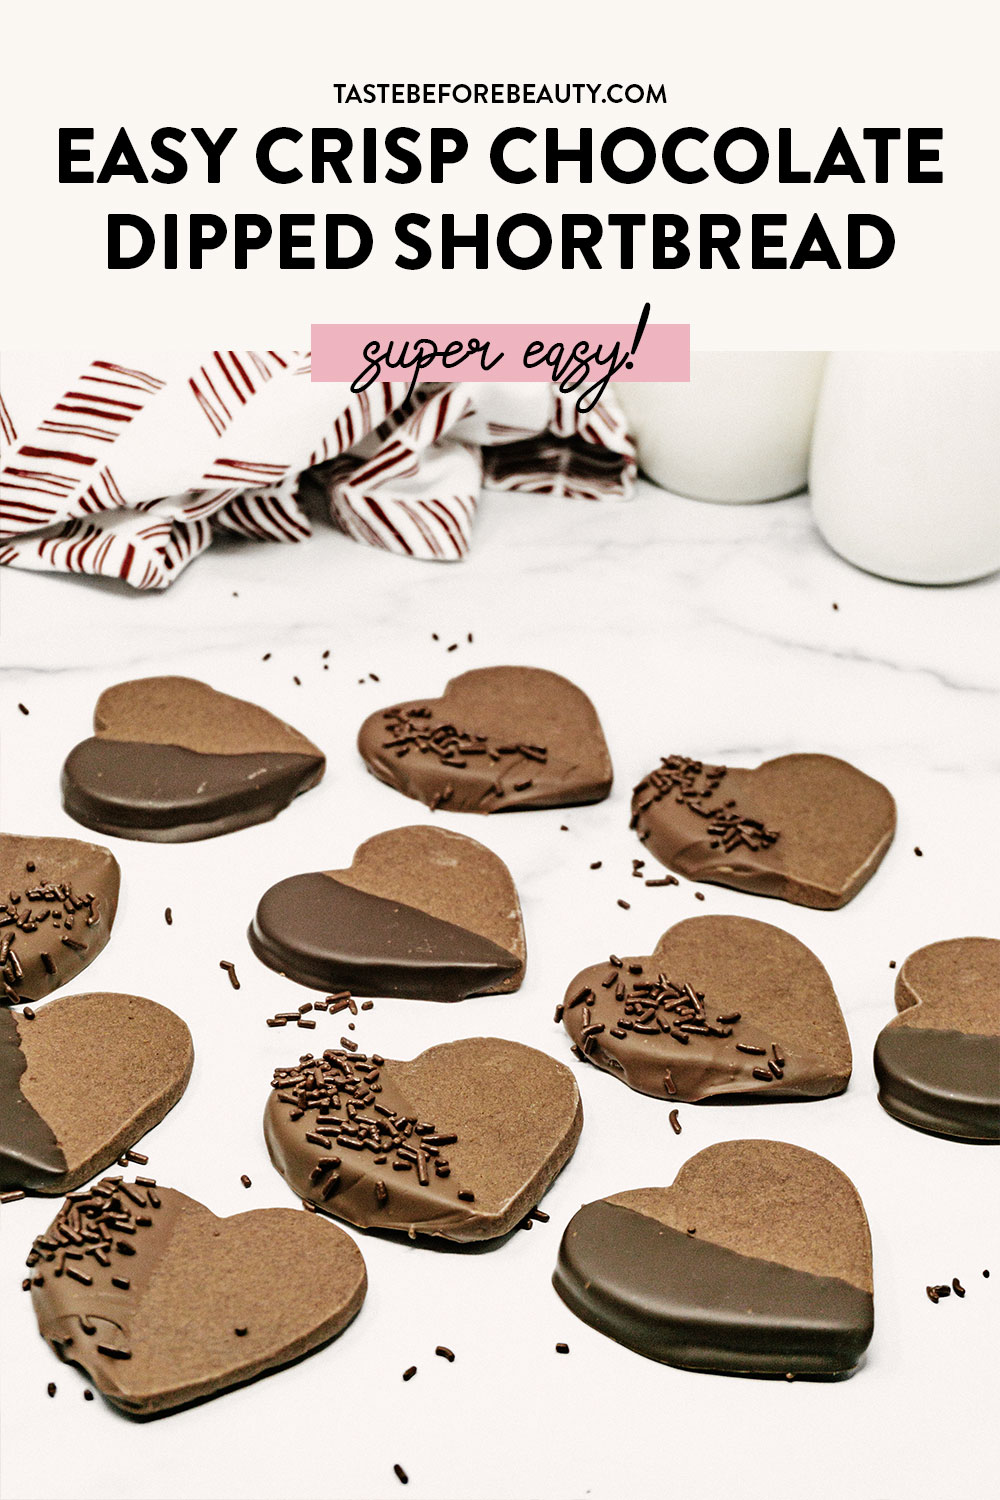
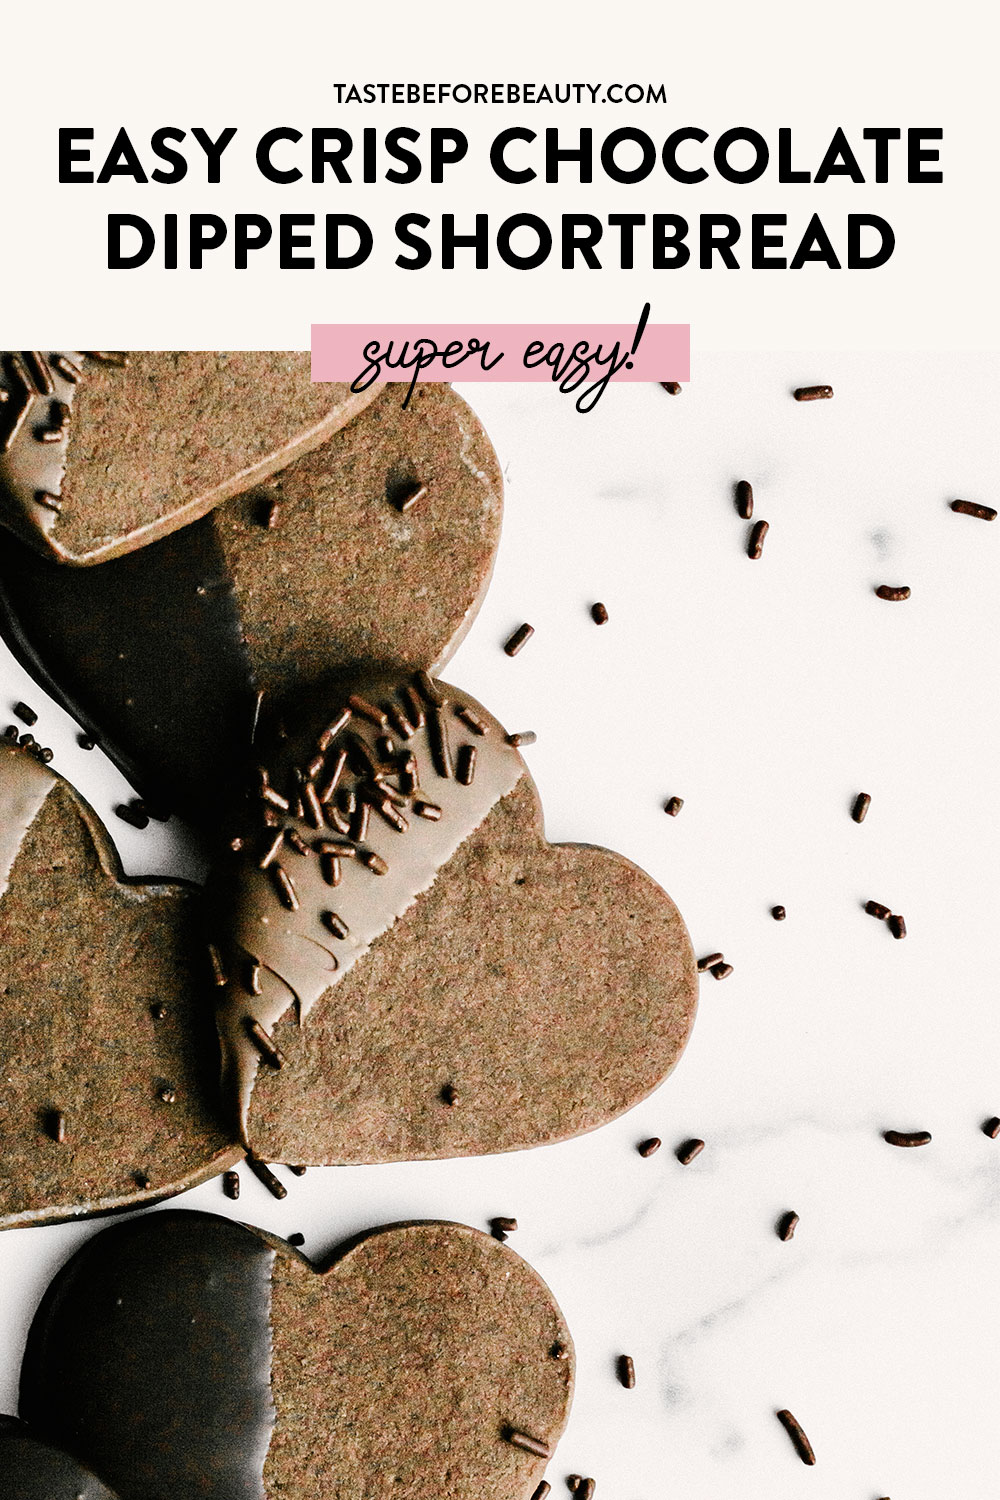
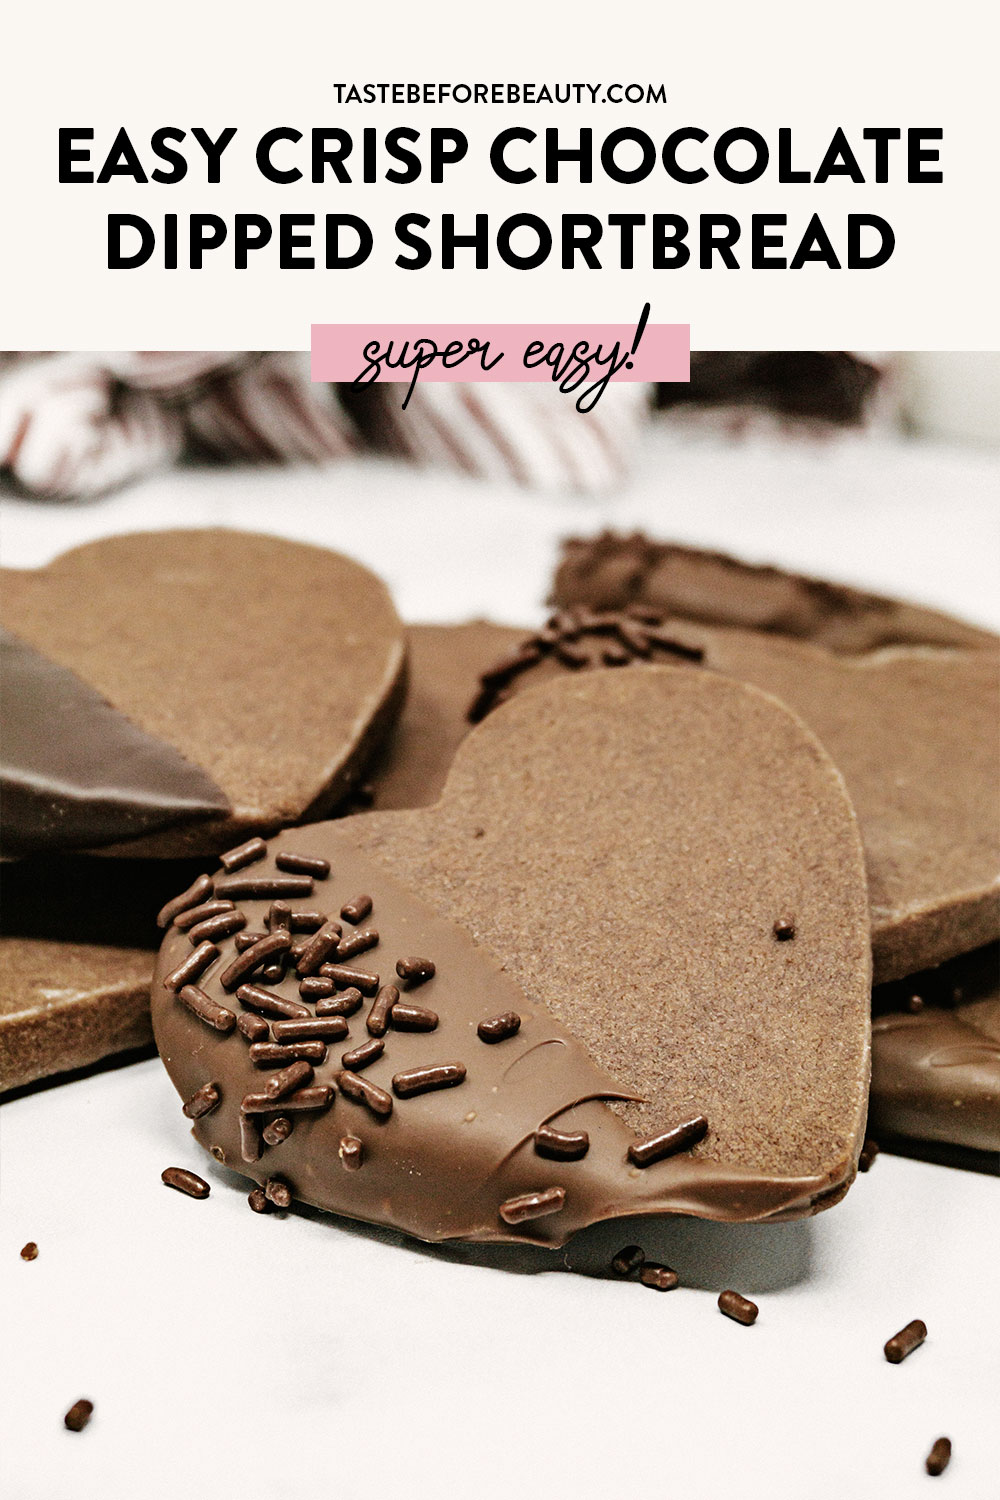
Thin, crispy chocolate shortbread dipped in chocolate. It’s a total showstopper with minimal effort.
These Easy Crisp Chocolate-Dipped Shortbread cookies are light, perfectly crisp, easy to make, and look beautiful too.
Some Shortbread Shortcuts
Melted chocolate is the trick to making perfectly crisp shortbread without the chalky mouthfeel that cornstarch gives. It helps to lighten the crunchiness of shortbread, turning it into a melt-in-the-mouth miracle. You can use white chocolate to make a vanilla shortbread cookie, too. Check it out in our Irish Butter Shortbread Cookies.
I love to use Dutch-process cocoa whenever I can. It adds a deep chocolate color and gives a smooth flavor. The smoother, less acidic flavor of the cocoa highlights the crisp texture of this shortbread.
I generally avoid refrigerated cookie dough. It takes extra time and changes the flavor of the cookie. However, this chocolate shortbread recipe is an exception. A short time in the refrigerator firms the dough up just enough that it holds its shape when cut. I take that time to wash dishes, clean up the kitchen, and preheat the oven. The dough will be ready before you know it!
Dipping in Chocolate Chips
Chocolate chips are an easy shortcut to making these cookies. They taste delicious and don’t require tempering. Ghirardelli Milk and Dark Chocolate Chips are my favorite. They melt easily and make a smooth coating for these Crisp Chocolate Shortbread cookies.
The undipped cookies will last at room temperature for several weeks. The chocolate coating, because it is not tempered, needs to be kept in the refrigerator once dipped. If it is left at room temperature, the chocolate will bloom and leave gray spots and streaks.
You can dip these all at once and store them in the refrigerator for up to two weeks, or leave them at room temperature and dip them in chocolate as you need them. I think the small amount of space in the refrigerator is worth the effort saved on these cookies. The best part about using chocolate chips is that it saves a ton of time.
I love baking and love how easy these Crisp Chocolate-Dipped Shortbread Cookies are. Let me know what you think of the awesome crisp texture and flavor of this cookie in the comments!
Easy Crisp Chocolate-Dipped Shortbread Cookie
Yield: 36 (2-3 inch) cookies
Prep Time: 35 minutes
Cook Time: 15 minutes
Additional Time: 1 hour
Total Time: 1 hour50 minutes
Thin, crispy chocolate shortbread dipped in chocolate. It’s a total showstopper with minimal effort.
Ingredients
Chocolate Shortbread Cookie
1 ½ C (12 oz) salted butter, room temperature
½ C (3 oz) semi-sweet chocolate chips, melted
1 tsp vanilla
½ C (2.2 oz) powdered sugar
2 T (.5 oz) Dutch-process cocoa
⅛ tsp salt
3 C (13.5 oz) all-purpose flour
Chocolate Coating
2 C (12 oz) milk, dark, or white chocolate chips
2 T chocolate sprinkles (optional)
Instructions
Make the Chocolate Shortbread Cookies.
Using a stand mixer, beat room temperature butter until very light and fluffy. Pour melted semi-sweet chocolate chips into butter and mix quickly to combine. Scrape the bowl and add vanilla. Mix.
Add cocoa, powdered sugar, and salt. Beat for two minutes until very light (do not skip). Add flour and mix to combine, scraping bowl as necessary.
Remove dough from bowl and divide in half. Place each half between sheets of wax paper and roll dough out to ¼ inch thick. Refrigerate rolled out dough until chilled and solid (at least 30 minutes). This helps the dough to keep its form when cut into shapes.
Preheat oven to 325*F. Line cookie sheets with parchment paper.
Remove top wax paper from dough and cut into desired shapes using a flour-dusted cookie cutter. Carefully transfer to parchment-lined cookie sheet. Bake for 15 minutes or until cookie is set. Cool completely.
Dip in Chocolate and Decorate.
Melt chocolate chips. Dip each cookie halfway in chocolate. Top with sprinkles if desired and place on wax paper to cool.
Store in an airtight container in the refrigerator for up to two weeks. Chocolate coating will bloom if stored at room temperature.
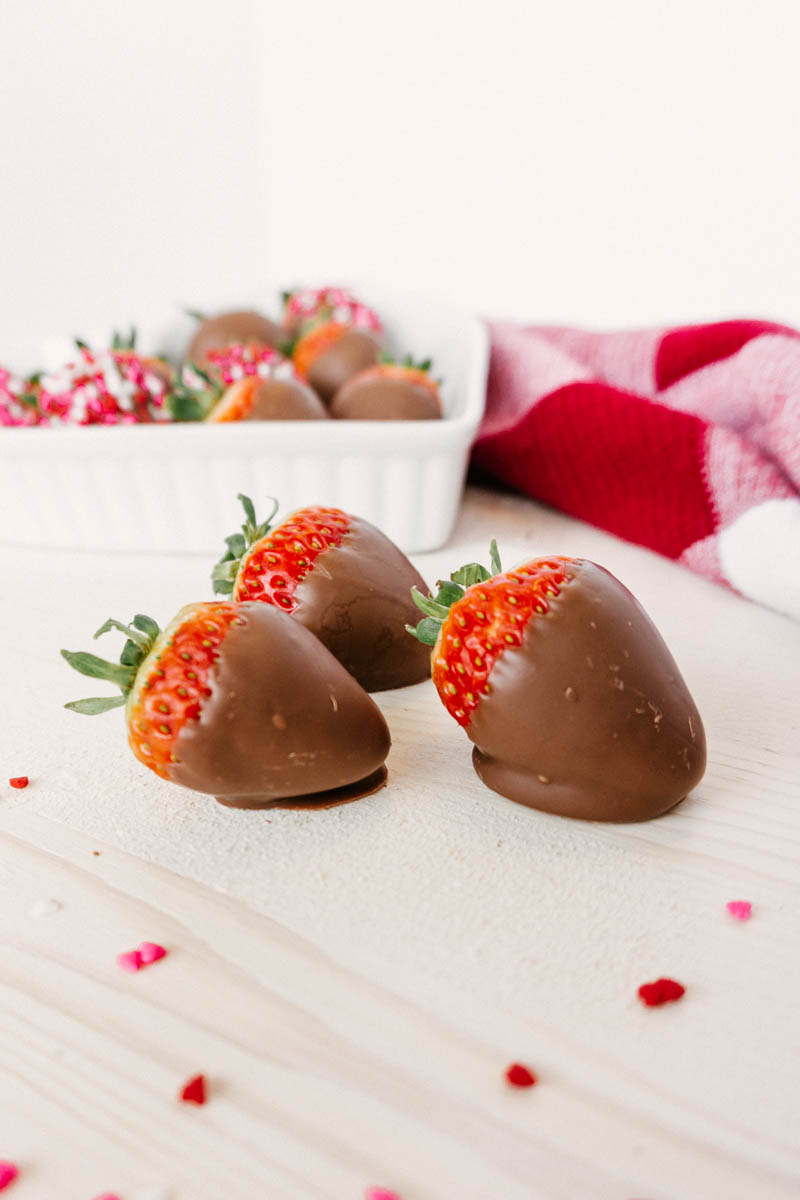
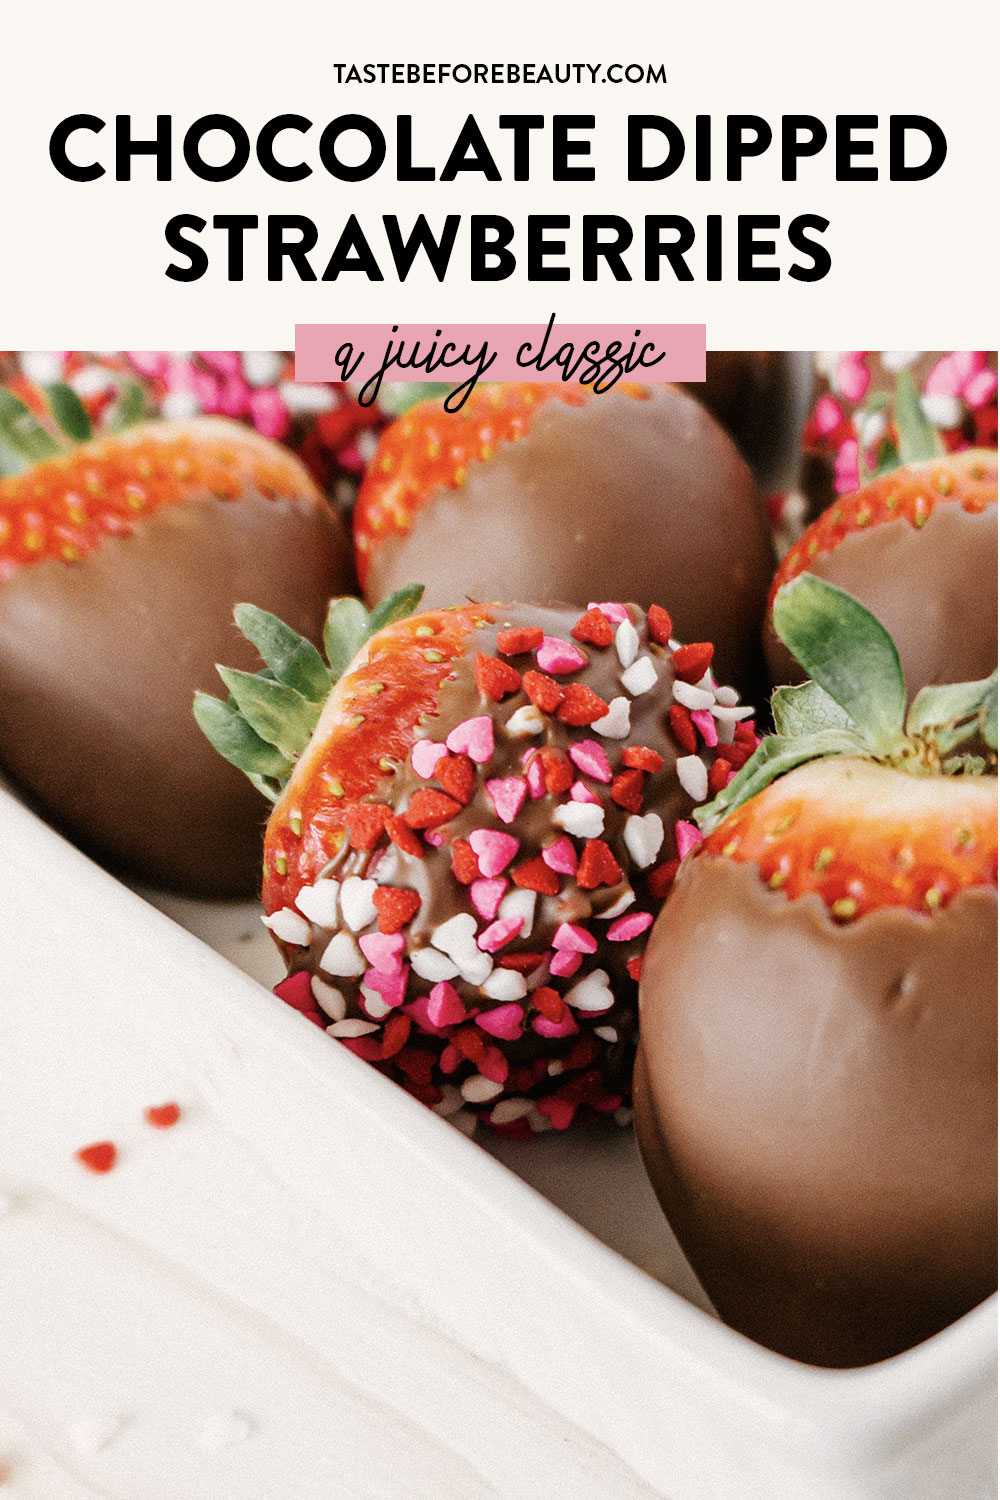
You will find yourself ‘berry’ much liking these Chocolate Dipped Strawberries! Delectable chocolate on a juicy strawberry, who would want anything else?
After many failed batches of chocolate covered strawberries over the years, I stumbled upon a little miracle. This simple trick has saved me countless hours in tempering chocolate and lots of money. These fail-proof Chocolate Dipped Strawberries vanish almost instantly!
Tempering is For Toddlers’ Tantrums
I have chocolate-dipped countless amounts of strawberries. I have used high-quality chocolate, studied it in cookbooks, and spent lots of time carefully tempering the chocolate. You would think it would be fairly simple to make a beautiful berry that lasts a few days.
However, due to the nature of strawberries, after about 24 hours the moisture begins to separate the berry from the chocolate coating. It doesn’t seem worth it to spend so much time tempering expensive chocolate just to have it be ruined by morning. I kept at it though because I love Chocolate Dipped Strawberries.
The Miracle
In this midst of my Chocolate Dipped Strawberry journey, I attended a wedding reception for a friend. They served chocolate dipped strawberries they had dipped by hand. I could not leave the dessert table. They were delicious! Curious to how they had achieved such wonderful results, I asked what kind of chocolate they had used. Their response? Chocolate chips!
I couldn’t believe I had been wasting so much time tempering fancy chocolate. Chocolate chips seemed to be the answer to all my problems. They were simple, beautiful, and tasted wonderful.
Choosing the Right Chocolate for the Chocolate Dipped Strawberries
The Chocolate Dipped Strawberries at the wedding reception had been dipped in semi-sweet chocolate chips. I tried using my favorite brand of semi-sweet chocolate chips but the melted chocolate was too thick and didn’t coat the berries well.
Next, I tried using some Ghirardelli Milk Chocolate Chips. WOW. They melt smooth and the strawberries come out perfectly dipped. The flavor is incredible. No matter if the strawberries are sweet or tart, they taste amazing. Even dark chocolate lovers, like Kenzie, can’t get enough of them. It’s like magic. You won’t be able to stop at just one.
I guarantee this easy Chocolate Dipped Strawberry recipe will save you time, money, and you’ll feel confident enough to make them anytime you feel like it. They make any day feel extra special. Let us know what occasion you’re making these for in the comments.
Chocolate Dipped Strawberries
Yield: ~40 strawberries
Prep Time: 15 minutes
Additional Time: 30 minutes
Total Time: 45 minutes
You will find yourself "berry" much liking these! Delectable chocolate on a juicy strawberry, who would want anything else?
Ingredients
Strawberries
3 C (16 oz) Ghiradelli Milk Chocolate Chips
Instructions
Rinse and dry strawberries.
Melt chocolate chips in a microwave-safe bowl, making sure to stir every 30 seconds until completely melted.
Dip strawberries in melted chocolate and set on parchment or wax paper to set up for about 30 minutes.
Consume within 24 hours for best results.
Notes
Make sure the strawberries are completely dry before dipping or else the chocolate will not stick correctly to the strawberries.
If you want to add toppings roll the chocolate-dipped strawberry in desired topping while chocolate is still wet.
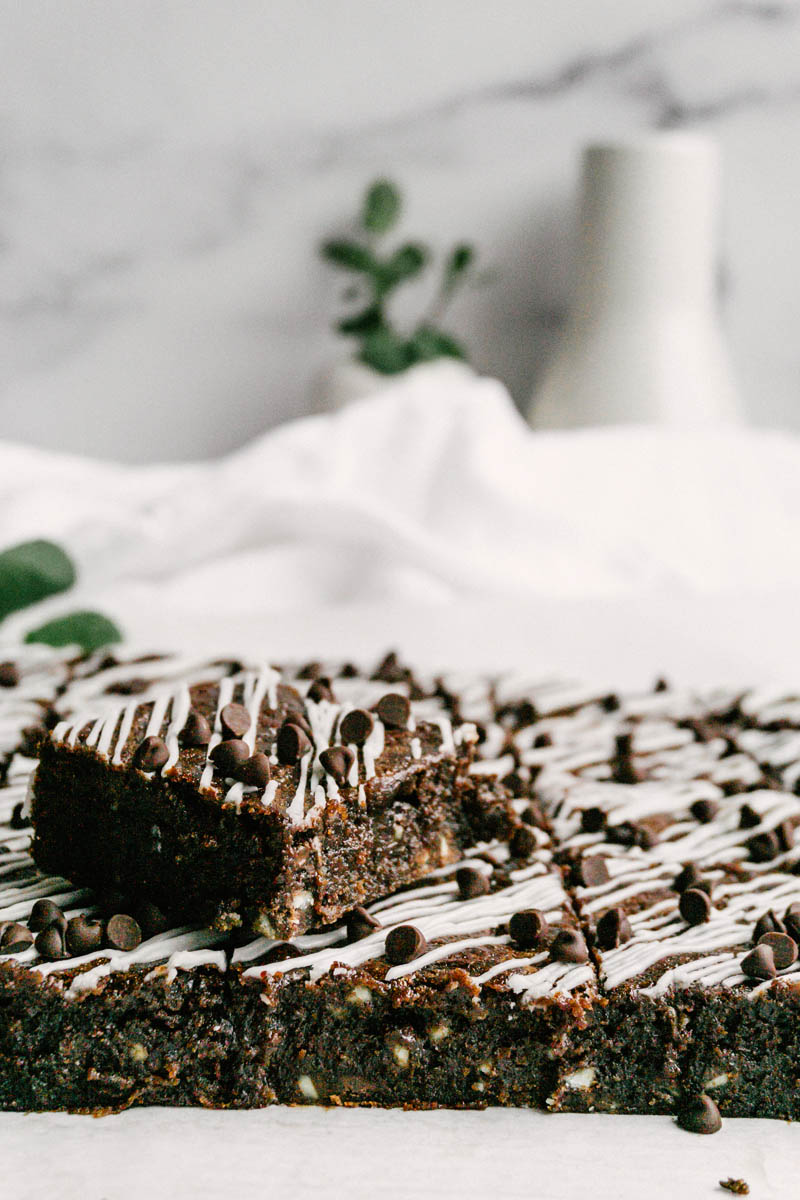
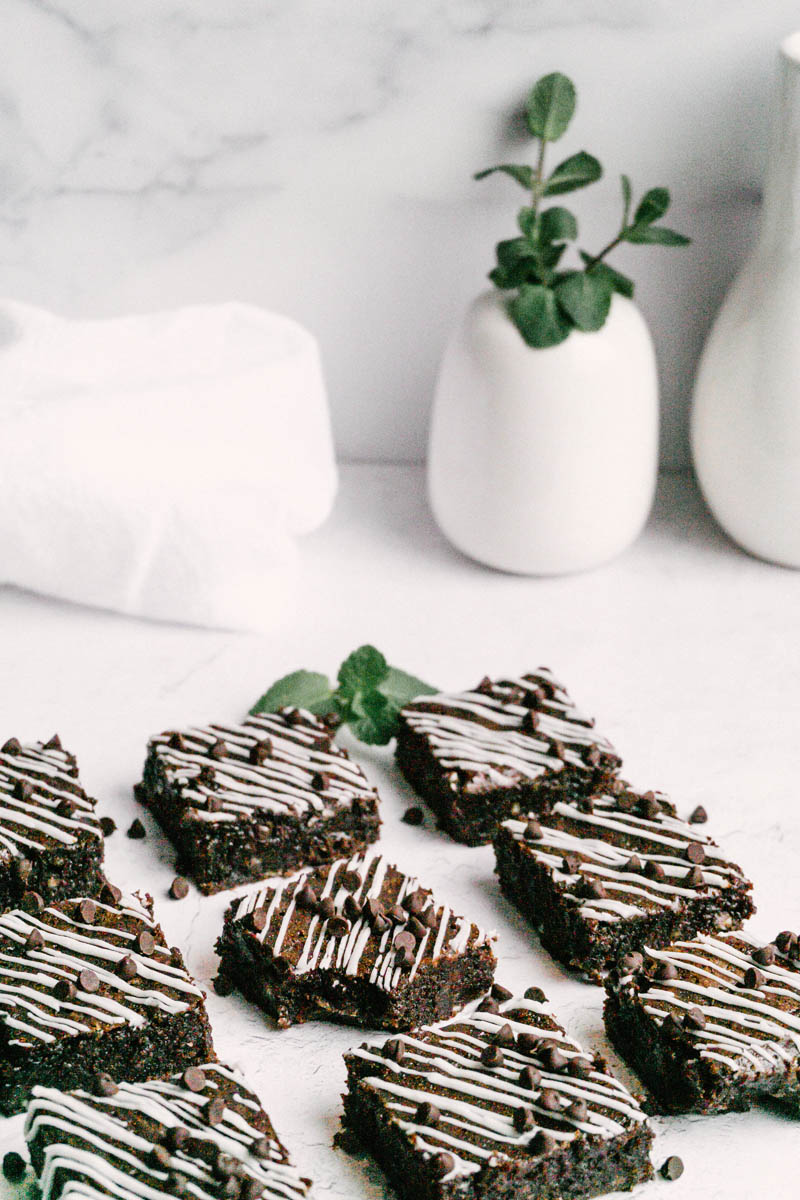
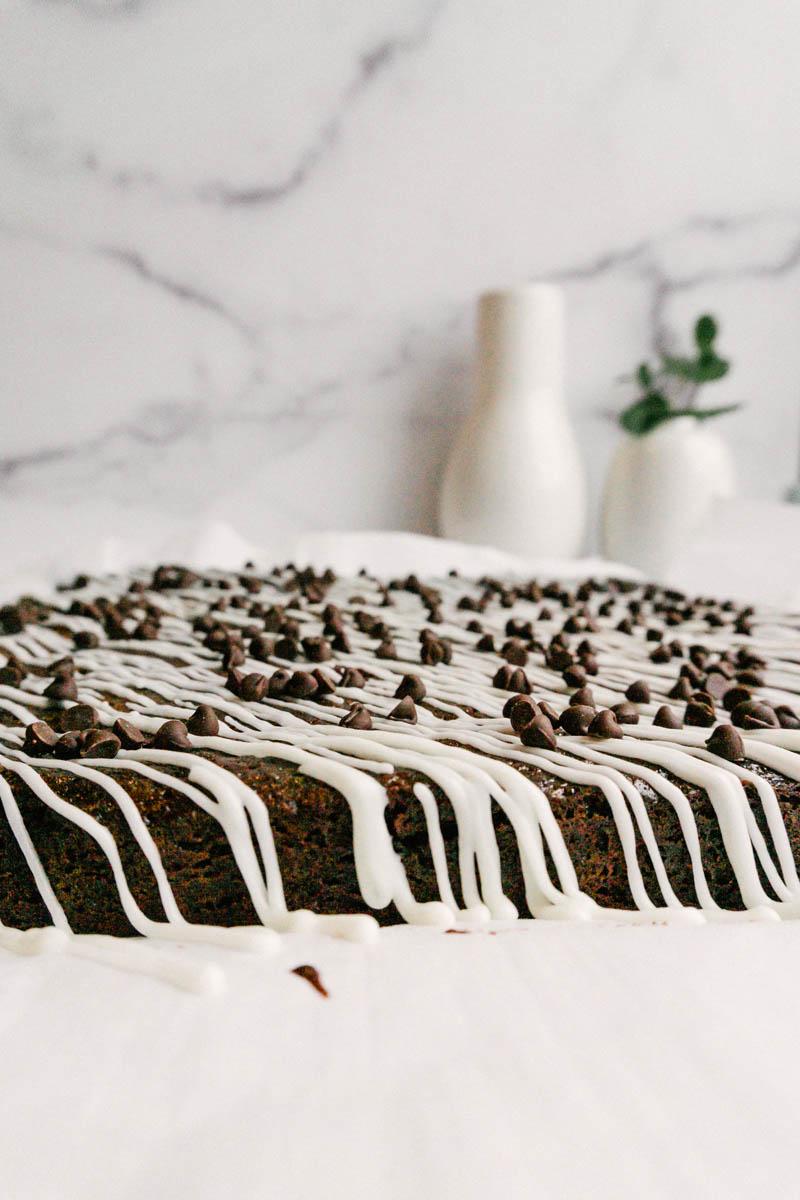
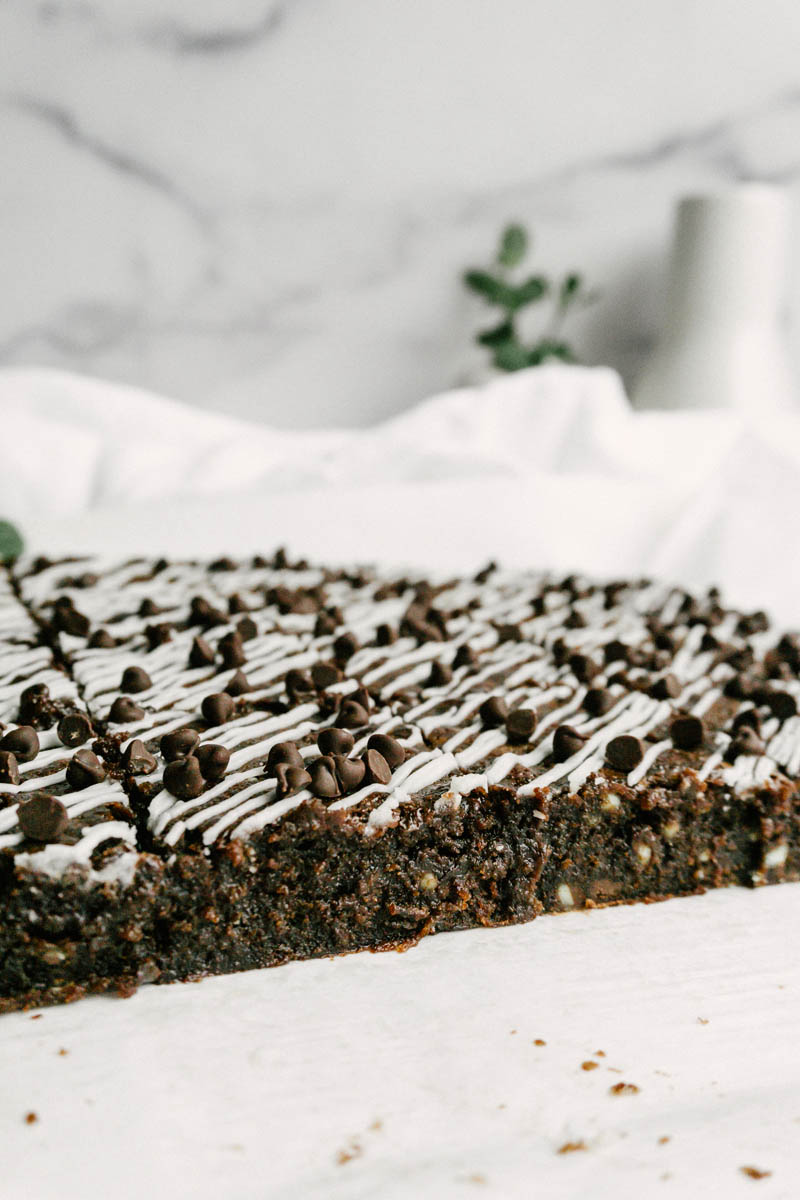
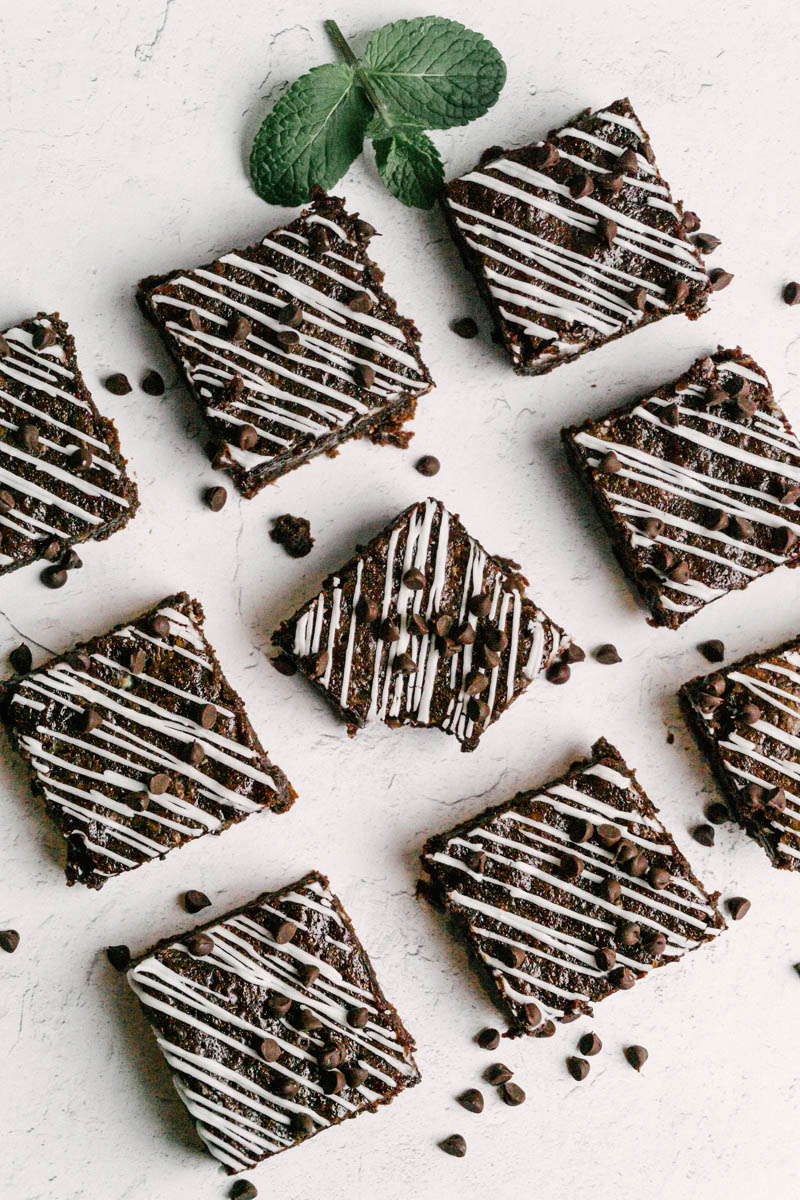
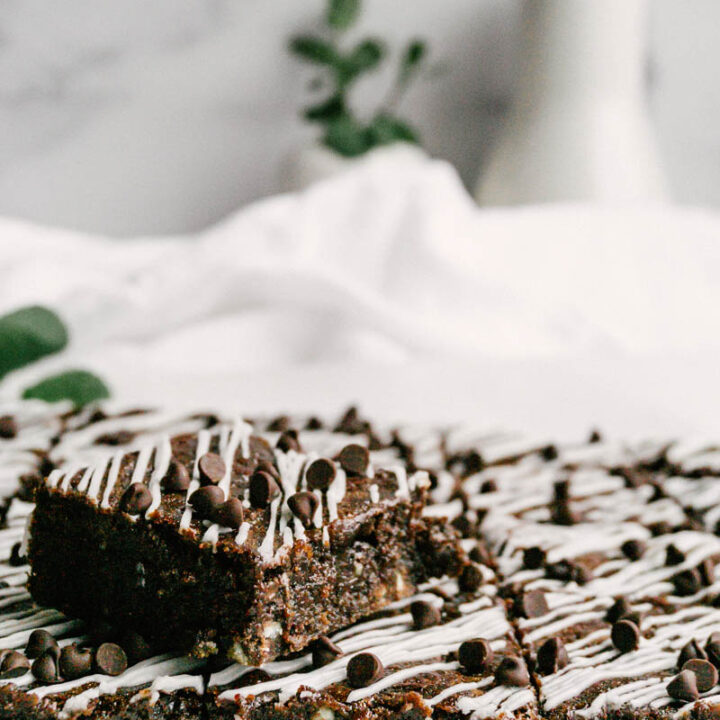
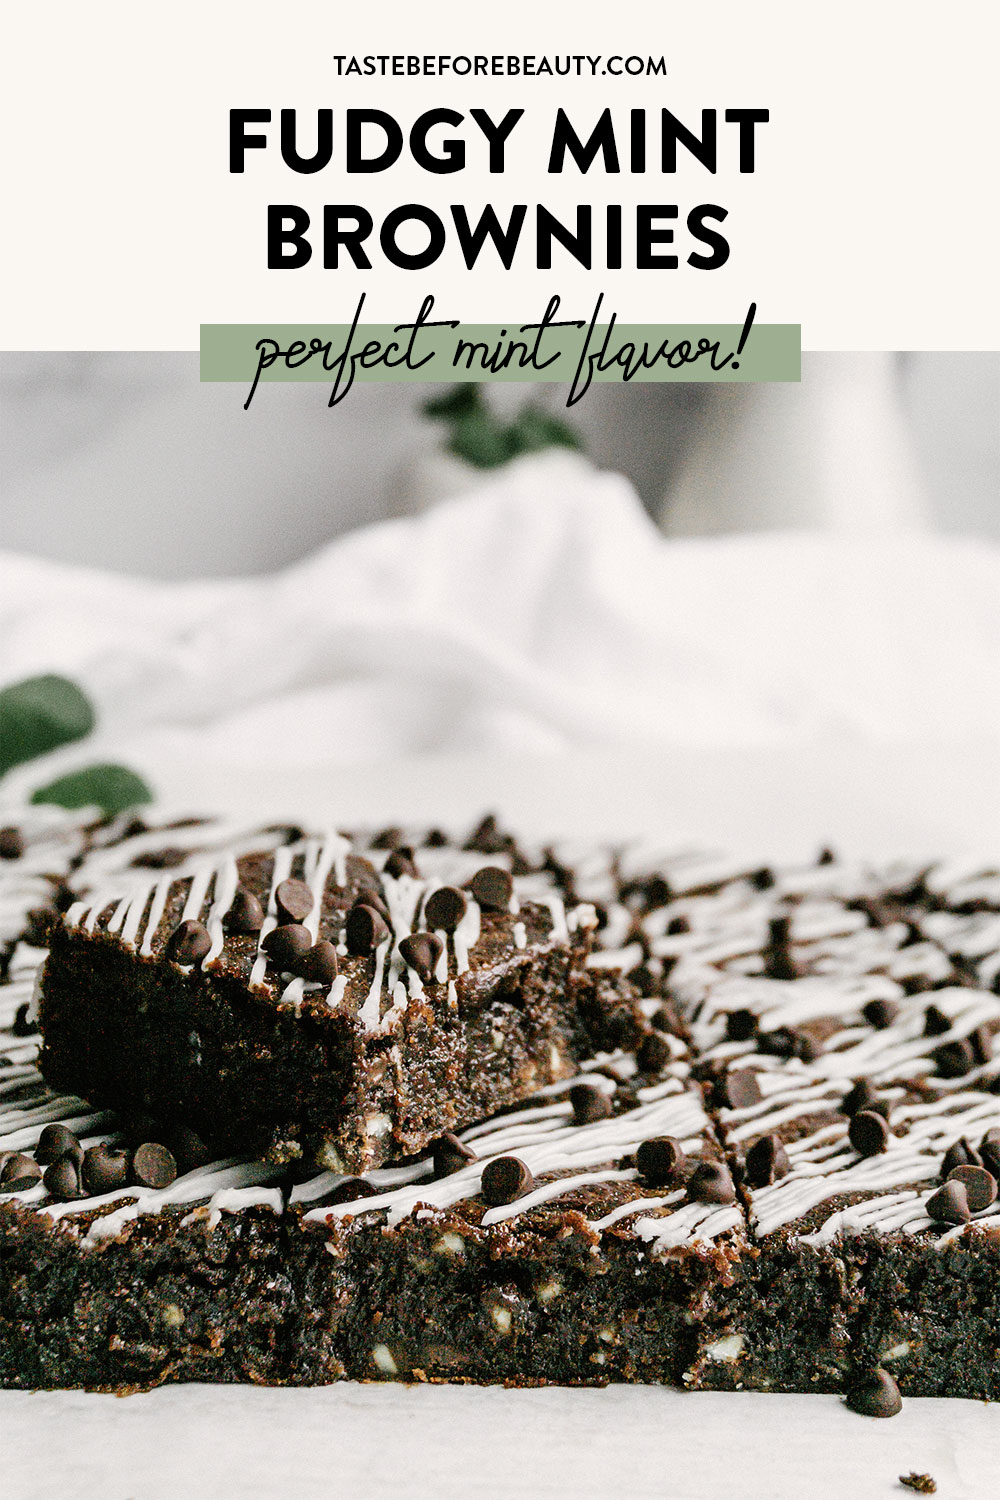
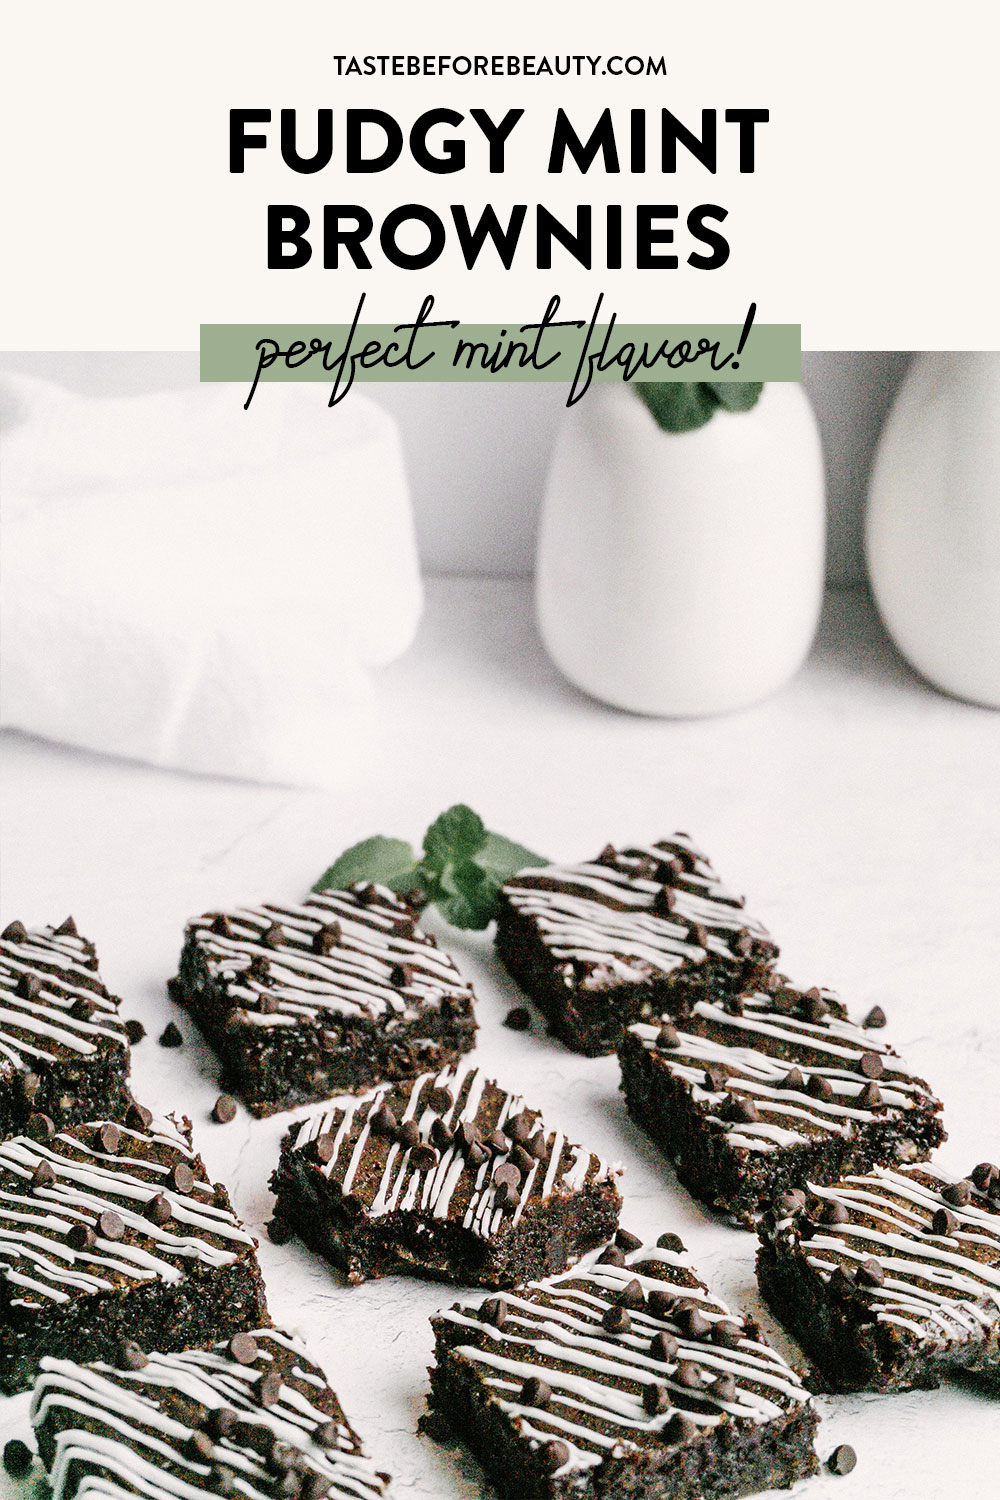
A rich fudgy brownie with mint chips and a beautiful mint drizzle. The perfectly balanced brownie treat!
During my time in college at Brigham Young University (BYU), everyone was wild about mint brownies. They were so good. They had a rich brownie with a mint topping and a chocolate frosting. Now that I’ve moved across the country, it’s kind of hard to get authentic BYU mint brownies.
The Perfect Mint Flavor
Mint is a hard flavor to get right. Use too much and it tastes like toothpaste, use too little and it tastes like… well nothing. With so many different kinds of mint out there, it’s hard to know which kind to use and which will taste best.
Mint is incorporated into the actual brownie batter in the form of Andes Mint Baking Chips. They deliver a beautiful, smooth mint flavor. These brownies still needed a little something on top to amp up the flavor a bit more and clue you into what lies inside. Enter a simple mint drizzle. With just a hint of mint extract, it adds to the experience without overpowering the fudgy brownie flavor.
Fudgy Mint Brownie Baking Tips
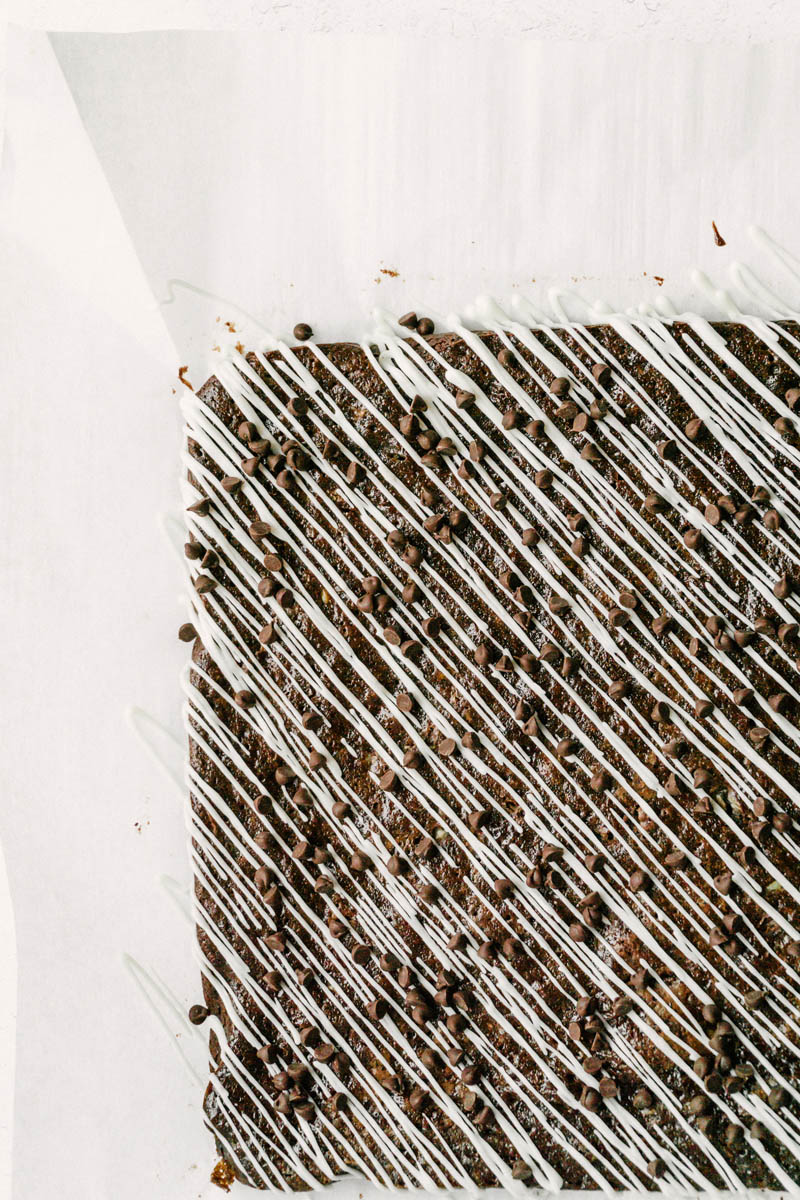
Making these brownies is super easy. Start with a basic chocolate brownie batter and add Andes Mint Baking Chips for a burst of smooth, creamy mint flavor. Once you’ve poured the batter into your prepared pan, swirl some chocolate syrup through the top for a beautiful, shiny top and extra fudginess. It will look beautiful coming out of the oven and you will hardly be able to stop yourself from sneaking a taste.
Spraying the parchment paper isn’t necessary but it guarantees a clean release. Using parchment paper also isn’t necessary but it saves washing the pan.
Adding a simple minty drizzle to the top adds just a hint of cool mint flavor. I like to use Watkin’s Pure Mint Extract. If you want to dye it a pale green, start small. Wilton Leaf Green Icing Color gives the perfect hue of green, plus gel food coloring is easier to control. Use a toothpick to add the smallest bit of dye and mix. Remember, you can always add more but you can’t take it back out.
So Good it’s “Mint” To Be
I was skeptical when I first tried these. They are missing some of the main elements of the mint brownies I was used to and I just wasn’t sure I would like them. One bite was all it took to convert me. Seriously, I’ll never go back to the layered brownies I used to love.
These are sophisticated, beautiful, and the taste is absolutely to die for. They are moist and fudgy in a way that so many brownies fail to be. I took an entire platter of these to a small gathering with a few friends. There were none left by the time I went home.
Let me know in the comments what you think of these simple, Fudgy Mint Brownies!
Fudgy Mint Brownie
Yield: One 10x10 pan
Prep Time: 20 minutes
Cook Time: 30 minutes
Additional Time: 1 hour
Total Time: 1 hour50 minutes
A rich fudgy brownie with mint chips and a beautiful mint drizzle. The perfectly balanced brownie treat!
Ingredients
Brownie Batter
½ C (4 oz) salted butter, melted
½ C (3.8 oz) vegetable oil
1 ¾ C (7 oz) powdered sugar
1 scant C (7 oz) brown sugar
½ C (1.8 oz) cocoa powder
4 large eggs
1 tsp vanilla
1 tsp salt
1 C - 2 T (4 oz) all-purpose flour
1 ¾ C (10 oz) Andes Mint Baking Chips
½ C (5 oz) chocolate syrup (reserved)
Mint Drizzle
1 T (0.5oz) salted butter, melted
½ C C (2.25 oz) powdered sugar, sifted
⅛ tsp mint extract
2 tsp milk
For Topping
½ C (3 oz) mini semi-sweet chocolate chips
Instructions
Make the Mint Brownie batter.
Preheat oven to 350*F. Line bottom and sides of 9x13 or 10x10 pan with parchment paper. Spray lightly with vegetable cooking spray.
Mix the melted butter, vegetable oil, powdered sugar, brown sugar, and cocoa together.
Add the eggs and vanilla.
Add in the salt, flour, and Andes Mint Baking Chips. Mix gently until combined.
Pour batter into prepared pan.
Pour the reserved chocolate syrup over the batter. Use a butter knife or chopstick to make a swirl pattern.
Bake for 25-30 minutes. Remove from oven and let cool.
Make Mint Drizzle.
Mix melted butter, sifted powdered sugar, and mint extract together. Add milk slowly, making sure to stir out any powdered sugar lumps.
Drizzle the top of the brownie with a piping bag or fork. Sprinkle immediately with mini chocolate chips.
Notes
Swirl the chocolate syrup just enough to make a swirl pattern on the top of the brownie batter. No need to mix it thoroughly.