
Refreshingly light yet fills your dessert stomach! This Fresh Cool Strawberry pie is served chilled, and a perfect end to those hot summer days!
Refreshingly Light and Easy
I have said this before, but I love a refreshingly light dessert! Not that I don’t enjoy my decadent chocolate desserts, like the Frosted Marshmallow Brownie, but desserts with fruit and cream seem to hit the spot every time.
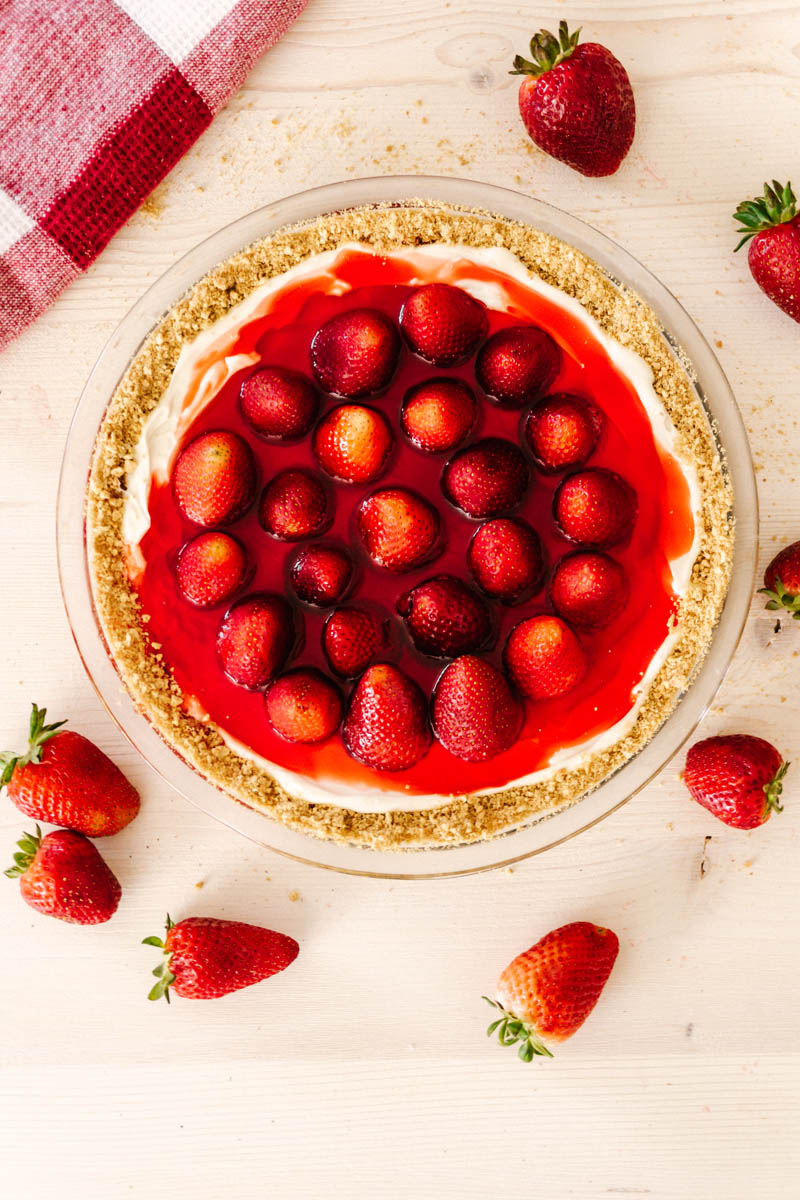
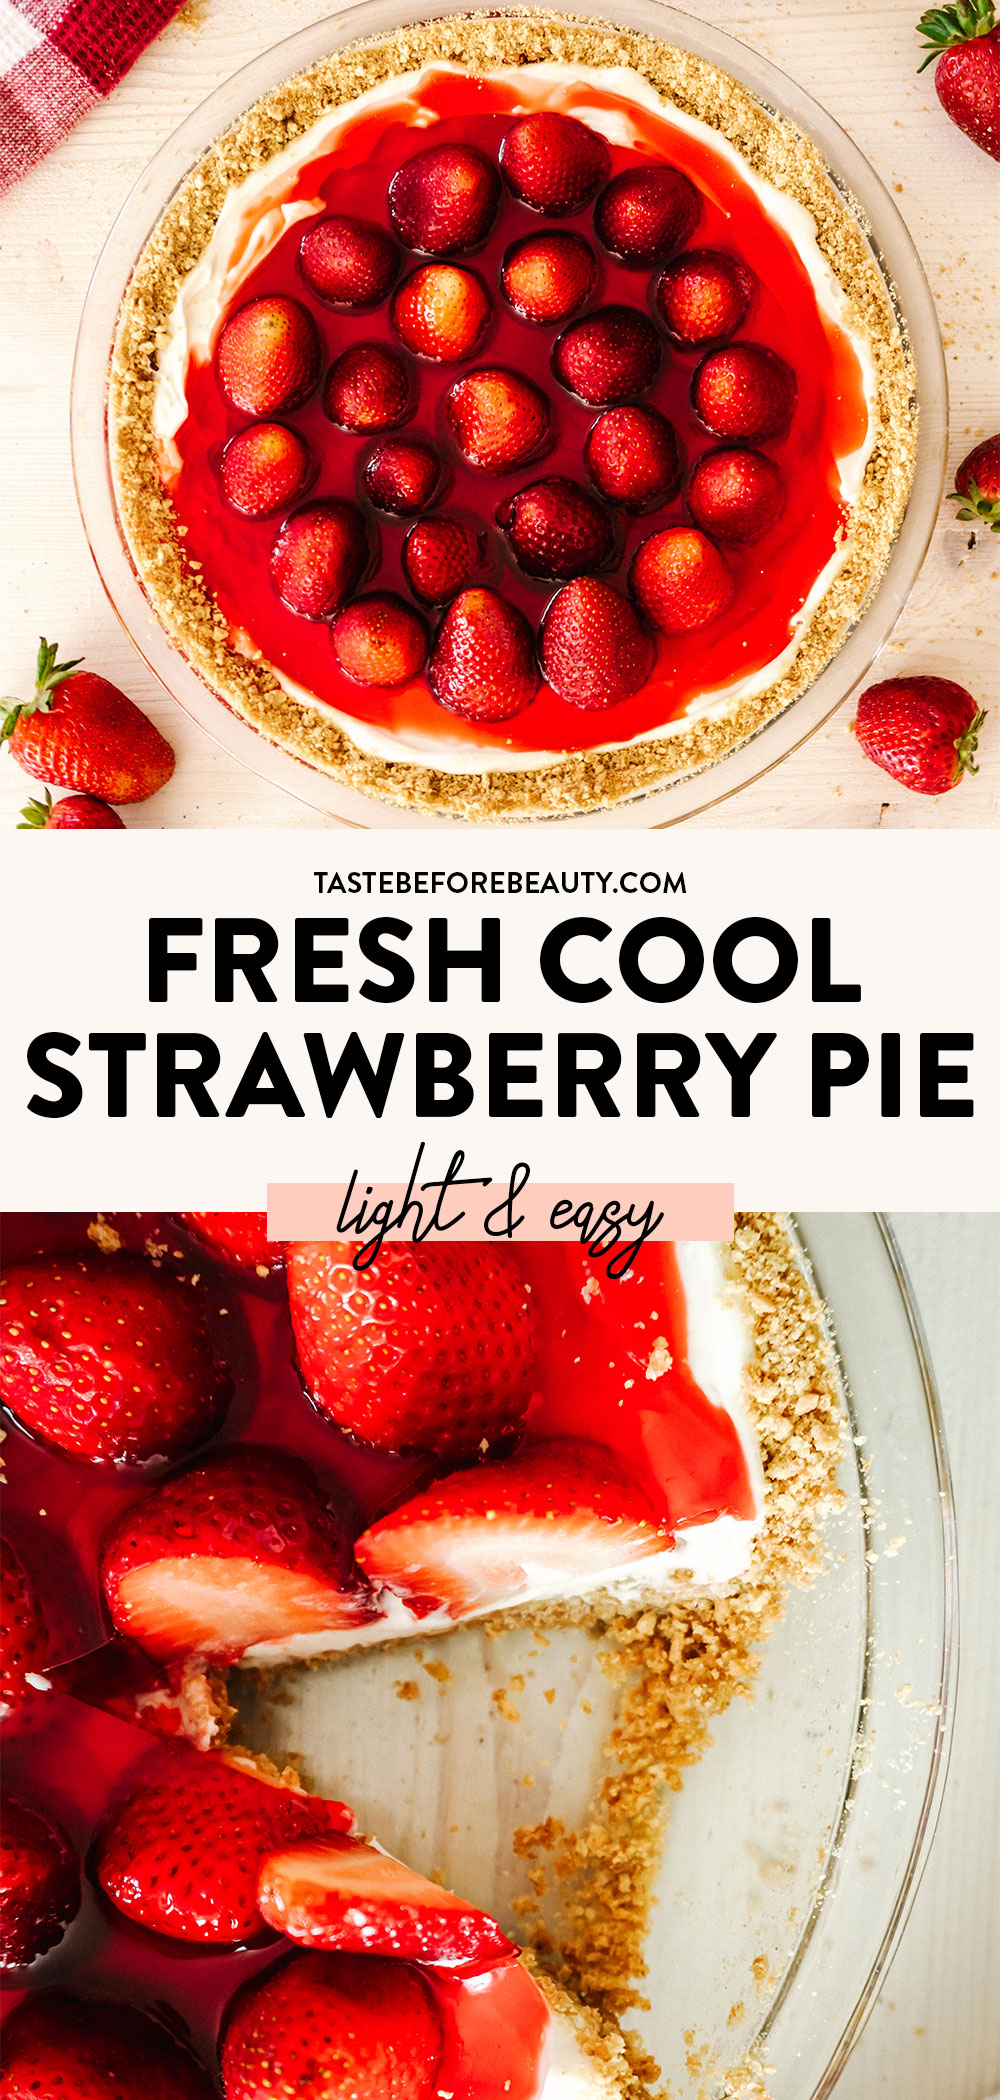
This Fresh Cool Strawberry Pie hit the spot again for me today. It is the perfect pie to bring to a picnic or a summer night barbeque. It has this glossy and beautiful red color and would work great for a 4th of July party.
Not only is it beautiful, but it is SO simple. The only thing you have to bake is the crust. The rest is up to the fridge. Let me know if this pie doesn’t fill your dessert stomach because if not I think this whole website is full of desserts for you to try (wink).
Recipe Ingredients
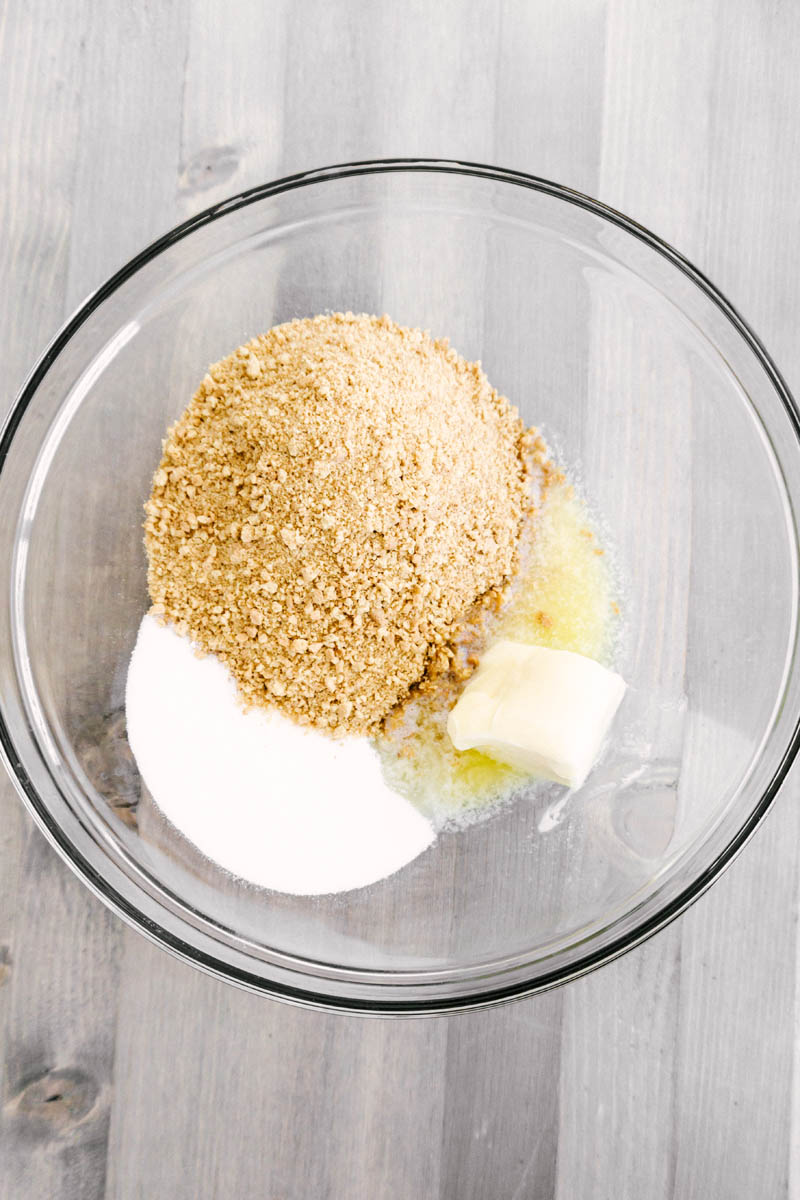
- Crushed Graham Crackers. I place my graham crackers in a ziplock bag and take a rolling pin to the bag until the graham crackers are completely crushed. The finer the better.
- Raspberry Gelatin. You can use generic or name-brand gelatin, but be sure to get raspberry, not strawberry. Believe it or not, the raspberry flavor makes all the difference in this Fresh Cool Strawberry Pie!
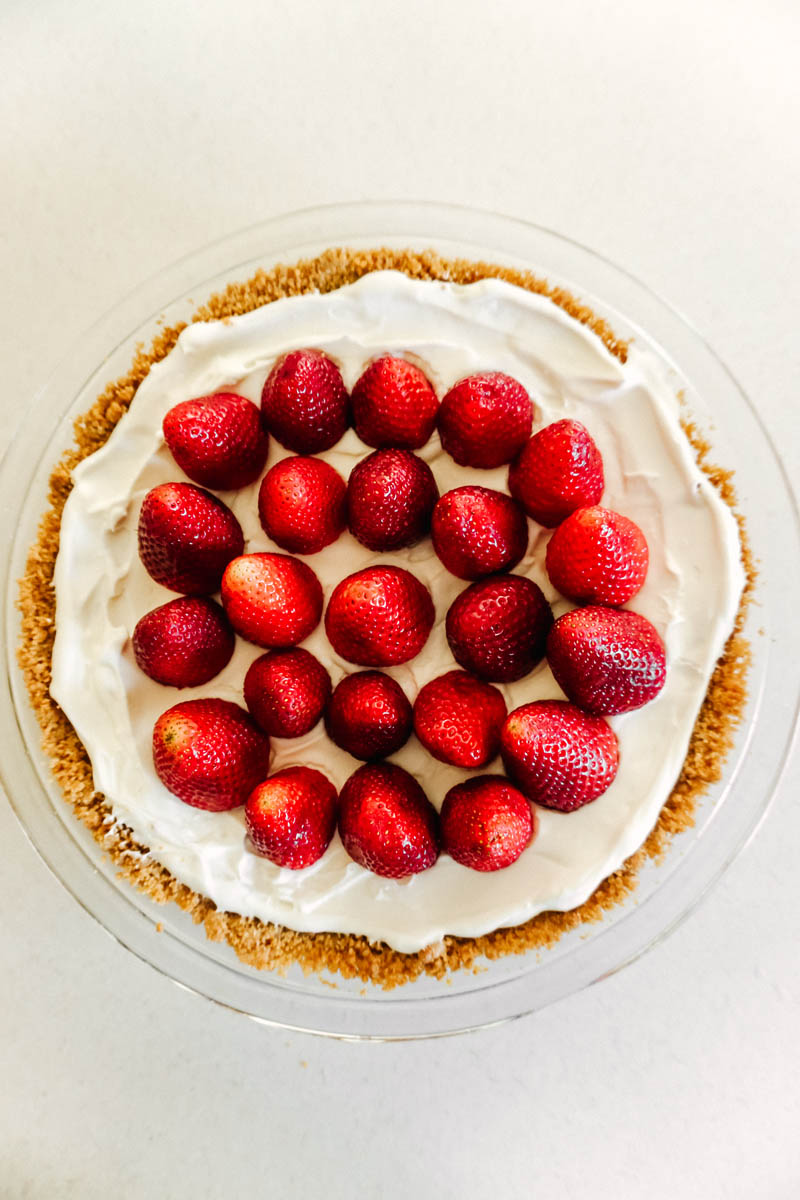
- Strawberries. Use fresh strawberries for this pie. Frozen strawberries would add extra moisture to the pie and ruin its crispy, light, and smooth textures throughout.
More Details on Assembly
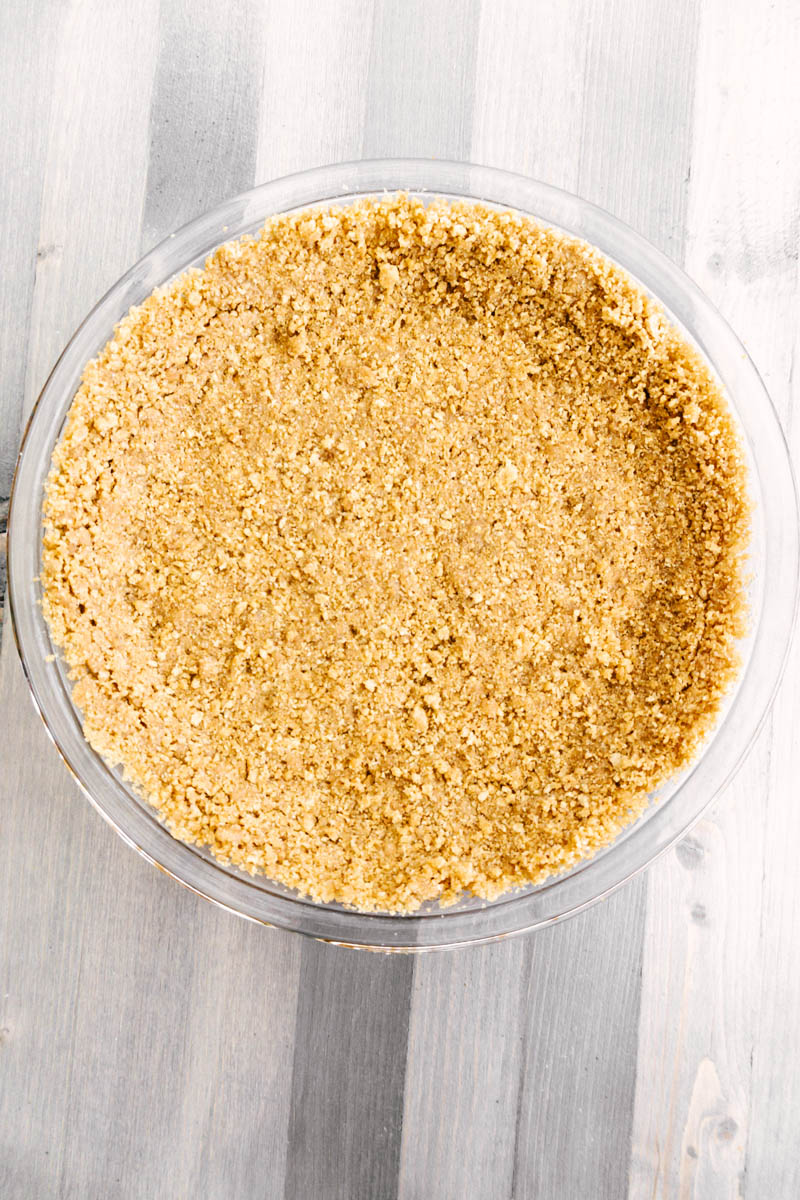
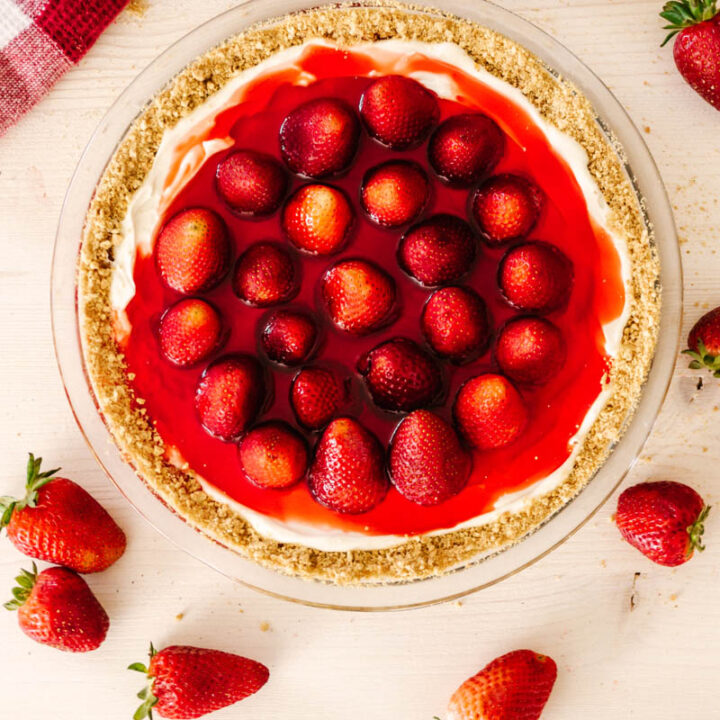
- Graham Cracker Crust: The graham cracker crust mixture is very crumbly and you think it won’t come together but it will! It is easiest to use the heel of your palm to flatten out and push that mixture into your pie plate. Just make sure you’ve sprayed it with cooking spray first. This crust likes to stick to the pan. Then, trust the oven to do its job and glue it all together as a crust.
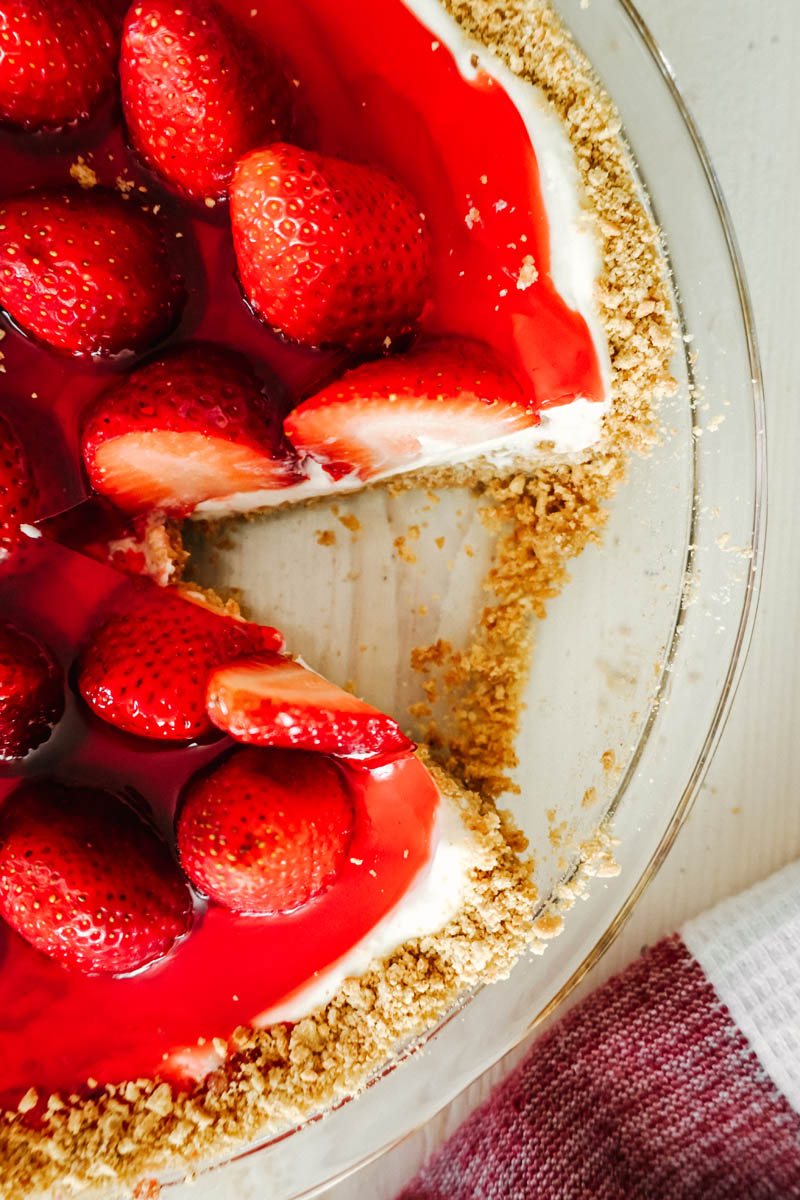
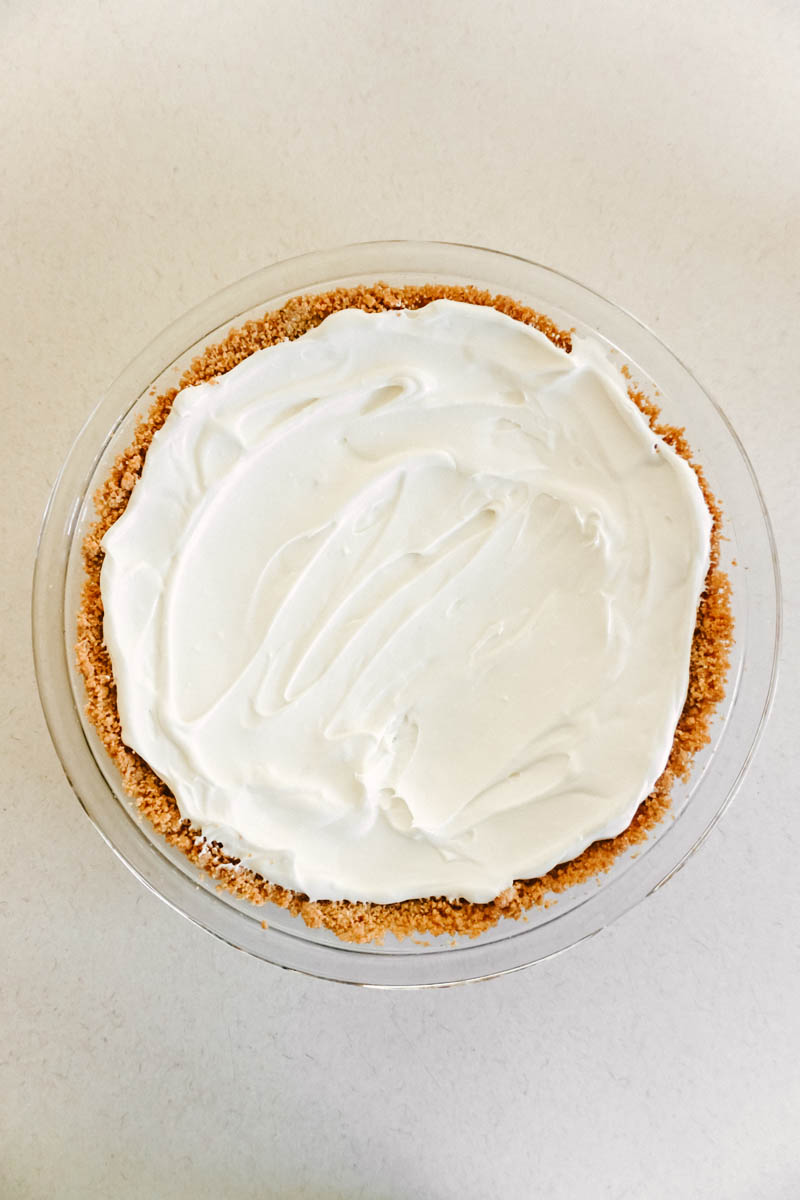
- Spreading the Cream Cheese Whipped Cream: Be sure to spread the cream cheese whipped cream to the top of the crust. If not, the gelatin may seep into the crust and make it soggy.
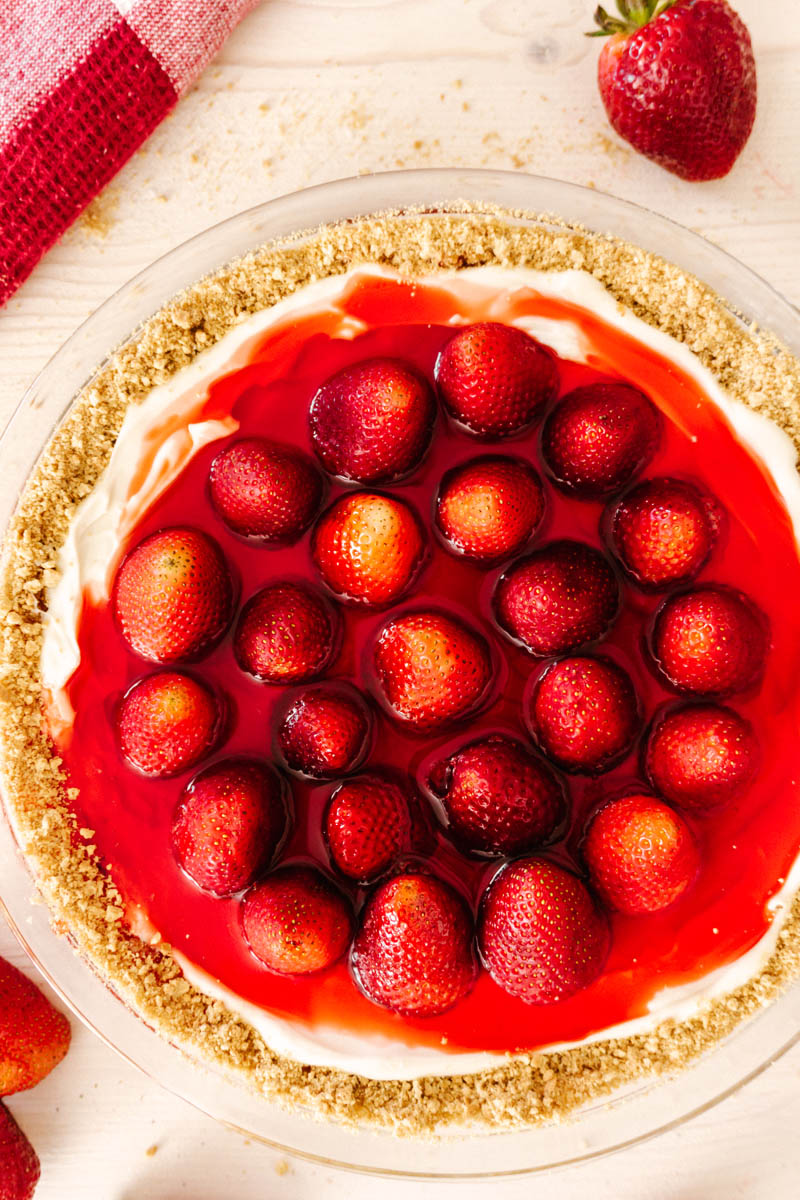
- Gelatin Mixture: Do not use a whisk to stir this on your stovetop. Doing so will introduce air and make bubbles all throughout your pie, which will make it lose its shiny gelatin sheen. Also, make sure the gelatin mixture is completely cool before pouring into the crust lined with the Cream Cheese Whipped Cream. If not, the heat can melt the cream, and then the gelatin will seep into your crust and make it soggy.
- Set in the fridge: Wait to serve this Strawberry Pie until gelatin has completely set. In my experience, three hours is enough to do the trick. If not, imagine trying to serve semi-set jello… it’s not great.

Bonus! Any extra cream and strawberries you have can be used as a snack for your kitchen counter. A strawberry dipped in the Cream Cheese Whipped Cream is a sweet snack for you and anyone else at home!
Looking for more light and refreshing recipes? Try these:
Fresh Cool Strawberry Pie
Refreshingly light yet fills your dessert stomach! This Fresh Cool Strawberry pie is served chilled, and a perfect end to those hot summer days!
Ingredients
Graham Cracker Crust
- 1 ¼ C finely crushed graham crackers (about 12 sheets or 1½ sleeves)
- ¼ C (1.7 oz) white sugar
- ⅓ C (2.7 oz) salted butter, melted
Cream Cheese Whipped Cream
- ½ C (4 oz) cream cheese
- ¼ C (1.7oz) white sugar
- ½ tsp vanilla
- ¾ C plus 2 T (7 oz) heavy whipping cream, cold
Gelatin Mixture
- ½ C (3.5 oz) white sugar
- 1 C water
- 1 (3 oz) package of raspberry gelatin
Strawberries
- 2 lb fresh strawberries
Instructions
Make Graham Cracker Crust
- Preheat oven to 350*F.
- Spray pie plate with non-stick spray.
- In a bowl, mix together crushed graham crackers, sugar, and melted butter. Press the mixture into a pie plate. It will be crumbly but baking will help it stick together.
- Bake for 8 minutes. Let cool completely.
Make Cream Cheese Whipped Cream
- Using a hand mixer or stand mixer, in a medium-sized bowl, beat cream cheese until smooth.
- Add sugar and vanilla and mix. Scrape bowl. I can’t say this enough.
- Add heavy cream and mix for 30 seconds. Stop, scrape bowl, beat another 30 seconds, then stop and scrape bowl again.
- Whip on high speed until it reaches a spreadable consistency.
Make Gelatin Mixture
- In a medium saucepan over medium heat, mix together sugar, water, and raspberry gelatin. (Do not use a whisk.)
- Once the mixture boils, remove from heat and let cool.
Prepare Fresh Strawberries
- Rinse and dry the strawberries, then cut the tops off.
Assemble
- After the graham cracker crust has cooled completely, spread the cream cheese whipped cream all over the bottom and sides of the crust. Make sure it reaches the top of the crust. You may have extra cream depending on the size of your pie plate.
- Add strawberries, point side up.
- After the gelatin mixture has had time to cool, pour gelatin over the strawberries and cream until it almost reaches the top of the cream. If overfilled, the gelatin will seep into the crust and make it soggy.
- Let cool in the fridge for at least 3 hours. Serve when gelatin is set.
Notes
- Be sure to spread the cream cheese whipped cream to the top of the crust. If not, the gelatin that is added may seep into the crust and make it soggy.

0 Comments