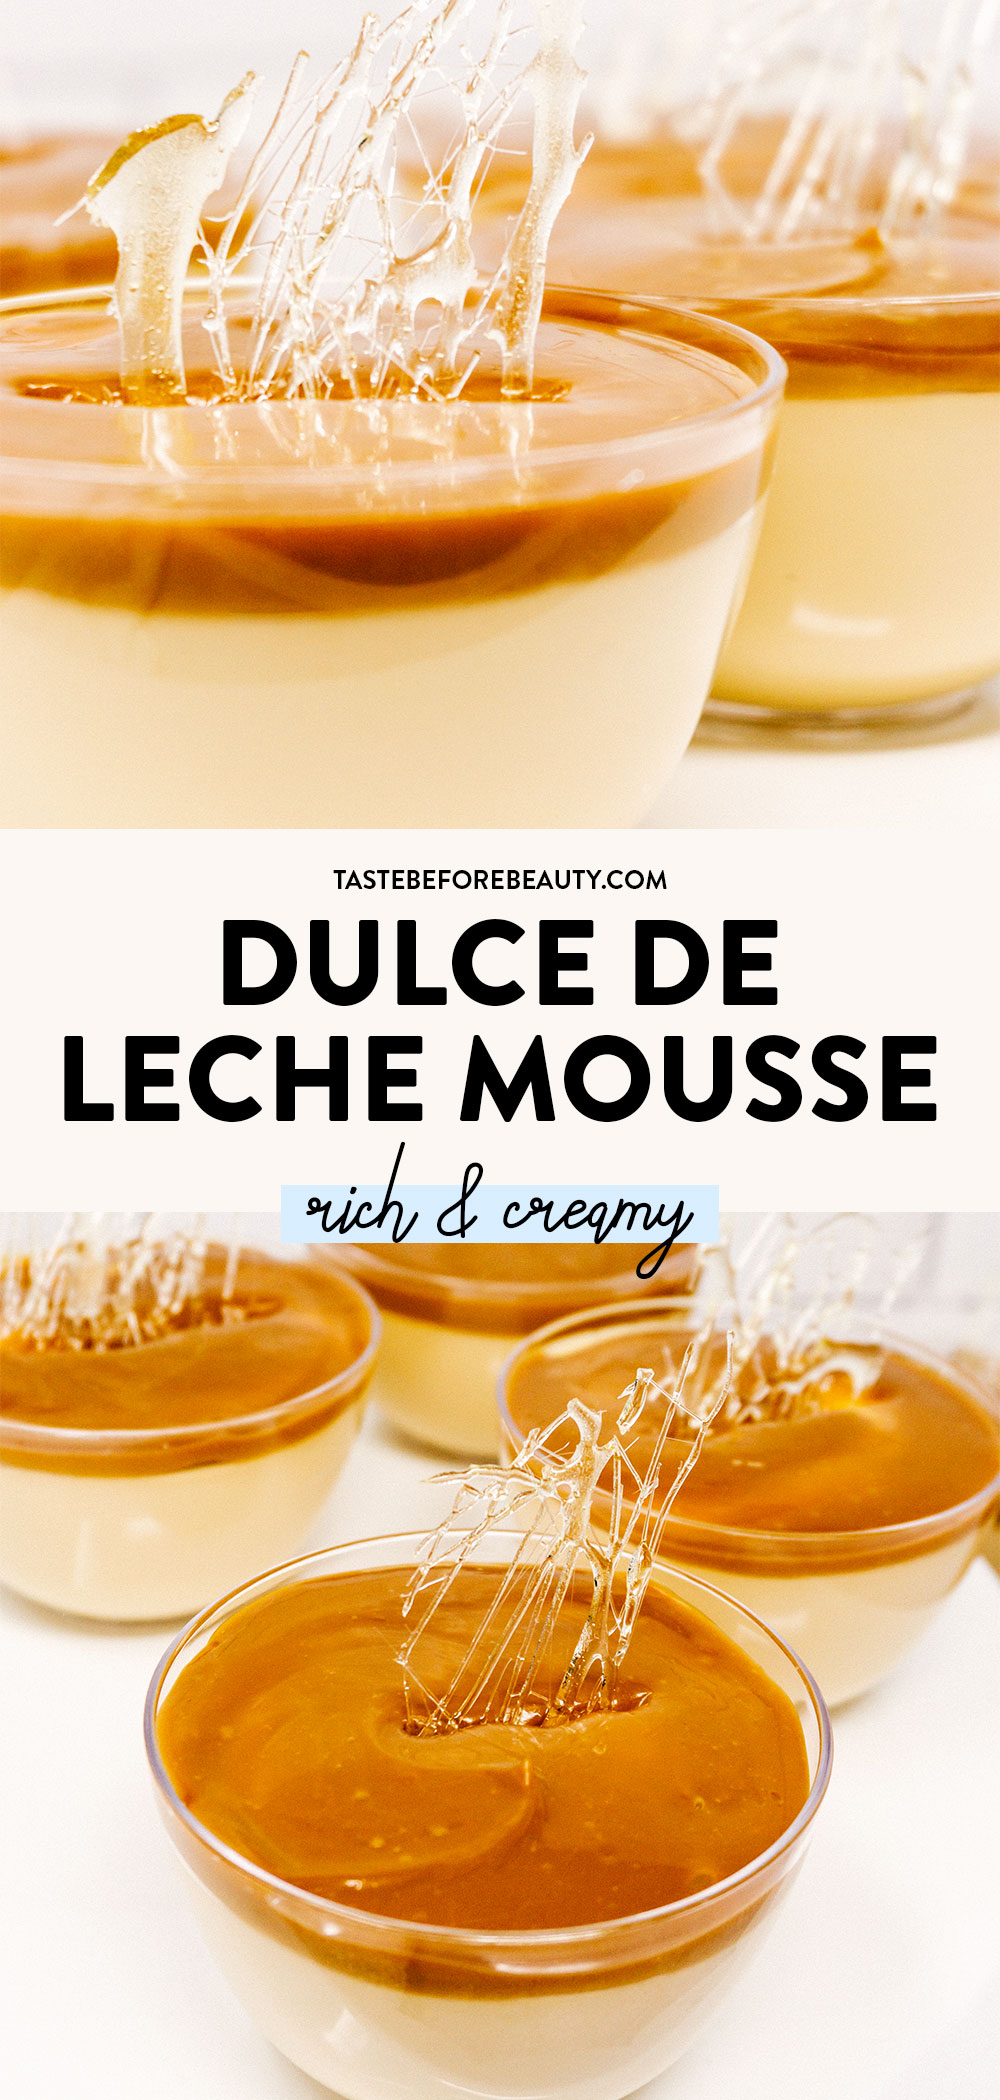
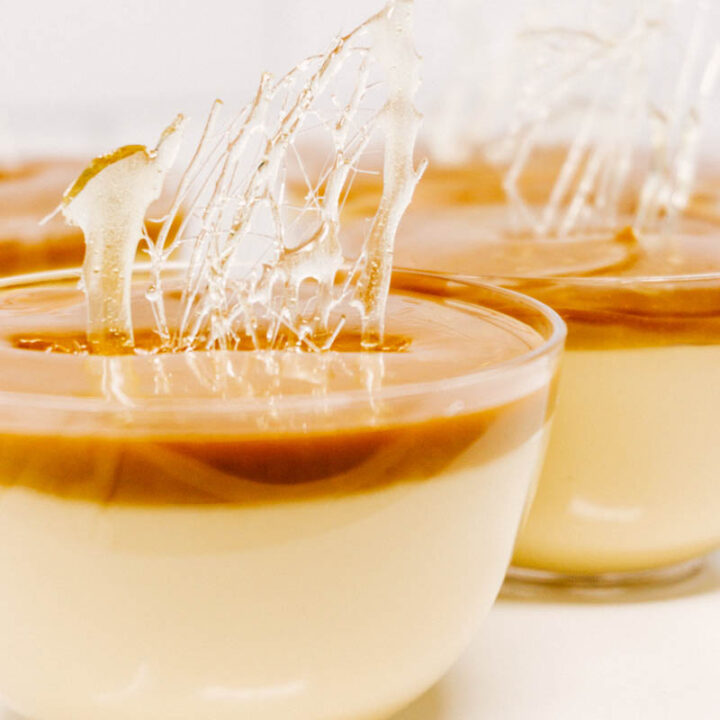
Creamy dulce de leche whipped into a luscious mousse. With rich caramel flavor and a light airy texture, this Dulce de Leche Mousse is fit for a caramel connoisseur but easy enough for a weeknight dessert.
Dulce de Leche is a delightful caramel confection made popular in Latin America. I love caramel. A friend introduced me to a candy recipe named “Brigadiero.” It’s from Brazil and is a chocolate caramel fudge ball. I was fascinated by the creamy, chewy insides.
A Creamy Caramel Journey
My friend told me this treat was made with sweetened condensed milk. It began a journey for me to learn what sweetened condensed milk can do and about a form of caramel made from slowly heated sweetened condensed milk. Dulce de Leche means “candy made of milk.” It is a nice caramel with the richness of sweetened condensed milk but better.
I ran to the Hispanic shops in the area and learned quickly there were many different varieties of dulce de leche. Not all are made with cow’s milk. Because I’m still working on developing a taste for goat’s milk, I prefer dulce de leche made from cow’s milk.
Keeping it Simple – Easy to Make
I used to make my own dulce de leche from scratch. My recipe is quick and simple. I didn’t trust the recipes online that said to put a can of sweetened condensed milk in a crockpot or oven all day, as I was worried it would explode. So I came up with a way around it. If you’re interested in making the dulce de leche from scratch, you can find the instructions in our Dulce de Leche Brownies. In fact, each of these recipes only requires half a batch of dulce de leche so make a batch of brownies while you’re at it!
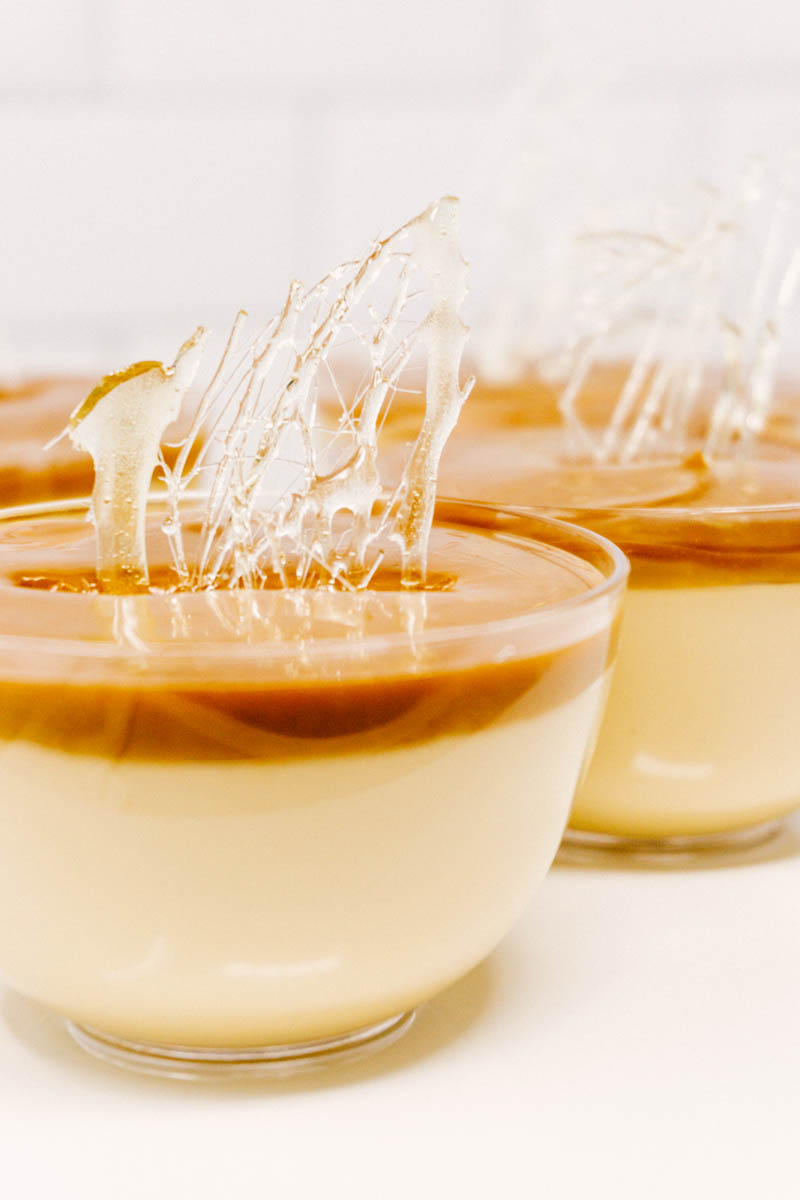
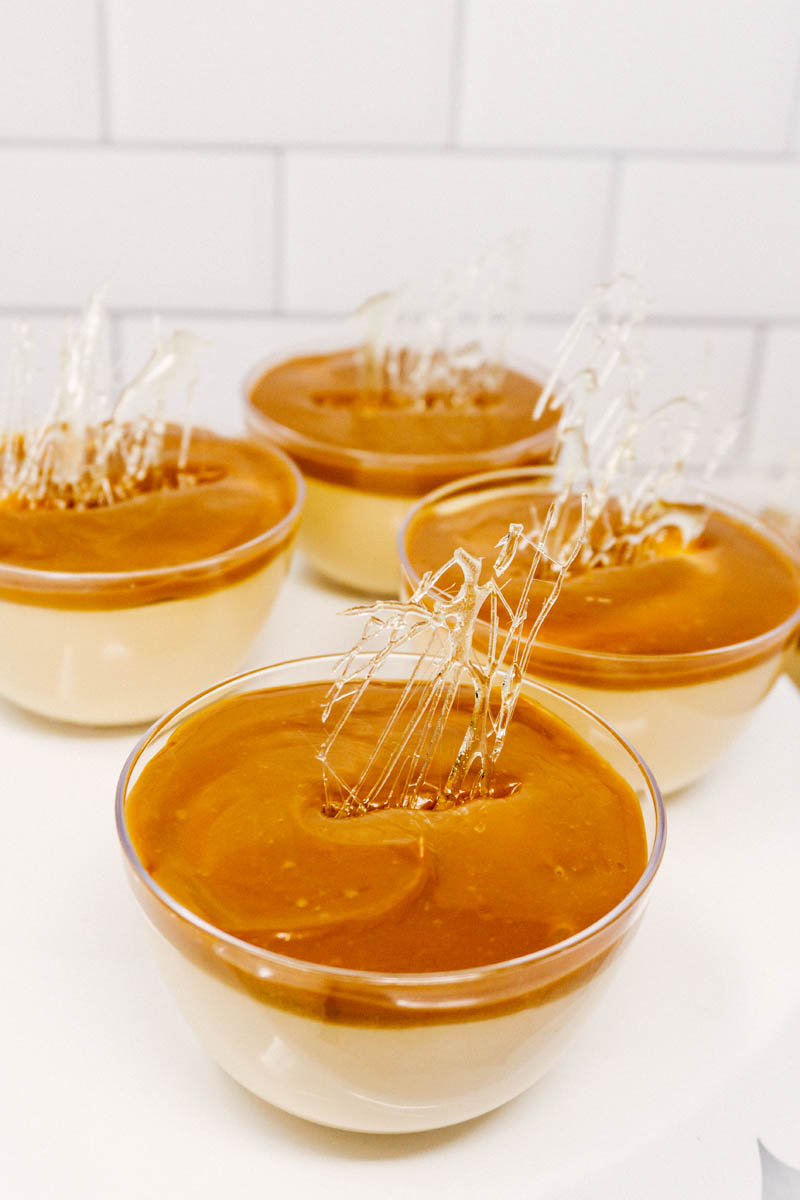
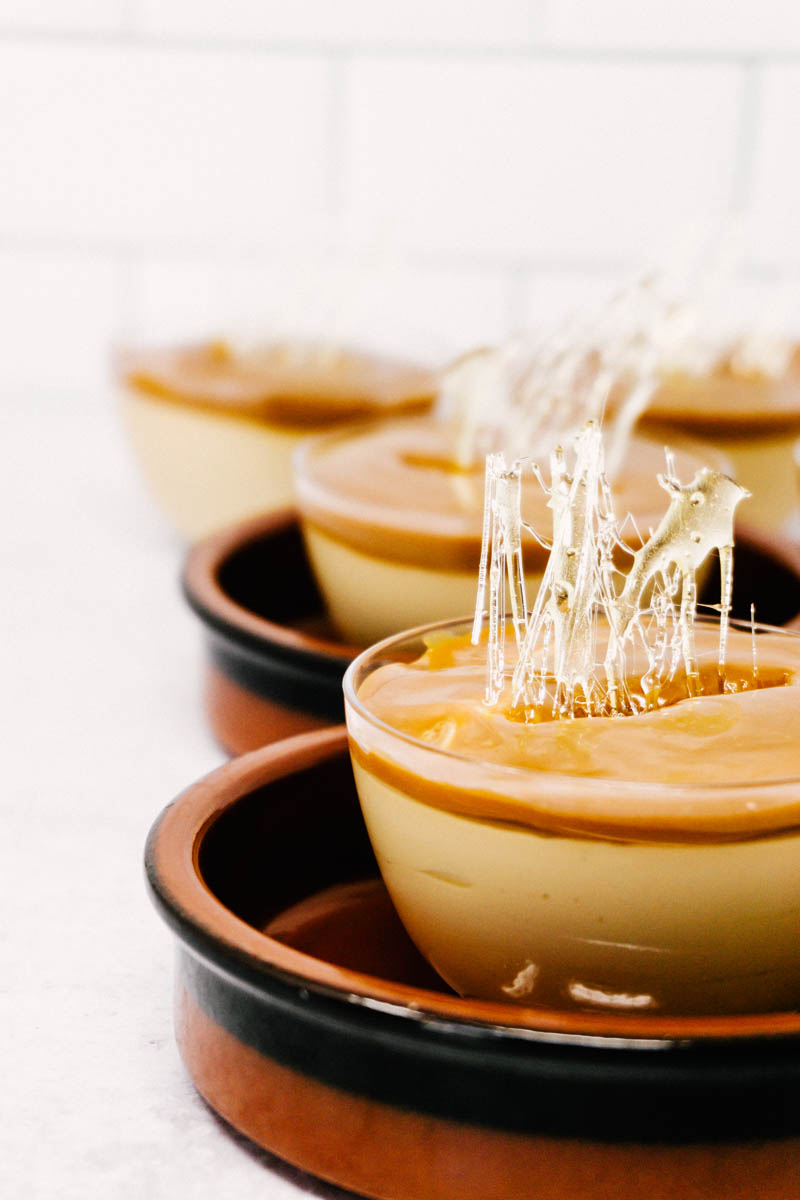
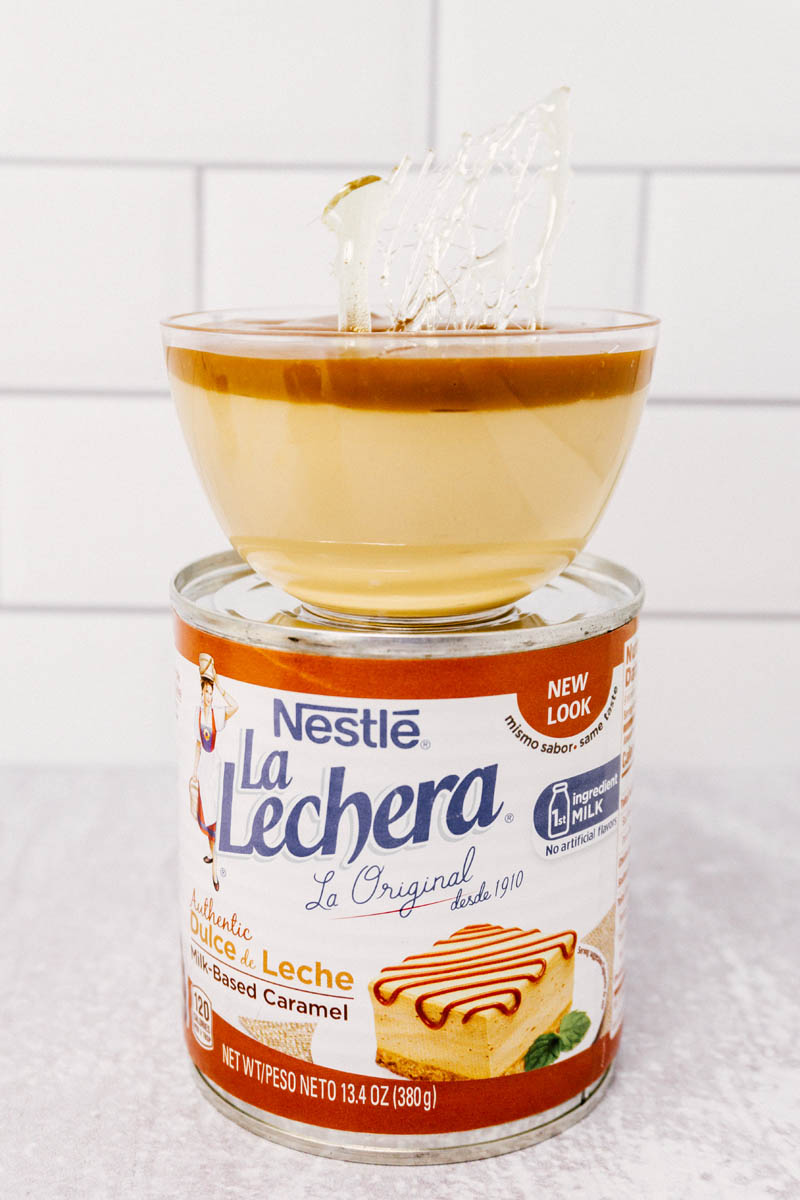
However, I like to keep things simple for myself and for you. Our local grocer started carrying dulce de leche in a small can, about the size of a can of sweetened condensed milk. I use the brand Nestle La Lechera Dulce de Leche. In any recipe that calls for dulce de leche, I use that almost exclusively. I don’t have to watch a pot of caramelizing sugar on the stove. Just opening the can is a delight – gorgeous, creamy caramel. The canned dulce de leche caramel matters for this Dulce de Leche Mousse because it’s important to have a thick dulce de leche when making this recipe.
Easier Than Pie
When I was creating this Dulce de Leche Mousse recipe, I wanted something simple to make that wouldn’t require lots of testing. It also needed to be simple enough that I would be willing to make it again. I started with my favorite Cream Cheese Whipped Cream as the base. It’s a stable, multi-use whipping cream with the slightest hint of tang from the cream cheese. I’ve used this in so many desserts and it performs well every time. If you’re looking for something to really highlight the Cream Cheese Whipped Cream, I recommend my simple Cream Puffs.
I made a few simple adjustments to really highlight the flavor of the dulce de leche. Brown sugar has a deeper, caramel flavor from the molasses in it that is a perfect pair for the dulce de leche. With such a simple recipe, you’ll hardly believe how good this Dulce de Leche Mousse tastes!
The mousse itself only uses half of the can of dulce de leche. I use the rest mixed with a bit of cream to create a pretty topping. There’s no mistaking it as a Dulce de Leche Mousse with the topping. If you prefer to keep this a light, simple mousse, use the leftover dulce de leche another day as an ice cream topping. It freezes well for the day you just need a dulce de leche ice cream sundae, complete with a banana!
Make It Your Own – Desserts with Dulce de Leche Mousse
This Dulce de Leche Mousse can be topped with whipped cream instead of a layer of dulce de leche. You could add pecans, almonds, or even cashews, graham crackers, bananas, or whatever your heart desires to the top.
You could layer it with Cool Whip or homemade whipped cream. It might be nice layered on cubes of Rich Chocolate Cake and cream in a chocolate dulce de leche trifle. We have even used this recipe in our Chocolate Cream Puffs.
No matter which toppings you choose to eat on this creamy Dulce de Leche Mousse, leave us a review to let us know how you liked it. And if you share on social media, don’t forget to tag us @tastebeforebeauty. Enjoy!
Dulce de Leche Mousse
Yield: 6 (½ C) servings
Prep Time: 25 minutes
Additional Time: 1 hour
Total Time: 1 hour25 minutes
Creamy dulce de leche is whipped into a luscious mousse. With rich caramel flavor and a light airy texture, this Dulce de Leche Mousse is fit for a caramel connoisseur but easy enough for a weeknight dessert.
Ingredients
Dulce de Leche Mousse
½ can (6.5 oz) Nestle La Lechera Dulce de Leche
8 oz cream cheese, softened
¼ C (2 oz) brown sugar
½ tsp vanilla
1 C (9 oz) heavy cream
Dulce de Leche Topping
1 ½ T heavy cream
½ can (6.5 oz) Dulce de Leche
Caramelized Sugar Garnish
½ C (3.5 oz) granulated sugar
1 ½ tsp light corn syrup
2 T water
Instructions
Make the Caramelized Sugar Garnish
Prepare cookie sheet by lining with parchment paper. Set aside.
Pour sugar, corn syrup, and water in a pan on the stove. Heat over medium heat and stir until light amber.
Using a fork, dip in the caramelized sugar and drizzle in lines on the parchment paper. Let some overlap slightly to hold the shape together. Let cool, break into 8 pieces, and set aside.
Make the Dulce de Leche Mousse.
In a large mixing bowl, whip cream cheese, vanilla, and brown sugar until smooth. Scrape the bowl before adding cream.
Add ½ can (6.5 oz) of dulce de leche and 1 C (9 oz) heavy cream. Whip until soft peaks form.
Pipe or pour into 8 small ( ½ C) serving dishes, smooth tops carefully, and place in the fridge.
Make the Dulce de Leche Topping and Assemble.
Mix remaining 6.5 ounces of dulce de leche and 1 ½ T heavy cream. Put in microwave or heat until smooth.
Spoon 1 T of dulce de leche mix over the top of each mousse cup and gently spread until smooth.
Serve chilled. Store in the refrigerator for up to 4-5 days. Just before serving, add a piece of Caramelized Sugar Garnish.
Notes
You can also add bananas, nuts, graham crackers, chocolate, or whipped cream to garnish.
My favorite dulce de leche is Nestle La Lechera Dulce de Leche.
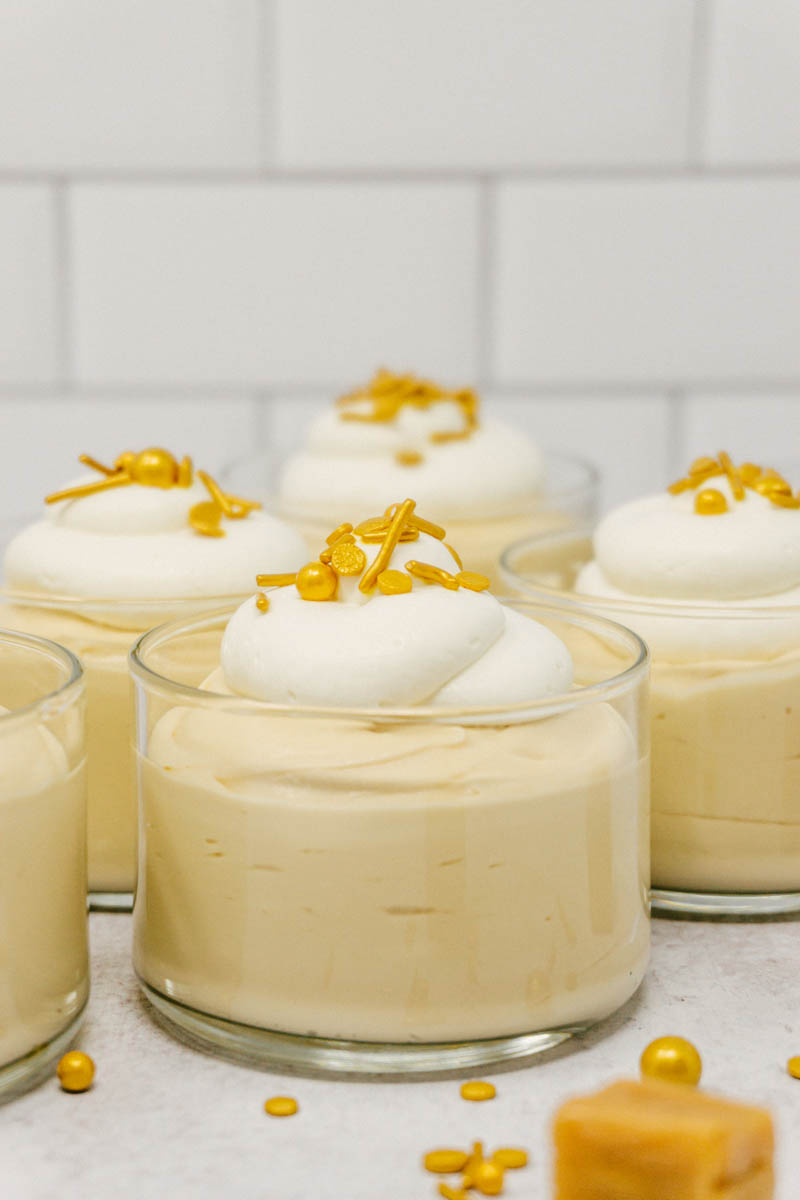
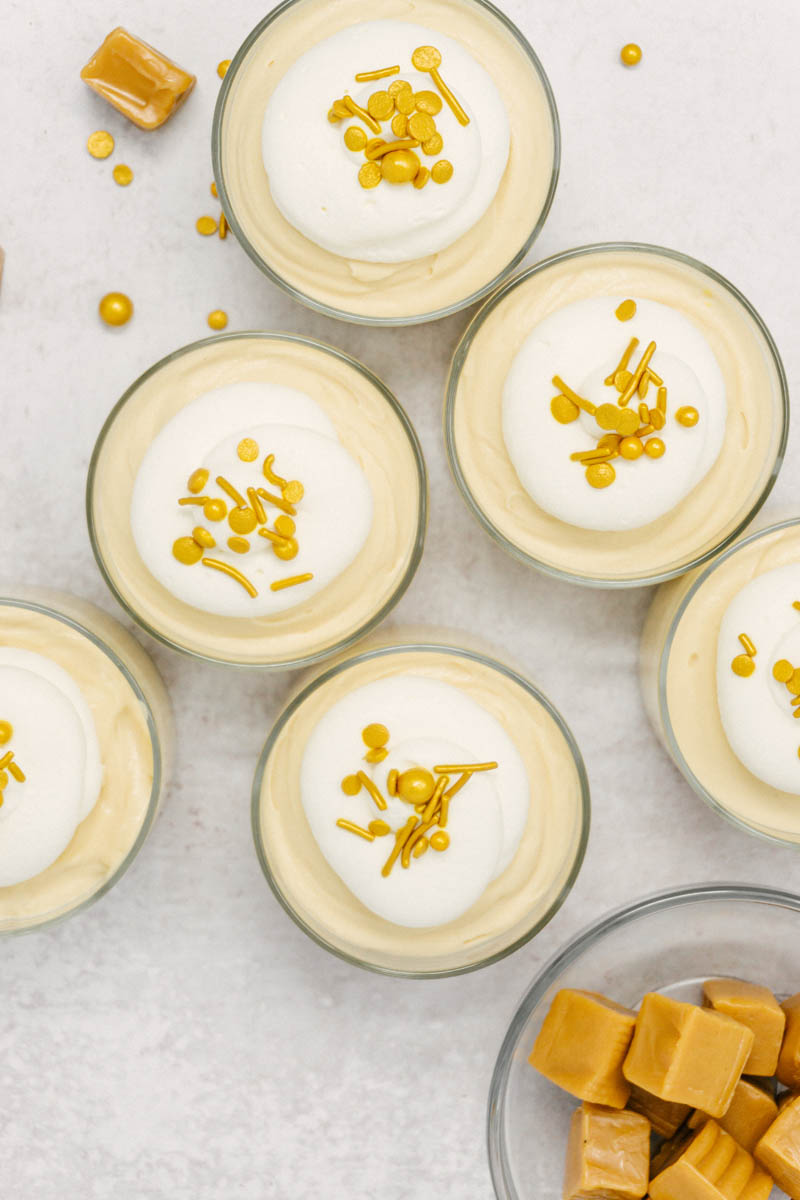
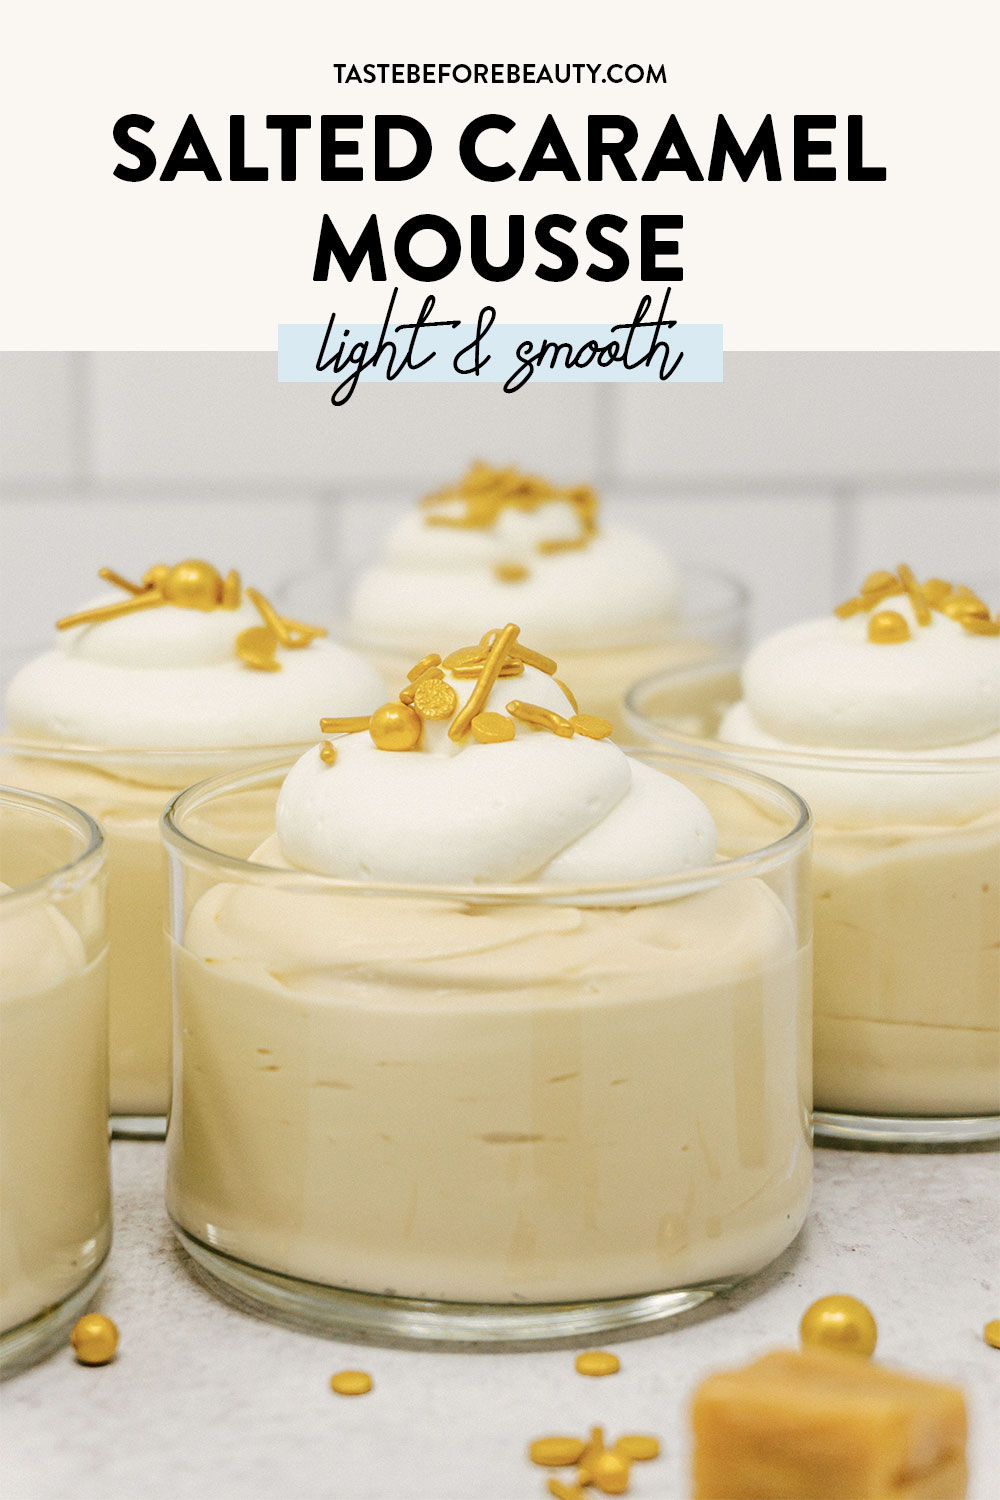
A rich caramel flavor accented with the perfect amount of salt all whipped up into a smooth and light mousse. It’s an edible Pot of Gold!
I like caramel. I like caramel a lot! Caramel rocked my world long before salted caramel became popular in the mainstream. If you asked me, “What two types of candy would you pick to eat for the rest of your life?” Without a doubt, I would choose chocolate and caramel.
The Origin of The Salted Caramel Mousse
Why not make a salted caramel mousse? When we ran the cookie shop, we sold specialty ice creams from a local ice cream maker. Among these delicious ice creams was a salted caramel ice cream. I noticed it tended to be softer than the rest of the ice creams. When I asked the gentleman who made them why that was, he explained that salted caramel ice cream is an industry-wide problem. Salt affects the freezing point and because of the higher salt content, the ice cream always ended up softer than the rest.
Because this mousse does not need to be frozen, you won’t have to worry about that. I just thought it was an interesting observation. Since I didn’t have to worry about achieving the perfect frozen texture, my only consideration in making this mousse was achieving the perfect salted caramel flavor.
How to Make it
I use Kraft America’s Classic Caramels. They are easy to find at almost any grocery store or online. Melt them with half-and-half until they are smooth. I add just a small bit of salt that dials up the caramel flavor with the perfect salty kick.
Whipping the melted caramel with a bit of cream cheese adds body to the mousse and gives it stability to last in the fridge for a few days (if you don’t eat it first!). Fresh cream lightens the mousse and gives melt in the mouth bubbles with hardly any effort.
I hope you enjoy this little pot of gold. It would be the perfect addition to a St. Patrick’s Day dinner or any time you need a simple, yet elegant dessert. Serve it in 2 oz dessert dishes to make it go further, use as the filling to a Classic Cream Puff or Chocolate Cream Puff, or use it to layer in a caramel trifle. The possibilities are endless. Let me know in the comments how you’re using this simple Salted Caramel Mousse.
Salted Caramel Mousse
Yield: 6 (½ C) servings
Prep Time: 25 minutes
Additional Time: 1 hour
Total Time: 1 hour25 minutes
A rich caramel flavor accented with the perfect amount of salt all whipped up into a smooth and light mousse. It’s an edible Pot of Gold!
Ingredients
Salted Caramel Mousse
6 oz unwrapped caramels
¼ C half-and-half
⅛ tsp salt
1 C (8 oz) cream cheese
¼ C (2 oz) brown sugar
½ tsp vanilla
1 C (9 oz) heavy cream
Whipped Cream
⅓ C (3 oz) heavy cream
2 tsp sugar
¼ tsp vanilla
1 T gold sprinkles or edible gold glitter
Instructions
Make the Salted Caramel Mousse.
Unwrap caramels. In a small bowl, gently heat caramels with half-and-half and salt until completely melted and smooth. Let cool to room temperature.
In a separate bowl, whip cream cheese, vanilla, and brown sugar until smooth.
Add completely cooled caramel mixture and heavy cream. Whip until soft peaks form.
Make the Whipped Cream Topping.
In a bowl, add heavy cream, sugar, and vanilla. Whip until stiff peaks form.
Assemble Pots of Gold.
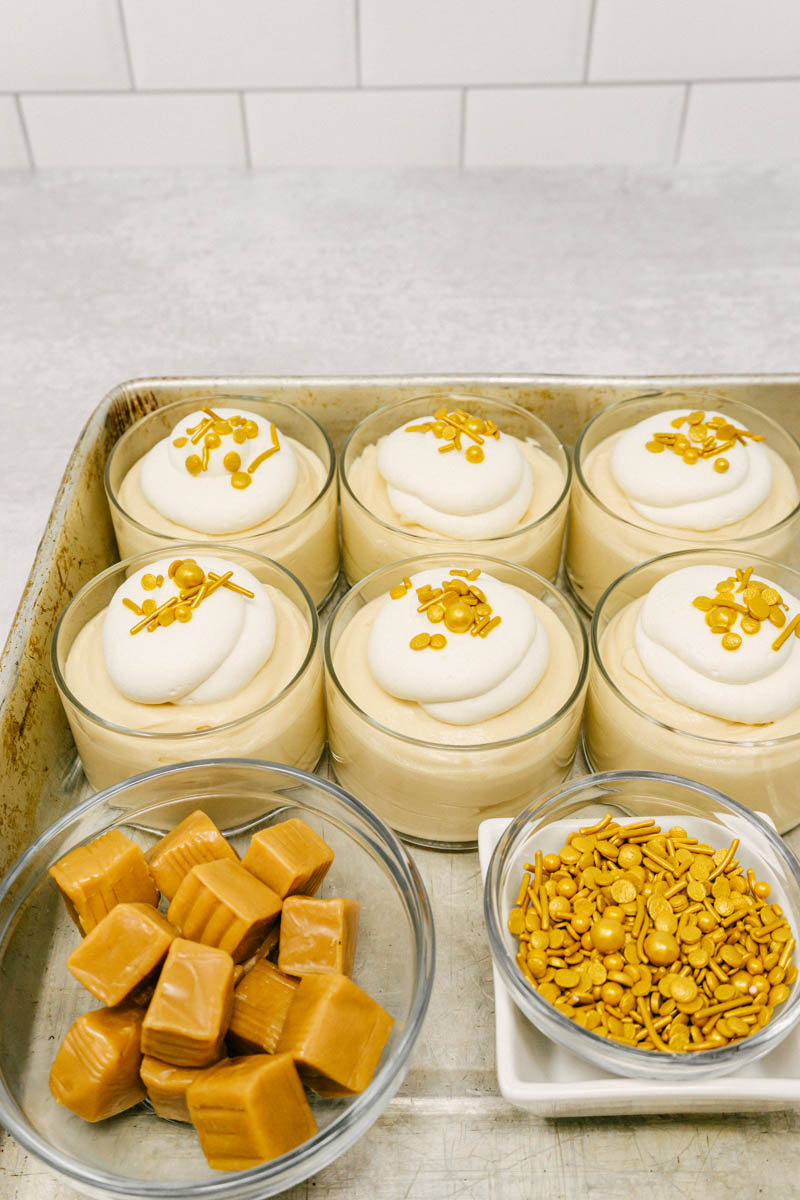
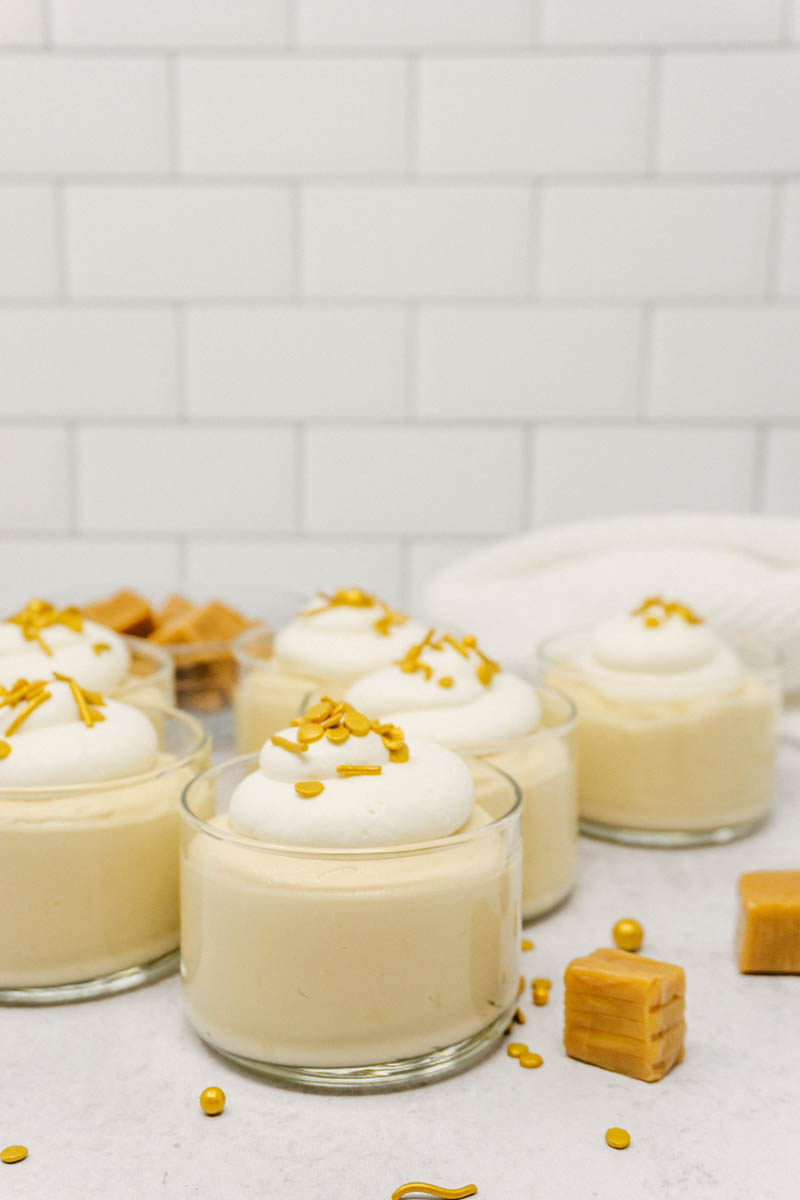
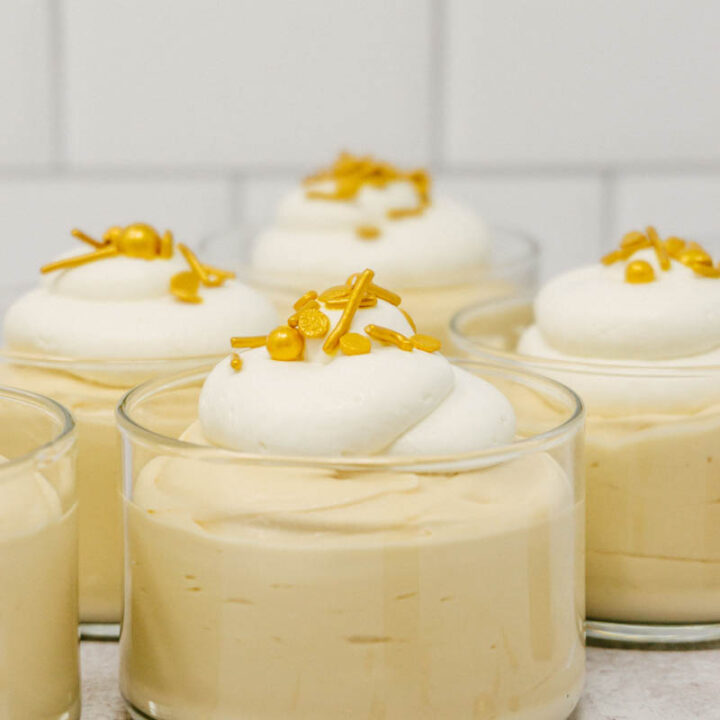
Use a spoon or a pastry bag with a large circular tip to pipe salted caramel mousse into small serving dishes.
Top mousse with a small dollop of whipped cream. Sprinkle with gold sprinkles or edible gold glitter just before serving.
Serve chilled. Store in the refrigerator for up to 4-5 days.
Notes
You can use premade whipped topping instead of homemade whipped cream to save time.
Wait to add sprinkles until a few hours before serving. They will bleed color into the whipped cream if left for longer than 3-4 hours.
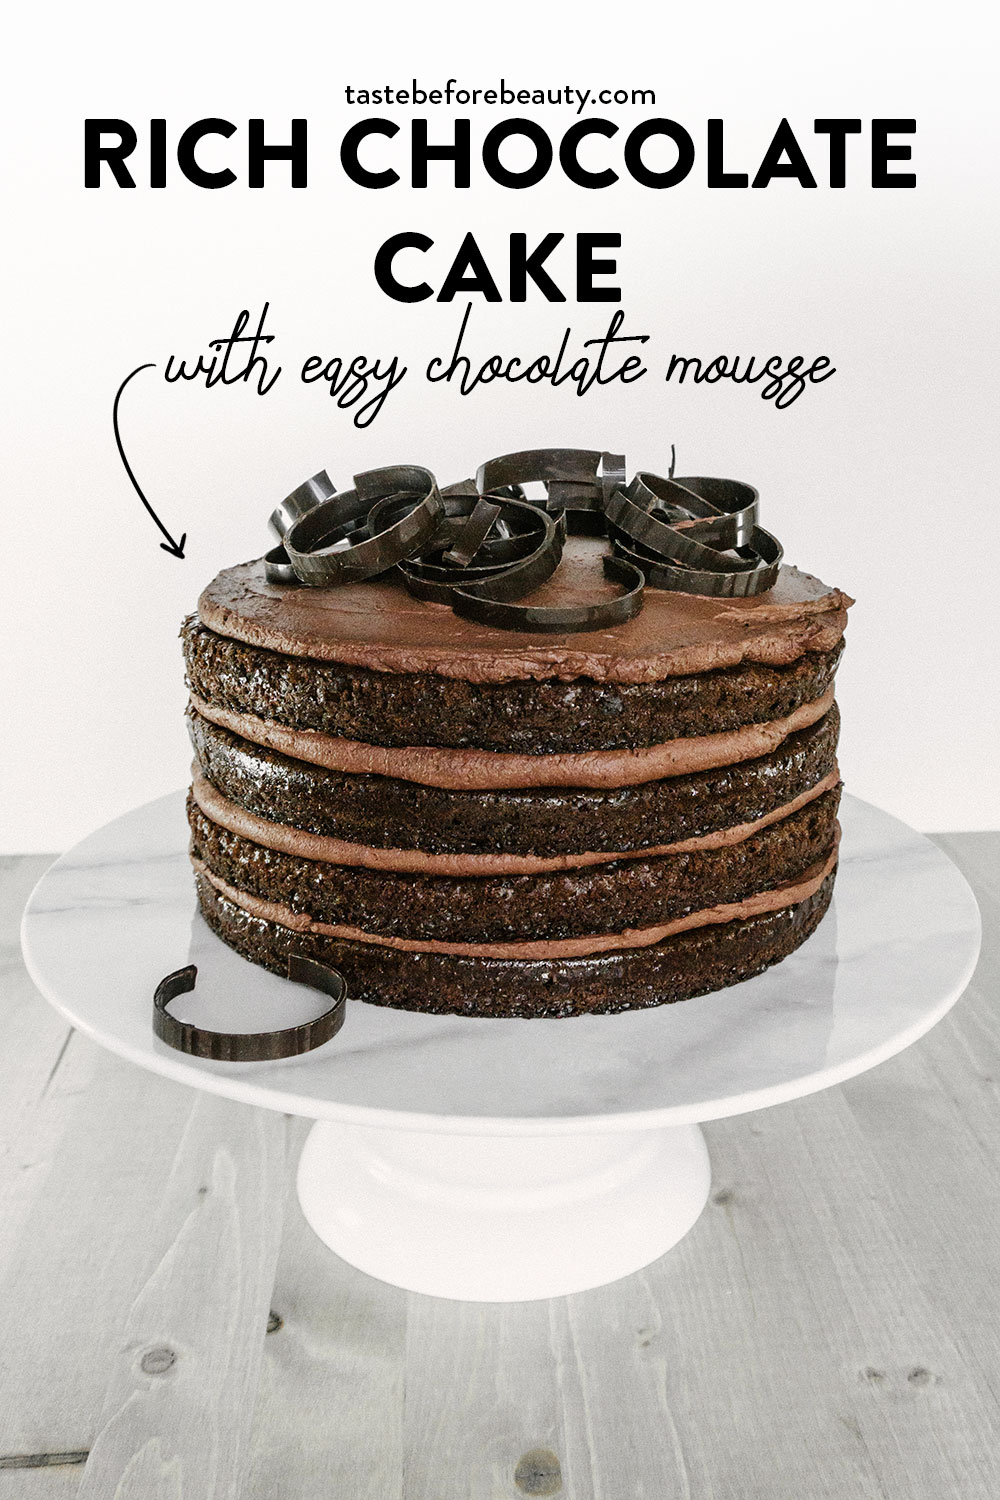
Rich chocolate cake layered with creamy, chocolate mousse. Ummm, do you need any more convincing to make this right now?
Close your eyes and imagine with me for a moment (okay, maybe don’t actually close your eyes because then you won’t be able to read along). You’ve just cut into the perfect chocolate cake. It slices like a dream. You take a bite. Instantly, you taste the rich chocolate flavor of the tender cake. Then the smooth, creamy chocolate mousse begins to melt on your tongue. It has a subtly sweet, perfectly balanced chocolate flavor that compliments the dark chocolate cake. The flavors meld and become a complex chocolate dance in your mouth. It’s the most perfect chocolate cake you’ve ever eaten.
Now open your eyes and read on, because you’re about to meet the perfect chocolate cake of your dreams.
No frosting on this cake? Hear me out. This Easy Chocolate Mousse packs a chocolate punch without being heavy. It’s lightly sweetened and so easy it’s practically effortless. Seriously, you’ve never made an easier, more delicious chocolate mousse in your life. It’s so light and refreshing you can eat two slices of this Rich Chocolate Cake with Easy Chocolate Mousse. Looking for a traditional Chocolate Cake with Chocolate Buttercream? It’s coming soon—stay tuned!
Recipe Tips
High Altitude: If you are making this Rich Chocolate Cake at a high altitude, please adjust the recipe according to your normal pattern. Because this recipe is fairly new to my repertoire and I live near sea level, I haven’t tested it for high altitude adjustments yet. I’d love to hear how it goes for you in the comment section.
Buttermilk Substitute: If you don’t have buttermilk on hand, make your own. In a 1 cup measuring cup, add 1 tablespoon of lemon juice plus enough milk to fill to 1 cup (8 oz) of liquid. Let it sit for a few minutes, then add as you would normal buttermilk.
Dutch Process Cocoa: I add just a touch of Dutch process cocoa to this Rich Chocolate Cake to add a touch of dark chocolate color and flavor. Don’t substitute the natural cocoa powder out in this recipe. It needs the acidity of natural cocoa to rise properly. Dutch process cocoa has been processed with alkali so it will not react with the baking soda properly and your cakes will be flat and sad.
This cake is as easy as it is delicious. I promise you will love every last bite. Let us know what special event in your life this cake is making into a dream come true in the comments below!
Some of the Products I Love to Use When Making the Rich Chocolate Cake
Yield: 2 9" round cakes or 1 9x13" cake plus 6 cupcakes
Prep Time: 25 minutes
Cook Time: 30 minutes
Additional Time: 2 hours
Total Time: 2 hours55 minutes
Rich chocolate cake layered with creamy, chocolate mousse. Ummm, do you need any more convincing to make this right now?
Ingredients
Rich Chocolate Cake
2 ¼ C (10 oz) all-purpose flour
½ C + 1 T (2 oz) natural cocoa powder
2 C (14 oz) white sugar
1 tsp salt
1 tsp baking powder
2 tsp baking soda
2 tsp Dutch process cocoa powder
2 C (16 oz) buttermilk
2 large eggs
1 C minus 1T (7 oz) vegetable oil
1 ½ tsp vanilla
Best Easy Chocolate Mousse
One batch
Garnish
Chocolate curls or shaved chocolate
Instructions
Make the Rich Chocolate Cake.
Preheat oven to 350*F (see note).
Prepare two 9-inch round cake pans. Spray bottom and sides of pans with non-stick cooking spray, line bottom with a circle of wax paper, then spray with non-stick cooking spray again.
In a large mixing bowl, sift together all-purpose flour, natural cocoa powder, sugar, salt, baking powder, baking soda, and Dutch process cocoa. Add buttermilk (see note), eggs, vegetable oil, and vanilla. Mix for one minute to combine. Batter will be thin.
Divide batter equally between two pans (about 25-26 ounces per pan) and bake for 25-30 minutes, until you can touch the center of the cake and it bounces back. Let cool in the pan for 5 minutes. Turn out onto wire cooling racks, peel the wax paper off the bottom and cool completely (2-3 hours) before decorating.
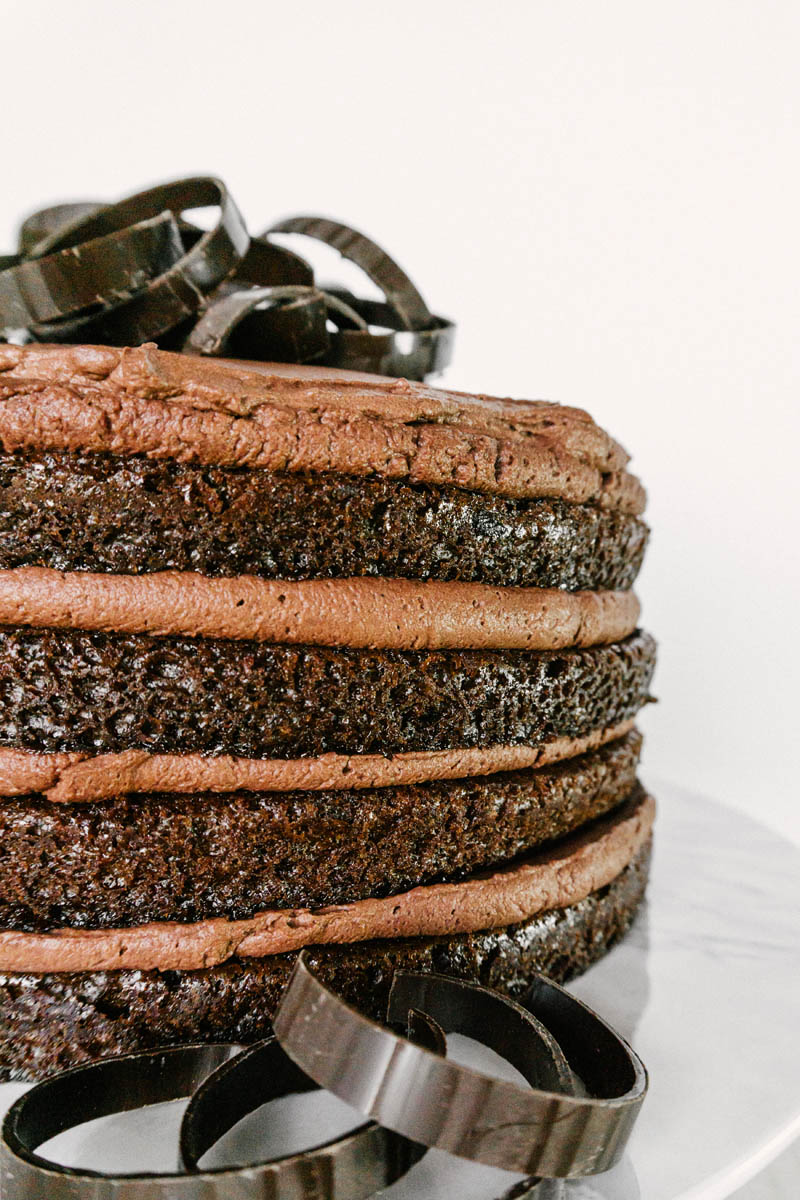
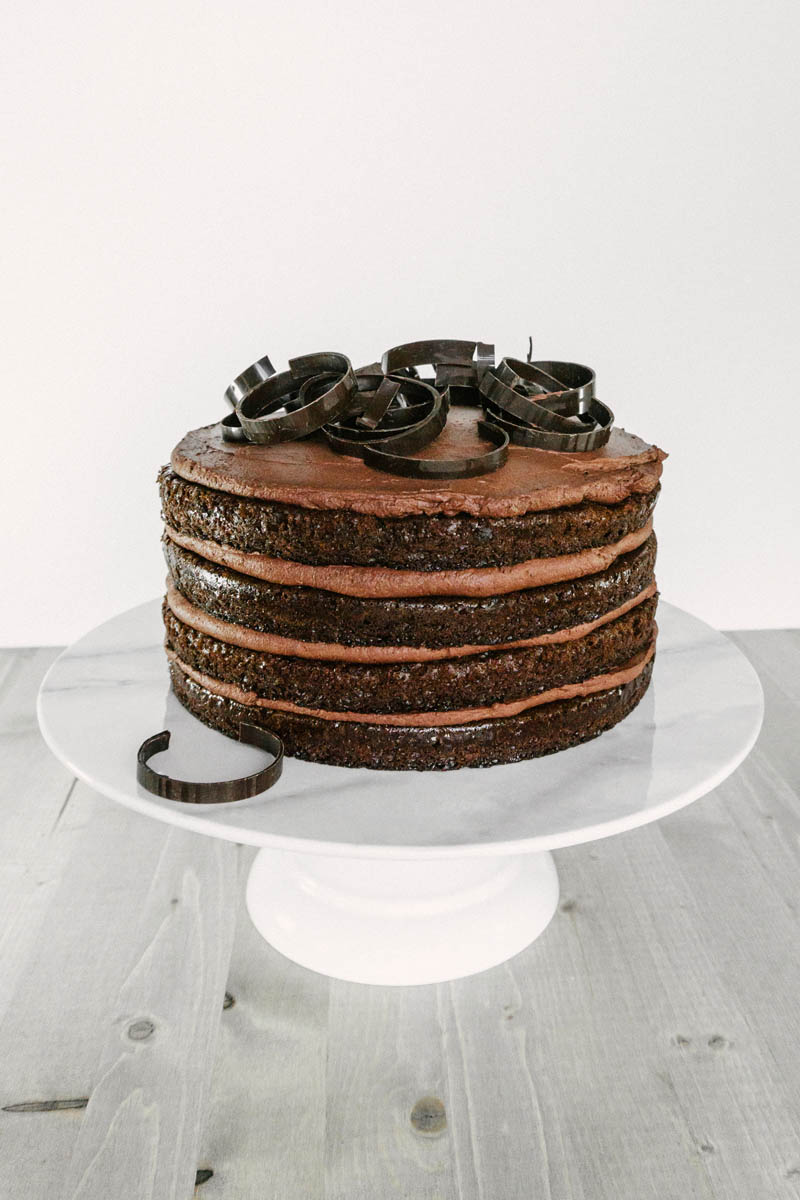
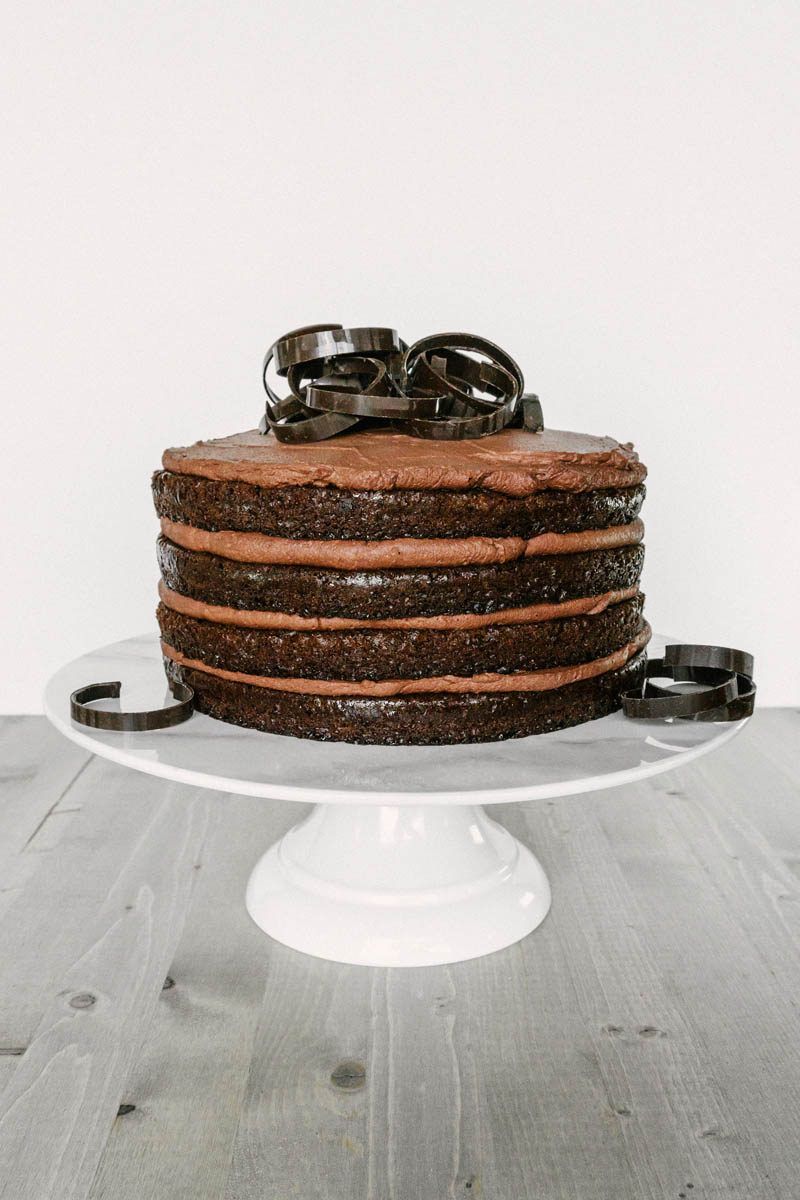
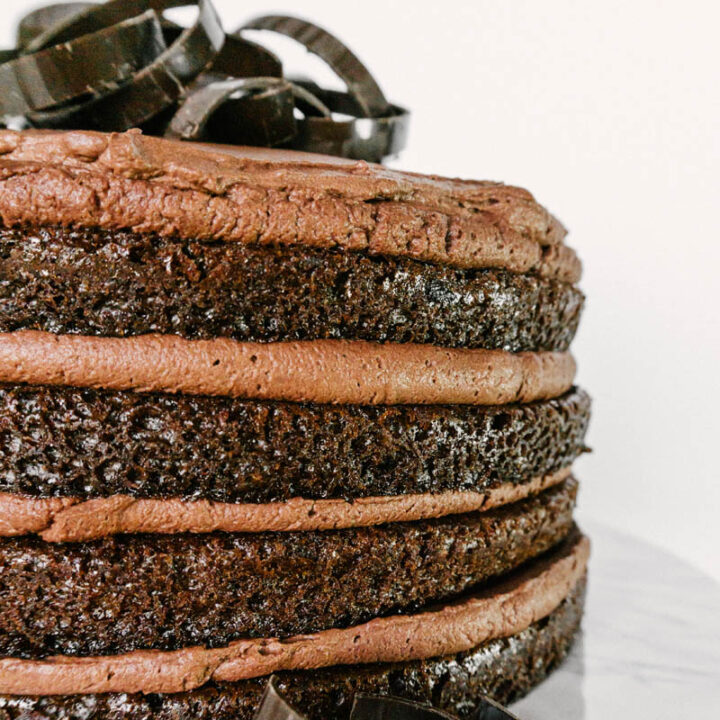
Place one cake layer on a cake stand or plate. Top with a layer of Easy Chocolate Mousse. Place second cake layer on top and add another layer of mousse. Garnish with chocolate curls or shaved chocolate.
Notes
If you need a flat cake top for decorating, bake the cakes at 325*F.
To make your own buttermilk, use 1 tablespoon of lemon juice plus enough milk to equal 1 cup. Let sit for a few minutes before adding to batter.
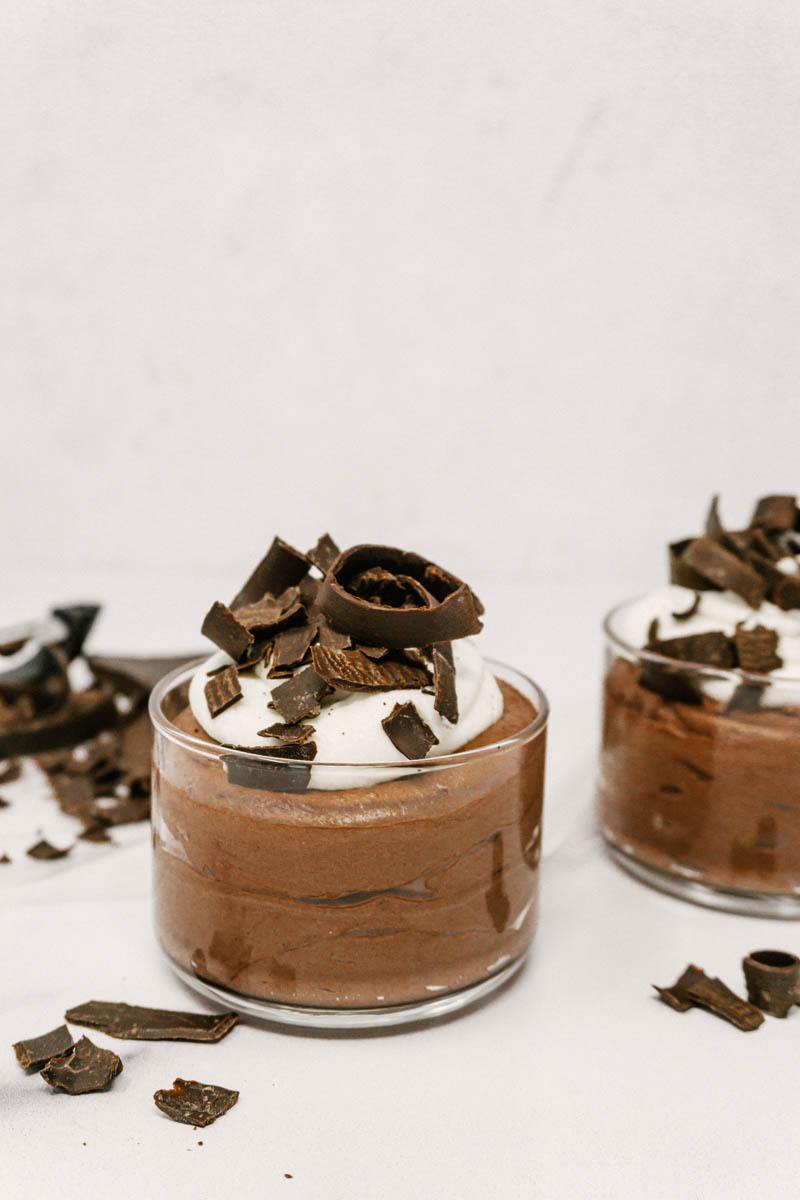
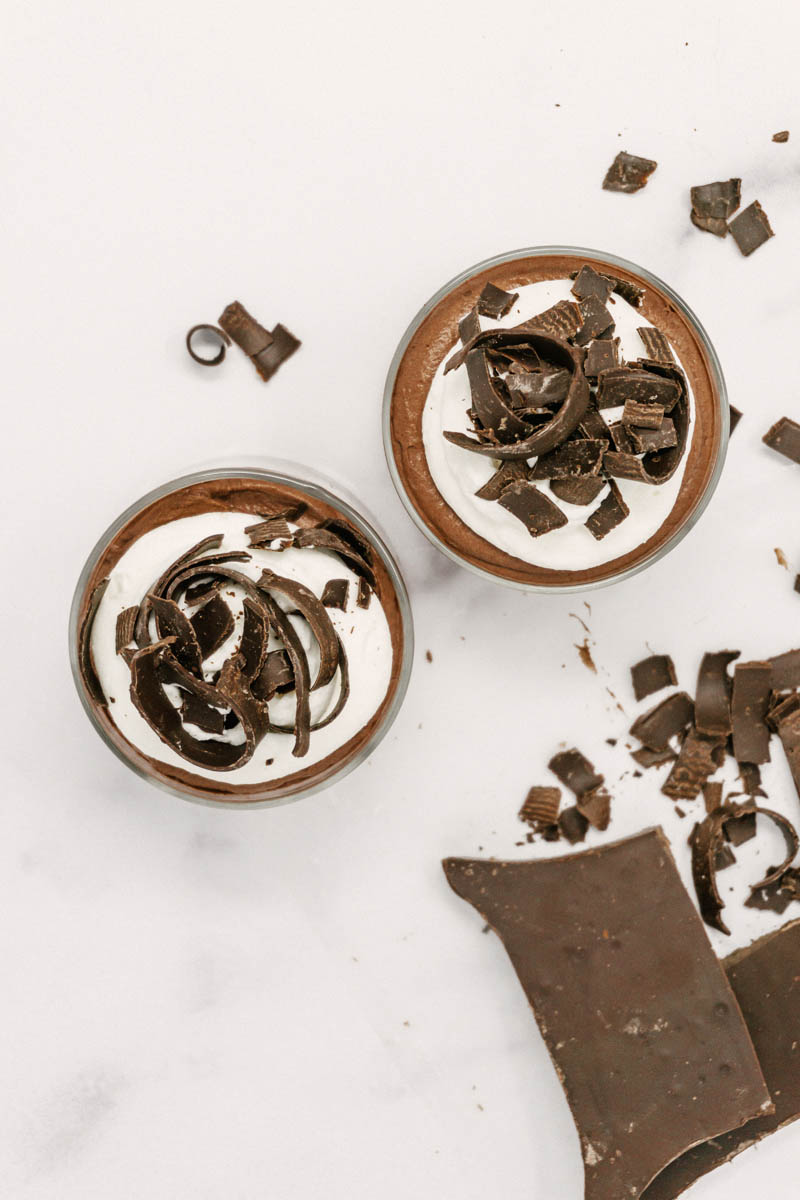
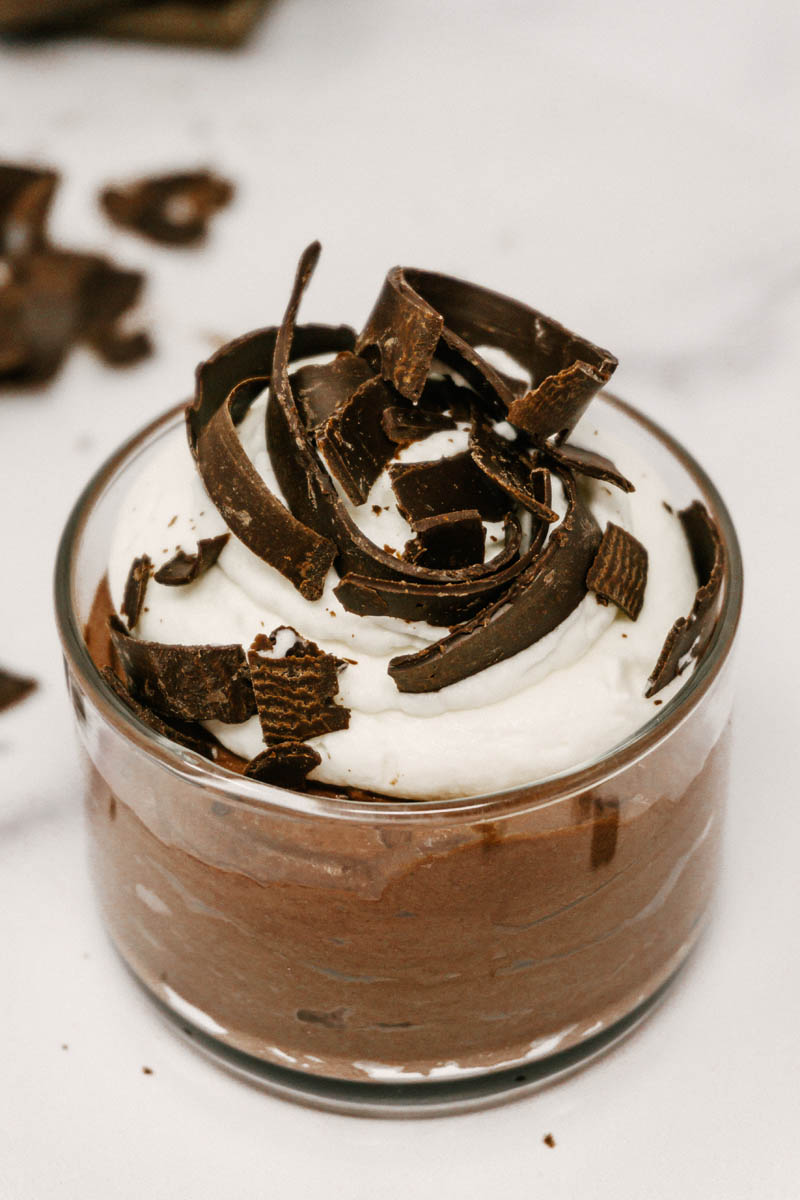
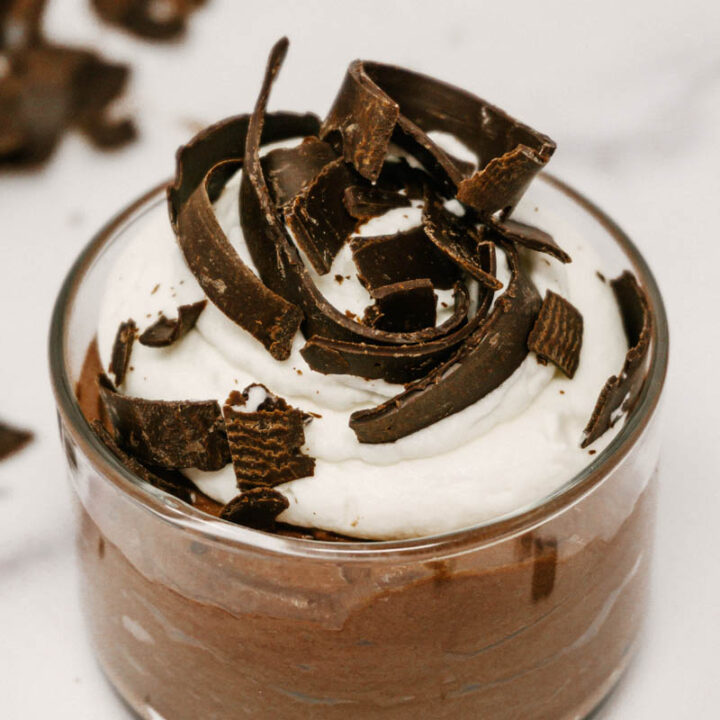
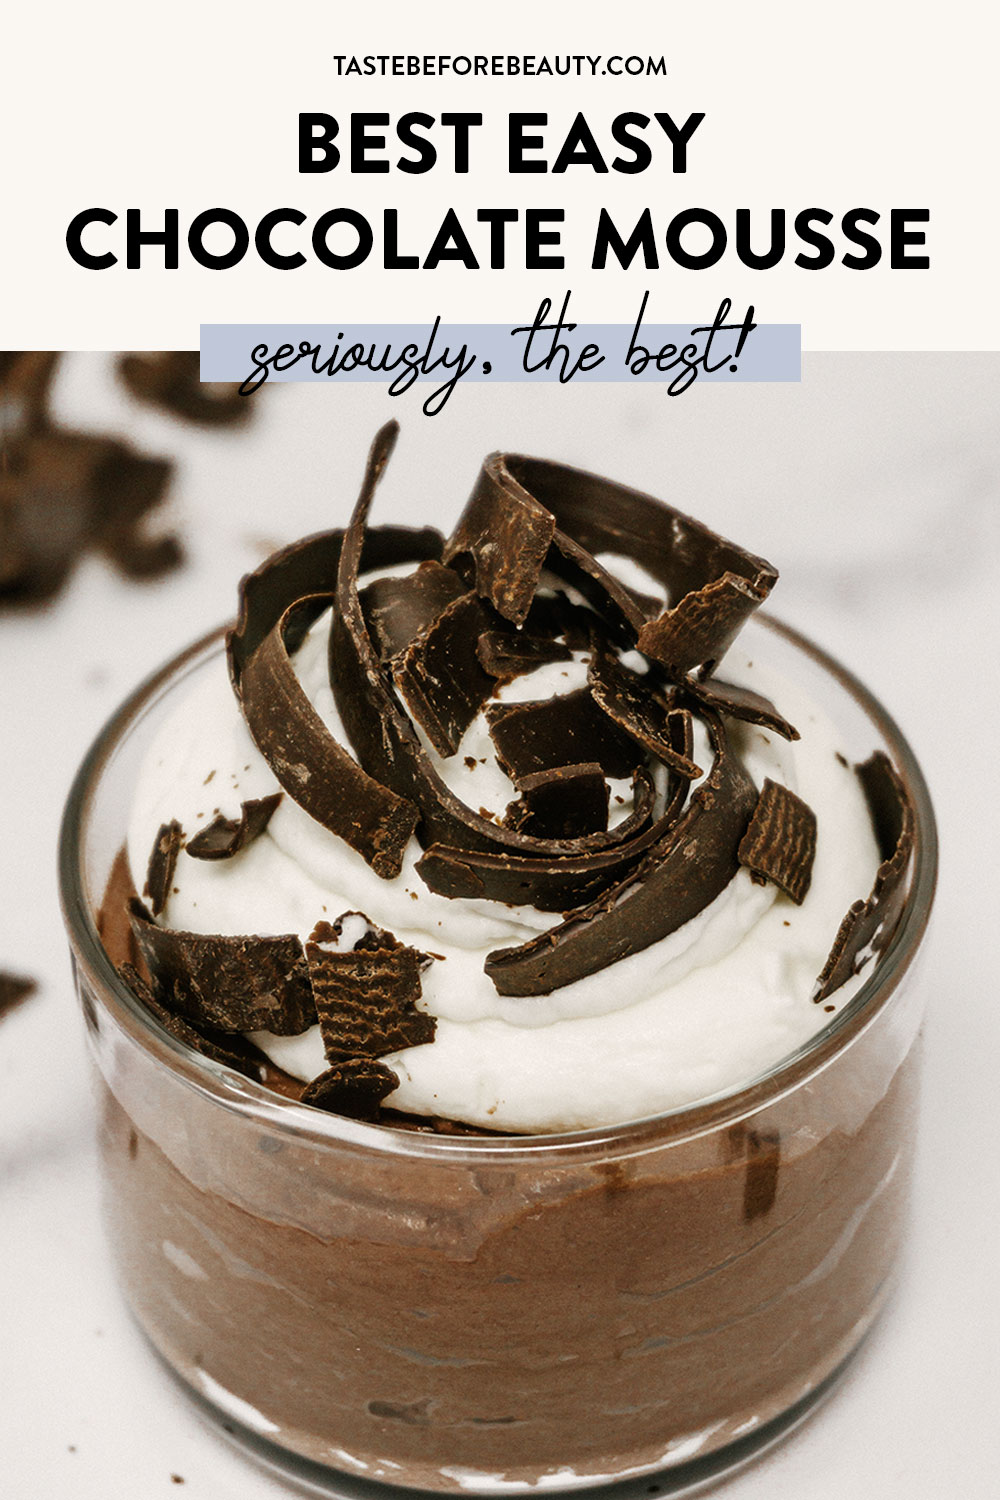
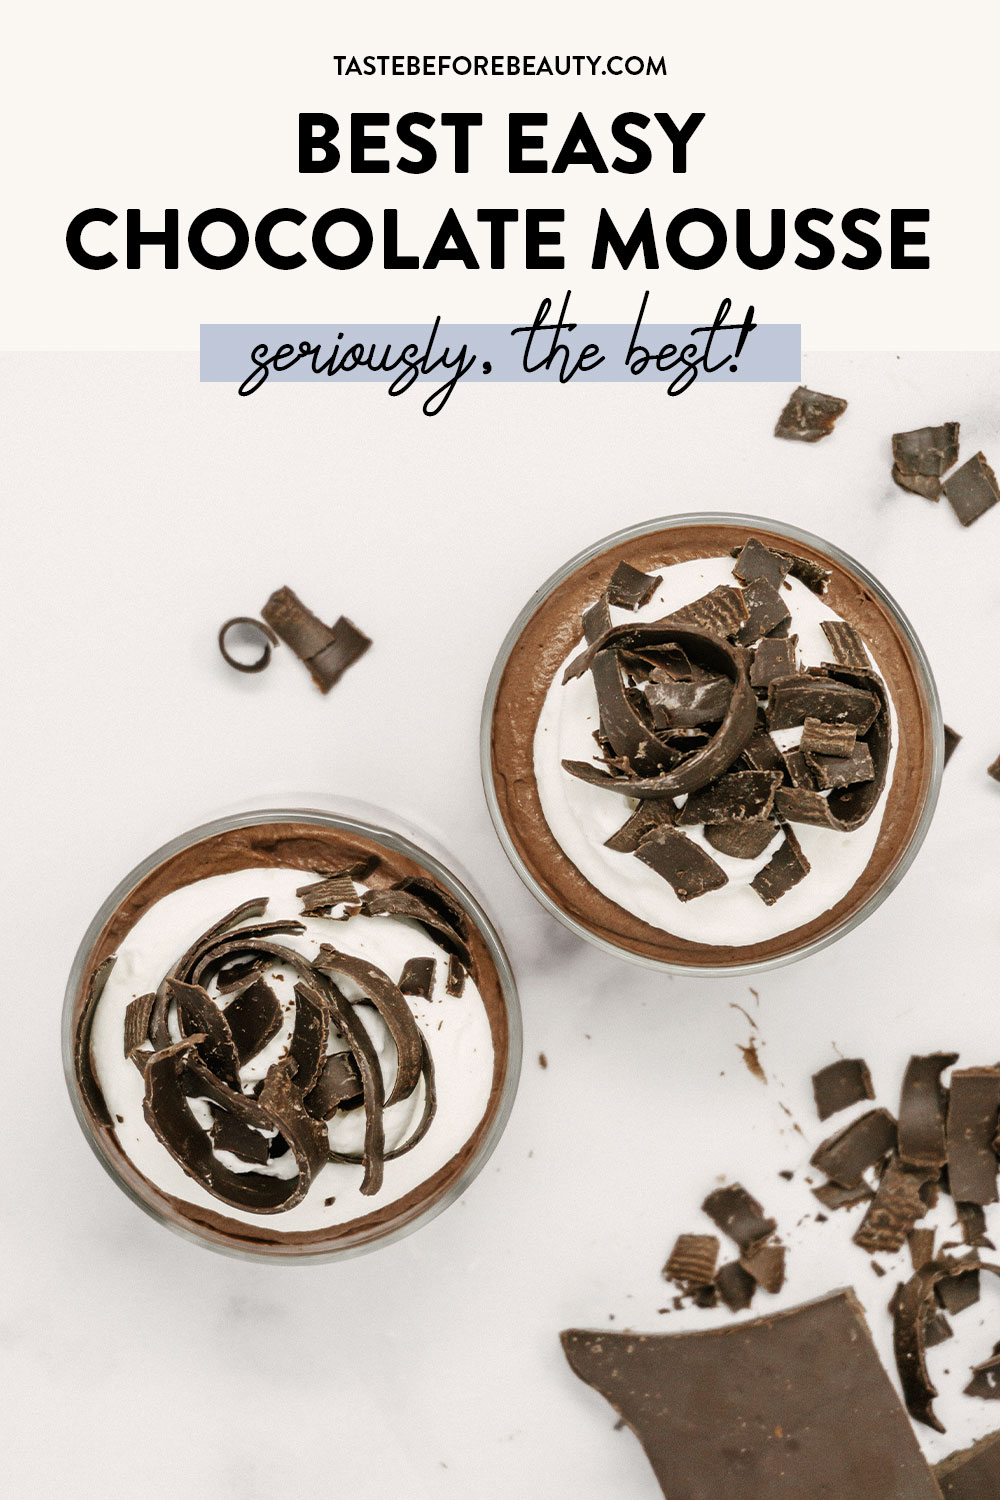
This mousse is a showstopper! Delightfully light, perfectly smooth, and chocolatey, you’ll find any excuse to make this often.
I love a good chocolate mousse. I’ve tried so many at restaurants and made quite a few myself. I’ve found that there is a fine line between too bitter, too sweet, too rich, too bland. I wanted to be able to make a chocolate mousse full of flavor that hits the spot, without the heart-racing rush of too much chocolate or a stomach ache from too much sugar.
I really love the taste, texture, and absolute simplicity of uncooked mousse made with cream and cocoa. You could call this a chocolate whipped cream, as that is what it is. The no-fuss preparation of this appeals to me and I find I make it more often than would be practical for a more complicated mousse.
Dutch-processed Cocoa
I found that using Dutch-processed cocoa gives a lovely, rich chocolate color. The process of treating the cocoa with an alkaline wash gives it a darker, almost red tint that looks beautiful in this luxurious chocolatey mousse. Additionally, the flavor is a bit smoother than natural cocoa and complements the creamy texture nicely. I do recommend weighing the cocoa powder, if at all possible, as it will ensure that you have the correct amount of cocoa in your mousse.
Using a mixture of powdered sugar and granulated sugar was a solution I came up with through lots of testing. I found that using only powdered sugar gives a chalky texture, but using all granulated sugar sometimes leaves a bit of grittiness. Combining the two gives the best of both worlds, with a smooth, silky finish and the perfect amount of sweetness.
This easy chocolate mousse lasts very well in the fridge. It’s great to make a day or two in advance for an event, or just to have around for you to eat! I always hope that there are a few leftover mousses for me to enjoy.
I love to pair this easy chocolate mousse with my cream cheese whipped cream for an elegant dessert. Layer them together in a 2-ounce shot glass and topped with shaved dark chocolate. It is sure to fly off the dessert table and leave everyone feeling satisfied and happy. I’ve also used this mousse between chocolate cake layers, as the filling for a chocolate cream puff, and as the cream layer in a chocolate trifle. All were delicious!
However you choose to use this best easy chocolate mousse, let us know in the comments!
Best Easy Chocolate Mousse
Yield: 15 (2 oz) servings
This mousse is a showstopper! Delightfully light, perfectly smooth, and chocolatey, you’ll find any excuse to make this often.
Ingredients
1 ½ C (12 oz) heavy cream
¼ C (1 oz) Dutch-processed cocoa
⅓ C + 1 T (1.25 oz) powdered sugar
3 T (1.5 oz) sugar
½ tsp vanilla
1 Batch of Cream Cheese Whipped Cream
2 oz dark chocolate bar, shaved
Instructions
Pour cream into a medium-sized bowl. Add vanilla. Sift cocoa and sugars into the cream. With a hand or stand mixer, whip until stiff peaks form.
Pipe or spoon immediately into individual serving dishes and top with cream cheese whipped cream and chocolate shavings. Fridge until serving.
Notes
If using this mousse as a filling for a cake, tart, or cream puff, make ahead of time and refrigerate until ready to use. Rewhip before using to return it to stiff peaks state.
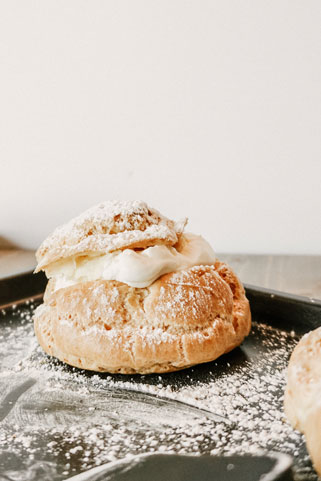
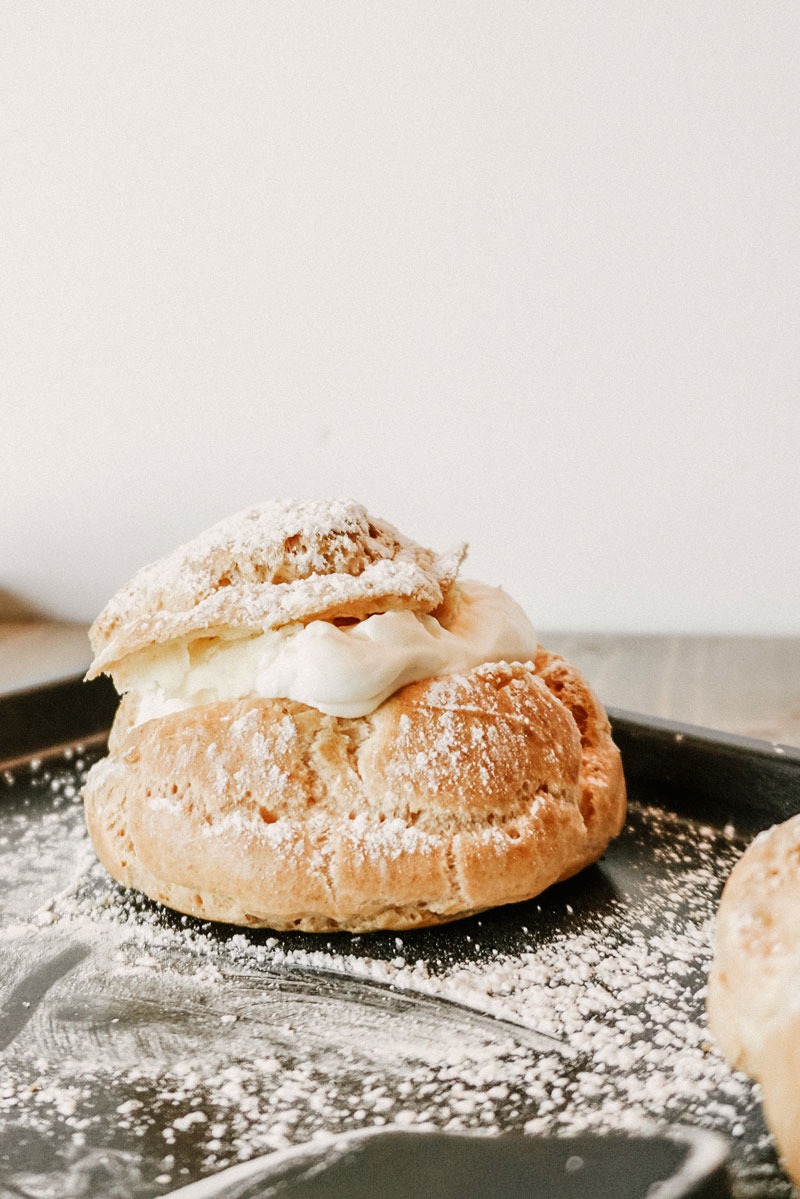
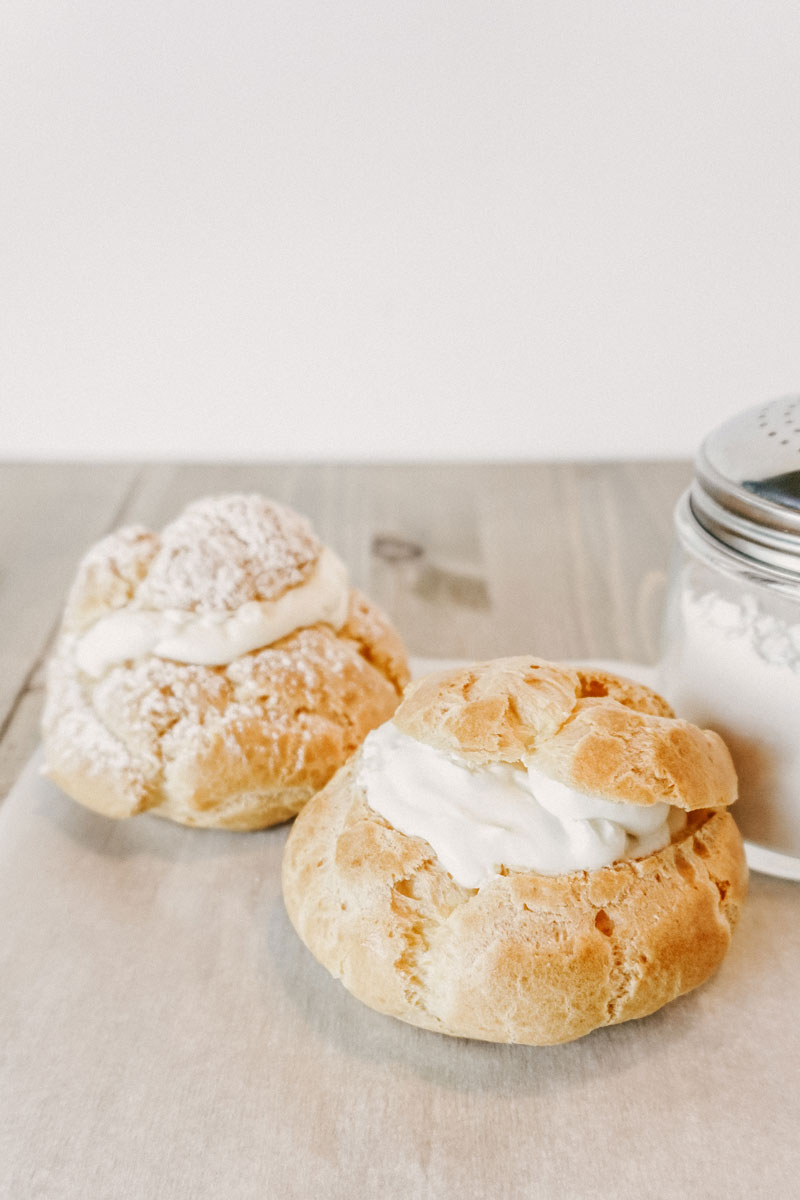
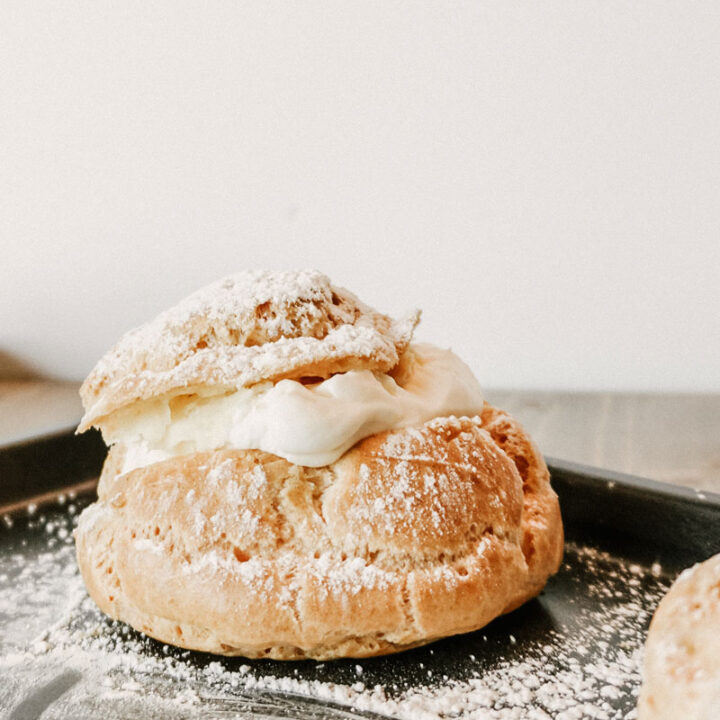
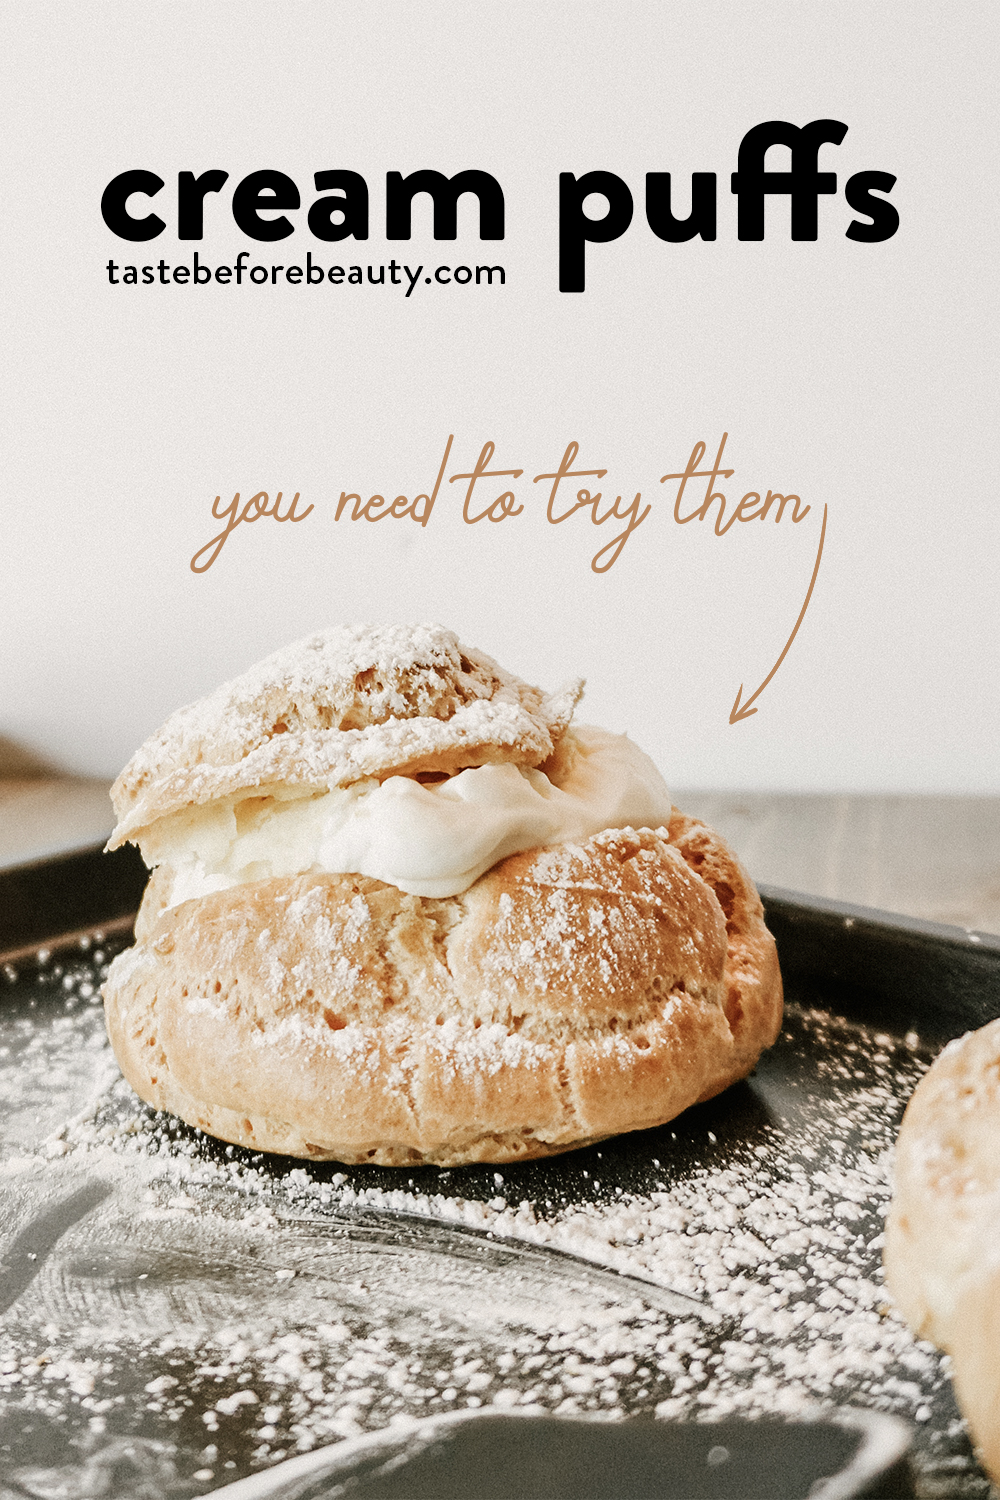
This Pâte à Choux is simple to make and extremely versatile. We love it filled with Cream Cheese Whipped Cream or Easy Chocolate Mousse.
Cream puffs are tricky until you know that the addition of the extra egg white will make your life easier and almost guarantee success. With this recipe, you don’t need to poke a hole in the puff when it’s done to let steam out. The puffs bake up nice and dry on the inside (unless you pull it out of the oven too early). Egg whites help add crispness to baked products. I’ve found that it’s helpful to decrease the amount of egg white in cookies to help keep the moisture in. A cream puff benefits from the crispy factor and doesn’t need extra moisture because it will have a filling. Just save the extra egg yolk. You will need it to make chocolate chip cookies tomorrow (wink).
I will never get tired of making these cream puffs and exploring the possibilities of delicious fillings. My favorites are Stabilized Cream Cheese Whipped Cream with a shiny chocolate glaze and Easy Chocolate Mousse with a dusting of powdered sugar. A few on my list to try are a lemon curd with vanilla cream and a few raspberries, or a dulce de leche cream filling with a salted caramel drizzle, and perhaps a lime cream with a drizzle of blackberry sauce. For a Christmas event, I piped it into a wreath shape and filled it with orange zest cream, and topped with sliced almonds.
Let’s not get stuck on sweet fillings though. I would also love to explore savory fillings like chicken salad or scrambled eggs and bacon. Now that I’ve got your creative engine warmed up, let us know your ideas in the comments and tag us in your creations on Instagram.
Cream Puffs
Yield: 10-12 large puffs
Cook Time: 35 minutes
Total Time: 35 minutes
This Pâte à Choux is simple to make and extremely versatile. We love it filled with Cream Cheese Whipped Cream or Easy Chocolate Mousse.
Ingredients
1 C (8 oz) water
½ C (4 oz) salted butter (no substitutions)
1 C (4.5 oz) all-purpose flour
¼ tsp salt
4 large eggs + 1 egg white
Instructions
Preheat oven to 400*F. Line baking sheet with parchment paper.
Bring water and butter to a boil in a saucepan. Add flour and salt and stir until a thick paste forms. Remove from heat. Let stand for five minutes. Add eggs, one at a time, and stir until completely combined.
Drop by ¼ C (#20 cookie dough scoop) for large puffs. Bake for 35 minutes or until medium golden brown. Let cool completely before filling.
To serve: split puffs open and fill with desired filling. Dust with powdered sugar immediately before serving.
Notes
If you would like smaller puffs use:
A #30 cookie dough scoop for medium-sized puffs. Bake 20-25 minutes.
A #40 cookie dough scoop for small puffs. Bake 15-20 minutes.
Place cream puffs in the oven immediately after portioning dough for optimum height.