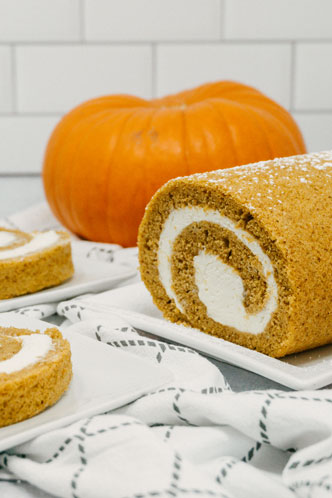
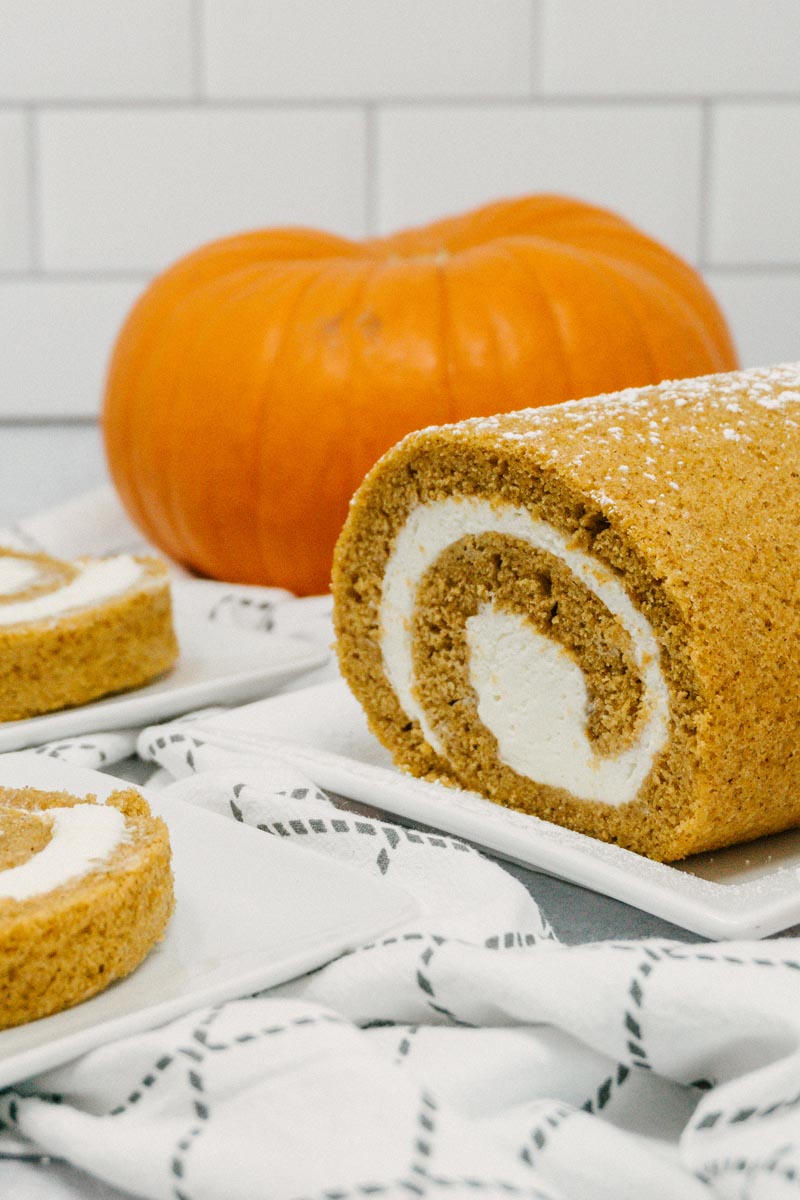
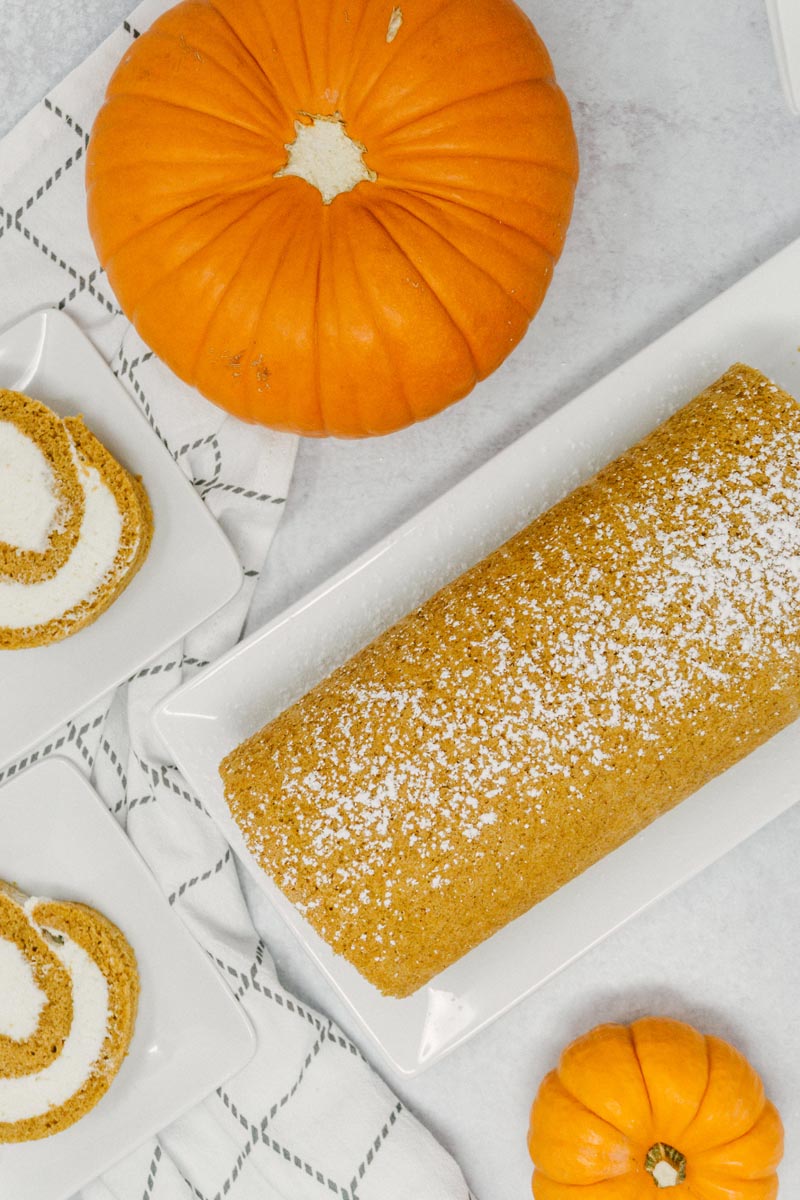
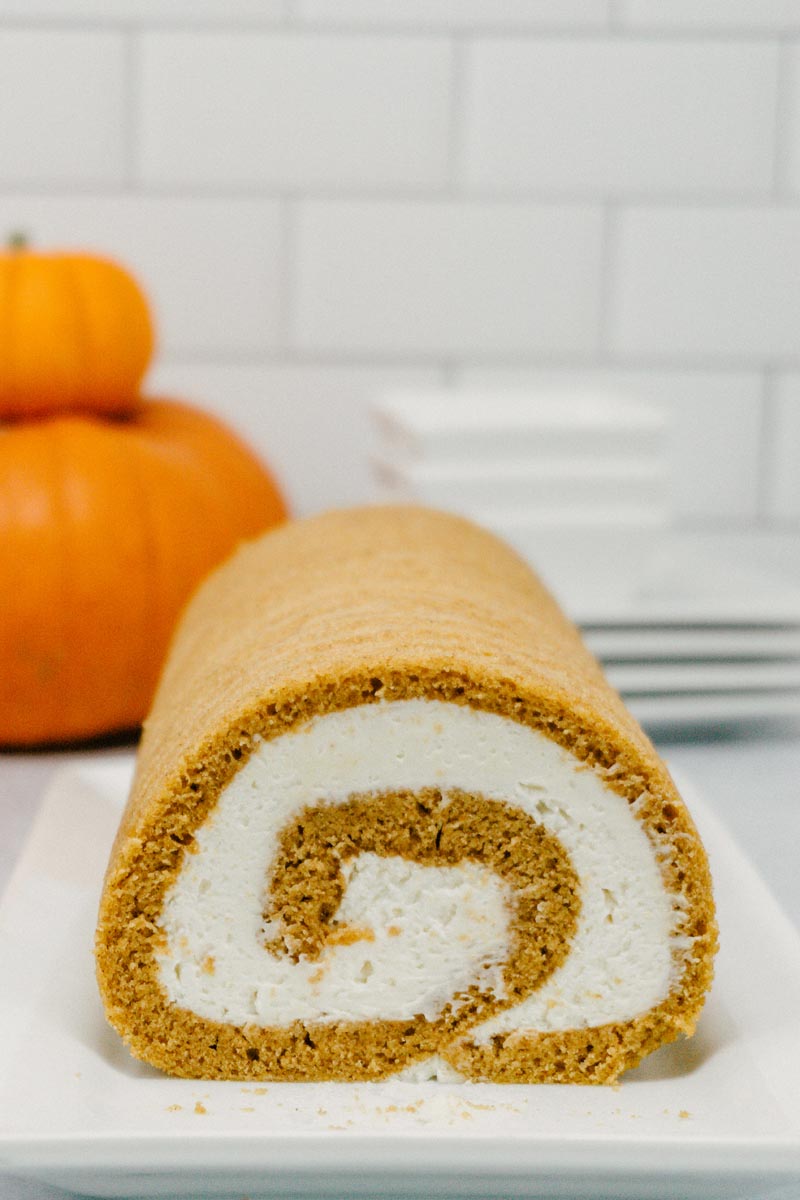
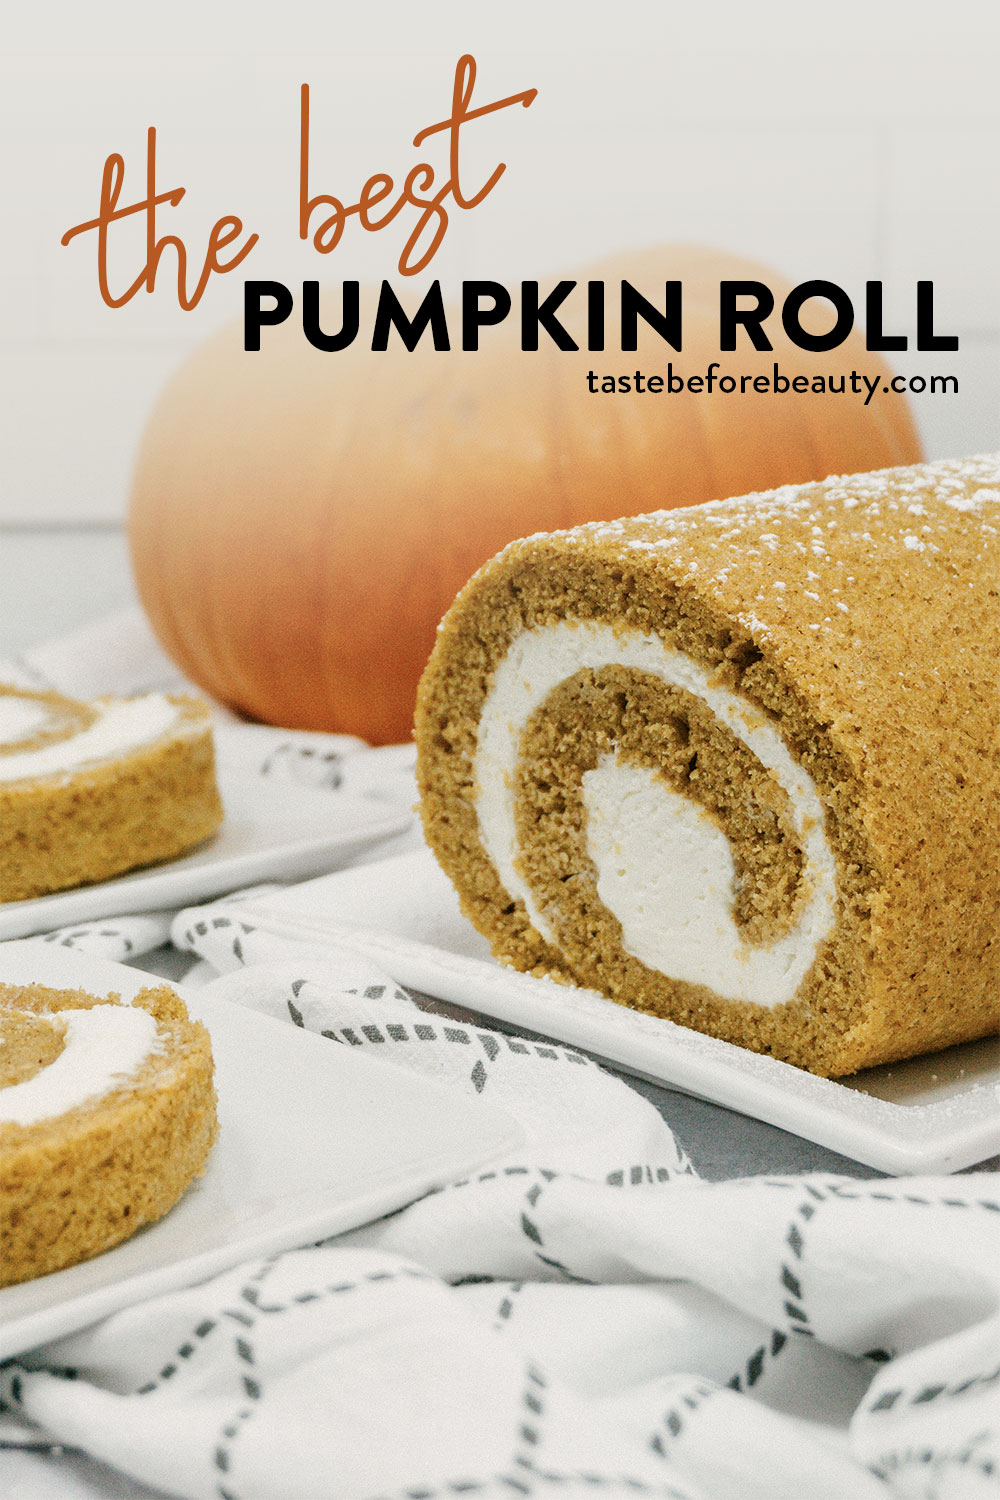
Plenty of pumpkin, perfectly balanced spices, and a light and fluffy cream cheese center make a perfect pumpkin roll that will keep you coming back for more.
My Pumpkin Roll Love
I love pumpkin rolls. There’s something so enticing about the beautiful swirl of pumpkin cake with the contrast of the cream cheese filling. I’ve tried many from the grocery store, but find I’m disappointed more often than not.
I was going through an old family cookbook and found my Grandma’s recipe for a pumpkin roll. I took a chance on it and haven’t turned back since. It is the most wonderful pumpkin roll I’ve ever had. The spices are balanced and the simple addition of lemon juice brightens the flavor of the whole thing. The only problem is that it was written for a jelly roll pan.
Pan and Teaspoon Measurements
I don’t own a jelly roll pan, and I will probably never own a jelly roll pan. I don’t believe in keeping kitchen tools around that have only one purpose. If you have the space to do so, then go for it! But I suspect most of us have small kitchens and have to carefully choose what we want to fill them with. So, I scaled this recipe up to fit a standard “half sheet” pan, also known as a cookie sheet. You may notice this recipe has some funky measurements, like ⅓ tsp. I don’t own a ⅓ tsp measuring spoon (do they even exist?) so I just use a ¼ tsp measuring spoon and fill it heaping full. It’s close enough to get the job done.
A lot of recipes will have you turn the pumpkin roll upside down on a flour sack towel sprinkled with powdered sugar, then roll it up in the towel. I realized in the cookie shop that I simply didn’t have the space and time to do that, nor did I want to clean up the mess from it. So, I let the cake cool for 10 minutes, then sprinkle it directly with powdered sugar and roll it up in the parchment paper it was baked on. It works beautifully and saves time and effort.
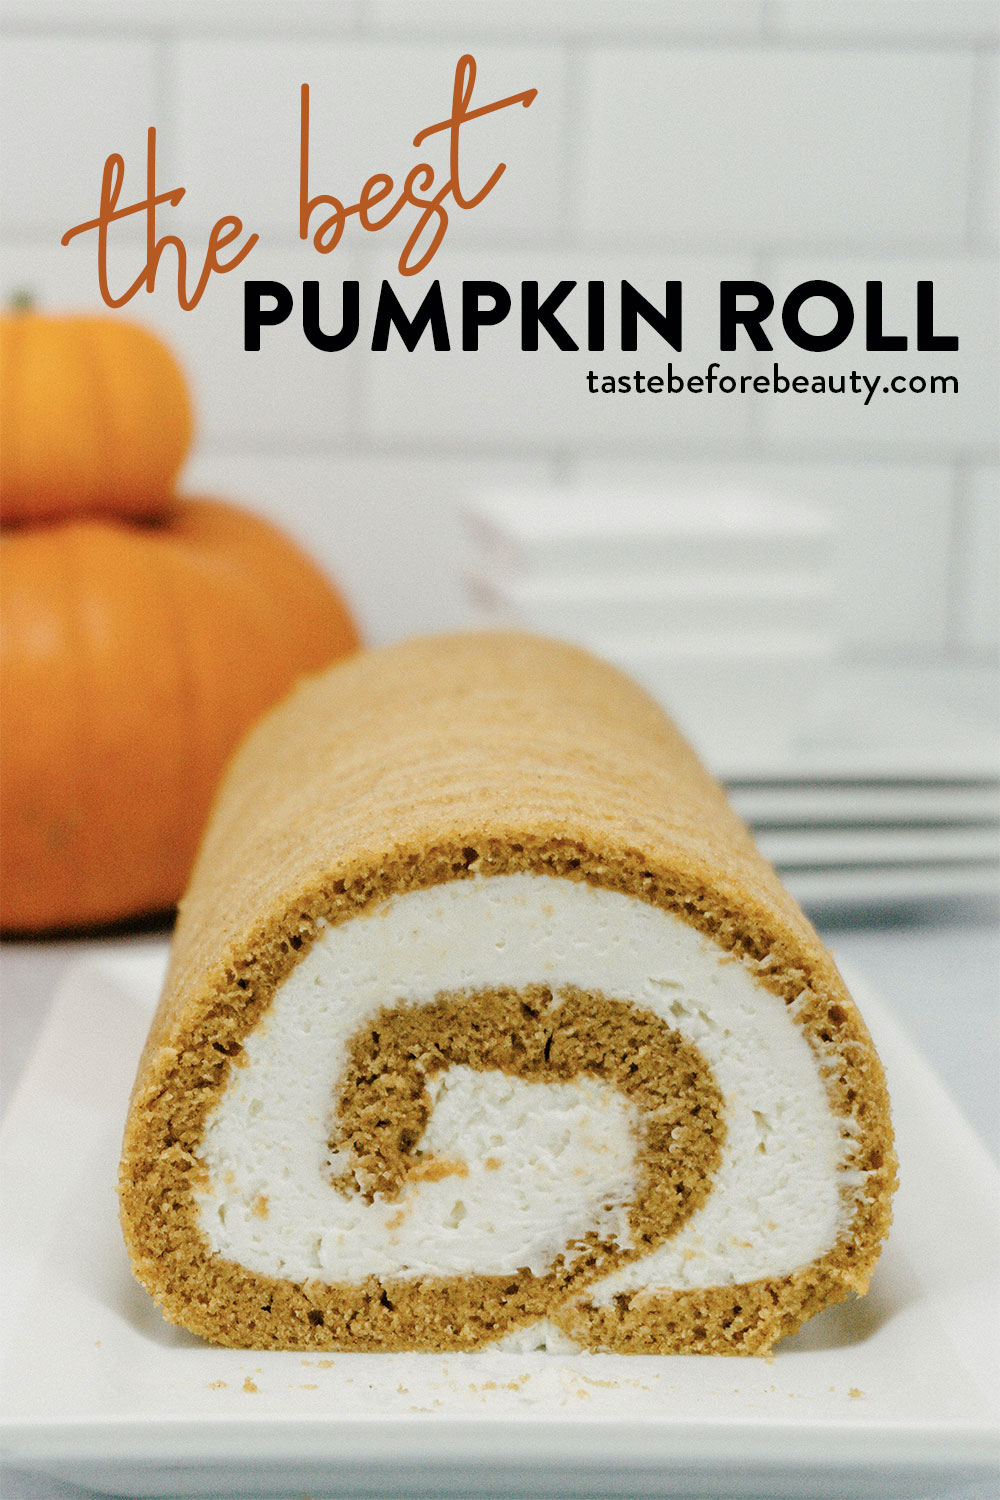
The stabilized cream cheese whipped cream I use in this pumpkin roll is the same cream filling I use for almost every dessert that calls for whipped cream. The texture is light and creamy and it lasts for days in the fridge without losing it’s body. The cream cheese flavor is quite light. If you prefer a more prominent cream cheese flavor, reduce the amount of heavy cream by ½ C (4 oz). Feel free to use as much or as little of the filling as you’d like. I like my pumpkin roll loaded with cream, so I choose to use the full batch of cream cheese whipped cream.
After making this pumpkin roll, I’ve never gone back to store-bought. The effort is worth the delicious results. Let us know what you think!
Pumpkin Roll
Yield: 16 slices
Prep Time: 25 minutes
Cook Time: 15 minutes
Additional Time: 10 minutes
Total Time: 50 minutes
Plenty of pumpkin, perfectly balanced spices, and a light and fluffy cream cheese center make a perfect pumpkin roll that will keep you coming back for more.
Ingredients
Pumpkin Cake
4 large eggs
1 ⅓ C (9.3 oz) white sugar
⅞ C (7.3 oz) canned pumpkin
1 ½ tsp lemon juice
1 C (4.6 oz) all-purpose flour (sifted)
1 ⅓ tsp baking powder
¾ tsp salt
2 ⅔ tsp ground cinnamon
Heaping ¼ tsp ground ginger
Powdered sugar for dusting
Cream Cheese Whipped Cream
1 (8 oz) package cream cheese
½ C (3.5 oz) white sugar
1 tsp vanilla
1 ¾ C (14 oz) heavy cream, cold
Instructions
Make the Pumpkin Cake.
Preheat oven to 375*F. Line a 13x18 pan with parchment paper. Spray parchment paper lightly with cooking spray.
In a medium bowl, sift flour, baking powder, salt, and spices together. Set aside.
In a separate bowl, use a hand mixer to mix eggs and sugar. Add pumpkin and lemon juice and mix. Add dry ingredients and mix until combined. Spread batter into prepared pan. Bake 375*F for 15 minutes or until center springs back to the touch.
Let cool for 15 minutes. Dust top lightly with powdered sugar. Roll cake starting at the short end of the pan, keeping the parchment paper on the cake.
Make Cream Cheese Whipped Cream.
In a medium-sized bowl, beat cream cheese until smooth.
Add sugar and vanilla and mix. Scrape bowl. I can’t say this enough.
Add heavy cream and mix for 30 seconds. Stop, scrape bowl, beat another 30 seconds, then stop and scrape bowl again.
Whip on high speed until pipeable and ready to spread. Refrigerate until ready to use.
Assemble Pumpkin Roll.
Gently unroll pumpkin roll when cool and spread prepared cream cheese whipped cream, leaving ¾ inch around the edges. Reroll gently. Peel off the parchment paper as you roll. Try to keep the roll as round as possible without squeezing the filling out. Cover and refrigerate for at least 2 hours before serving.
Sprinkle with powdered sugar and slice to serve. Trim the ends if desired for a more polished look (we won’t tell anyone if you eat them).
Notes
I have scaled this recipe up to fit a standard cookie sheet size, rather than the jelly roll pan my grandma used. This gave some unconventional measurements. Anywhere I call for a ⅓ tsp, you may simply use a heaping ¼ tsp.
When making the cream cheese whipped cream, scrape the bowl at least 2-3 times before the cream begins to thicken. This will help incorporate the cream cheese evenly. Failing to do so may result in unsightly chunks of cream cheese in the final product.
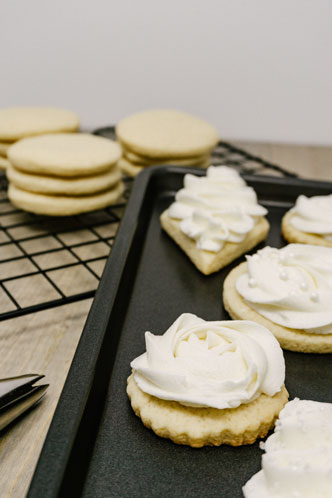
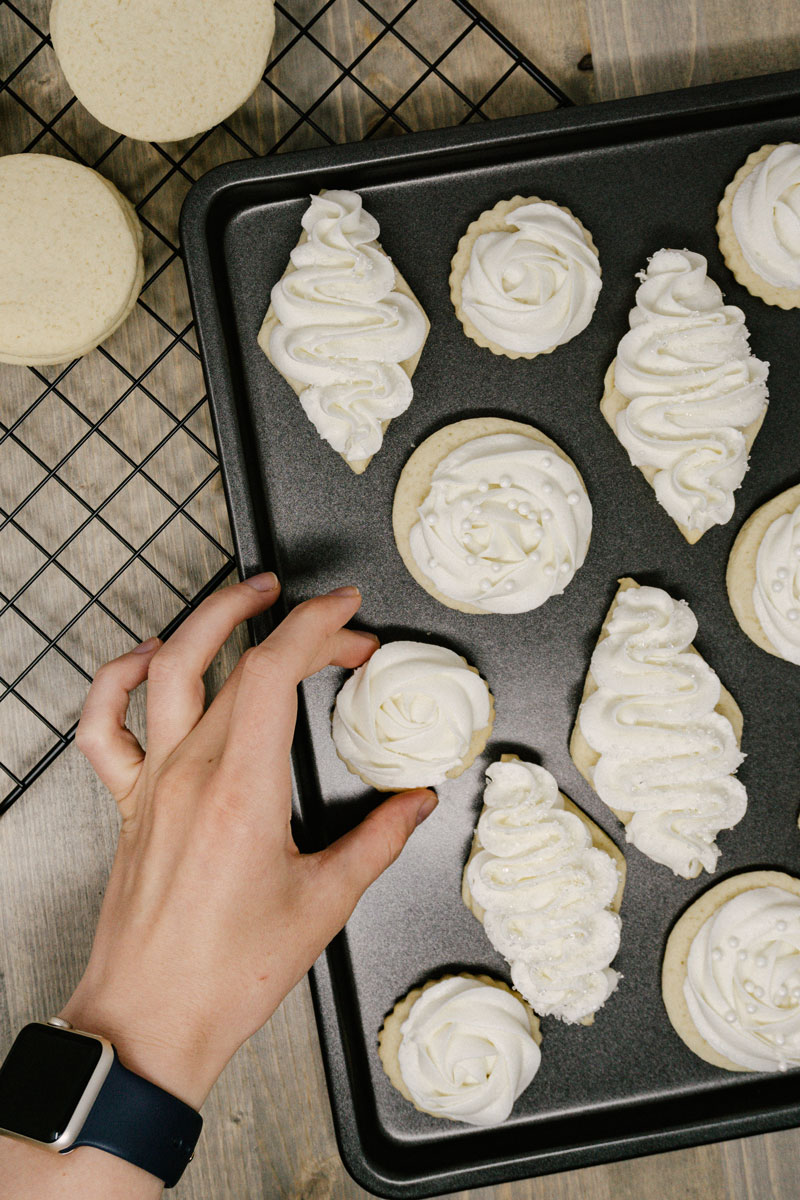
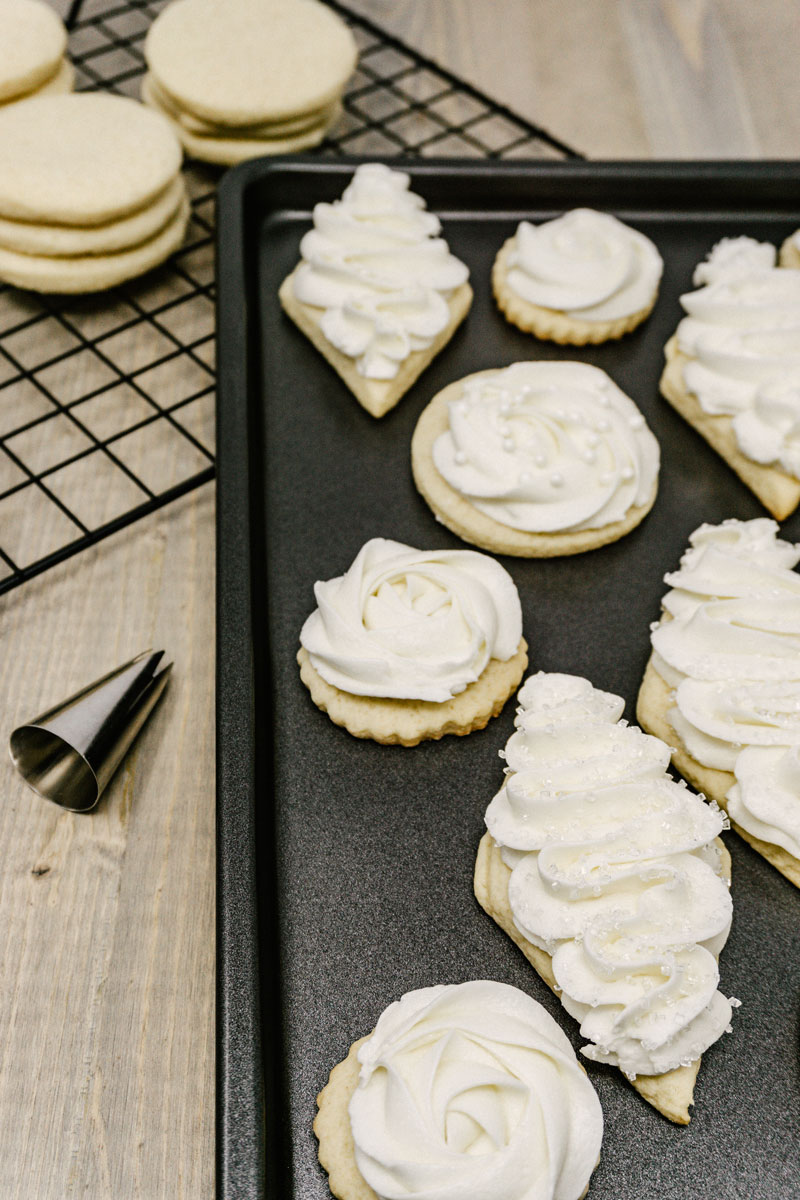
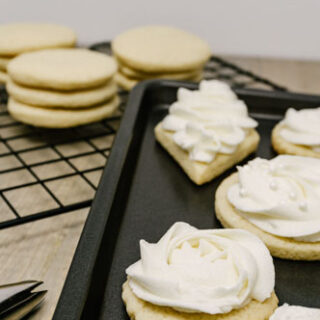
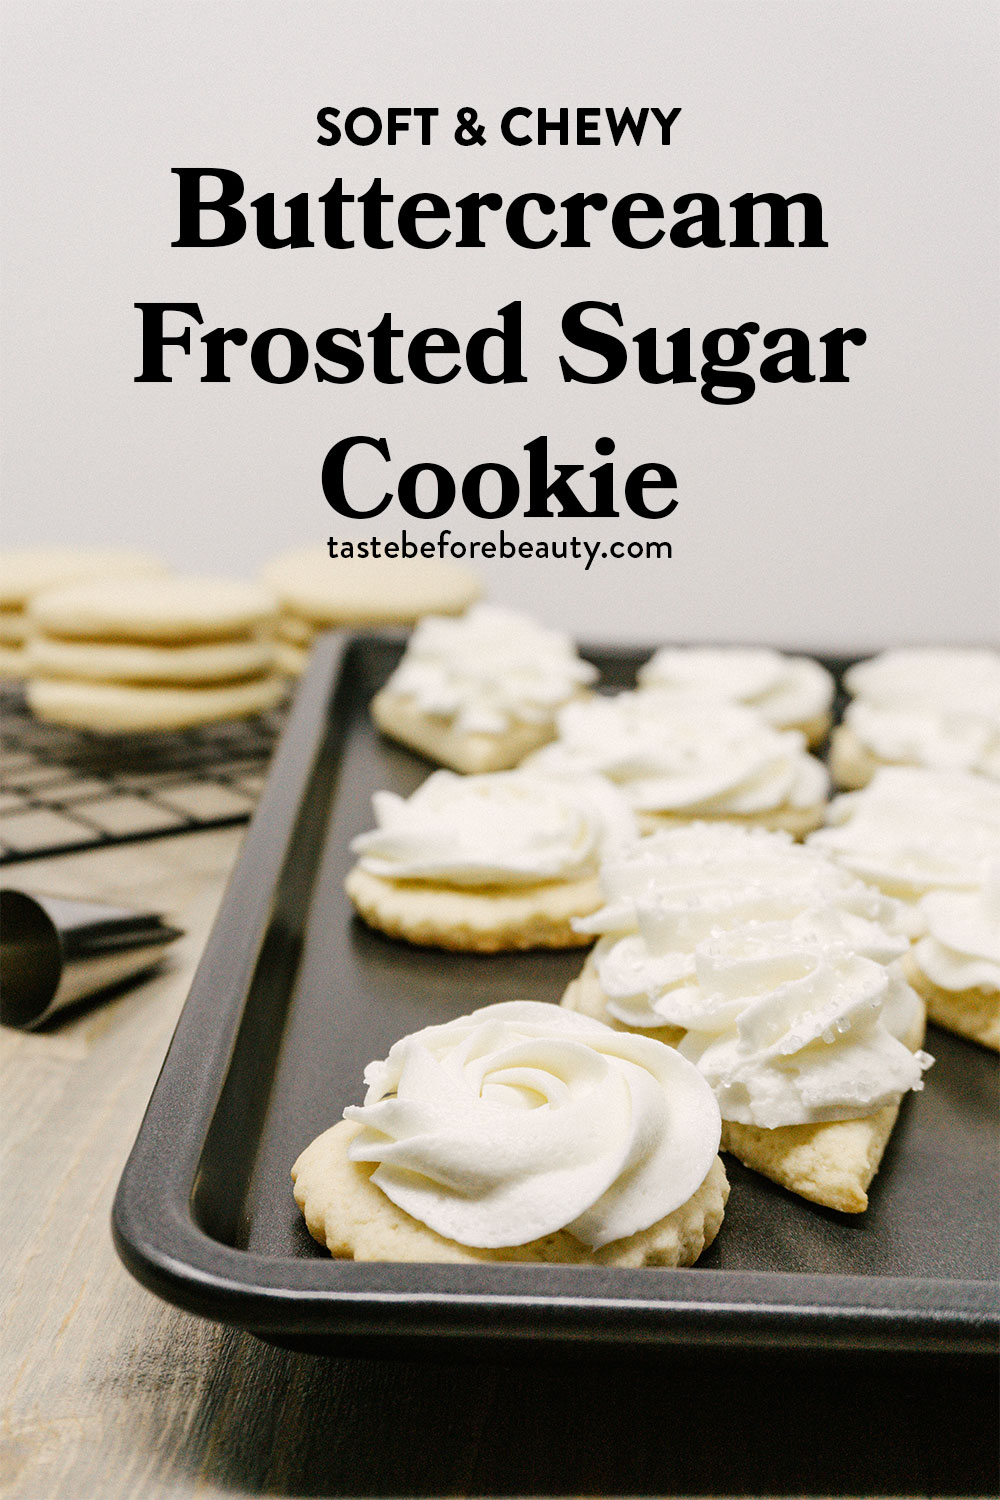
This frosted sugar cookie is my personal weakness. A simple, flavorful sugar cookie pairs with a rich, buttery vanilla frosting for the perfect marriage.
The Perfect Frosted Sugar Cookie Flavor
The first time I made frosted sugar cookies from the ol’ family cookbook, they weren’t as flavorful as I remembered. I knew I needed to fix this problem. With big sugar cookie flavor in mind, I began recipe testing.
I really feel that a good sugar cookie needs to be just sliiiightly salty to stand up to the sweet, generous amount of buttercream on top. I used salted butter, plus a bit of extra salt to achieve this salty base. I also used margarine, in addition to the butter, as it gives a softness that butter alone just can’t achieve. Do be sure to use stick margarine though. The spreadable tub kind is too watered down to be used for baking.
Frosted Sugar Cookie Baking Tips
This frosted sugar cookie dough will be soft and doesn’t take much arm strength to roll out. Make sure you use enough flour on your work surface to keep the dough from sticking. Try dipping your cookie cutters in flour too. It will guarantee a clean cut. When you make these, try not to roll the dough more than about three times. It starts to pick up too much flour, resulting in a dry, tough cookie.
For decoration, I’ve noticed that pretty sprinkles tend to bleed their color into the buttercream after about 12 hours. For that reason, I generally stick to colored sugars. While I do believe that treats can be ugly and still taste delicious, this was an easy swap for me to make that resulted in lasting beauty.
Simple and Delicious
You’ll notice this is one of the few sugar cookie doughs out there that doesn’t require refrigeration. It’s just not my thing. I’m impatient when it comes to baking. When I want a cookie, I want to make it, bake it, and eat it.
These frosted sugar cookies are simple, soft, and so delicious. I love to make them year-round. They warm my kitchen and the hearts of those who eat them. Let me know what you think in the comments!
Frosted Sugar Cookie
Yield: 24 cookies
Cook Time: 7 minutes
Total Time: 7 minutes
This cookie is my personal weakness. A simple, flavorful sugar cookie pairs with a rich, buttery vanilla frosting for the perfect marriage.
Ingredients
Sugar Cookies
1 stick (4 oz) margarine
1 stick (4 oz) salted butter
1 C (7 oz) white sugar
1 large egg
1 ½ tsp vanilla
2 tsp baking powder
½ tsp salt
3 ½ C (15.7 oz) all-purpose flour
⅓ C (2.6 oz) milk
Additional flour for rolling out
Vanilla Buttercream Frosting
4 sticks (16 oz) salted butter, softened
7 C (32 oz) powdered sugar
2 tsp vanilla
4-7 T milk
Instructions
Make the sugar cookies.
Preheat oven to 350*F. Prepare cookie sheets by lining with parchment paper.
Mix margarine, butter, and sugar. Whip until light. Add egg and vanilla and mix well. Add dry ingredients and milk all at once. Mix well. Dough will be very soft.
Prepare a surface for rolling out by dusting with flour. Using a rolling pin, roll dough out to ⅛ inch thick. Dip cookie cutters into flour and cut dough into shapes. Use a metal spatula to transfer cut dough to parchment-lined cookie sheet. Bake cookies 5-7 minutes, or until edges are barely golden. Let cool.
Make the buttercream frosting.
Beat butter until smooth. Add powdered sugar and beat until very dry and the mixture pulls together, like dry playdough. Scrape bowl. Add vanilla and 4-7 T of milk. Beat until light and creamy. If it is too thick, add more milk a little at a time.
Frost cookies with a thick layer of buttercream, once they have cooled completely. You can use a knife or a piping bag with a large star tip. Add sprinkles while the frosting is soft.
Notes
While rolling and cutting dough, do not reroll more than three times. The dough will pick up too much flour and the cookies will be tough.
Tip: Colored sugar won’t bleed color into the frosting like sprinkles, and they add a nice texture. Use colored sugars instead of sprinkles if not serving within 12 hours.
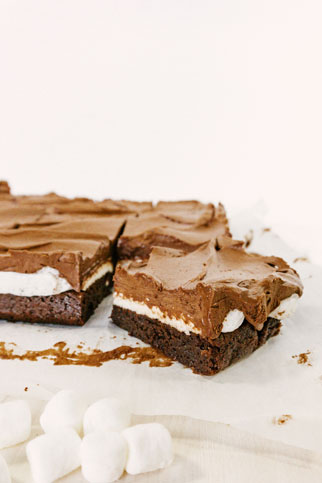
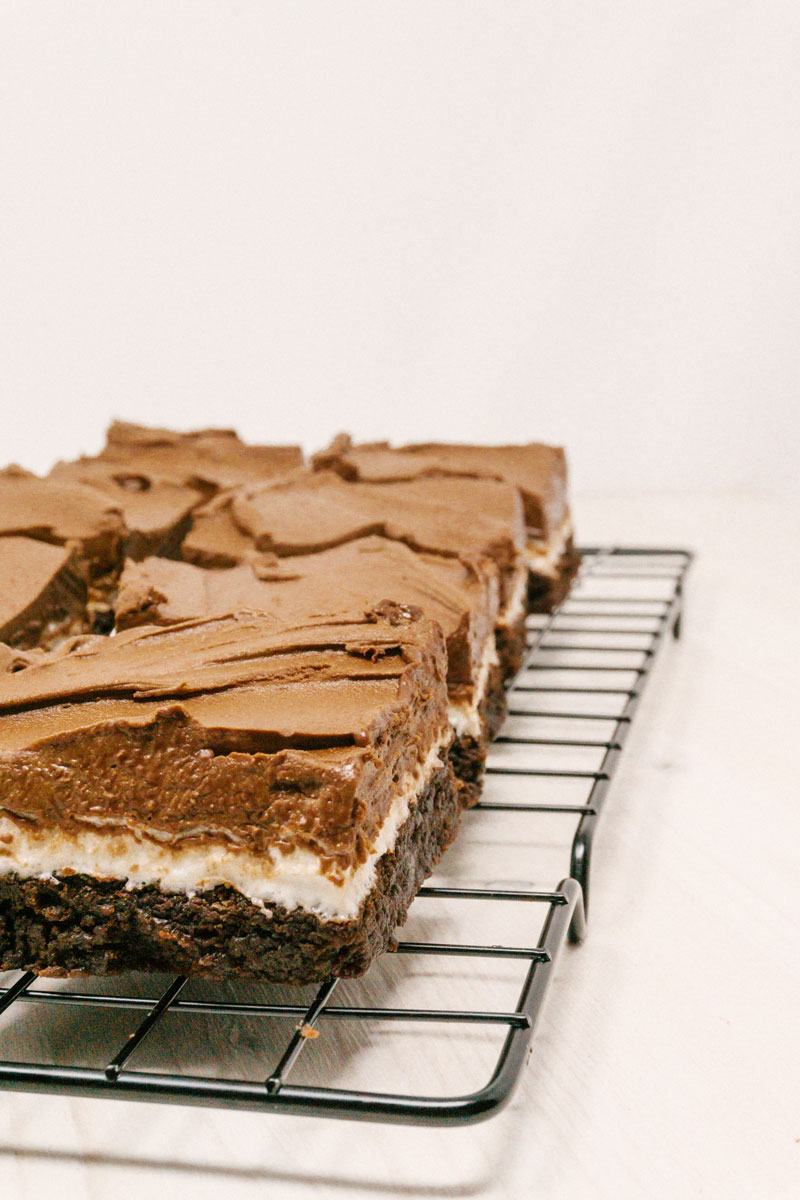
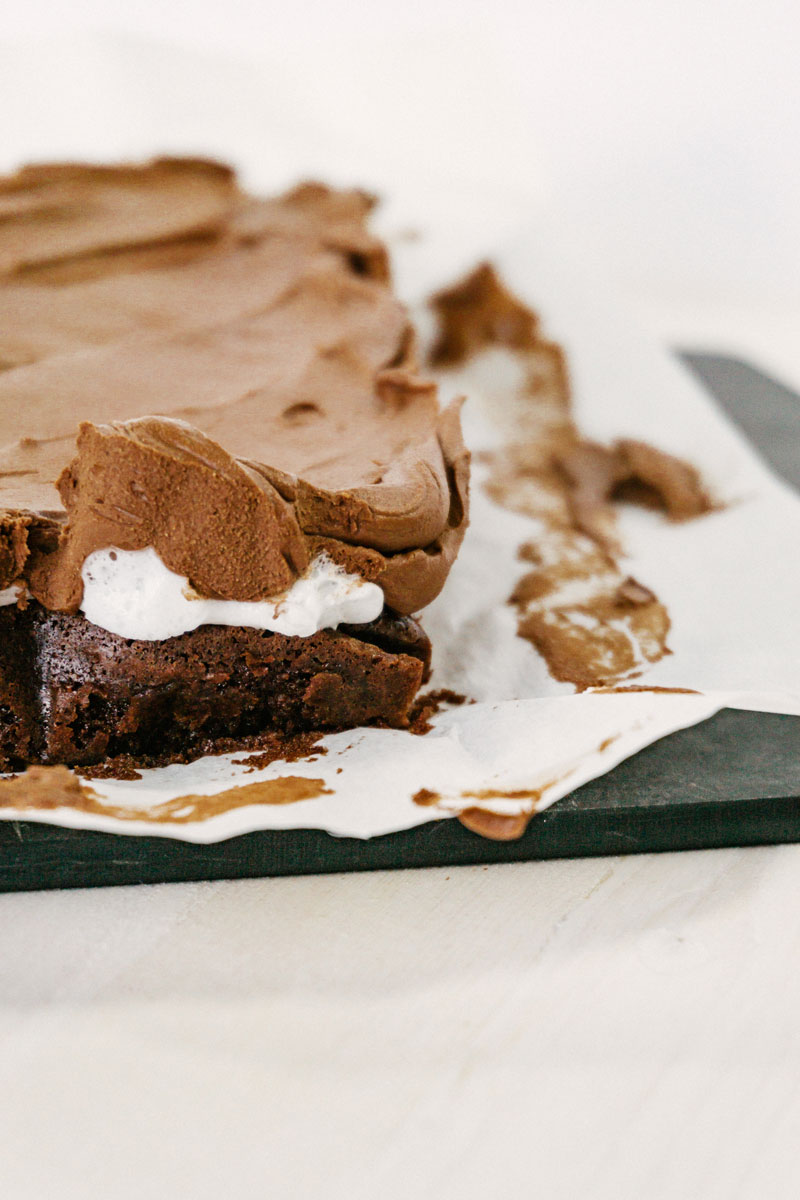
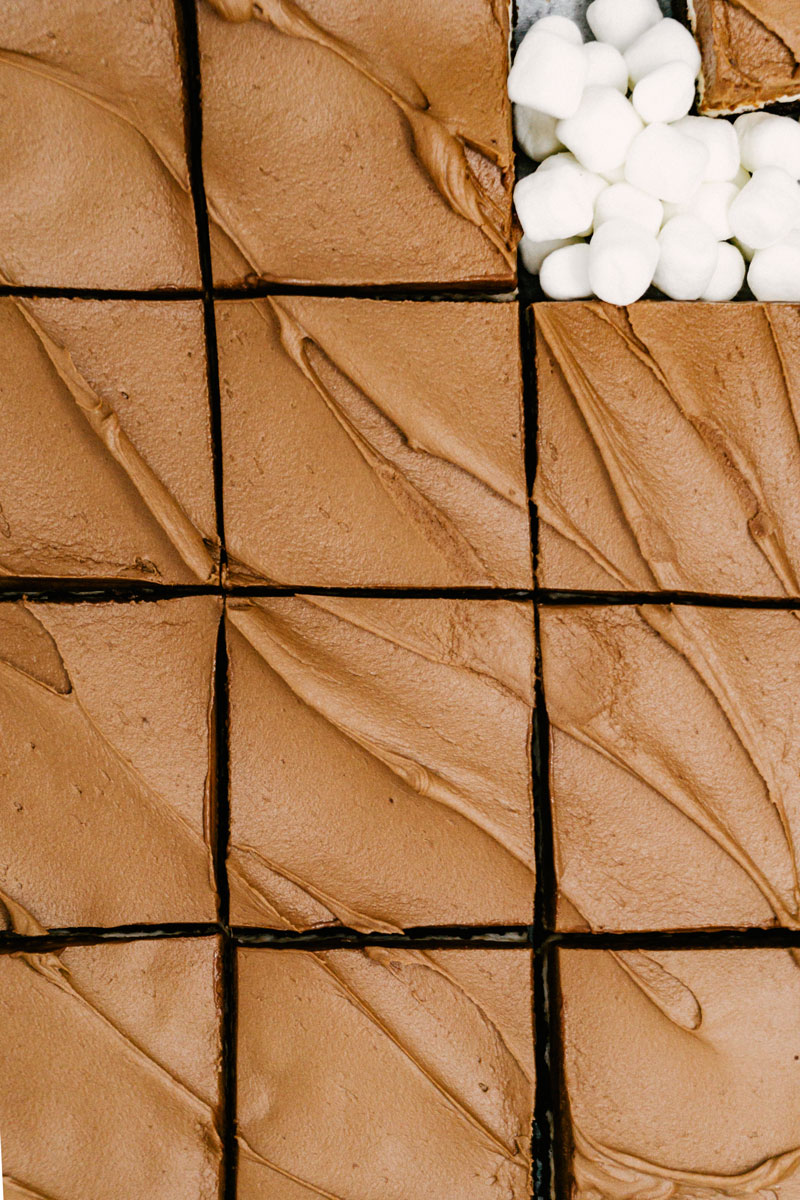
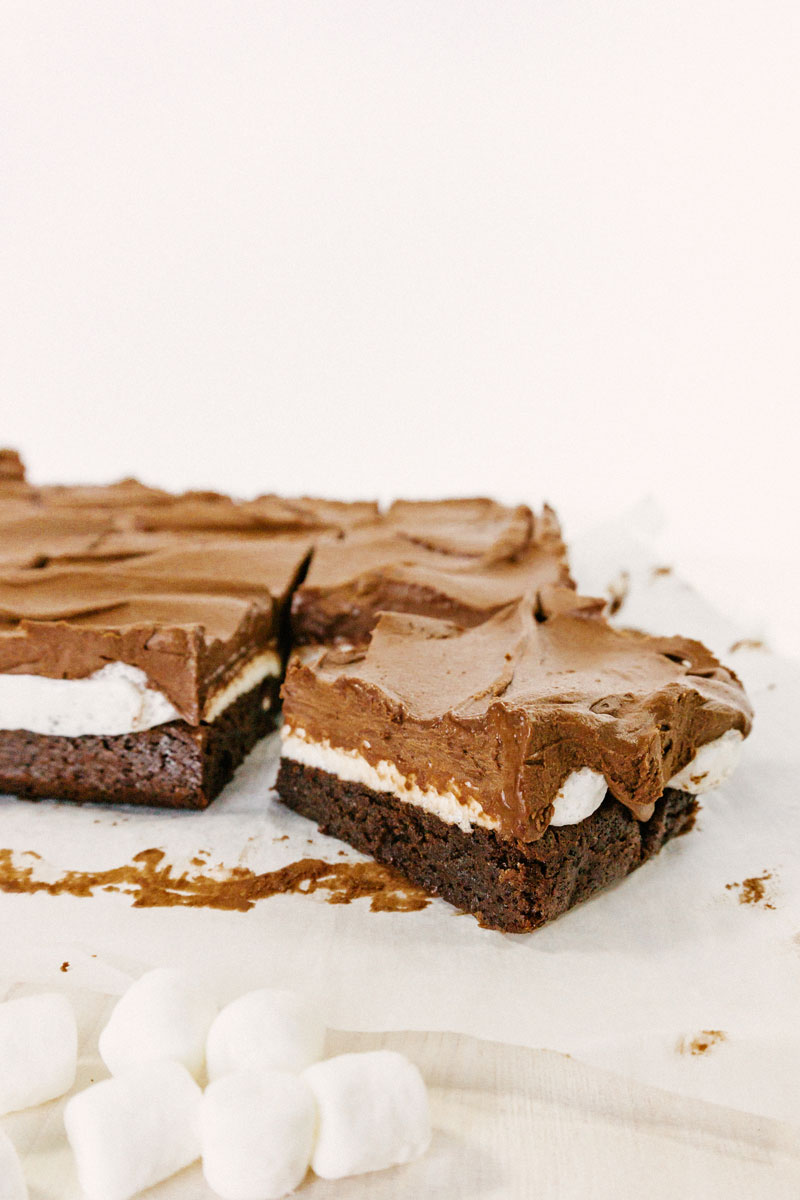
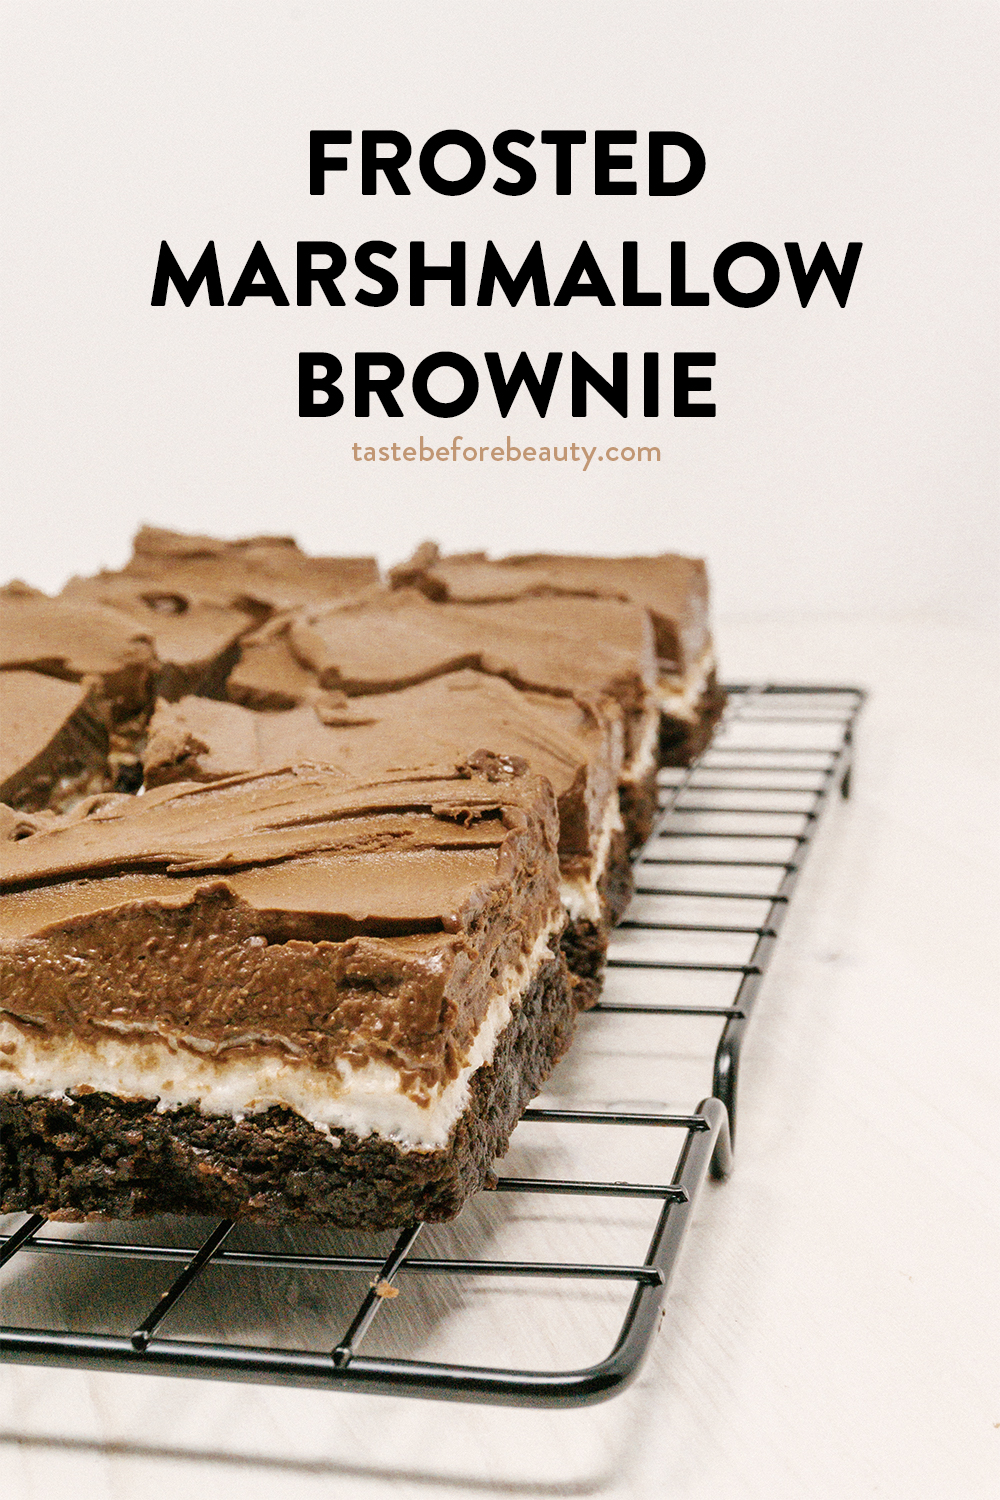
This is not your average, made-from-the-box brownie. Dense and moist, with a pillowy marshmallow layer, and topped with homemade chocolate buttercream, this is what brownie dreams are made of.
This brownie is in my personal baked goods hall of fame. Dense and moist and a dreamy creation, it is not your average frosted brownie. The chocolate buttercream frosting is so creamy and the marshmallow layer is so fluffy. I hope they serve these in heaven.
I grew up eating brownies with toasted marshmallows on top. I know you think this is going to be one of those “Missy goes on a baking journey to recreate another childhood memory” stories, but wait. This one has a plot twist! I was looking for a good brownie that would pair well with a layer of marshmallow on top. I didn’t want it to be super chewy or cakelike. I knew I needed a fudgy, truly chocolate brownie. I tested this recipe and that recipe, tweaking amounts of ingredients until my kids practically begged me to stop making them taste-test brownies (just kidding!). After many trials, I arrived upon the mouthfeel and chocolate flavor I wanted.
Then, it was on to finding the right consistency for the marshmallows. My family always let the marshmallows get toasty and browned, and while there is nothing wrong with a toasted marshmallow in s’mores, it didn’t work here. As soon as the marshmallows cooled, they set up into a pseudo-cement texture that could probably work as road paving in a pinch. After some more trial and error (and more brownie testing by my wonderful kids but not my favorite Kenzie because she hadn’t married into the family yet) I discovered that a quick minute in the oven just to soften the marshmallows was the key. It helped bind everything together without drying the marshmallows out.
During the whole process, I had made a chocolate cake with chocolate buttercream frosting, when ALL OF A SUDDEN (that’s what you say when a plot twist is coming, right?) I realized that chocolate frosting was the obvious finishing touch to my marshmallow brownie. The missing piece. The third element to the perfect trio. So, there you have it. A frosted marshmallow brownie.
Sounds simple enough, and it can be. I’ll let you in on all of my tried and tested tricks. First, as I mentioned, don’t let the marshmallows get too melty. They dry out, harden, and the whole thing falls apart. The second is to get a nice, clean cut. Start by cooling the brownies with marshmallows until they are room temperature and then frost, otherwise the butter in the frosting melts, and then you’ll have to start all over again (while you eat this batch because it’s hideous). Once frosted, stick the whole pan in the fridge until the frosting hardens. This usually takes about an hour. Using a large knife, I run it under hot water, dry it, then cut the brownies, re-heating the knife as necessary.
When it’s time to serve the brownies, I place each brownie on a white cupcake liner and then put on a platter or tray. I like to individually wrap these and store them in the refrigerator if I’m not serving them right away. It helps me not to eat them all in one sitting. I wish you luck in not eating them all immediately. If you come up with a better method of self-control, let me know!
Frosted Marshmallow Brownie
Yield: 16 brownies
Cook Time: 25 minutes
Total Time: 25 minutes
This is not your average, made-from-the-box brownie. Dense and moist, with a pillowy marshmallow layer, and topped with homemade chocolate buttercream, this is what brownie dreams are made of.
Ingredients
Brownies
½ C (4 oz) salted butter, melted
½ C (3.8 oz) vegetable oil
1 ¾ C (7 oz) powdered sugar
1 C minus 2 T (7 oz) light brown sugar
½ C (1.8 oz) cocoa
4 large eggs
1 tsp vanilla
1 tsp salt
1 C minus 2 T (4 oz) all-purpose flour
Marshmallow Layer
3 C (5 oz) mini marshmallows
Chocolate Buttercream Frosting
1 C (8 oz) salted butter, softened
½ C (1.8 oz) cocoa
3 ½ C (16 oz) powdered sugar
1 tsp vanilla
4 T milk
Instructions
Make the brownies.
Preheat oven to 350*F. Line the bottom and sides of 10x10 or 9x13 cake pan with parchment paper.
Mix fats, sugars, and cocoa. Add eggs, vanilla, salt, and flour and mix until combined. Pour into prepared pan.
Bake for 25 minutes. Pull brownies from the oven and immediately top with marshmallows. Put back in the oven for one more minute to slightly melt marshmallows. Remove from the oven and let cool completely.
Make the chocolate buttercream frosting.
Let butter come to room temperature before beating. Beat until smooth. Add cocoa and powdered sugar. Beat until very dry and uniform in texture. Scrape bowl, then add vanilla and 4 T milk. Beat until light and creamy. If frosting is still too thick, add up to 2 additional tablespoons of milk.
Once brownies have cooled completely, top with frosting.
Notes
While it may be tempting to leave the marshmallows in the oven longer so they start to brown, this will result in a tough, overly chewy topping when they cool. One minute allows them to melt and become soft, without drying them out.
Be careful not to overbeat the chocolate buttercream frosting. It should be light and creamy, but not have lots of big air pockets.
Brownies, once topped with marshmallows, can be chilled in the fridge for 30-60 minutes, then frosted, and cut immediately.